Web
This article guides you through setting up Google as an identity provider, enabling your website to access Player Network authentication services.
Prerequisites
1. Set up the Google app in Google Play Console
For IEGG projects, contact [miaruan (Ruan Mingjun)] for Google app registration and configuration.
1. Create a Google app
Register an account on Google Play Console following the prompts.
Google charges a fee of 25USD for the service. Please prepare a credit card in advance.
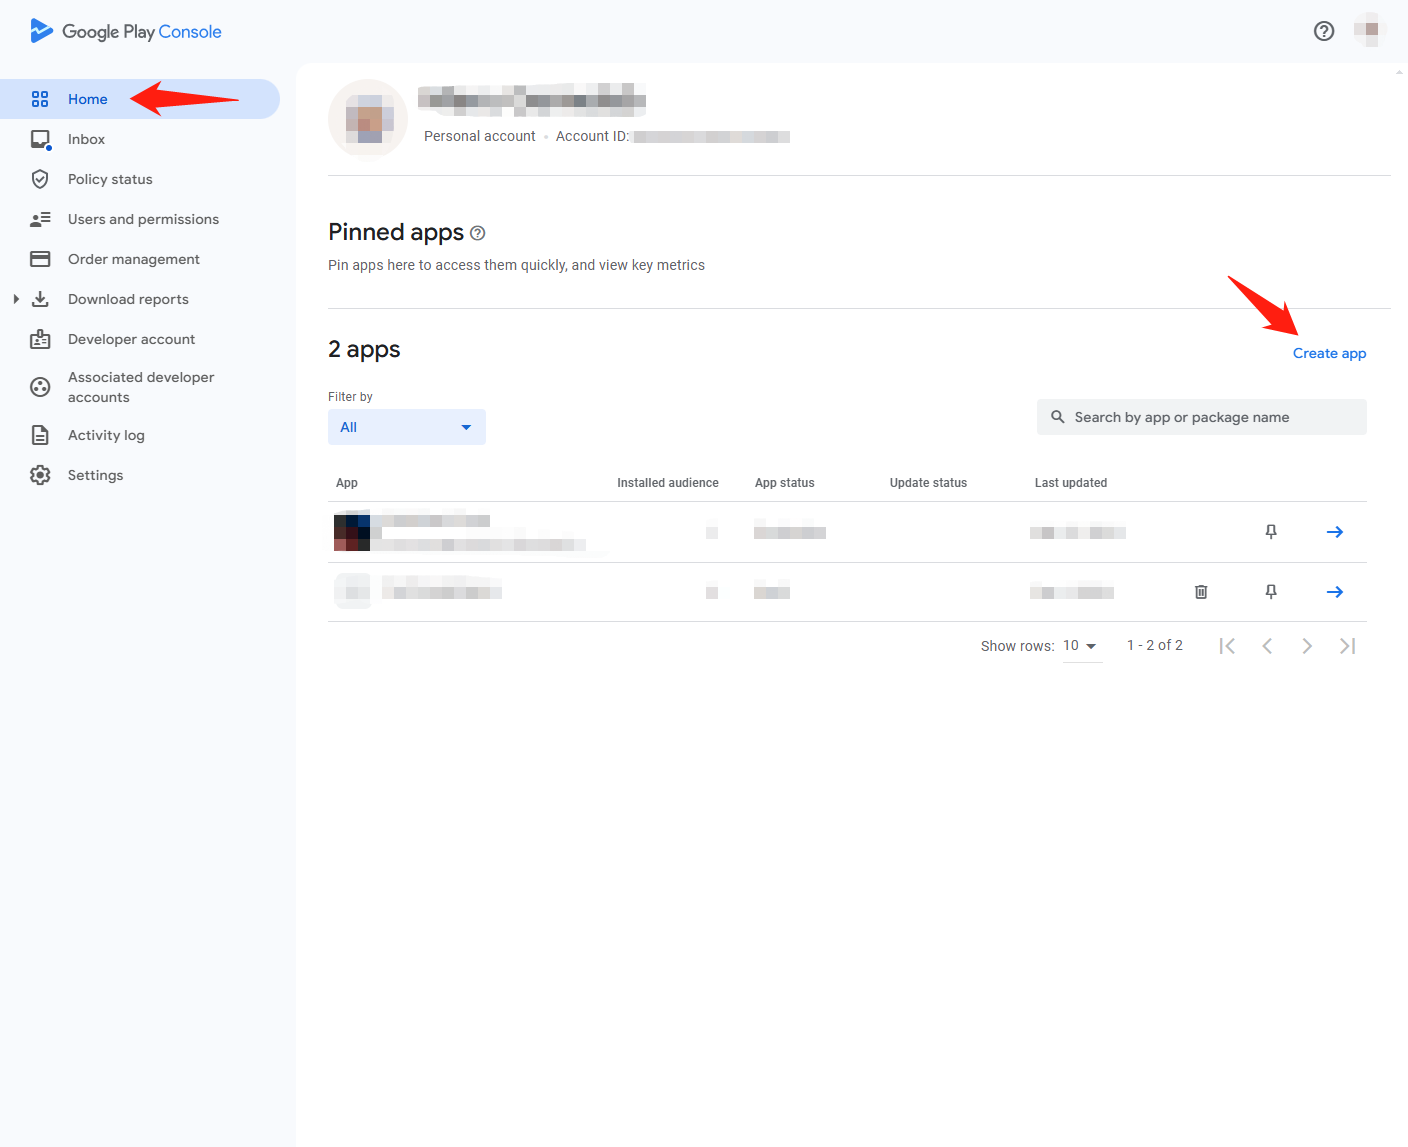
- Go to Google Play Console.
- On the All apps page, click Create app to create a game app.
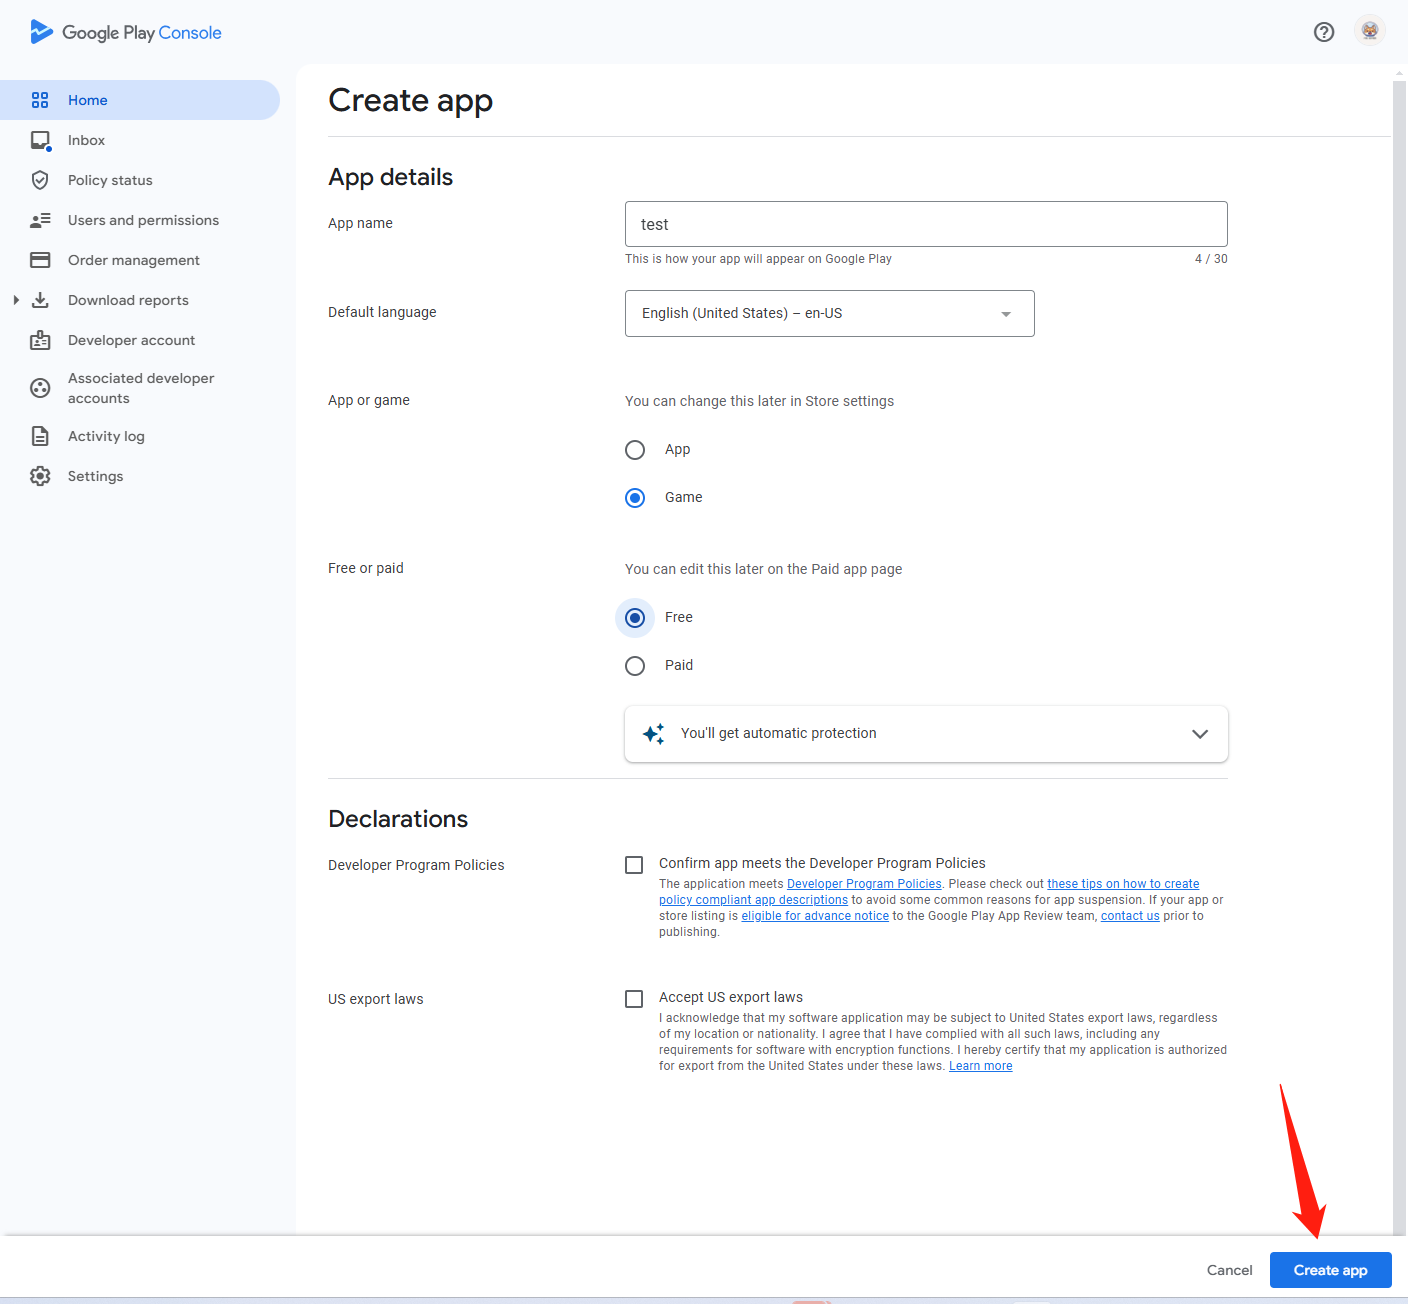
- Enter the app information.
2. Create a Play Games Services game project
Set up Play Games Services to manage game metadata and automate game production and distribution tasks.
- Go to Google Play Console.
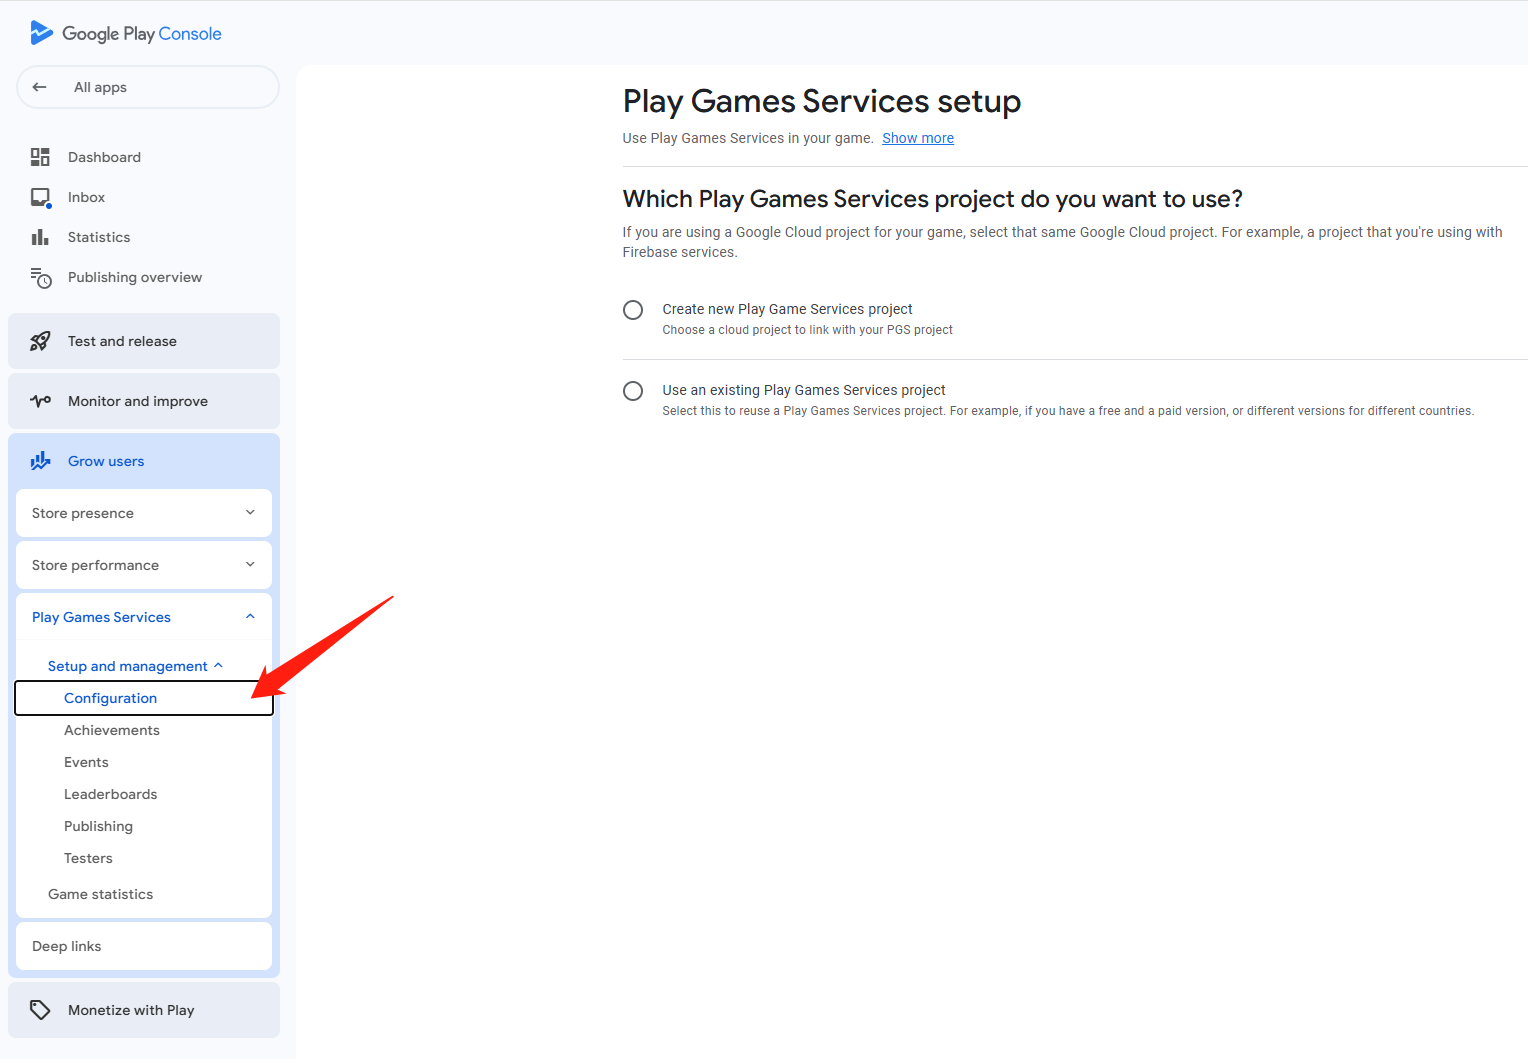
- In the left navigation bar, select Grow users > Play Games Services > Setup and management > Configuration.
- Under Which Play Games Services project do you want to use, select the option to create a Play Games Services project.
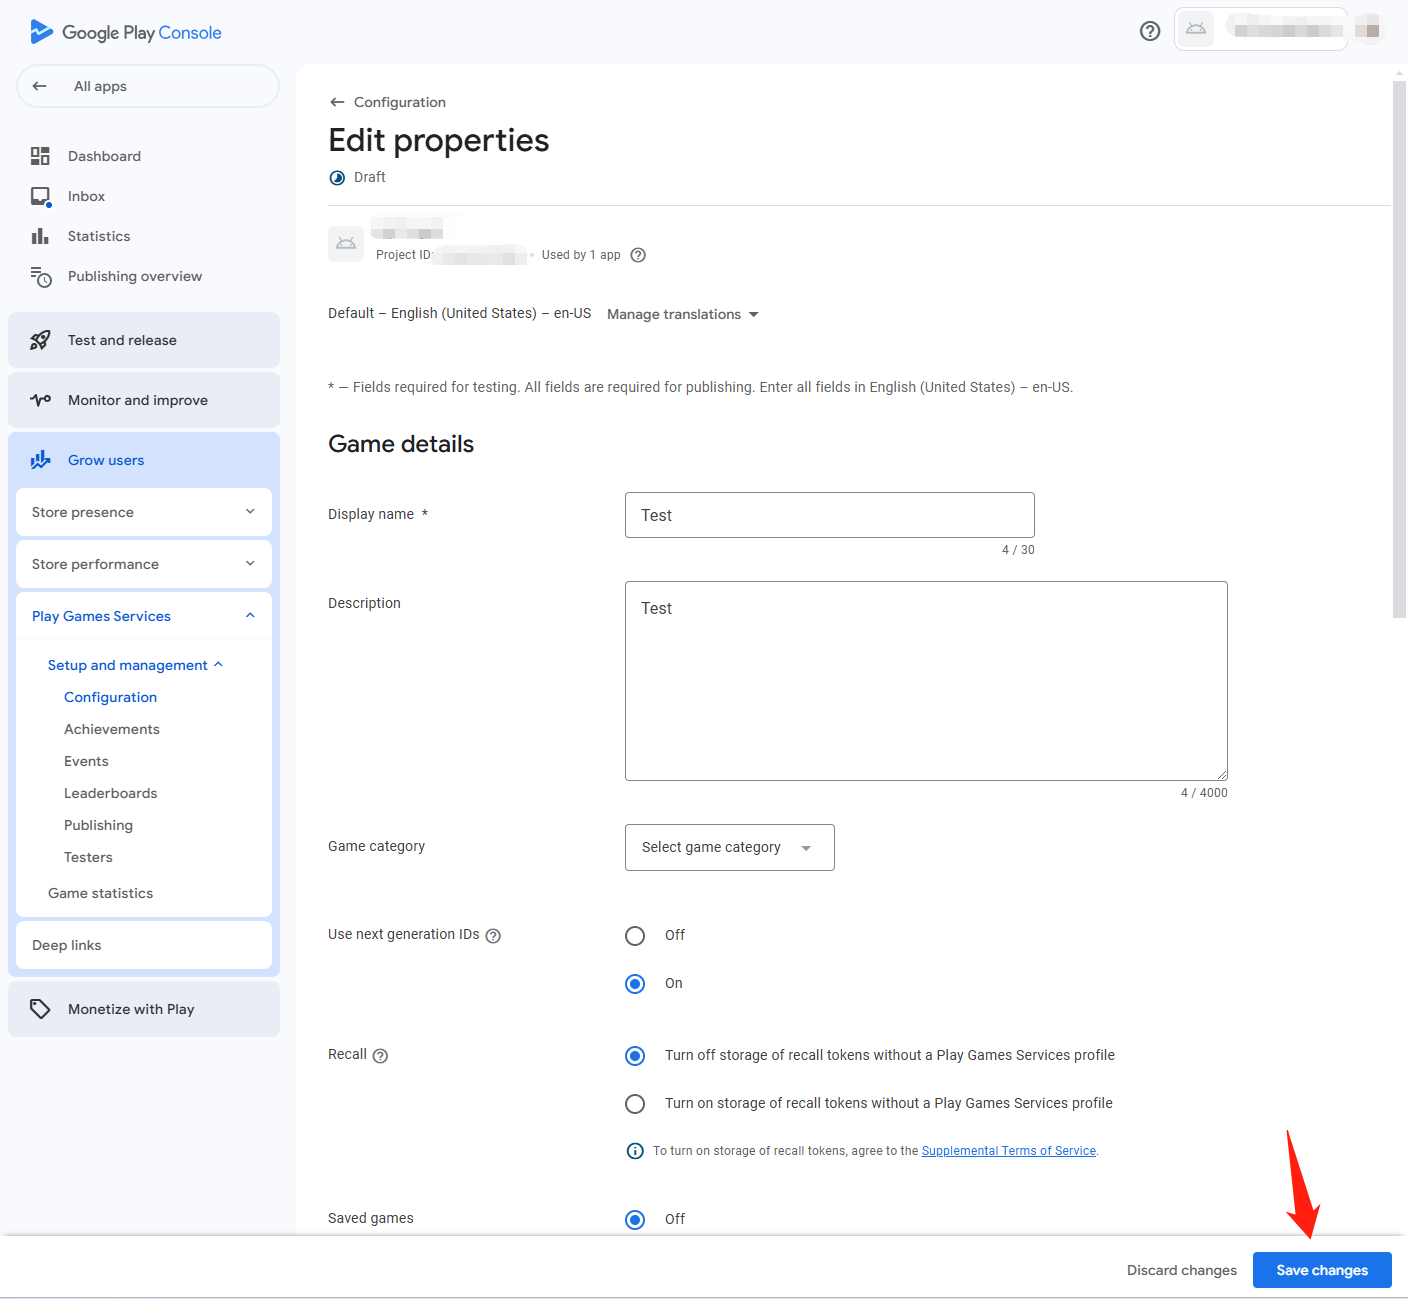
- In the Properties section, click Edit Properties.
- Enter basic game information and click Save changes.
3. Add a credential to link the OAuth 2.0 client ID to your game
- Go to Google Cloud Platform.
- In the left navigation bar, click OAuth consent screen.
- Follow the instructions to setup the OAuth consent screen.
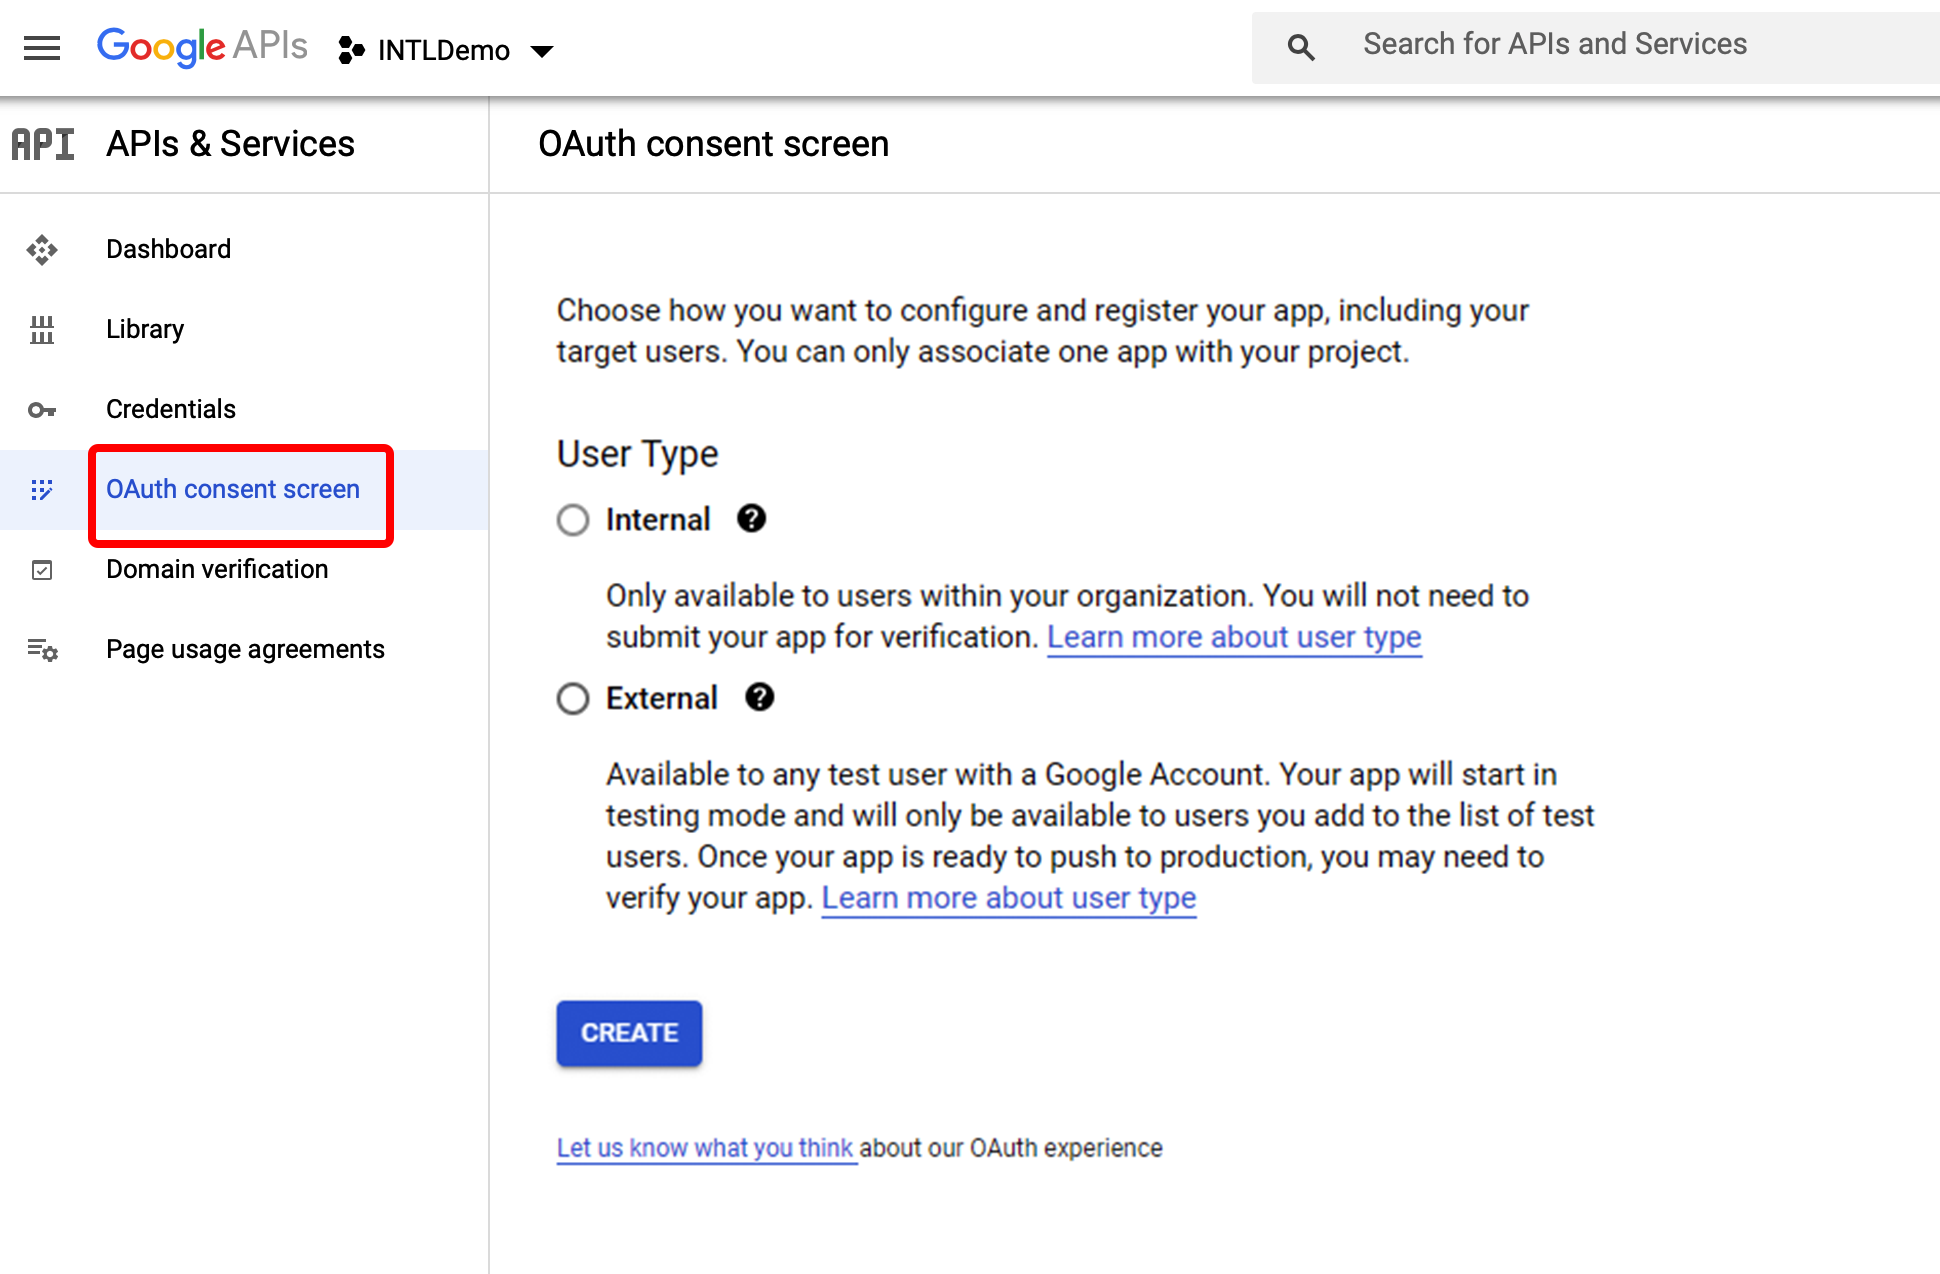
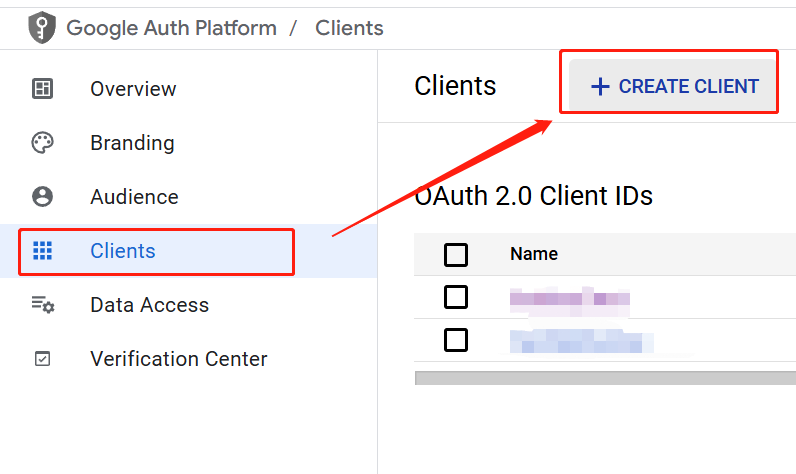
- In the left navigation bar, click Clients.
- On the Clients page, select CREATE CLIENT > Create OAuth Client ID to create an OAuth client ID.
- In the Authentication type list, click Web.
- Enter the required information.
In the Authorized redirect URLs section of the web application details page, addhttps://test-common-web.intlgame.com/jssdk/googlelogincallback.htmlandhttps://common-web.intlgame.com/jssdk/googlelogincallback.html.
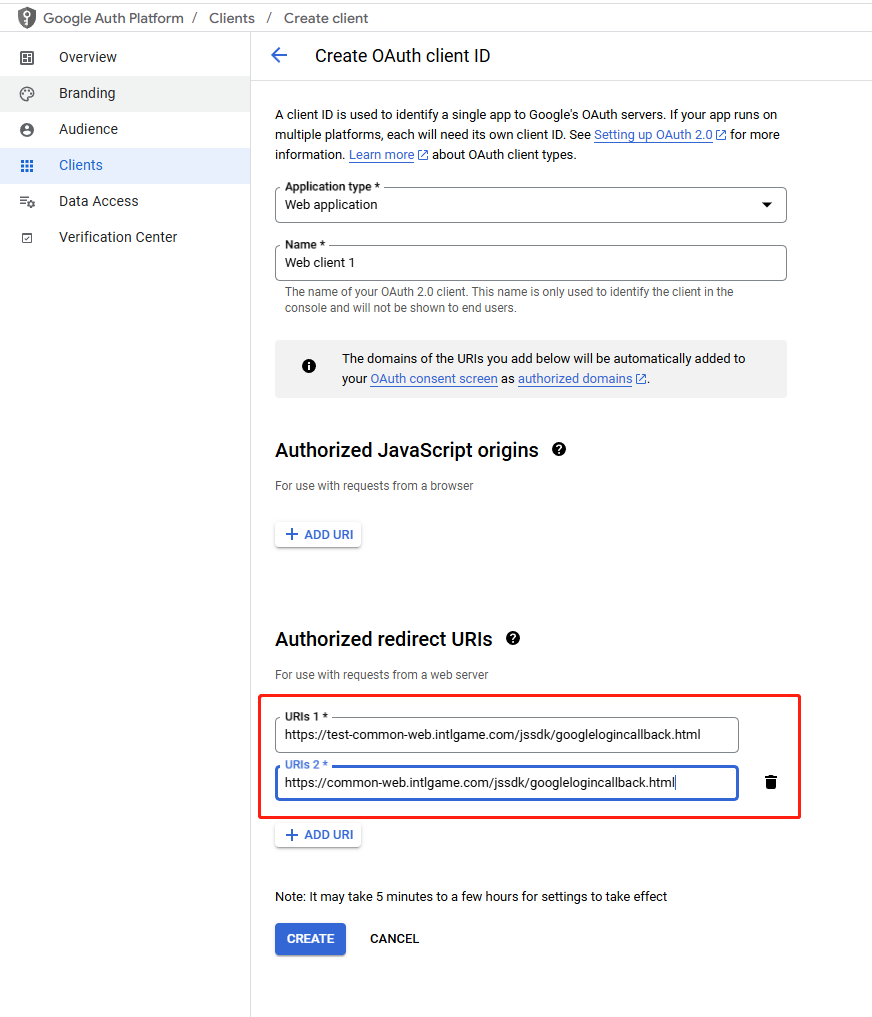
- Click SAVE to complete the configuration.
- Go to the details page of the Web app.

- Find the Client ID and Client Secret, and enter them into the game configuration of the Player Network Console.

- Click Audience > ADD USERS to add test users for login.
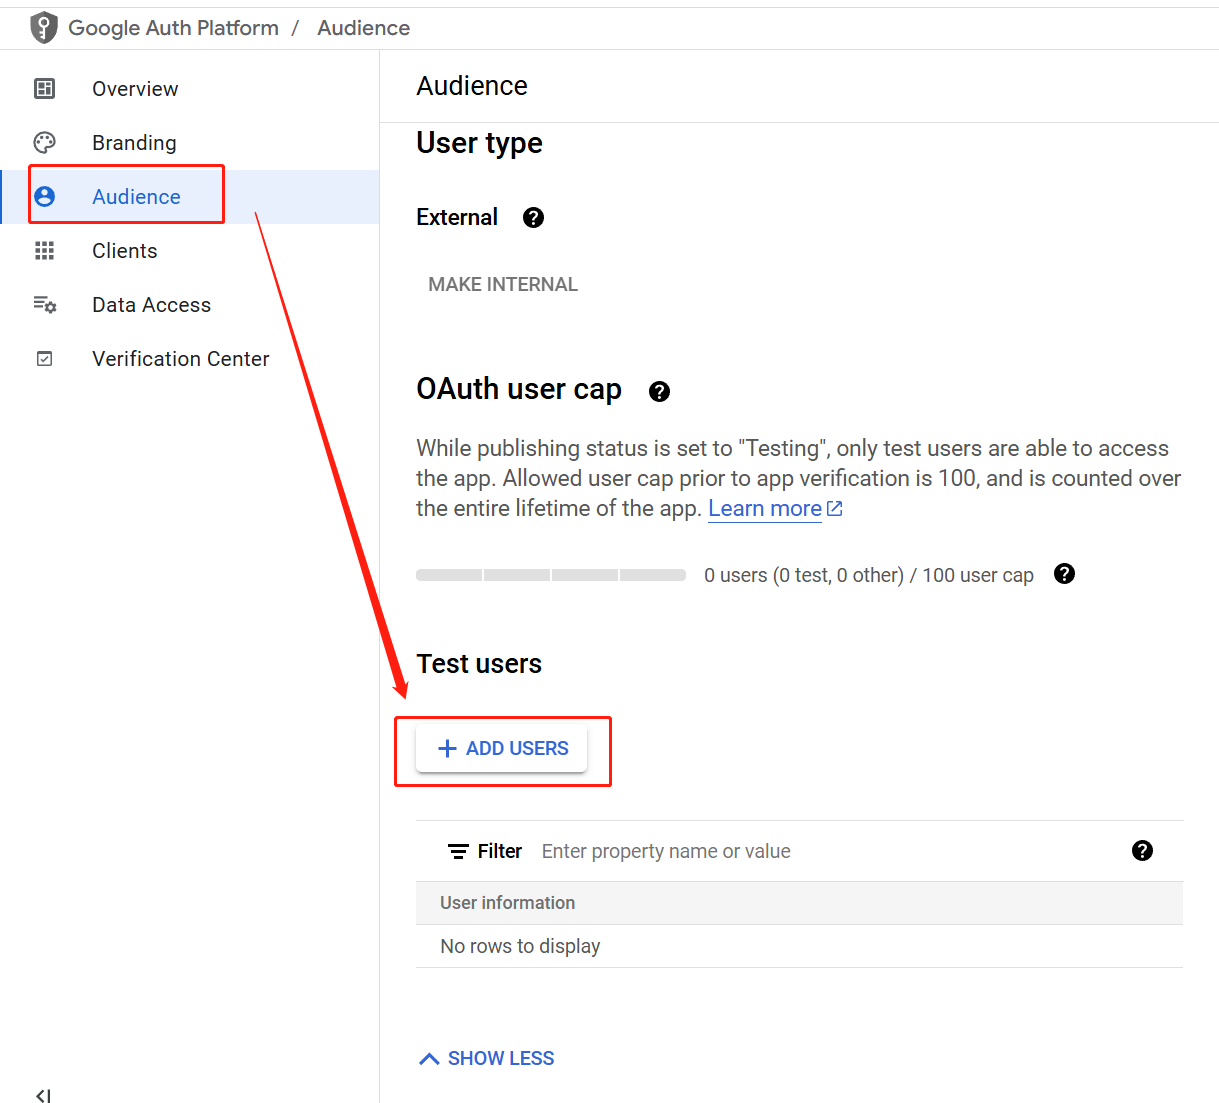
4. Add testers for your game
- Go to Google Play Console.
- In the left navigation bar, select Grow users > Play Games Services > Setup and management > Testers.
- In the Testers tab, click Add testers to add testers for your game.
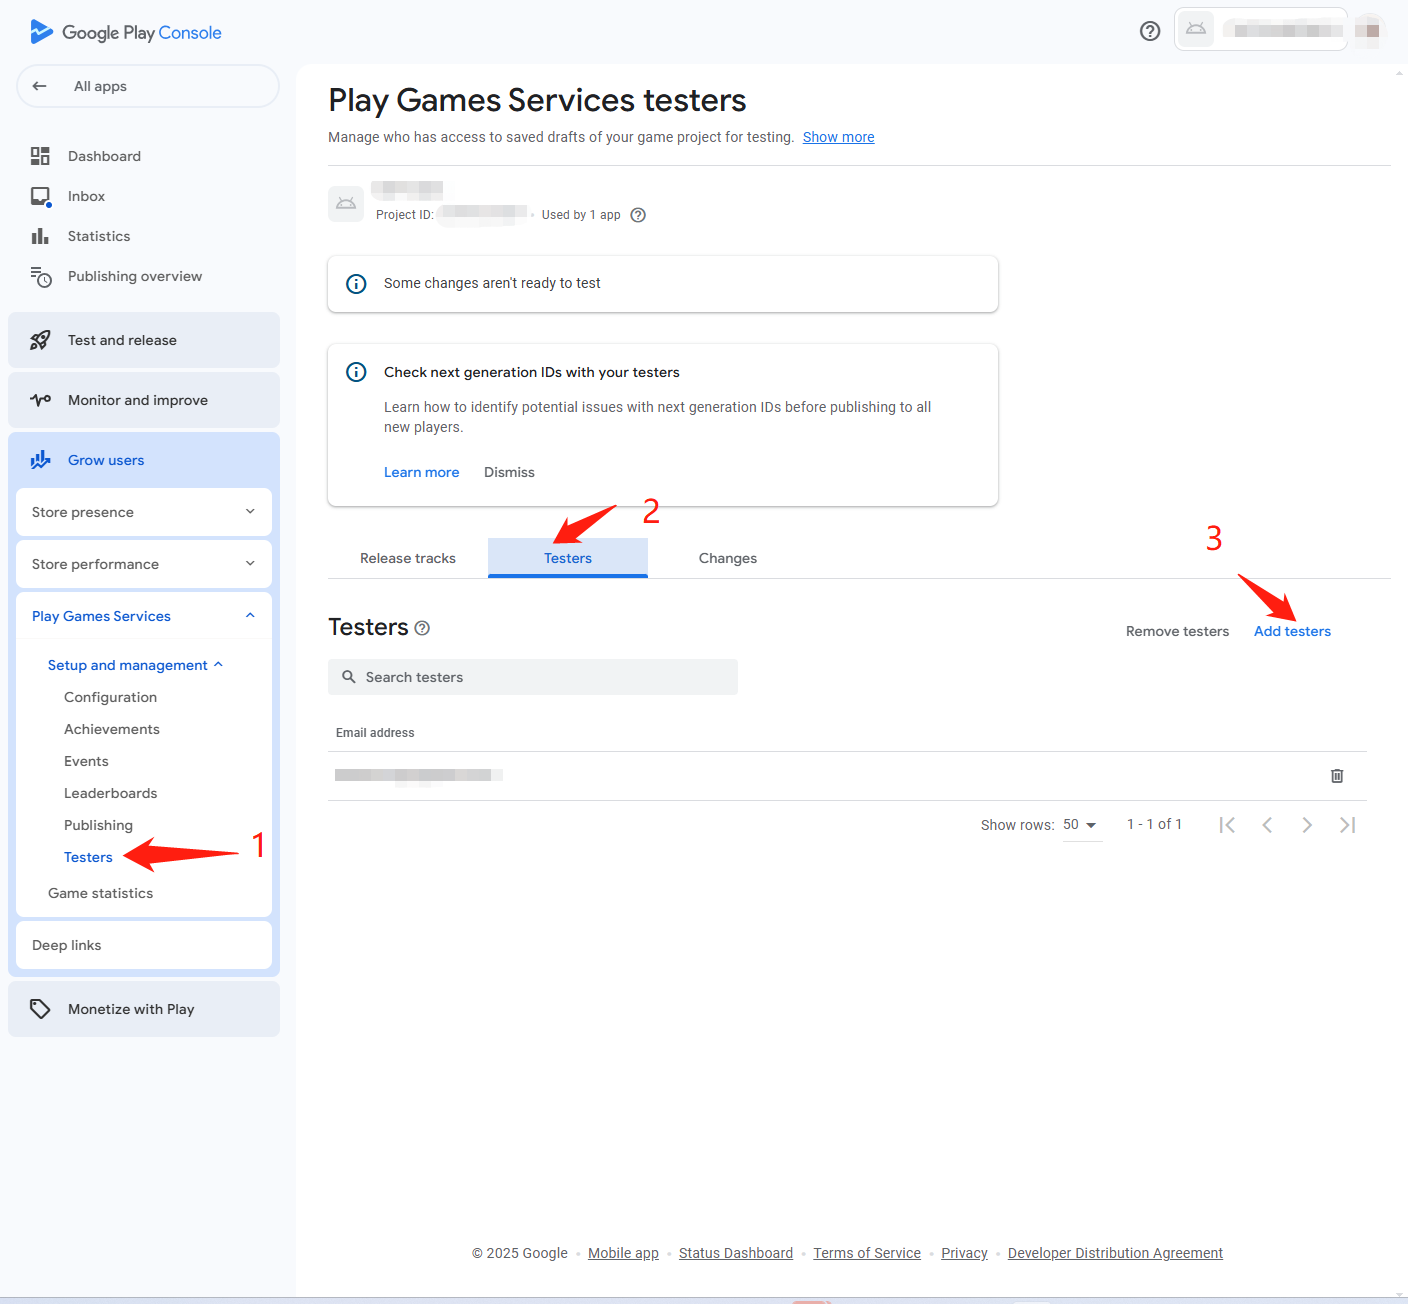
Before the game app is released, only testers can log in. Please make sure that the app is in the testing status.
5. Configure Achievements and Leaderboards
Find the Achievements and Leaderboards functions in the Games Services menu and configure them as needed.
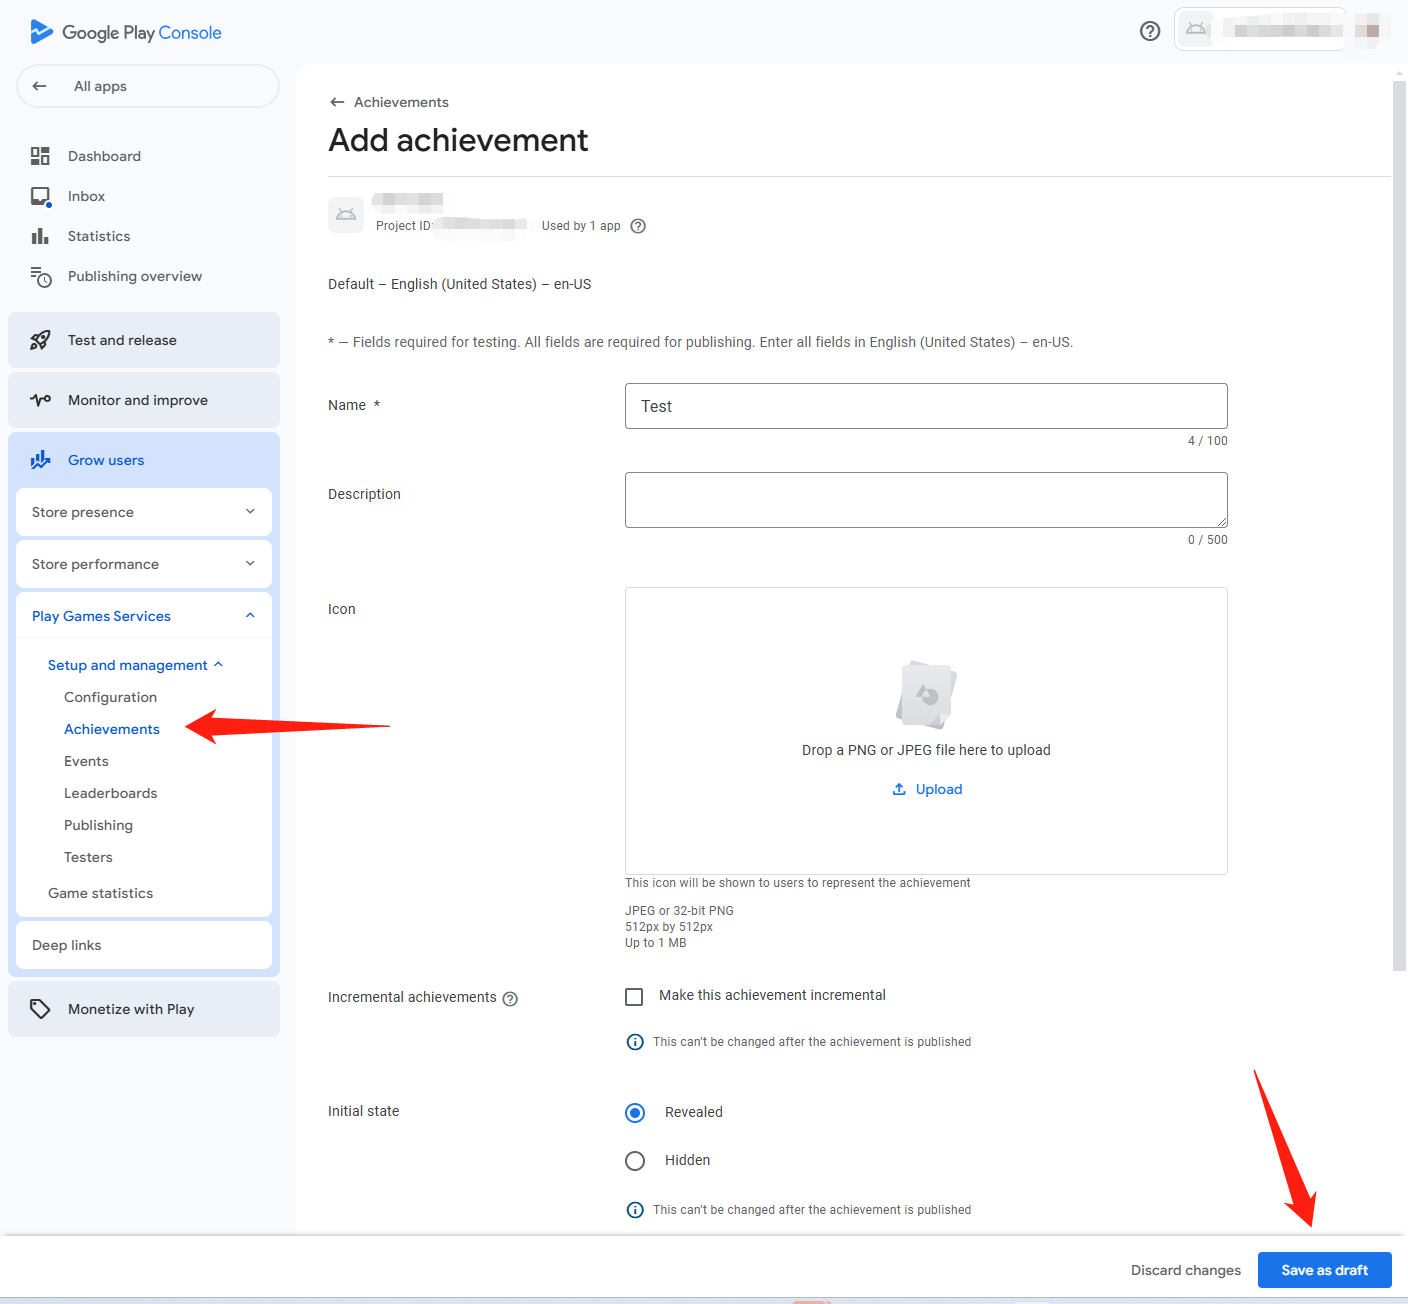
6. Get Google API ID
Access the Information Center from the Google Cloud Platform dashboard. The Google API ID is the Project No. on this page.
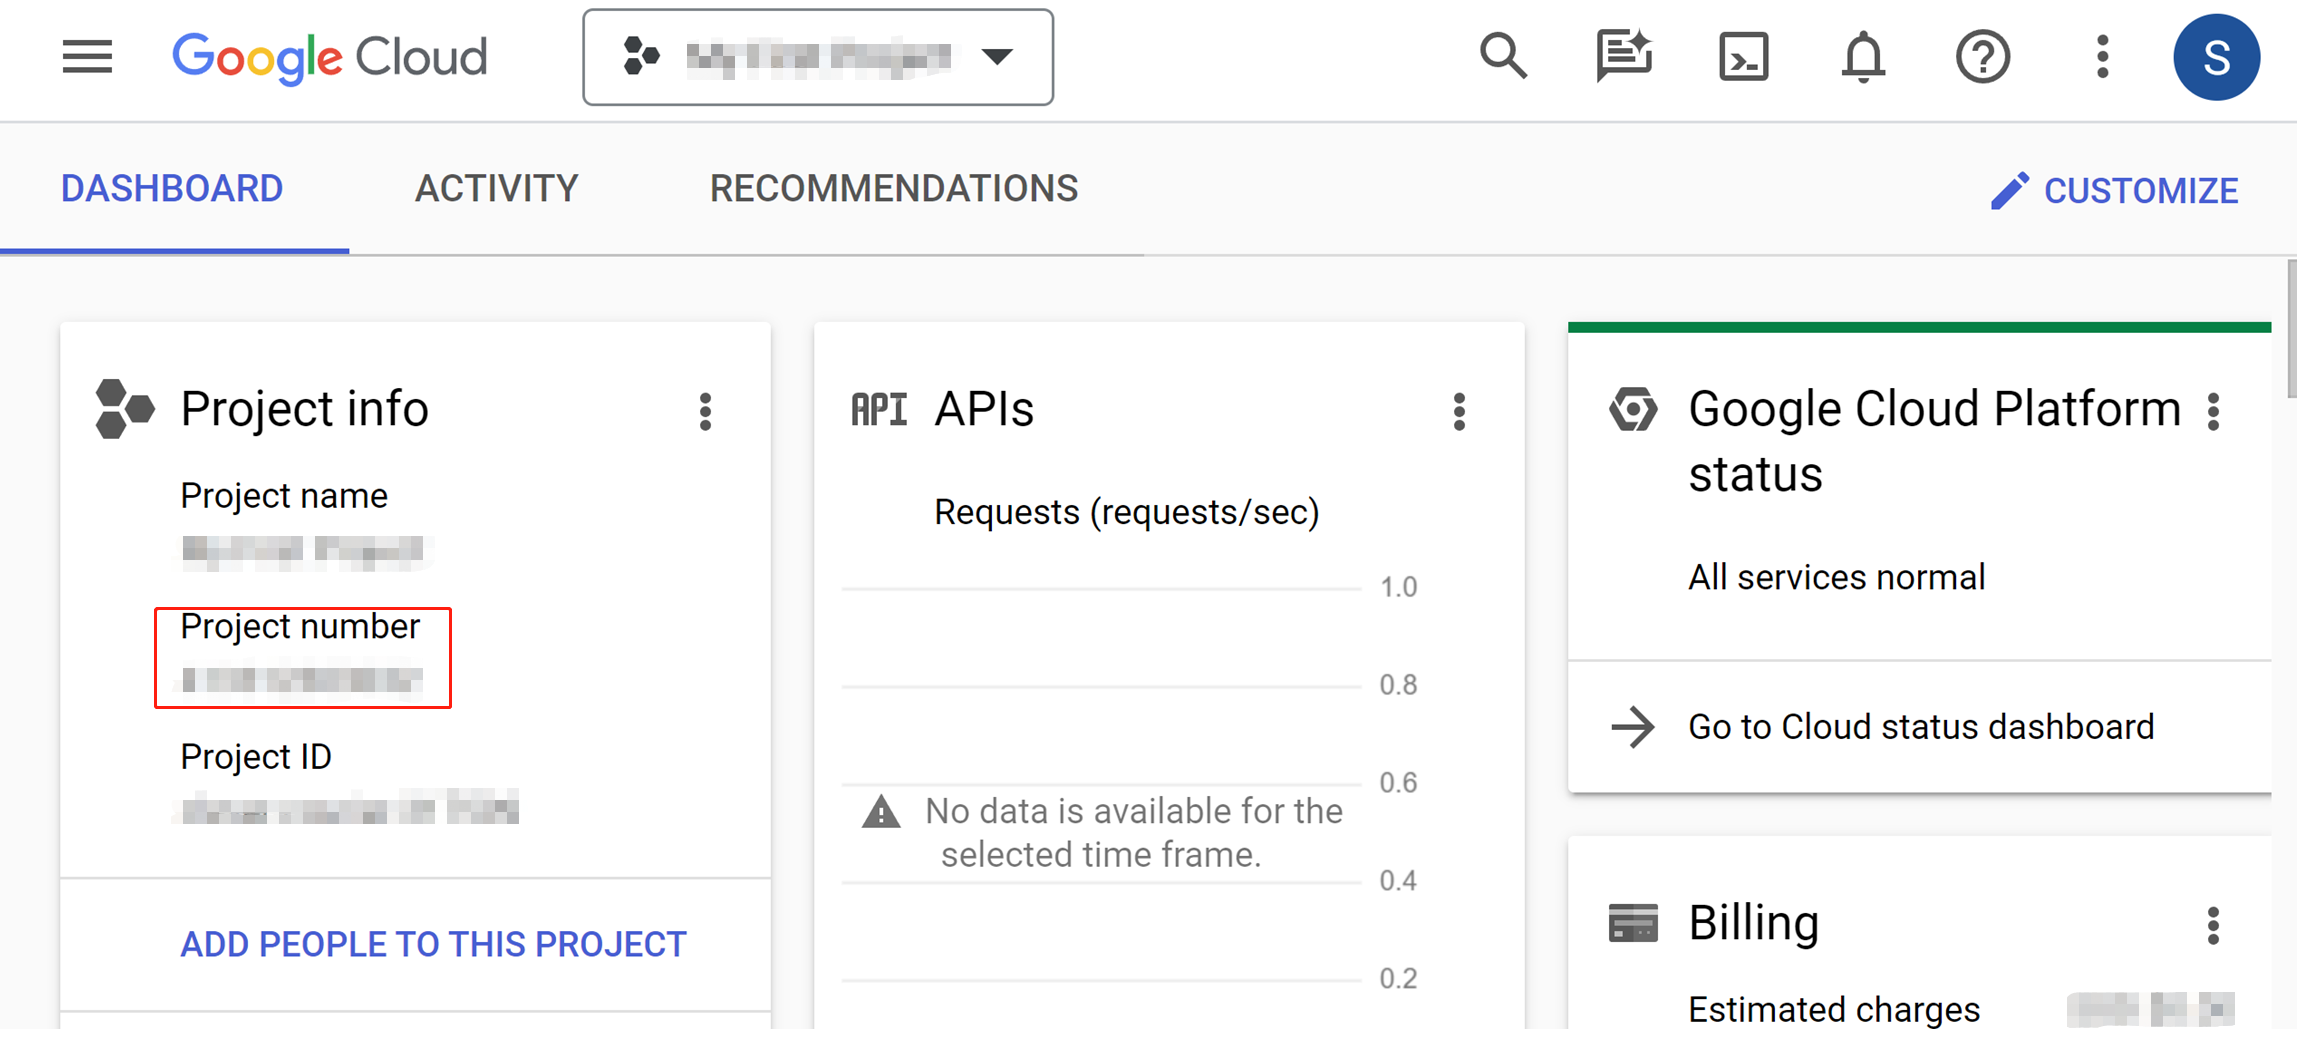
7. Get the Client ID and Client secret
Follow the steps in Add a credential to link the OAuth 2.0 client ID to your game to get the application information.

- Create an account for Player Network Console.
- Create a new project for your game, or join an existing one.
- Add Google as an authentication method for your project on Player Network Console.
For more details about integrating the SDK for other third-party channels, see JavaScript SDK.
Step 1: Install the JavaScript SDK
Install the SDK package from the production environment when launching the game. The SDK package from the test environment is only used for integration testing.
Install the JavaScript SDK from npm or CDN.
- npm
- CDN
$ npm install @intlsdk/account-api
// SDK production version package
<script src="https://common-web.intlgame.com/sdk-cdn/account-api/latest/index.umd.js"></script>
Step 2: Instantiate the SDK
Set env to the test environment during the integration testing and env to the corresponding production environment when launching the game.
const accountApi = new IntlgameAccountApi({
  env: "test", // SDK environment
  gameID: 11,
});
| Parameter | Type | Description | Remark |
|---|---|---|---|
| env | string | SDK environment For more information, see Retrieve cluster information. | Required |
| gameID | number | Unique game ID assigned by Player Network | Required |
Step 3: Implement web login
After instantiating the accountApi component, call the thirdAuthorize method to request the access token from Google.
accountApi.thirdAuthorize({
    third_type: 'google',
}).then(
(res) => {
    console.log(res);
});
With the Google token returned, call the intlAuthorize method to get the Player Network SDK OpenID and token to log in to your website.
accountApi.intlAuthorize({
    third_type: 'google',
    channel_info: {
        code: "EAAI2lTrXAZBwBAC"
    }
}).then(
(res) => {
    console.log(res);
});
Call the intlLogout method to log out from your website.
accountApi.intlLogout({
    token: '4567xsdfsd',
    openid: 'xxxxxxxx',
    channel_id: 6,
}).then(
(res) => {
    console.log(res);
});