Android
This article guides you through setting up Facebook as an identity provider, enabling your Android game to access Player Network authentication services.
Prerequisites
1. Set up the Facebook app in Meta for Developers
1. Register for an account
Before you can configure your app for the required platforms, you need to register a Facebook developer account and create an app in the Facebook App Dashboard.
-
Go to the Facebook website. Register for an account and finish the account authentication (by email or phone) according to the prompts.
-
Activate a developer account in Meta for Developers.

-
Consent to the agreement and continue.
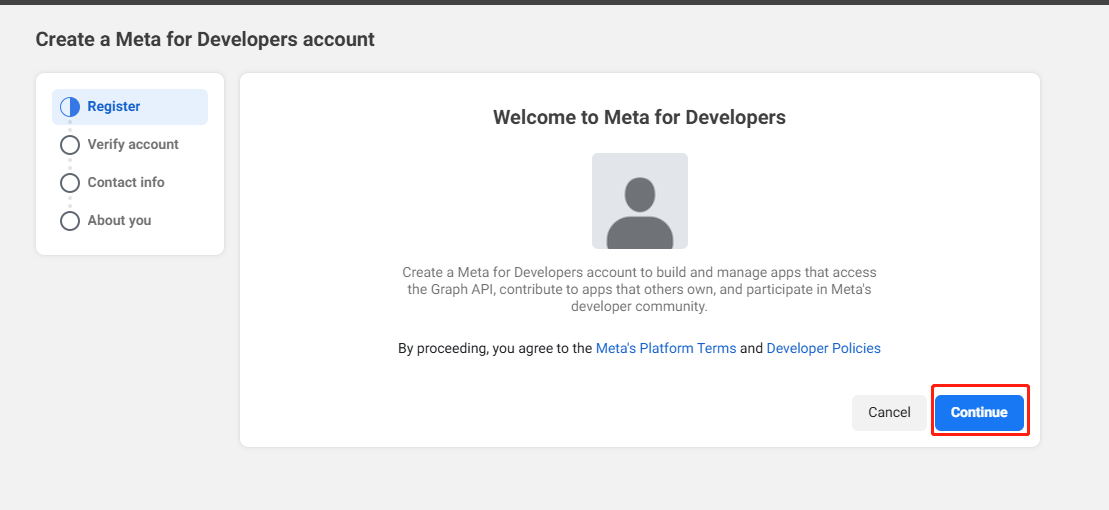
-
Complete mobile phone verification.
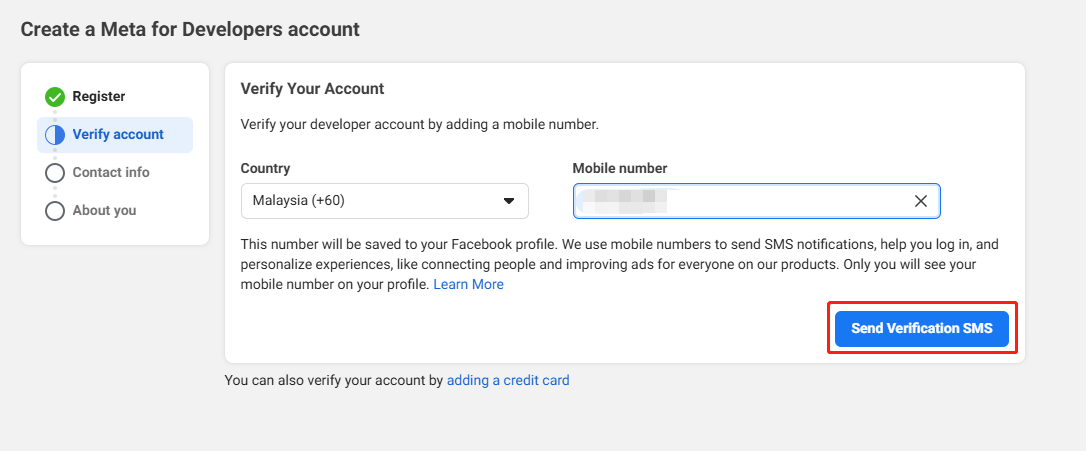
-
Complete email verification.
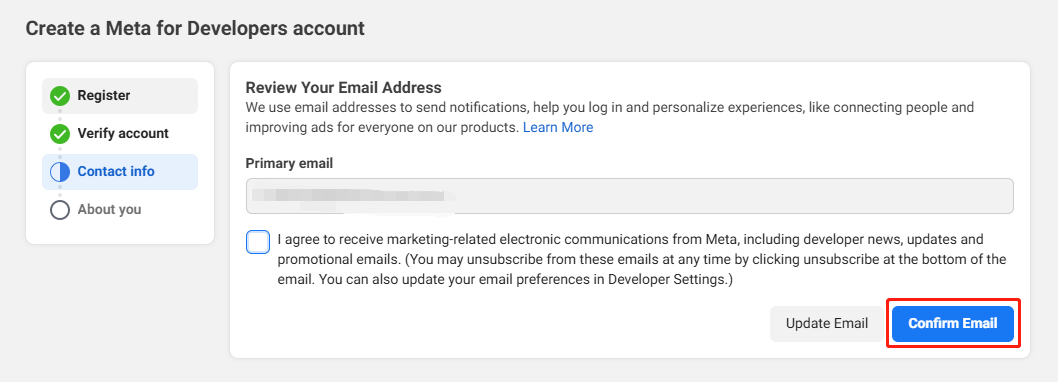
-
Complete the registration.
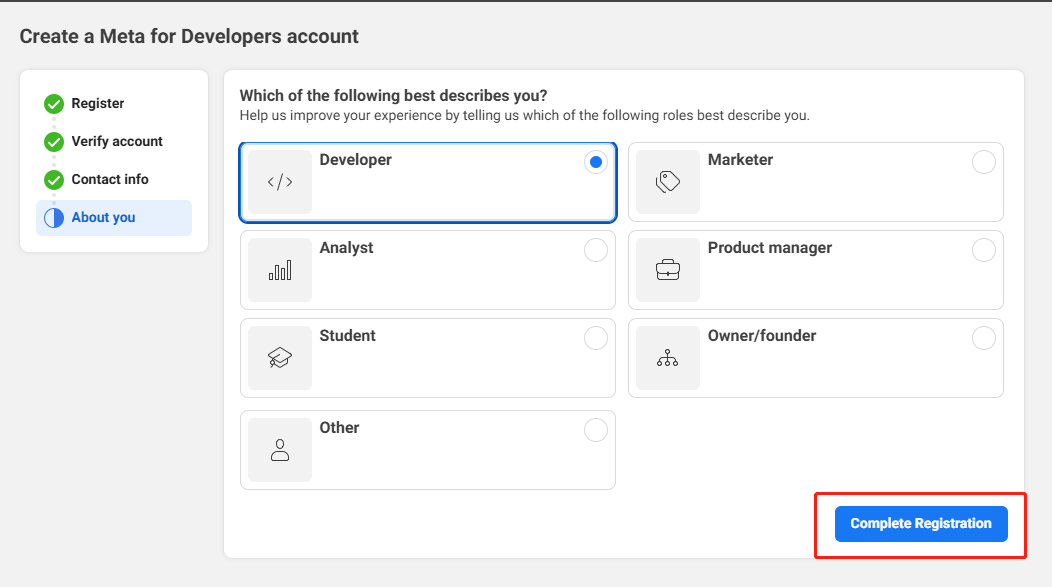
-
Add Facebook SDK to the project in Meta for Developers.
2. Create an app
-
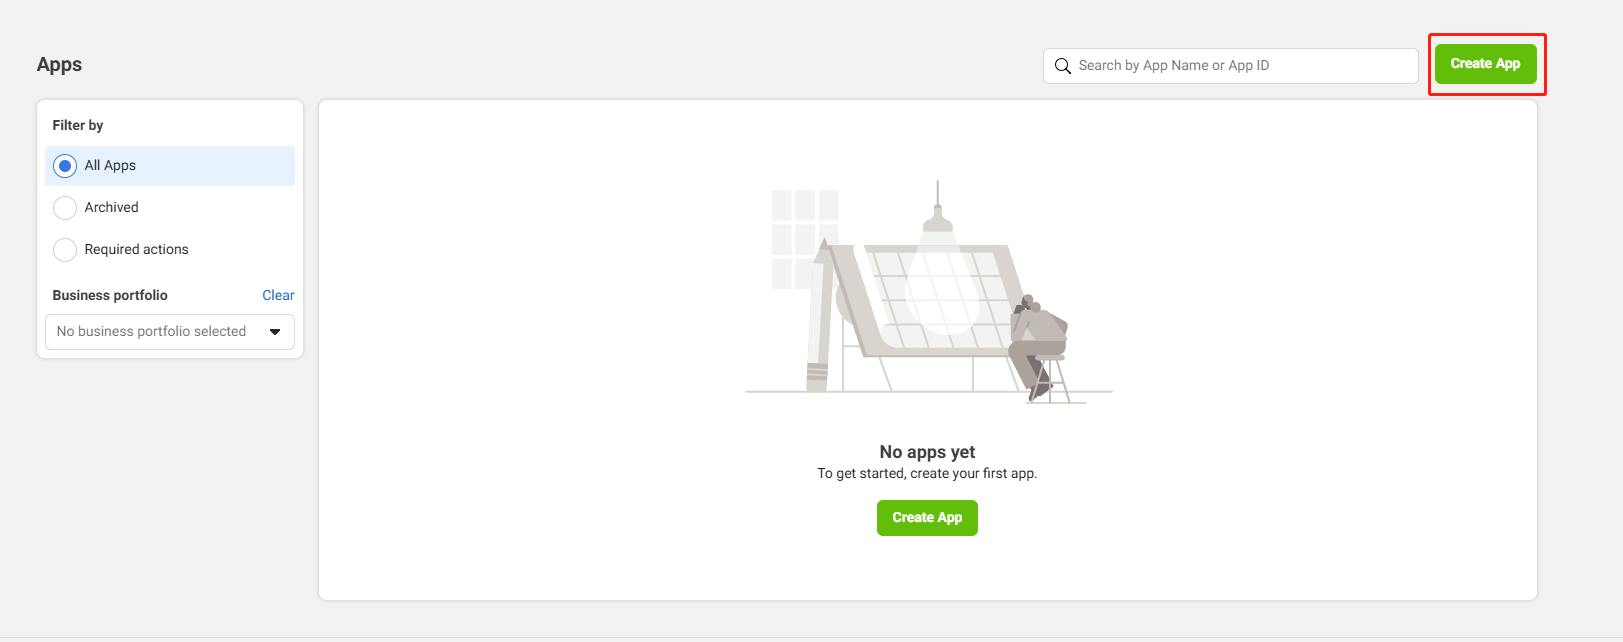
Click Create App from the upper right corner.
-
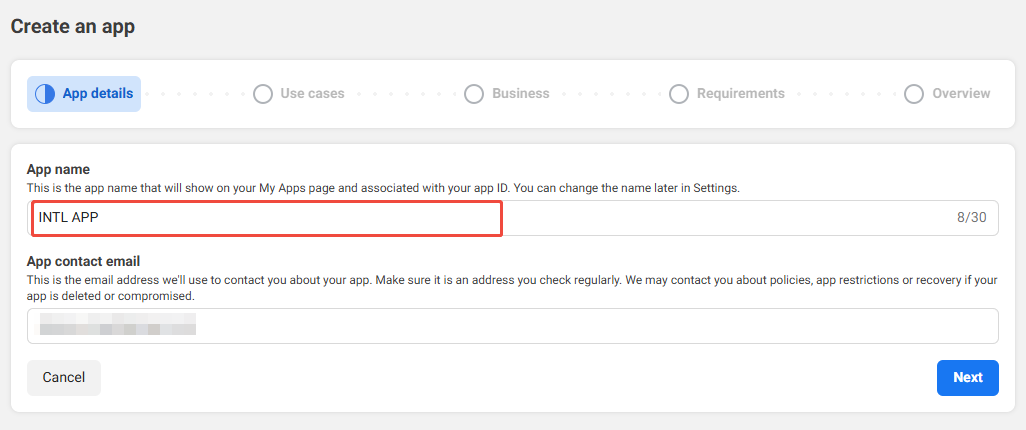
Enter the basic information for your app:
- App name -
FACEBOOK_DISPLAYNAMEin the INTLConfig.ini configuration file. - App contact email - Primary contact email used to receive notifications from Facebook regarding your app.
- App name -
-
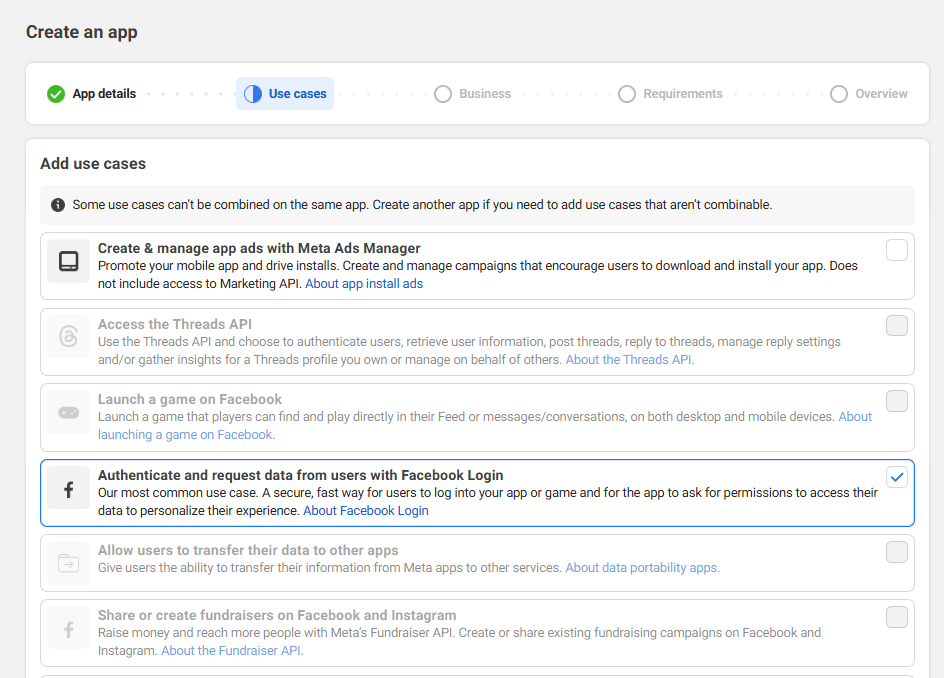
Select Authenticate and request data from users with Facebook Login as the app type.
-
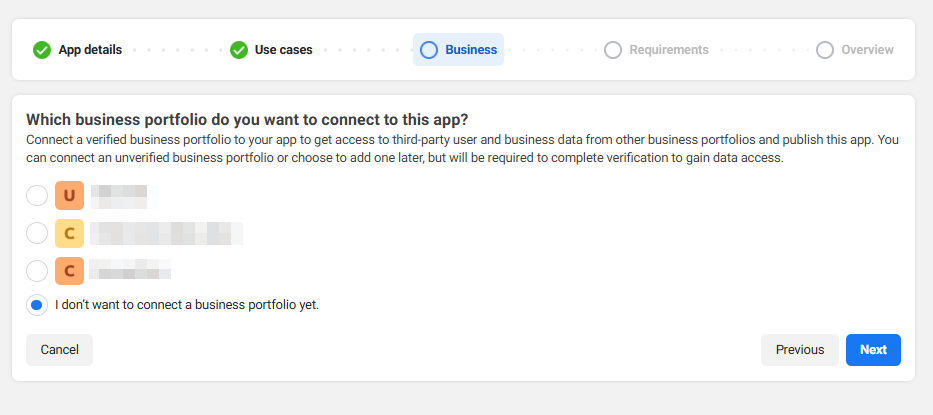
Select Business if available, else proceed to the next step.
-
Agree and continue.
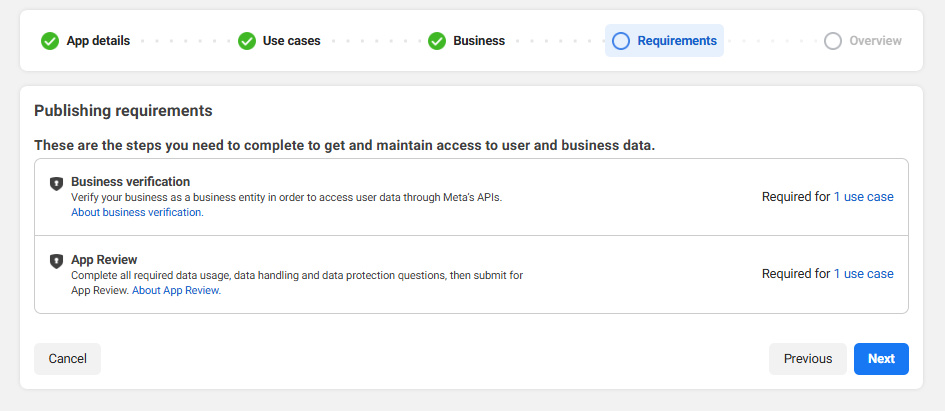
-
Review the information and click Go to Dashboard to complete the app creation.
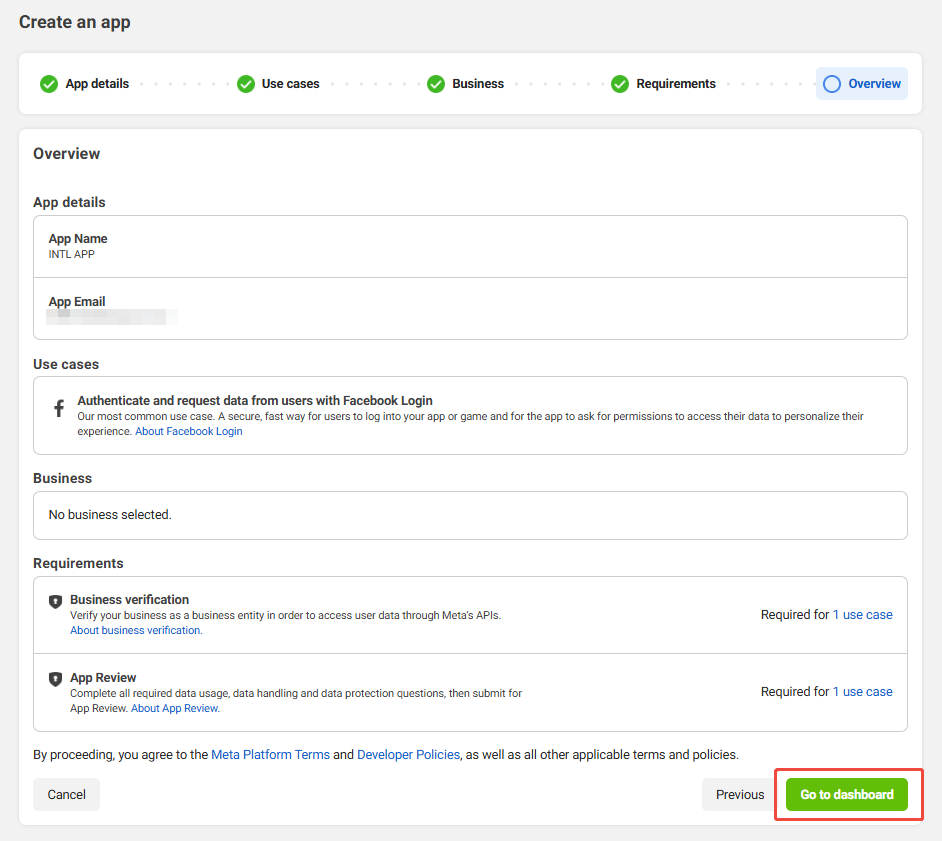
3. Configure the app
Follow Facebook specifications to enter the Privacy Policy URL, User Data Deletion, and Terms of Service URL. If you do not follow Facebook specifications, Facebook may disable your app after it is released.
For apps that have been already submitted to Facebook, they can continue to use Facebook Login For Gaming. New apps that have not been submitted are only allowed to use Facebook Login, see Facebook Login For Gaming for more information.
- In the left sidebar, click App Settings > Basic to view basic information about the application, such as App ID and App secret.
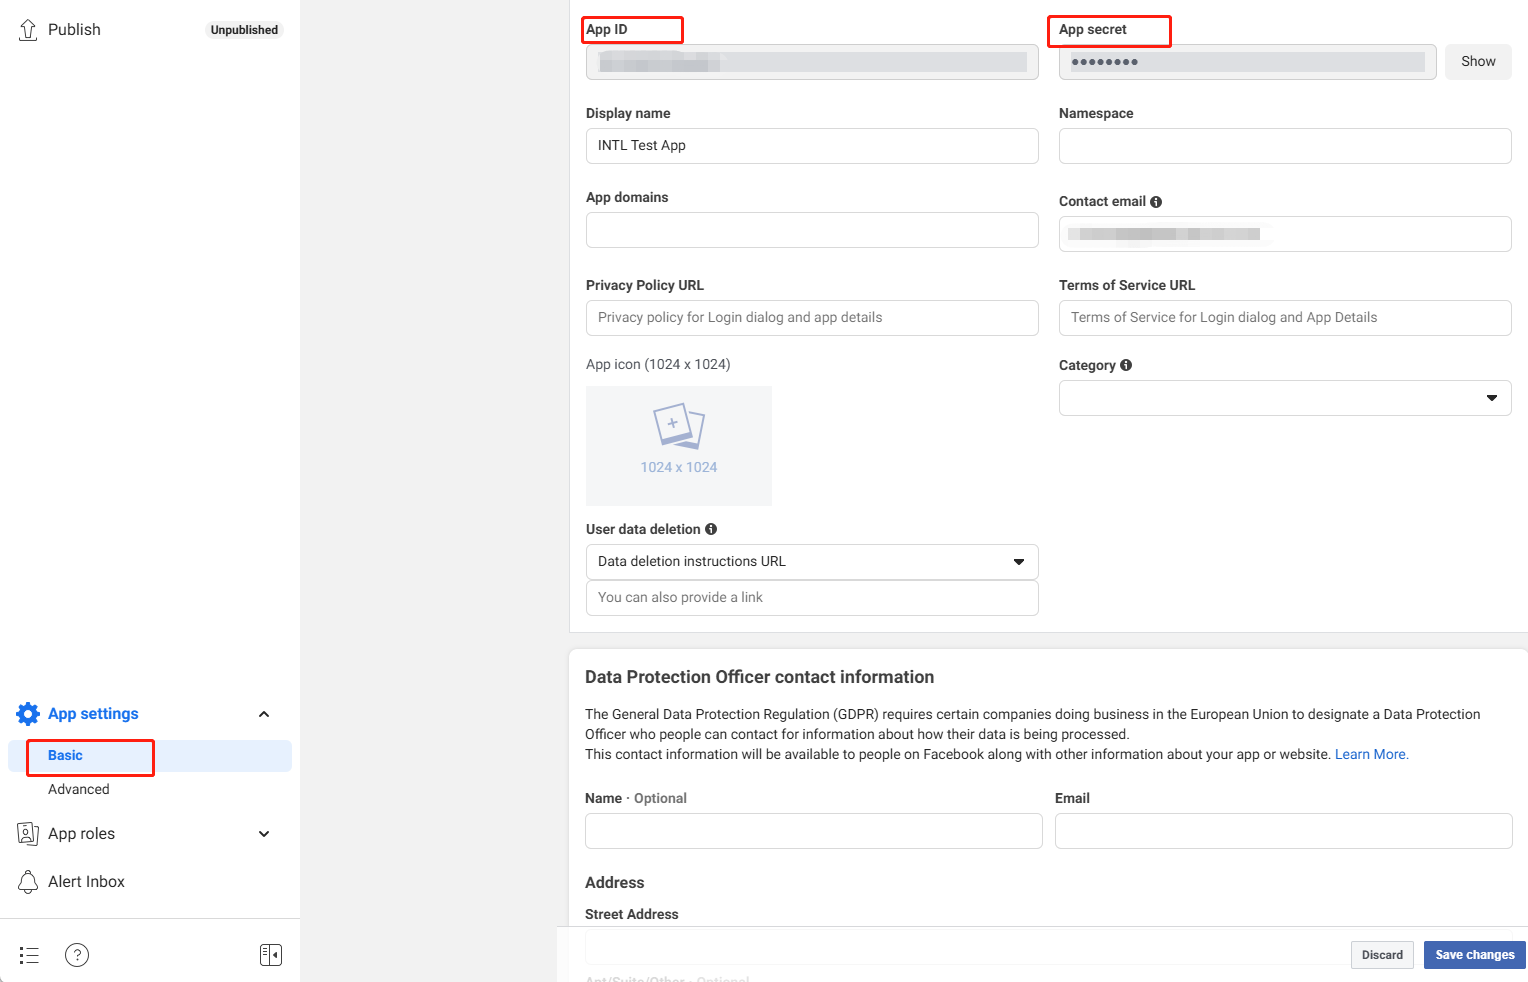
-
In the Privacy Policy URL field, enter the URL of the Privacy Policy.
-
In the User Data Deletion field, select the data deletion instructions URL, and enter the URL according to the user's instructions for data deletion.
-
In the Terms of Service field, enter the URL of the Terms of Service.
-
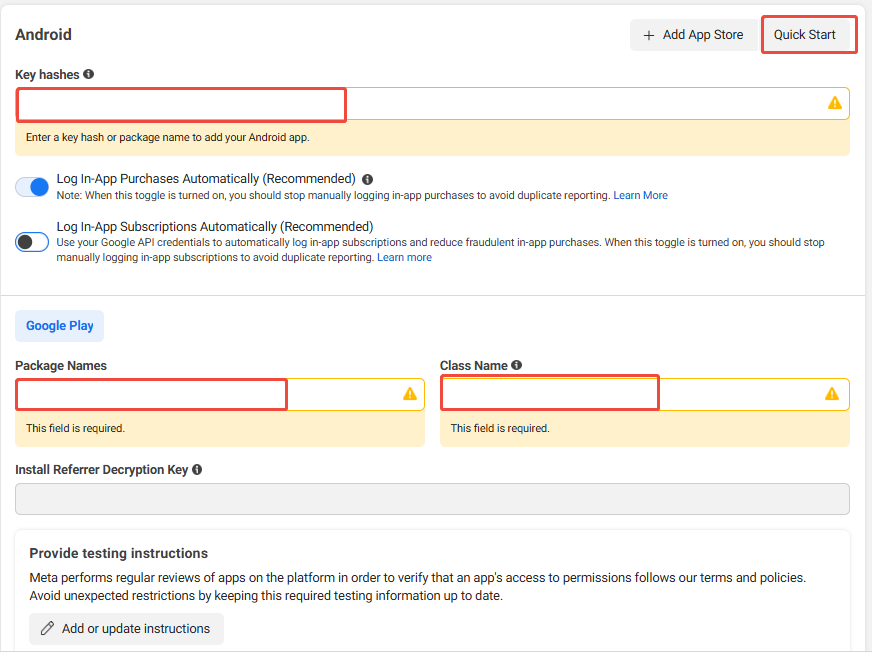
Click Add Platform and select Android to add an Android app.
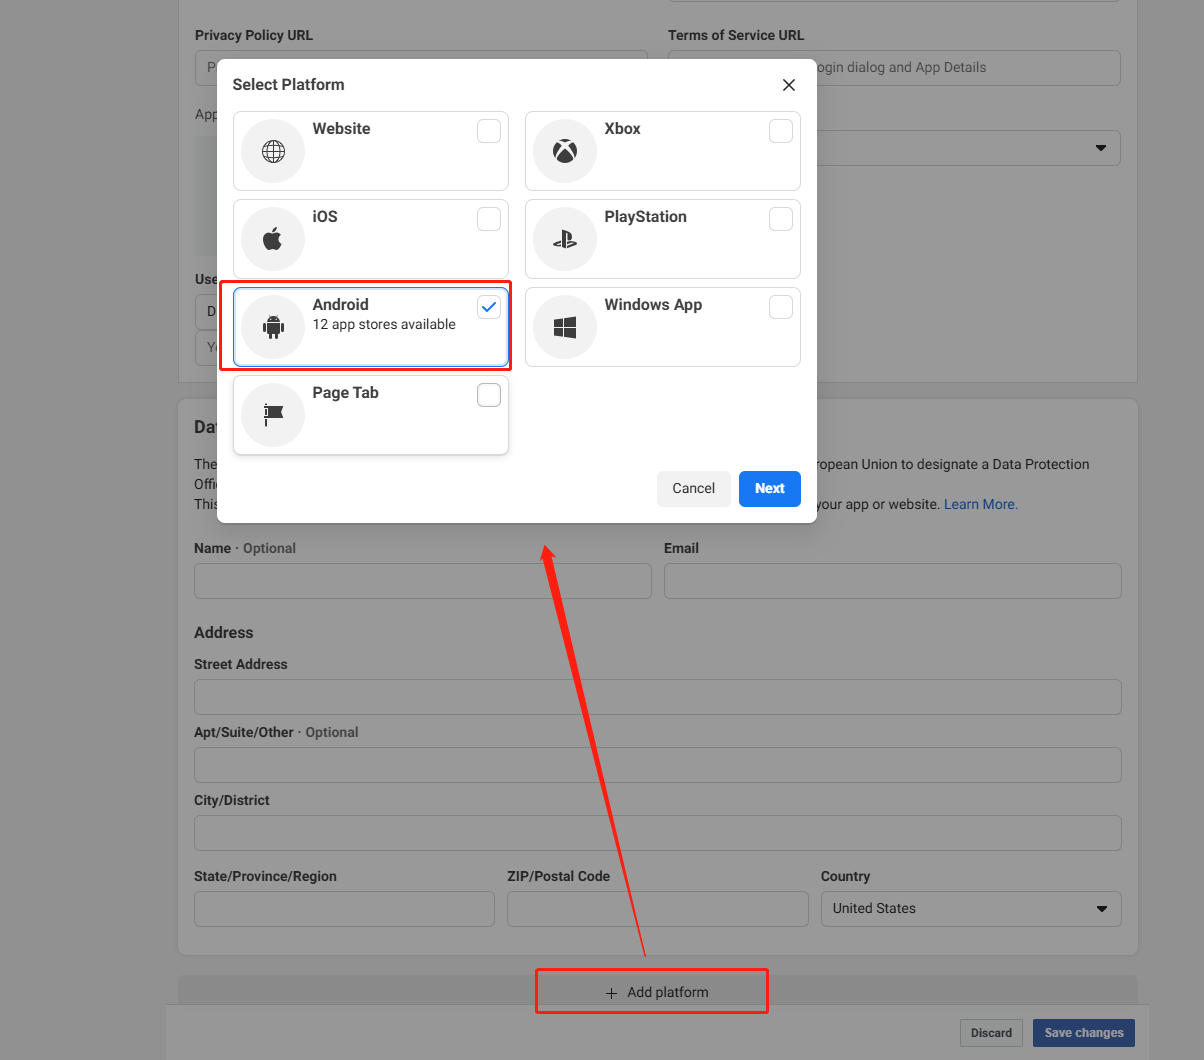
-
Enter the configuration directly, or click Quick Start from the top right corner of the platform configuration interface and set the configuration based on the guide.
noteFor the Key Hashes generation method, see the official guide from Facebook.
-
Click Save Changes to save the configuration.
Configure Facebook Login
- In Facebook App Dashboard, click Use cases > Customize.
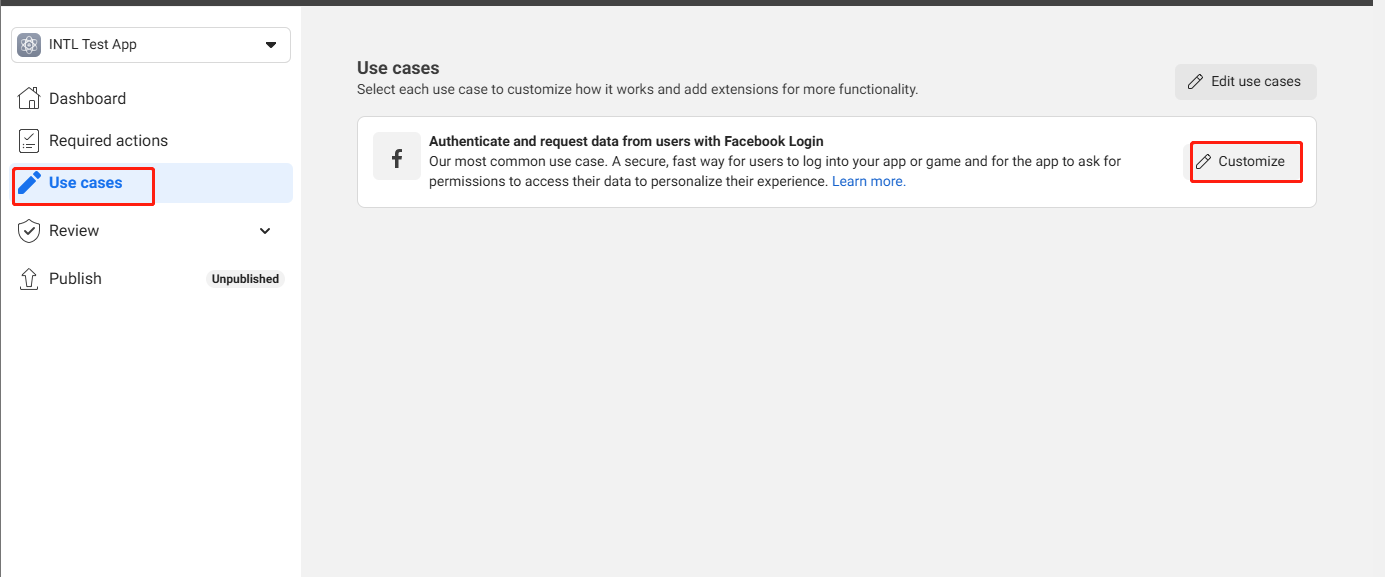
- Select Settings under Facebook Login.
- In Valid OAuth Redirect URIs, enter
https://common-web.intlgame.com/jssdk/facebooklogincallback.htmlandhttps://test-common-web.intlgame.com/jssdk/facebooklogincallback.html. - Turn on Embedded Browser OAuth Login.
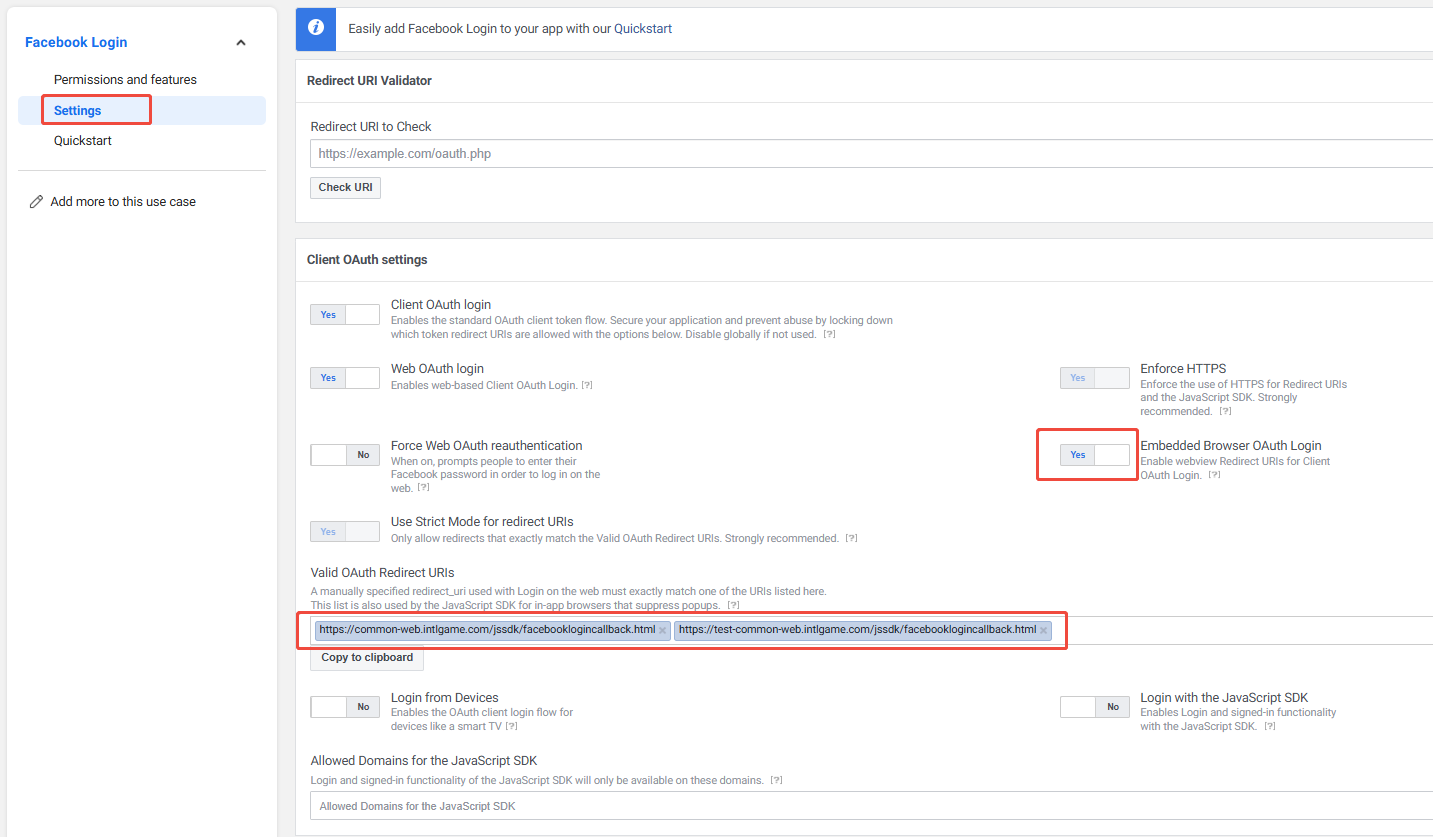
- Click Save changes at the bottom of the page to save the configurations.
4. Add testing permissions
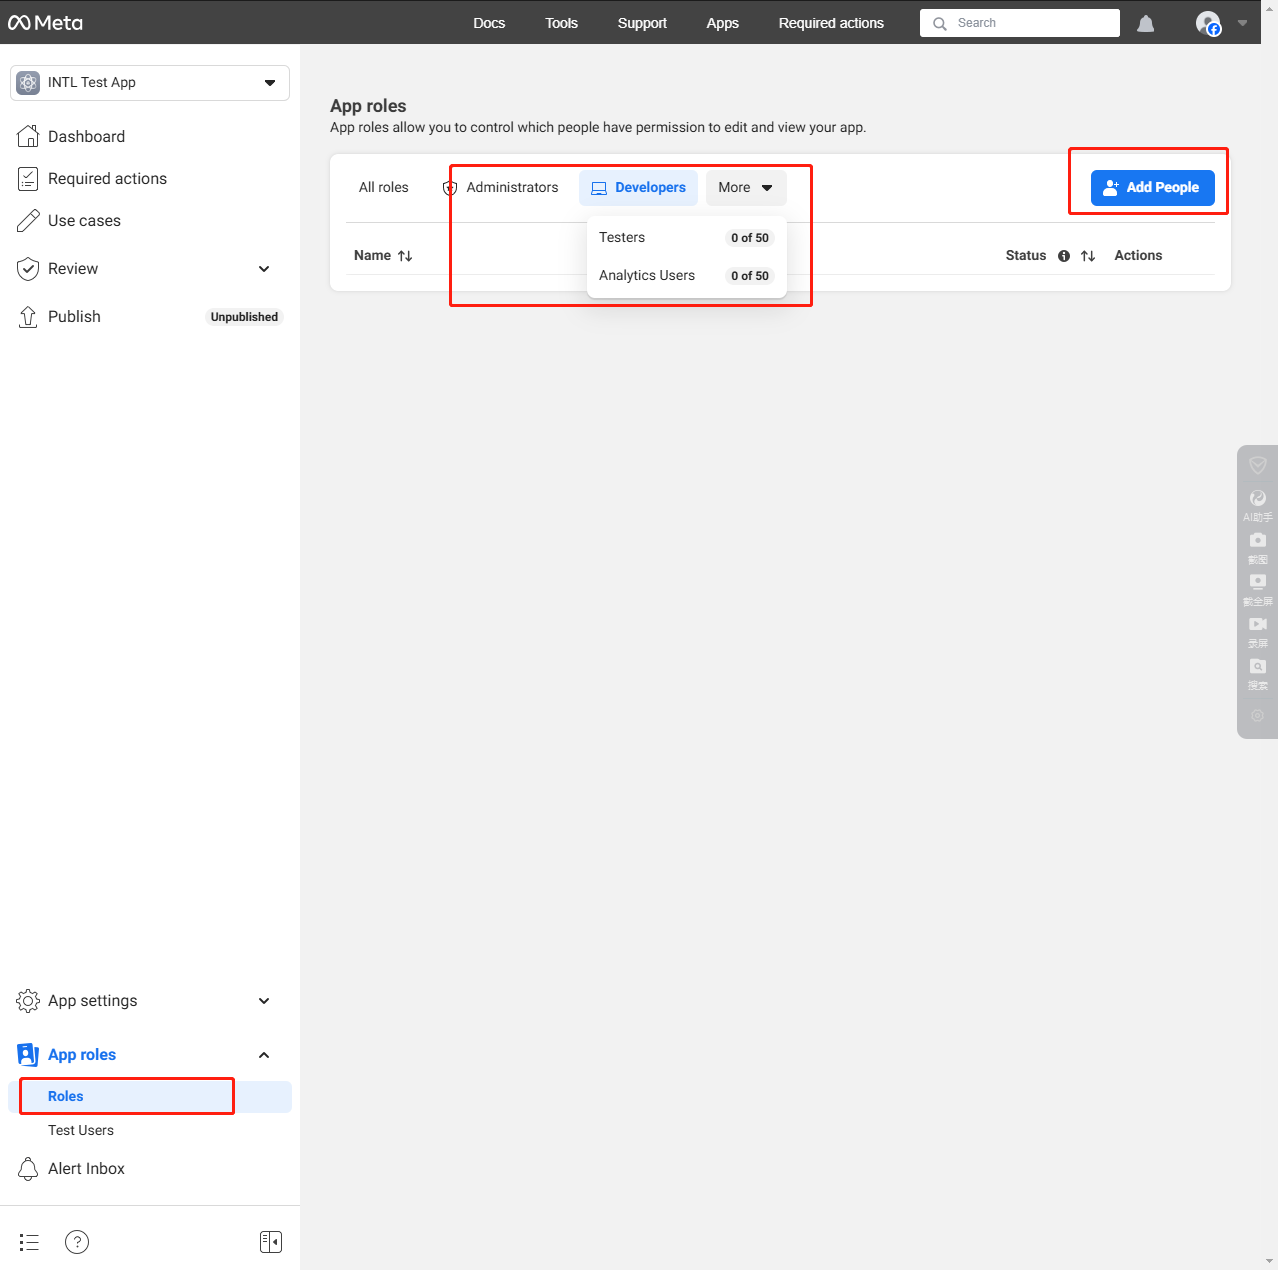
Before the app is released, only test users or users who are added into the permission list have access to Facebook functions.
- In Facebook App Dashboard, click Roles.
- Click Add Administrators/Add Developers/Add Testers to add respective roles.
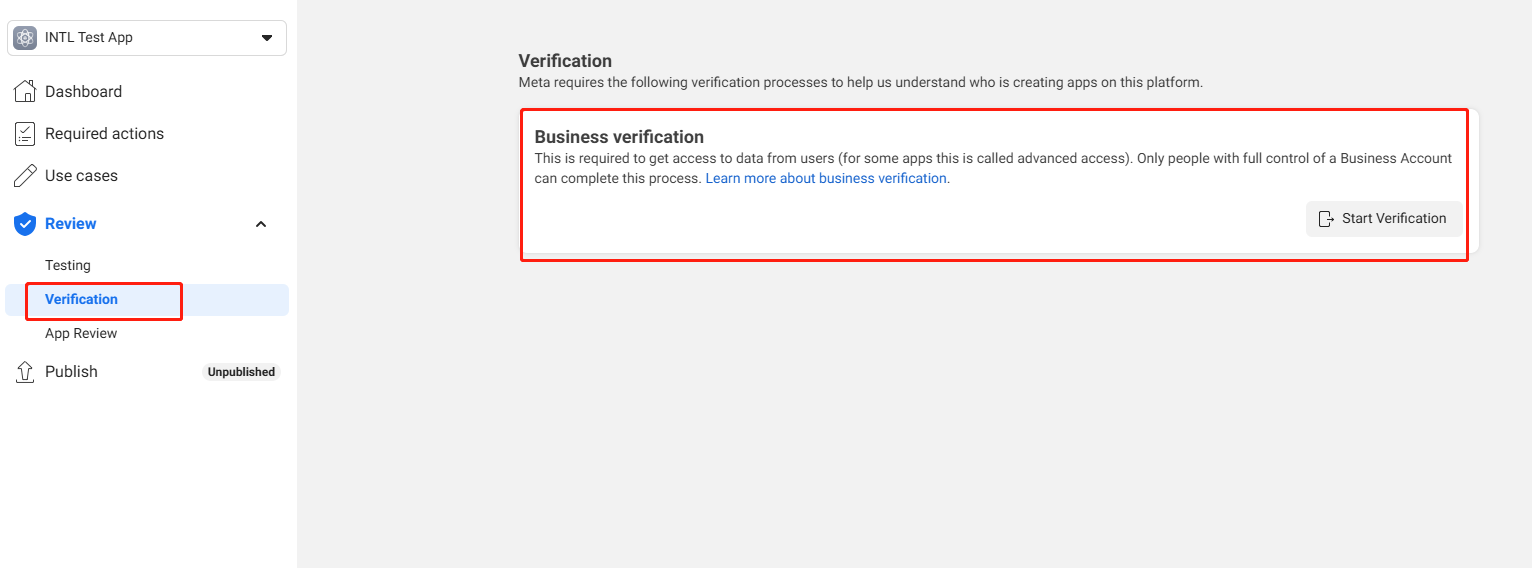
5. Verify your business
Certain Meta technologies or features require you to go through the Meta business verification. For more information, reach out to the Player Network representative.
- Create an account for Player Network Console.
- Create a new project for your game, or join an existing one.
- Download the SDK.
- Integrate the SDK.
- Add Facebook as an authentication method for your project on Player Network Console.
Step 1: Configure the SDK for Facebook login
-
In the
AndroidManifestfile, make sure the required permissions have been added. Facebook requires access to the network.<uses-permission android:name="android.permission.INTERNET"/> -
Open the project's INTLConfig.ini:
INTLConfig.ini[INTL environment]
# WARNING: You should change this URL to the production environment when you release your game.
INTL_URL = https://test.intlgame.com
GAME_ID = {INTL_GAME_ID}
SDK_KEY = {INTL_SDK_KEY}
[INTL Log]
LOG_LEVEL = 1
LOG_CONSOLE_OUTPUT_ENABLE = 1
LOG_FILE_OUTPUT_ENABLE = 1
LOG_ENCRYPT_ENABLE = 0
LOG_COMPRESS_ENABLE = 0
[Android LifeCycle]
LIFECYCLE = Facebook
[Facebook]
FACEBOOK_APP_ID = {INTL_FACEBOOK_APP_ID}
FACEBOOK_DISPLAYNAME = {INTL_APP_NAME}- Set the SDK backend environment
INTL_URLtohttps://test.intlgame.com. - Replace
{INTL_GAME_ID}and{INTL_SDK_KEY}with theGAME_IDandSDK_KEYassigned by Player Network Console. - Set
LOG_LEVEL = 1,LOG_CONSOLE_OUTPUT_ENABLE = 1,LOG_FILE_OUTPUT_ENABLE = 1,LOG_ENCRYPT_ENABLE = 0, andLOG_COMPRESS_ENABLE = 0to output console logs and log files without encrypting or compressing the output. - Add Facebook to
LIFECYCLE. For more information, see SDK Environment. - Replace
{INTL_FACEBOOK_APP_ID}with the Facebook App ID. - Replace
{INTL_APP_NAME}with the name of your Facebook app.
- Set the SDK backend environment
-
Define
manifestPlaceholdersin your gradle file and replace{INTL_FACEBOOK_APP_ID}with the Facebook App ID.- Unity
- Unreal Engine
mainTemplate.gradleandroid {
defaultConfig {
manifestPlaceholders = ["FACEBOOK_APPID":"{INTL_FACEBOOK_APP_ID}"]
}
}noteFor Player Network SDK V1.17 or later, edit
INTLConfig_APL.xml.For Player Network SDK V1.16.04 or earlier, edit
INTLCore_UPL.xml.<buildGradleAdditions>
<insert>
<![CDATA[
android{
defaultConfig {
manifestPlaceholders = ["FACEBOOK_APPID":"{INTL_FACEBOOK_APP_ID}"]
}
}]]>
</insert>
</buildGradleAdditions> -
Configure
ClientToken. To obtainClientToken, go toApp Dashboardin the Facebook Developer platform, and selectApp settings/Advanced/Client token. For more information, see Getting Started with the Facebook SDK for Android.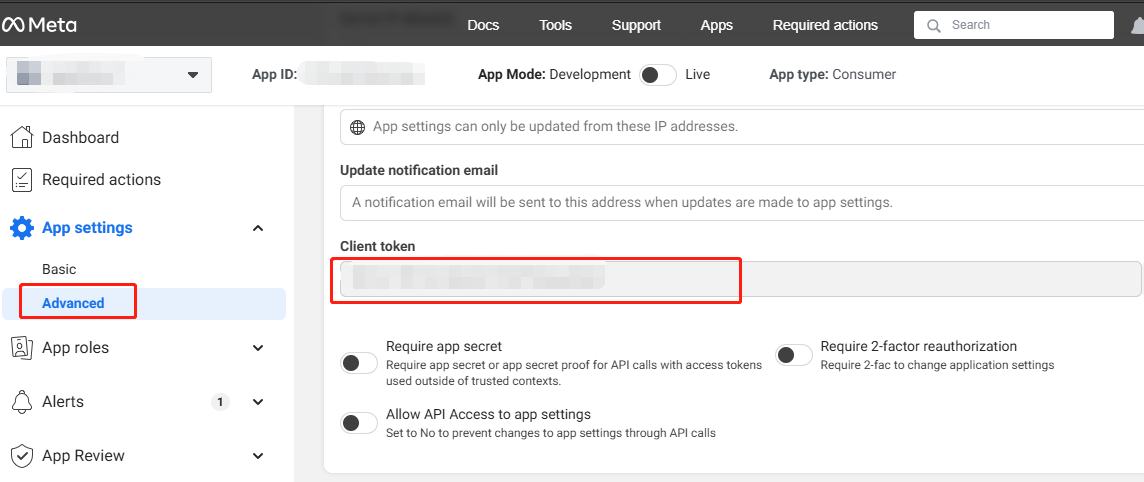 note
noteClientTokenconfiguration is added for the Facebook channel to resolve the problem of the app failing whenfb graph apiis called too many times in a short period of time.
This feature is effective for V1.19.03 and later versions. The following configurations are not necessary for V1.19.02 and earlier.- Unity
- Unreal Engine
Add
ClientTokenconfiguration toINTLConfig.ini.FACEBOOK_CLIENT_TOKEN = CLIENT-TOKENAdd
ClientTokenconfiguration to the projmods file."FacebookClientToken":"CLIENT-TOKEN"Add
ClientTokenconfiguration toINTLConfig.ini.FACEBOOK_CLIENT_TOKEN = CLIENT-TOKENAdd
ClientTokenconfiguration to the gradle file."FACEBOOK_CLIENT_TOKEN" : "CLIENT-TOKEN"
Step 2: Add Facebook login for your app
For Android, Player Network checks the app login state before the web login state.
- If the Facebook app is installed, Player Network opens the Facebook app for login.
- If the Facebook app is not installed, Player Network opens the website for login.
Player Network authentication services also supports Facebook Login for Gaming. For more information, see the Technical Implementation section of the Facebook official documentation.
-
Add an observer to handle authentication callbacks.
- Unity
- Unreal Engine
// Add callbacks
public void AddAuthObserver()
{
    INTLAPI.AddAuthResultObserver(OnAuthResultEvent);
}

// Remove callbacks
public void RemoveAuthObserver()
{
    INTLAPI.RemoveAuthResultObserver(OnAuthResultEvent);
}

// Process the INTLAuthResult callback
public void OnAuthResultEvent(INTLAuthResult ret)
{
    Debug.Log($"MethodID: {ret.MethodId}");

    string methodTag = "";
    if (authRet.MethodId == (int)INTLMethodID.INTL_AUTH_LOGIN)
    {
        methodTag = "Login";
    }
    else if (authRet.MethodId == (int)INTLMethodID.INTL_AUTH_BIND)
    {
        methodTag = "Bind";
    }
    else if (authRet.MethodId == (int)INTLMethodID.INTL_AUTH_AUTOLOGIN)
    {
        methodTag = "AutoLogin";
    }
    else if (authRet.MethodId == (int)INTLMethodID.INTL_AUTH_QUERY_USER_INFO)
    {
        methodTag = "QueryUserInfo";
    }
    else if (authRet.MethodId == (int)INTLMethodID.INTL_AUTH_GET_AUTH_RESULT)
    {
        methodTag = "GetAuthResult";
    }
}
C++ Event Handling (above v1.15)
//configure callback
FINTLAuthEvent authEvent;
authEvent.AddUObject(this, &OnAuthResult_Implementation);
UINTLSDKAPI::SetAuthResultObserver(authEvent);
// Remove callbacks
UINTLSDKAPI::GetAuthResultObserver().Clear();
void OnAuthResult_Implementation(FINTLAuthResult ret)
{
UE_LOG(LogTemp, Warning, TEXT("MethodID: %d"), ret.MethodId);
}Unreal Event Handling
void OnAuthResult_Implementation(FINTLAuthResult ret)
{
    UE_LOG(LogTemp, Warning, TEXT("MethodID: %d"), ret.MethodId);
} -
Call the
AutoLoginmethod.- Unity
- Unreal Engine
INTLAPI.AutoLogin();UINTLSDKAPI::AutoLogin(); -
Call the
Loginmethod to ask for user input if auto-login fails.-
Facebook Login
- Unity
- Unreal Engine
// taking Facebook as example
INTLAPI.Login(INTLChannel.Facebook);
// taking Facebook as example
UINTLSDKAPI::Login(EINTLLoginChannel::kChannelFacebook); -
Facebook Login for Gaming
Call the
Loginmethod with the permission parameter to retrieve Facebook profile picture. For more information, see Requesting User's Profile Picture.- Unity
- Unreal Engine
//Add a `gaming_user_picture` permission to the original permissions string, like this: `"email,public_profile,gaming_user_picture"`
public static void Login(string channel, string permissions = "gaming_profile,gaming_user_picture", string extraJson = "{}");
//Add a `gaming_user_picture` permission to the original permissions string, like this: `"email,public_profile,gaming_user_picture"`
UFUNCTION(BlueprintCallable, Category = "INTLSDKAPI")
static bool Login(
const EINTLLoginChannel Channel,
const FString Permissions = "gaming_profile,gaming_user_picture",
const FString ExtraJson = "{}");
-
-
Sync client authentication state with the game's backend and wait for the final authentication result.
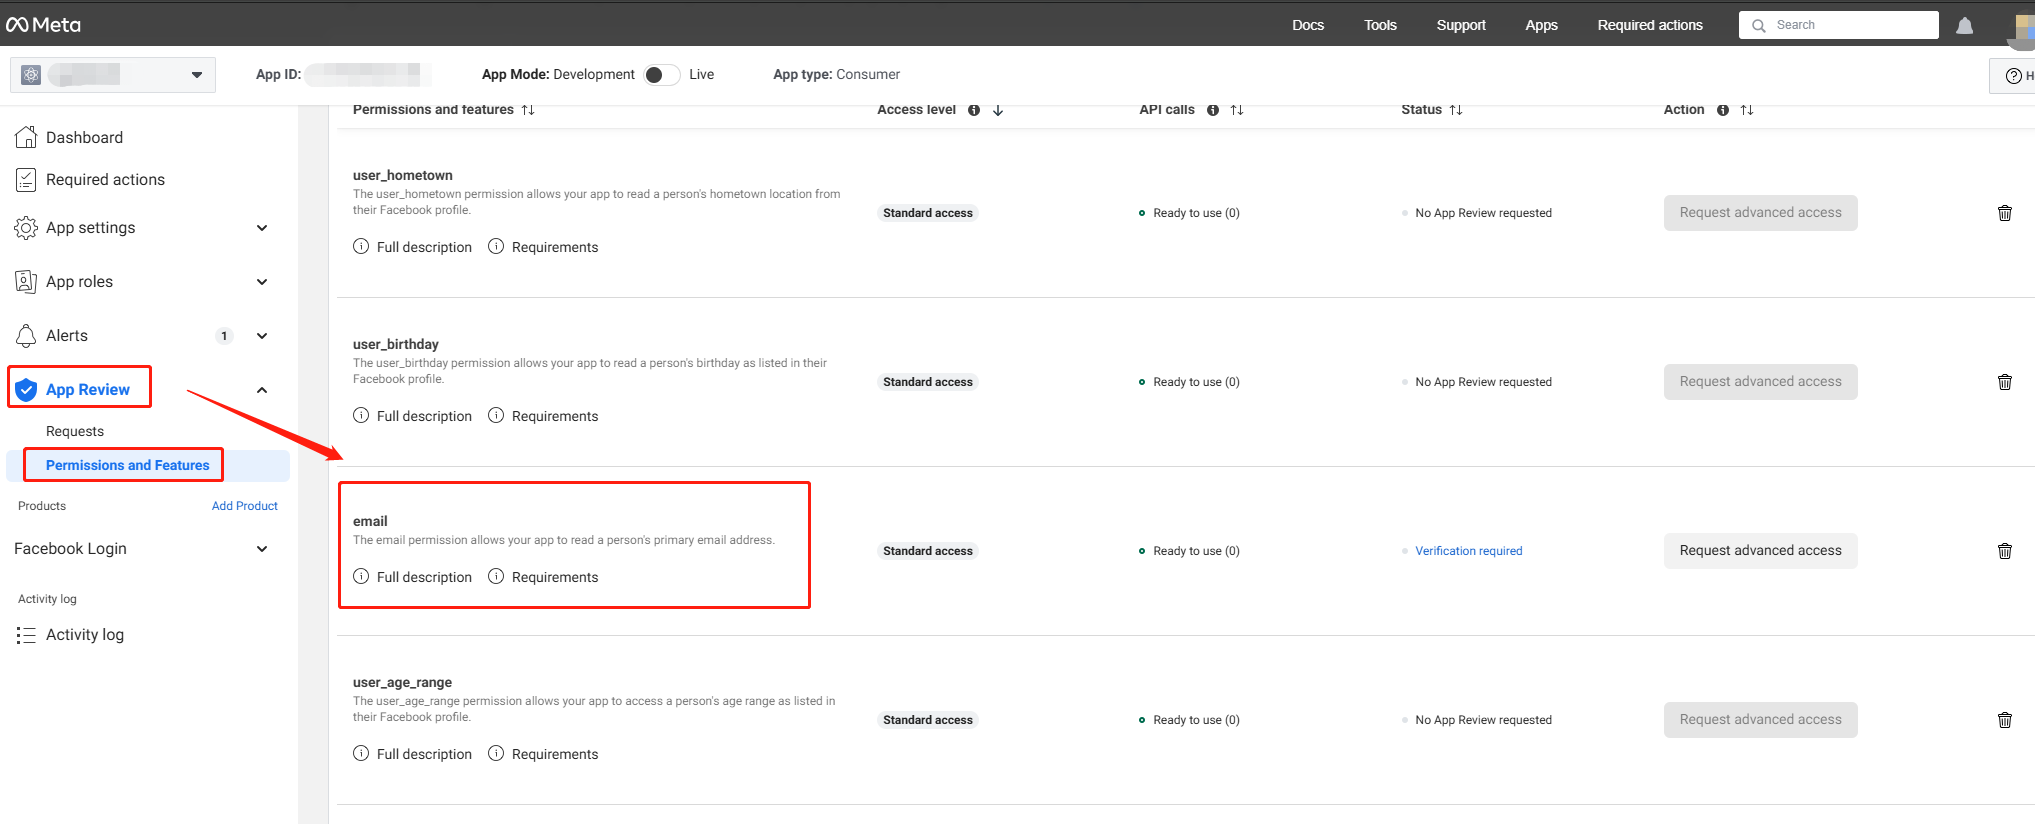
[Optional] Set up email permissions
Set up permissions to obtain the email address of players during Facebook login, returned as email in the ChannelInfo of AuthResult.
- Email masking can be performed on the returned
emailaccording to compliance requirements, reach out to the Player Network representative to enable this feature. - The hashed
base64(sha256(email))can be reported to the backend logs, reach out to the Player Network representative to enable this feature. - Can be used to verify if
emailis present in a player's profile or third-party channel information, reach out to the Player Network representative to enable this feature.
-
Configure the email permission on Meta for Developers. The email permission requires Advanced access, in order for all apps to be able to obtain player email.
-
Add
emailto thepermissionsparameter when calling the Login API. If thepermissionsparameter is not specified or is empty when calling theLoginAPI, theemailpermission will be added. -
Enable email return on Player Network Console by setting return_email to YES, see Configure Third-party Channels for detailed procedures.
Step 3: Test the login function
Search for the keyword "AuthResult" in the Player Network SDK logs to verify if the correct channel name and OpenID are returned. If they are, it indicates a successful configuration and the login function has been added successfully.