Nintendo
This article guides you through setting up Nintendo Switch as an identity provider, enabling your game to access Player Network authentication services.
Curently, Nintendo Switch channel login is only available for Unreal Engine, while Unity support is planned for a future release.
Prerequisites
1. Create the product in Nintendo Developer Portal
Apply for a Nintendo developer account and create your game product first, before proceeding with Player Network configurations.
Required fields:
| Field | Type | Description | | -------------- | ------ | ---------------------------- ---------- | | application_id | string | Application ID provided by Nintendo | | redirect_uri | string | Redirect URI | | client_id | string | Client ID provided by Nintendo | | client_secret | string | Client Secret provided by Nintendo |
Create a Nintendo product
-
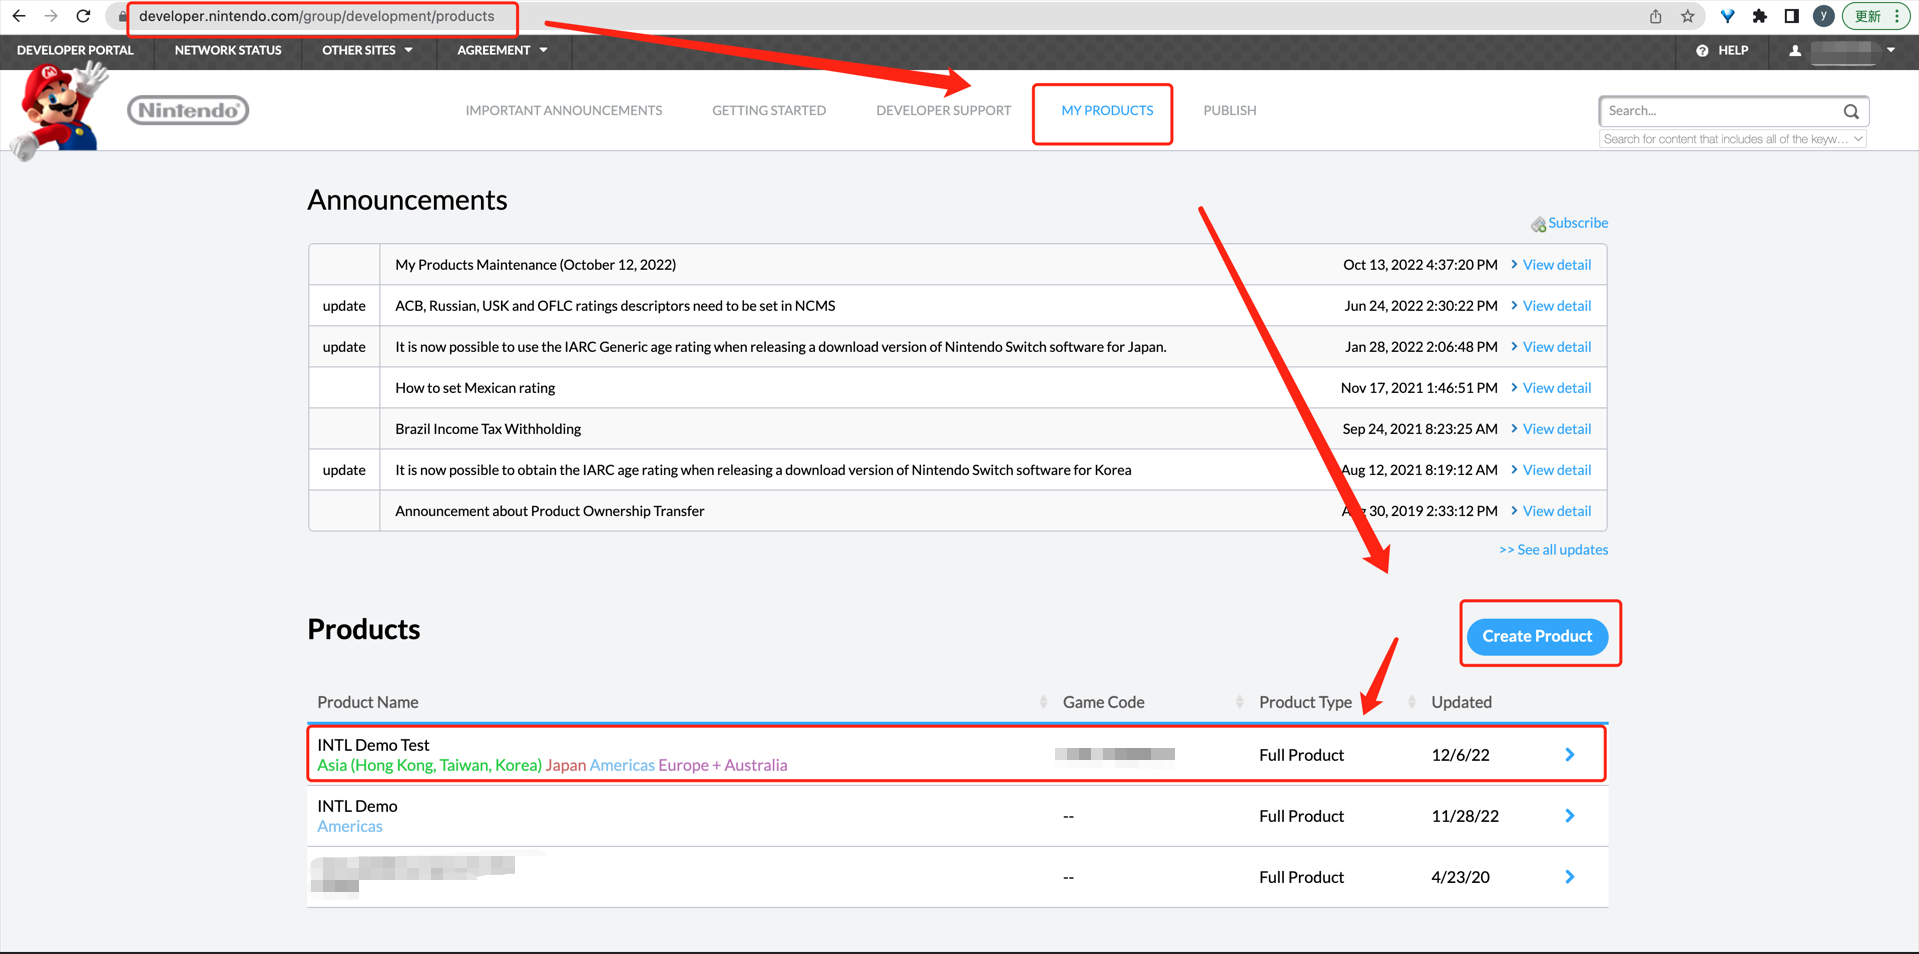
Log in to the Nintendo Developer Portal, then select MY PRODUCTS.
-
Under Products, click Create Product.
-
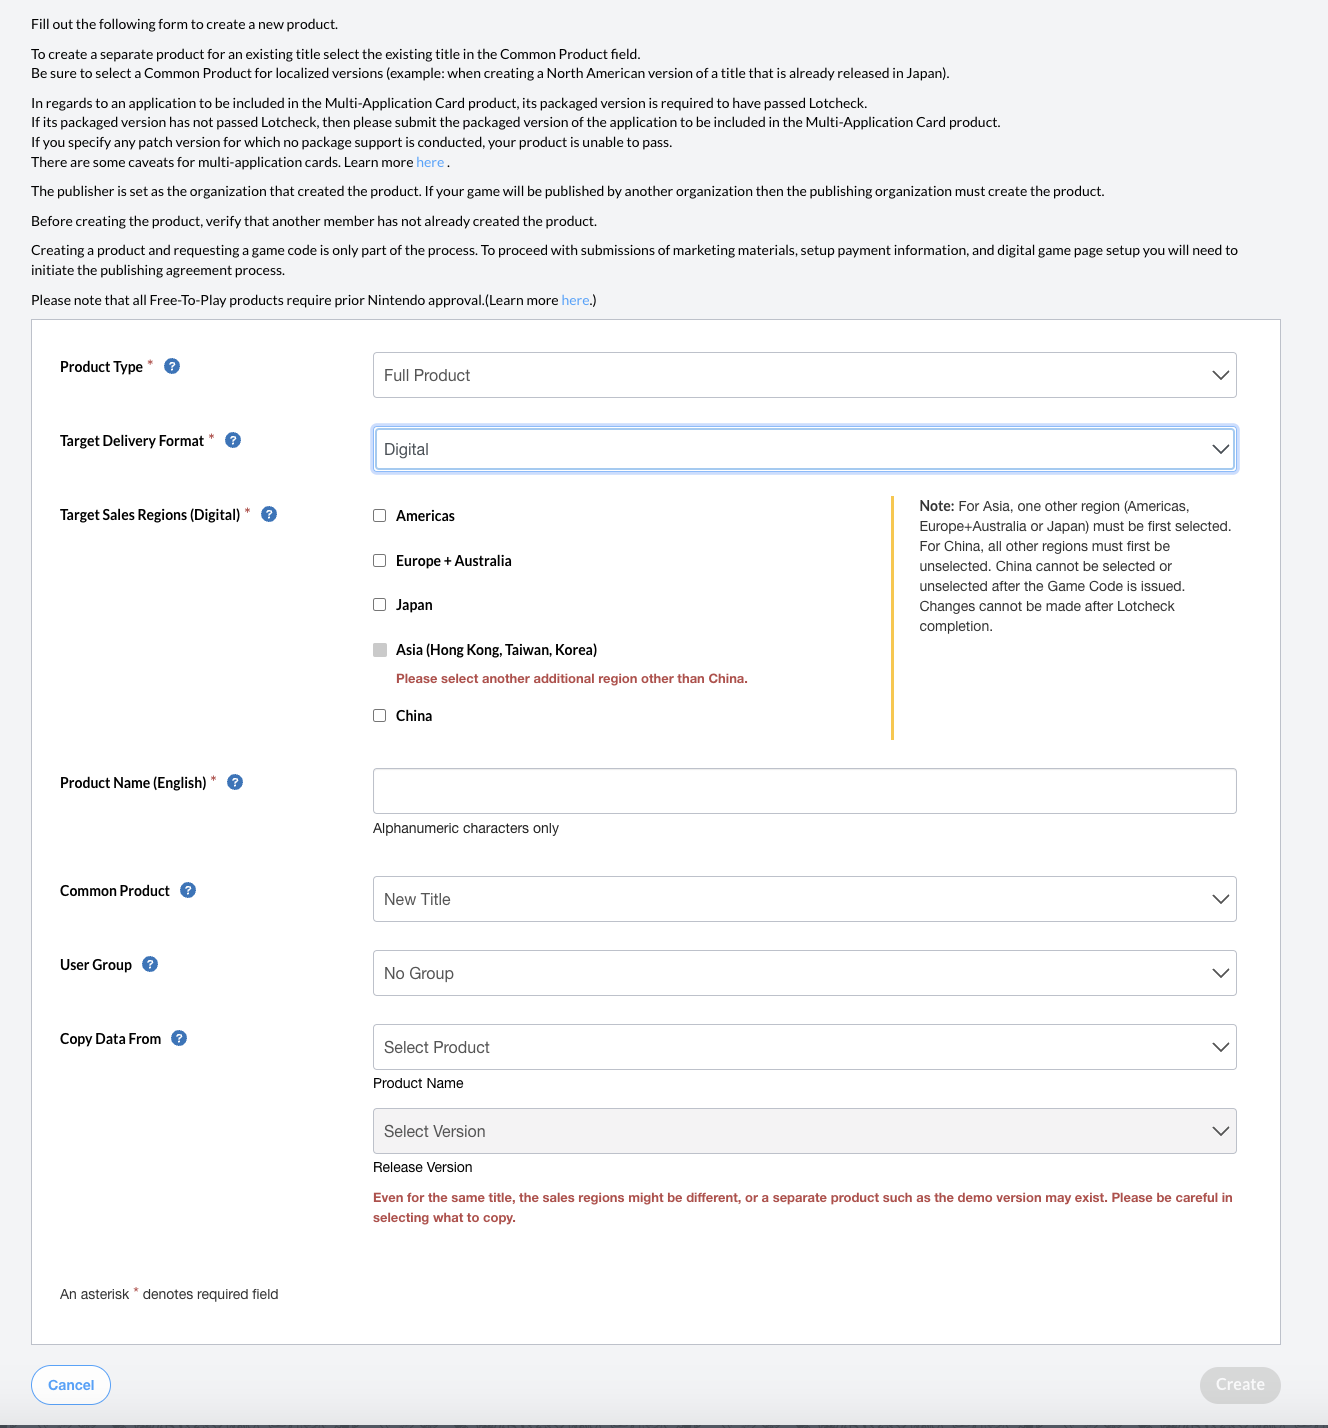
Enter the app details. After selecting the Target Delivery Format, options for Target Sales Regions will be shown.
noteChina should not be selected for the Target Sales Regions.
-
Click Create to create your product.
2. Publish the game code and obtain an Application ID
-
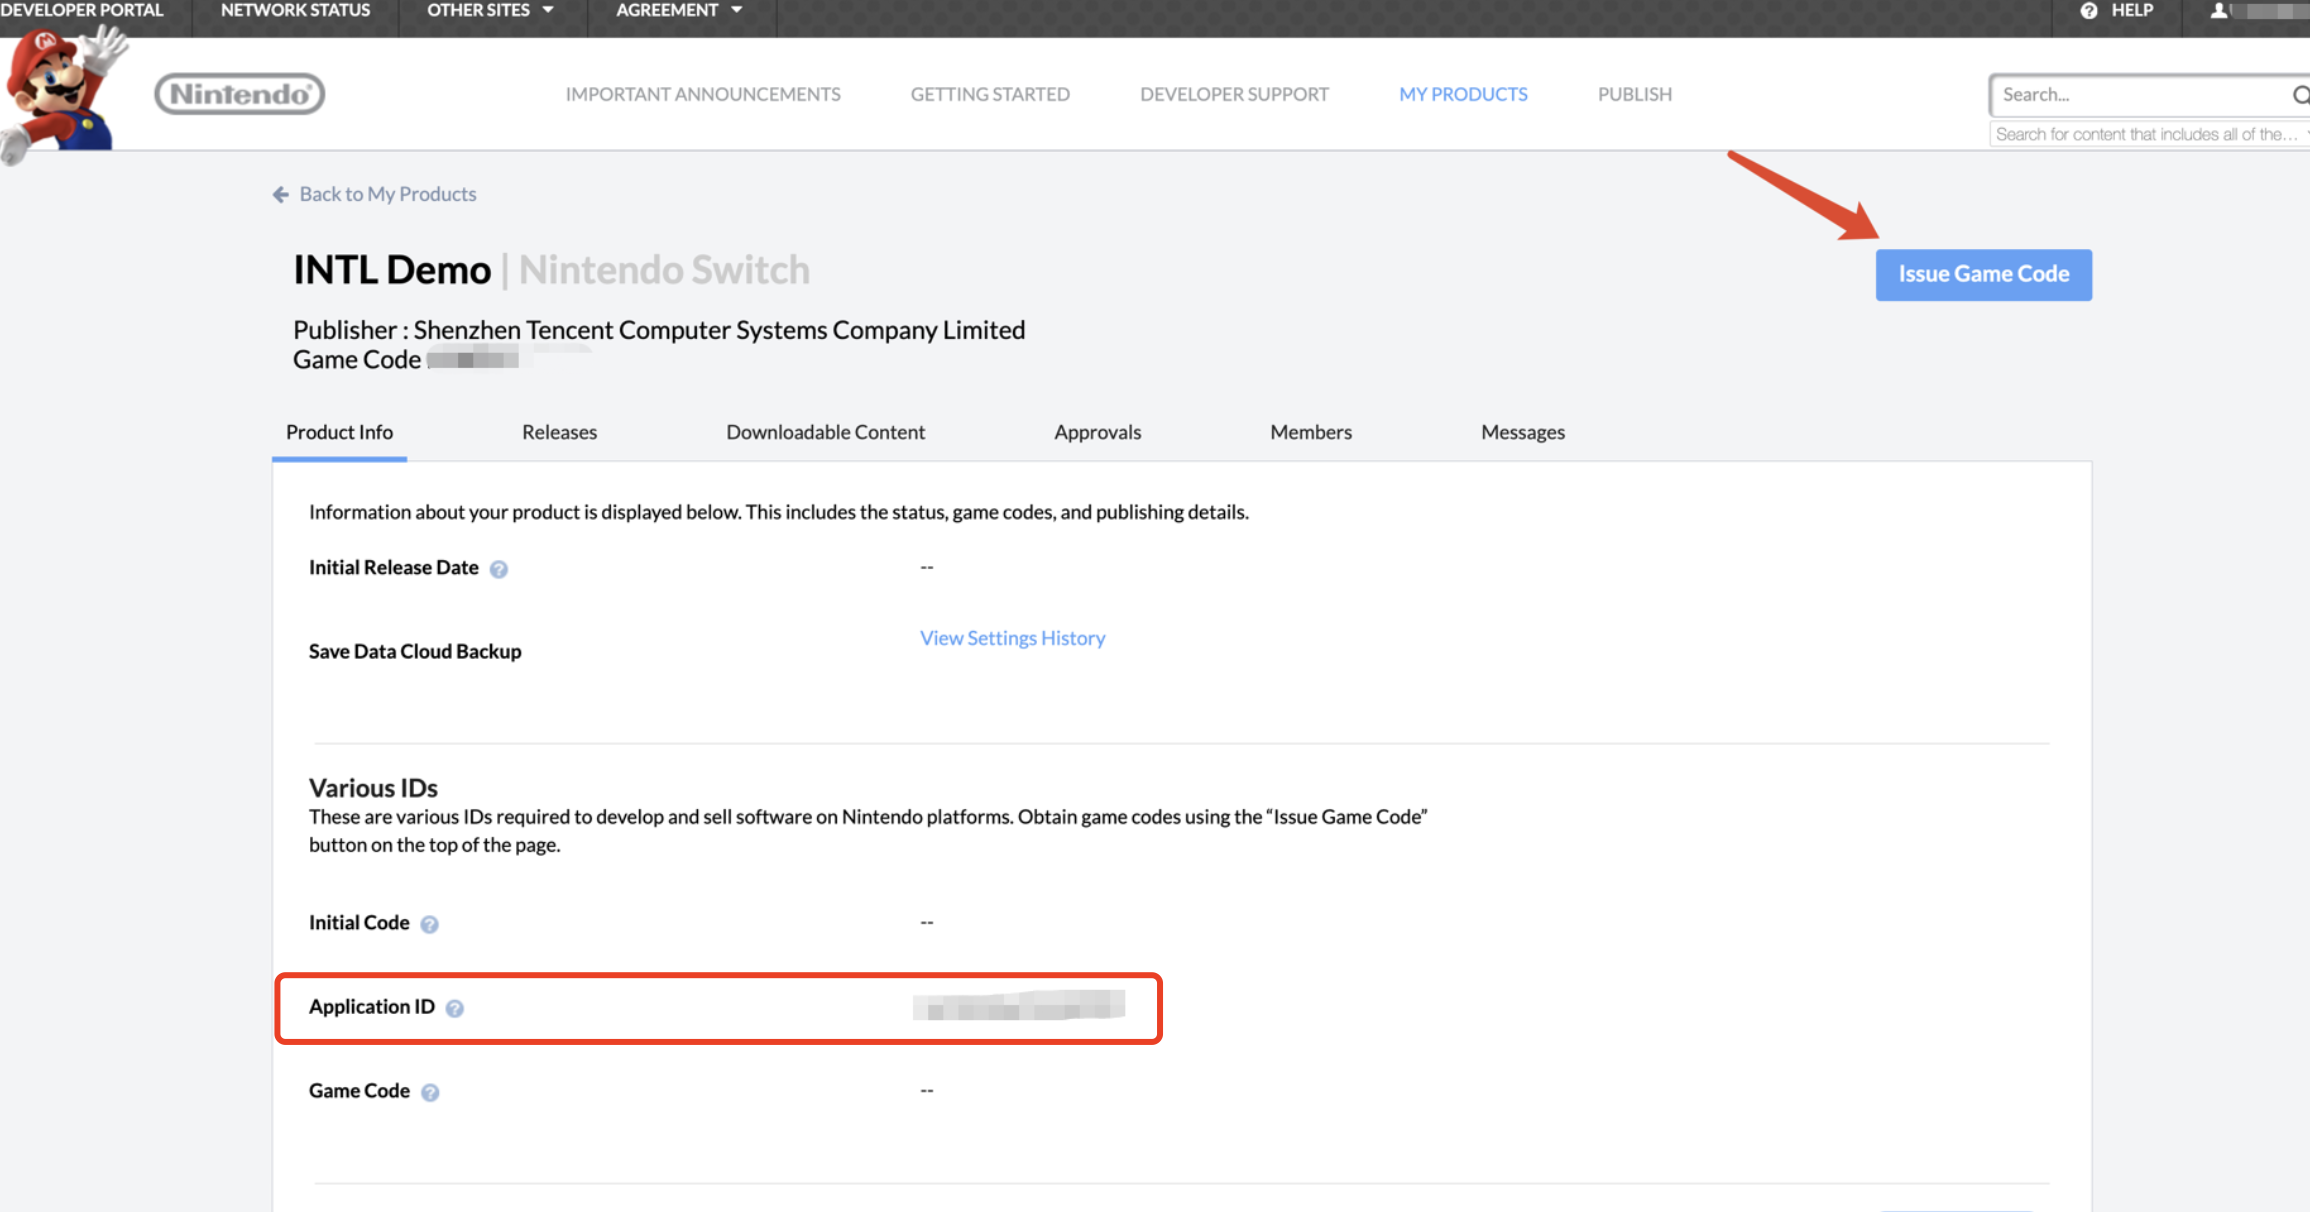
From the MY PRODUCTS page, select your product from under Products.
-
In the top right corner, click Issue Game Code.
-
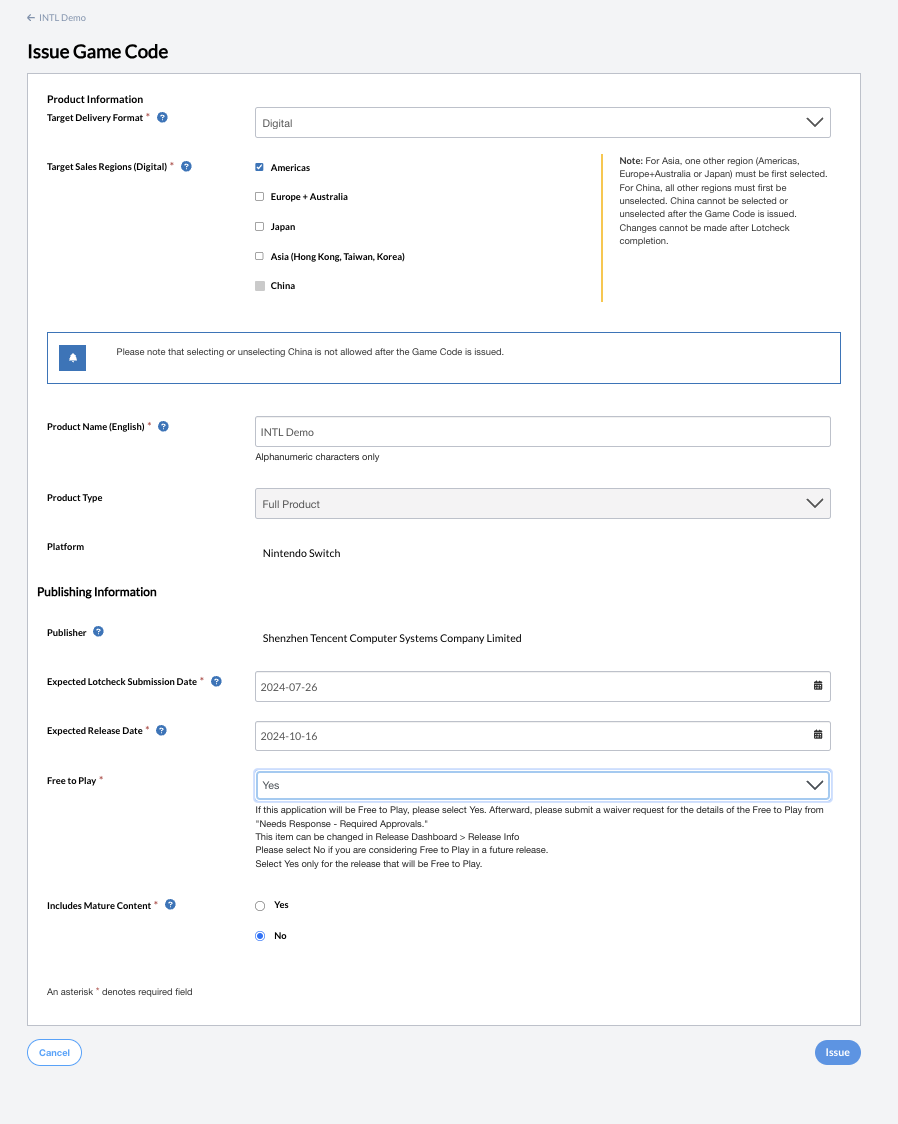
Enter the details under Publishing Information.
-
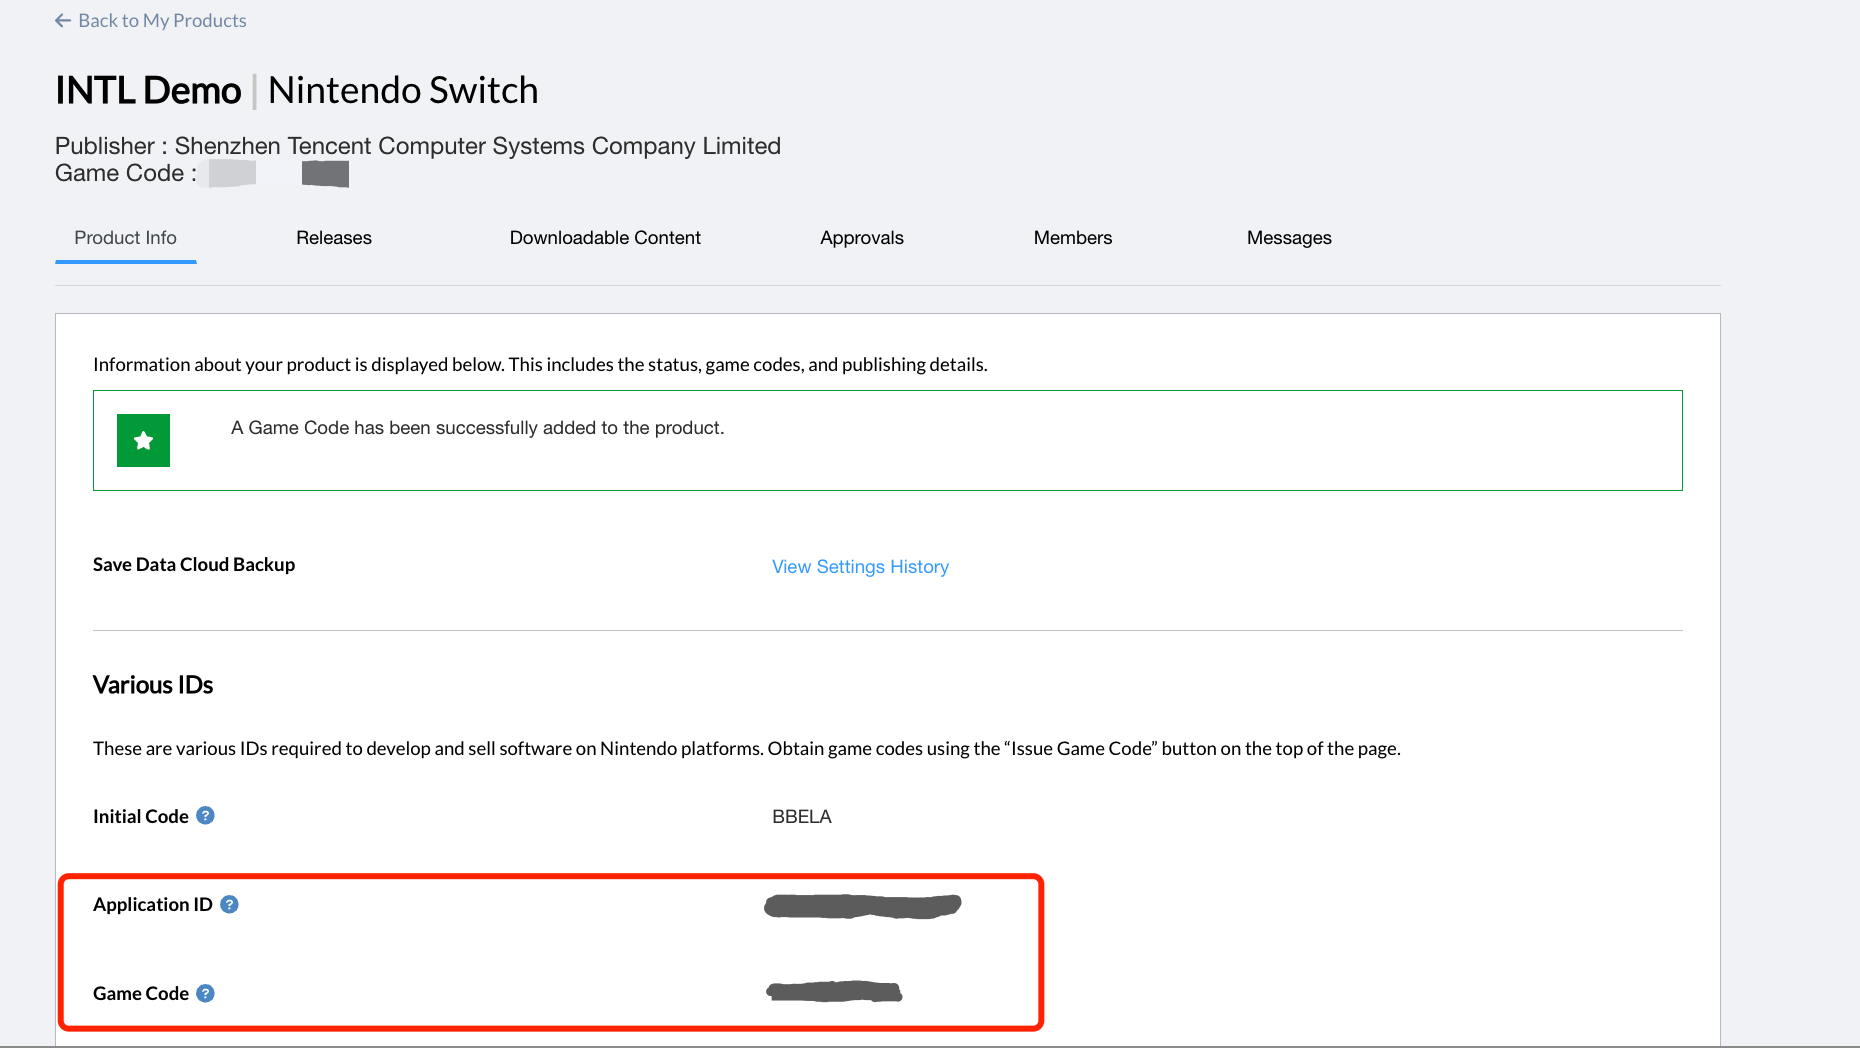
Click Issue. The Application ID and Game Code will be generated and displayed on the product page.
3. Configure socket and HTTP communication
When creating an online game, the follow information has to be configured to ensure that the game has access to the network.
-
Log in to OMAS2 with your Nintendo Developer account, then select Products and Releases from the sidebar.
-
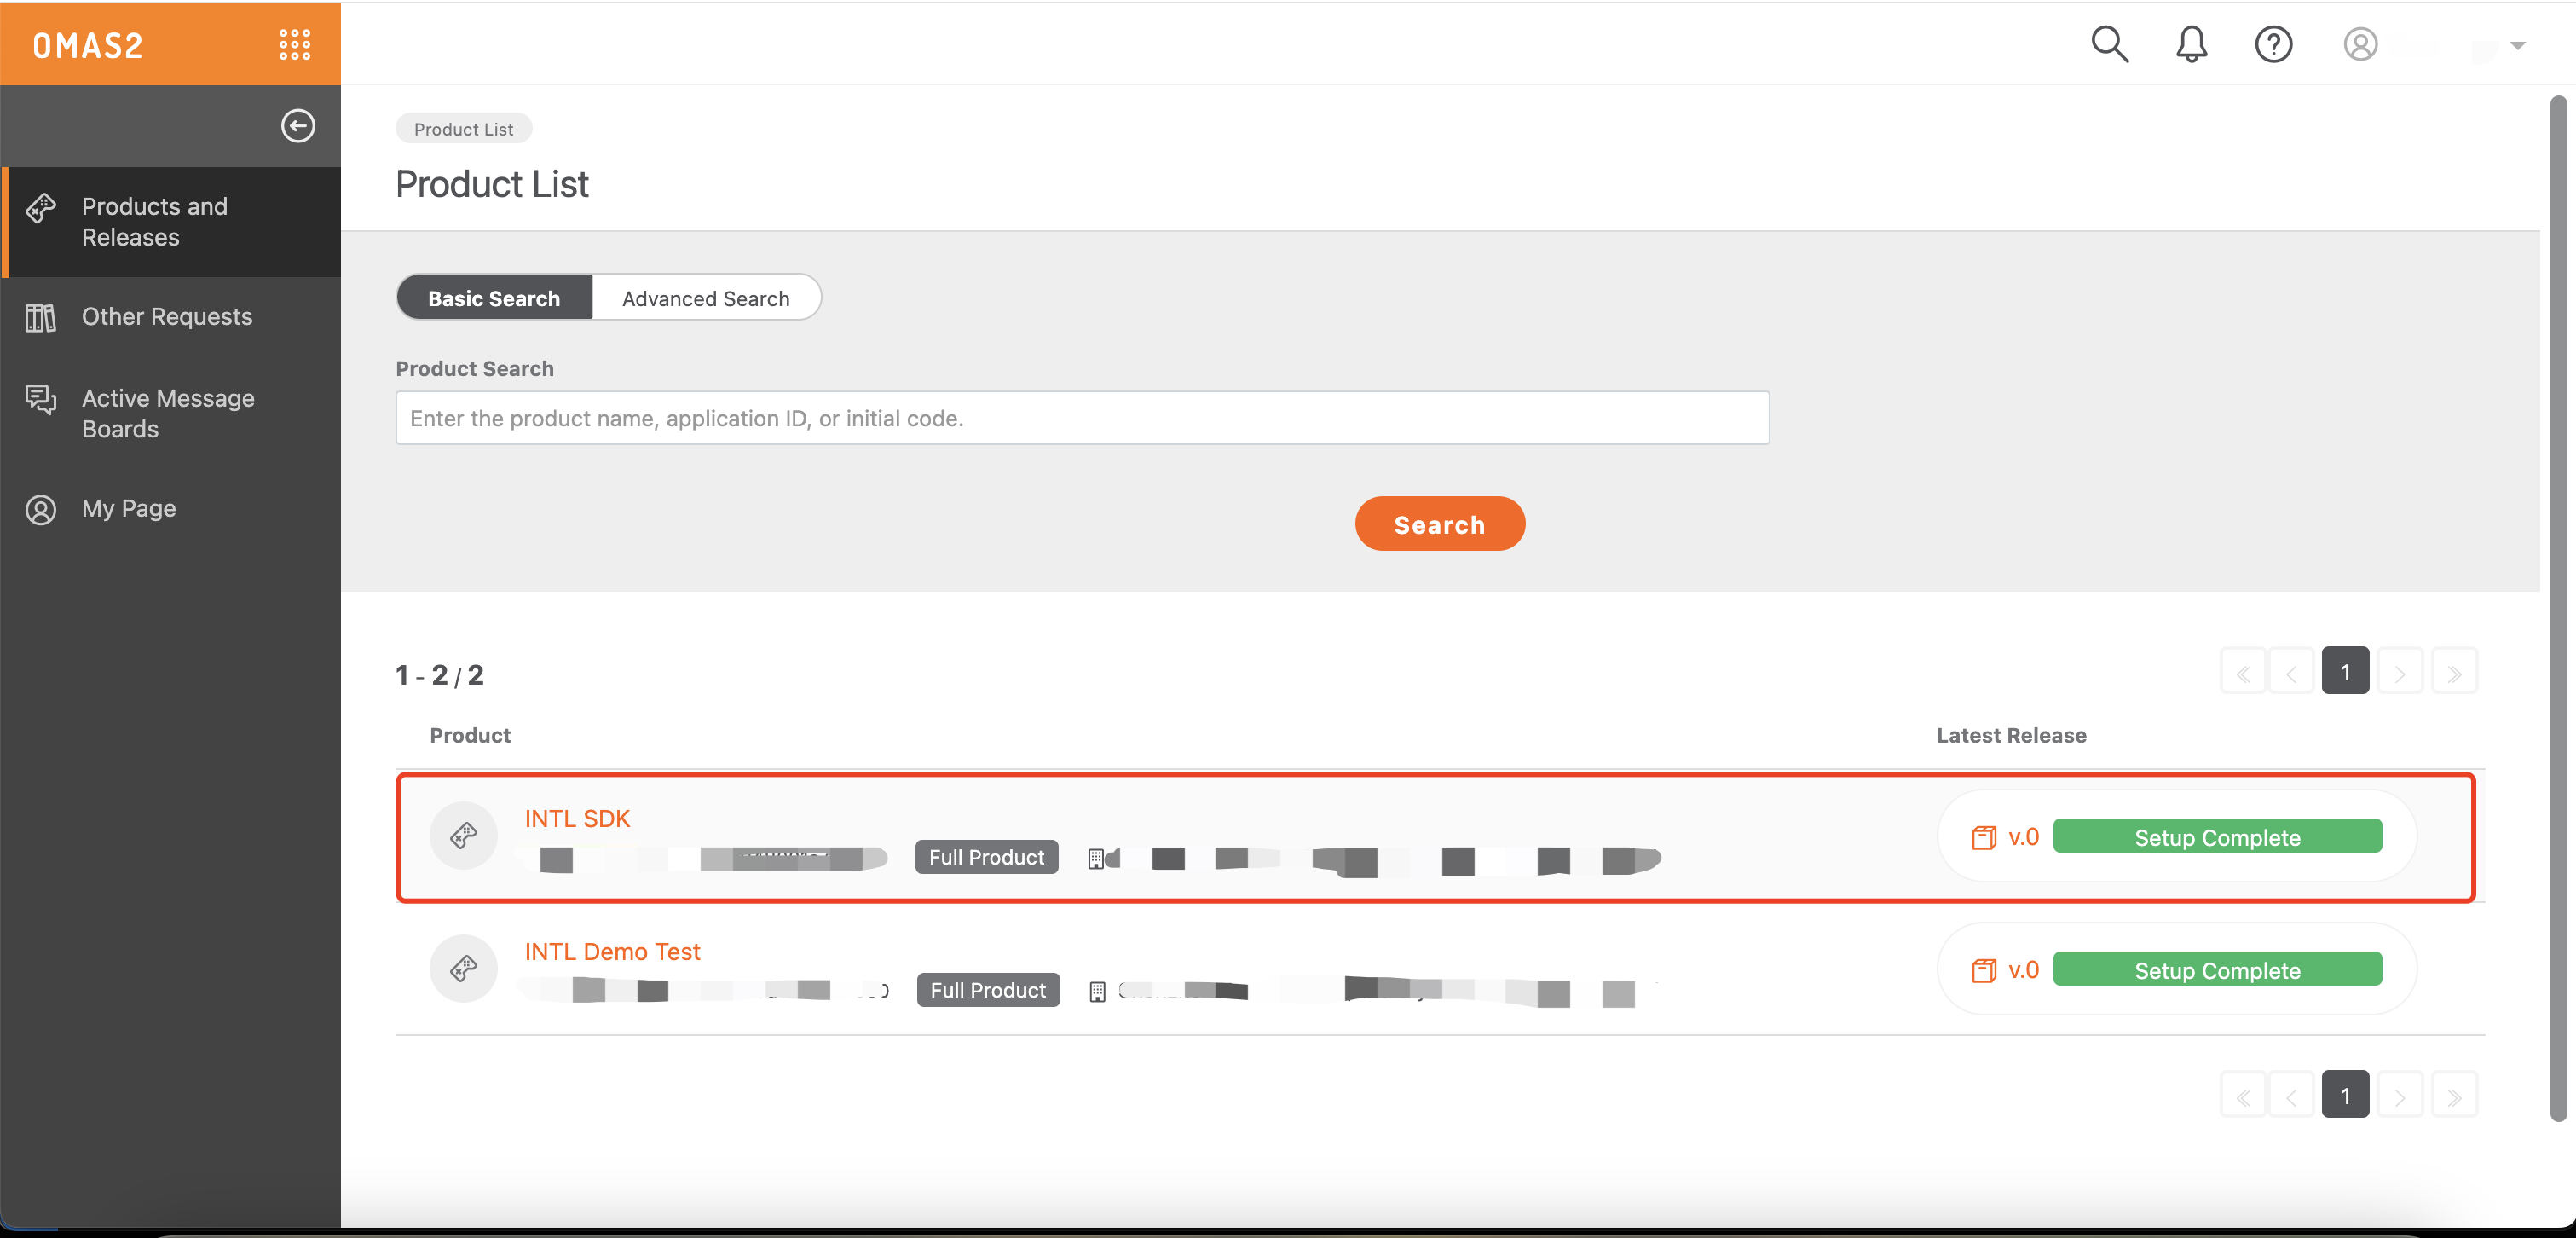
Select your product from the Product List page.
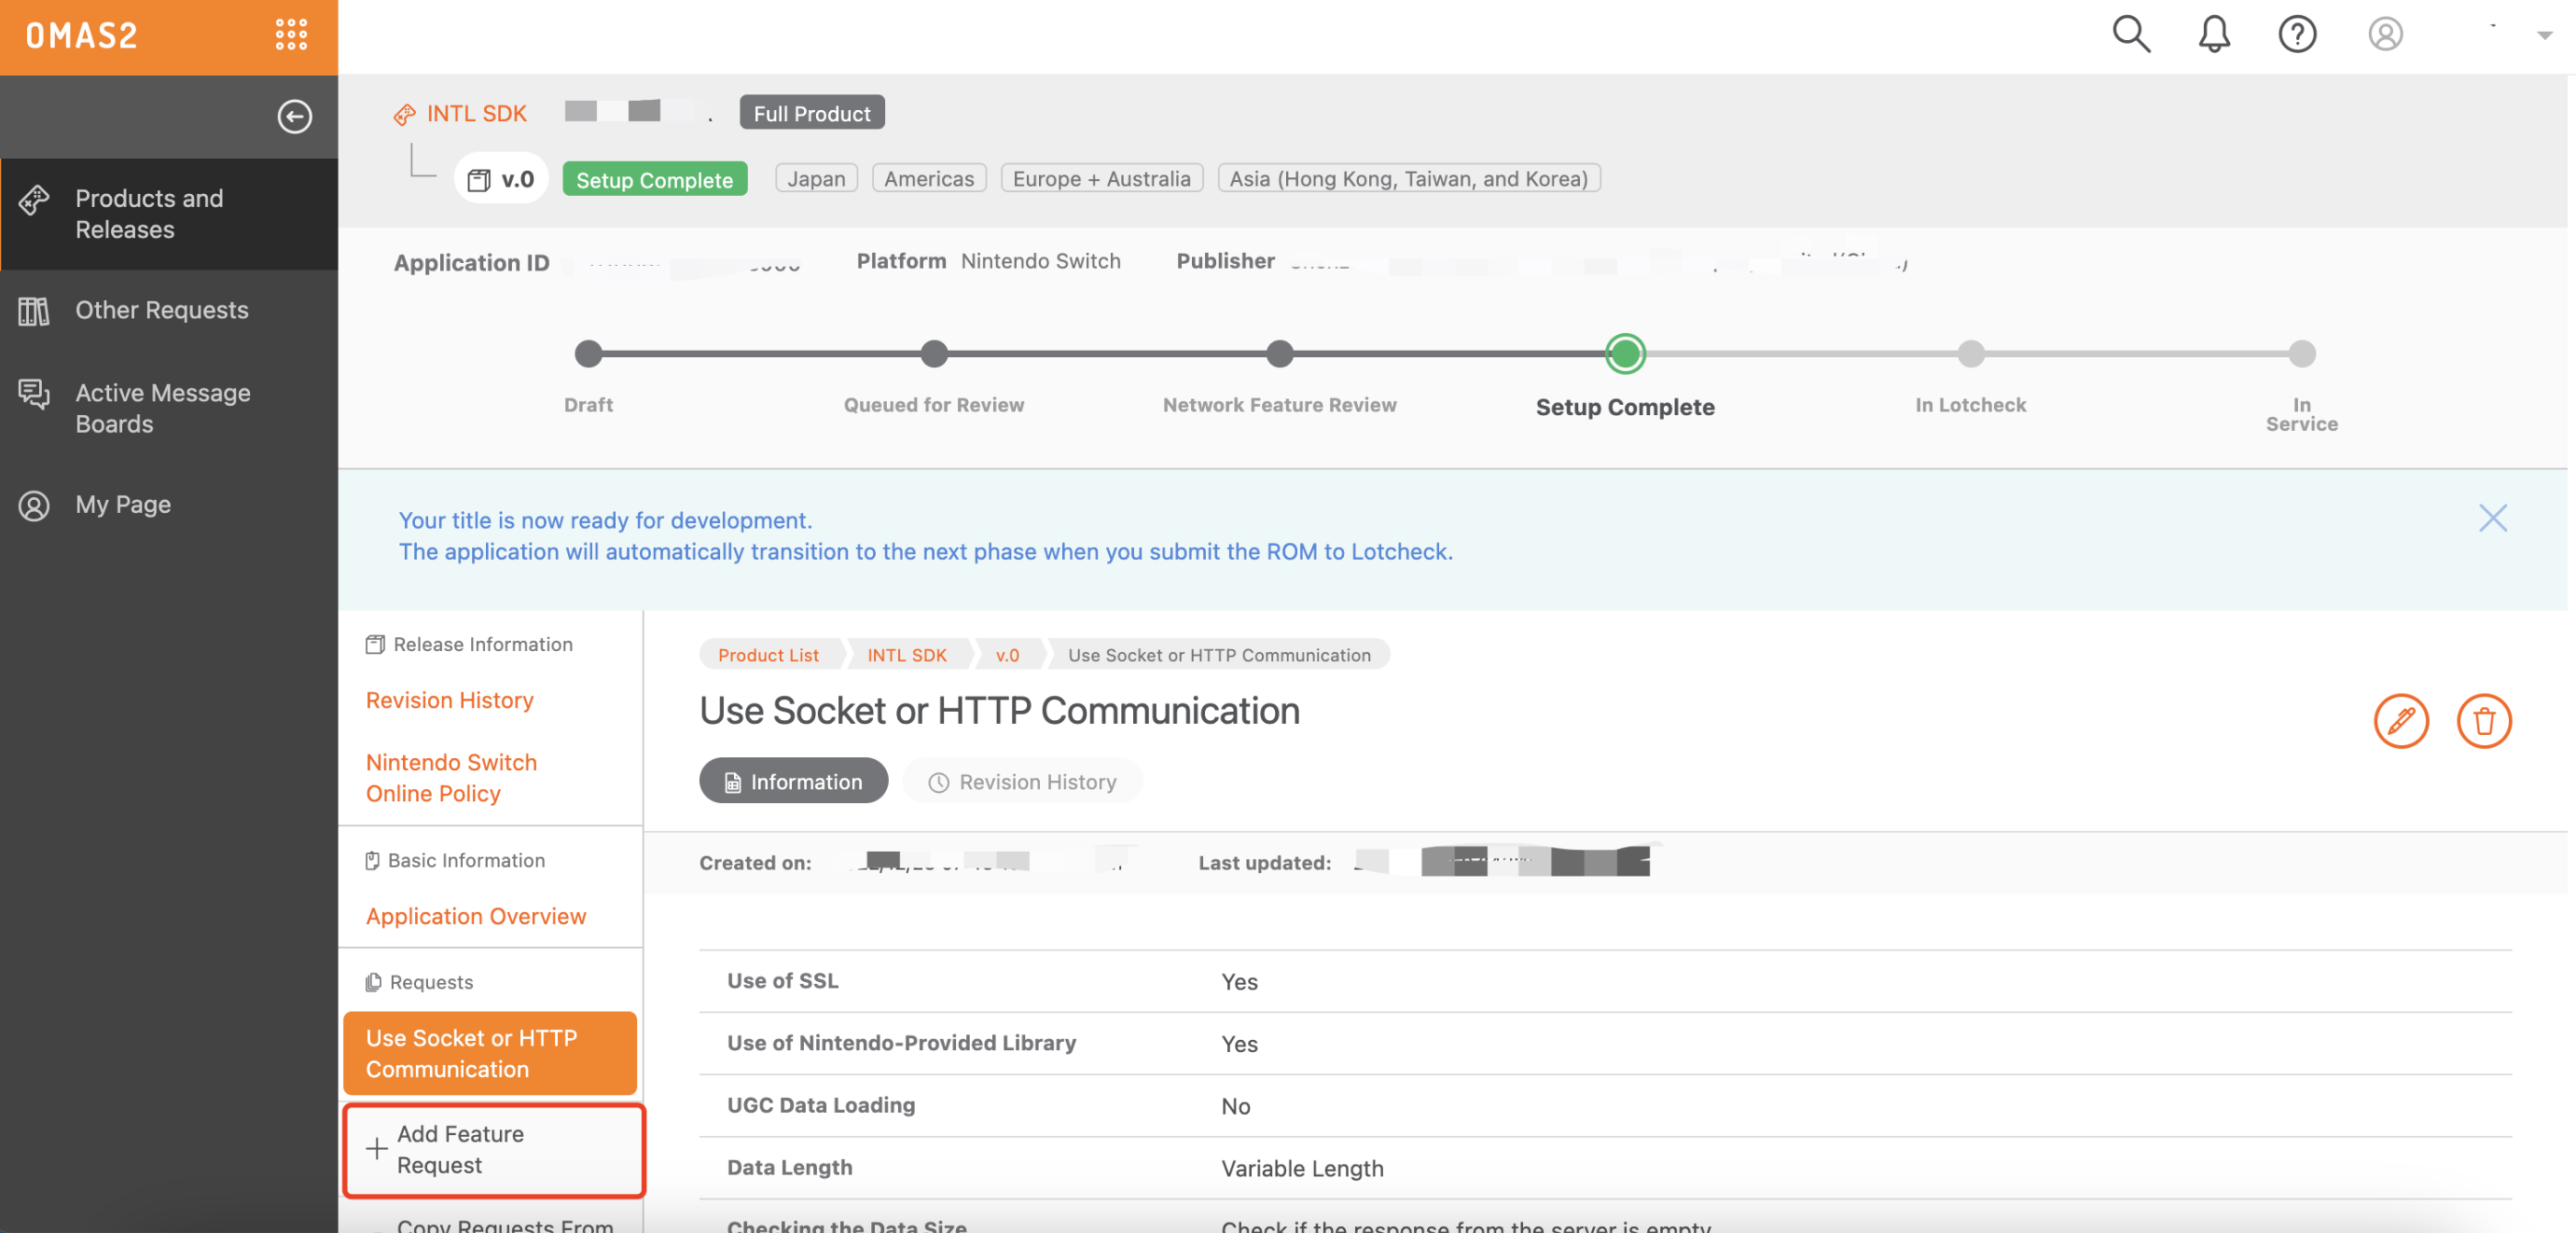
- Click Latest Release.

- Under Add Feature Request, click Use Socket or HTTP Communication.
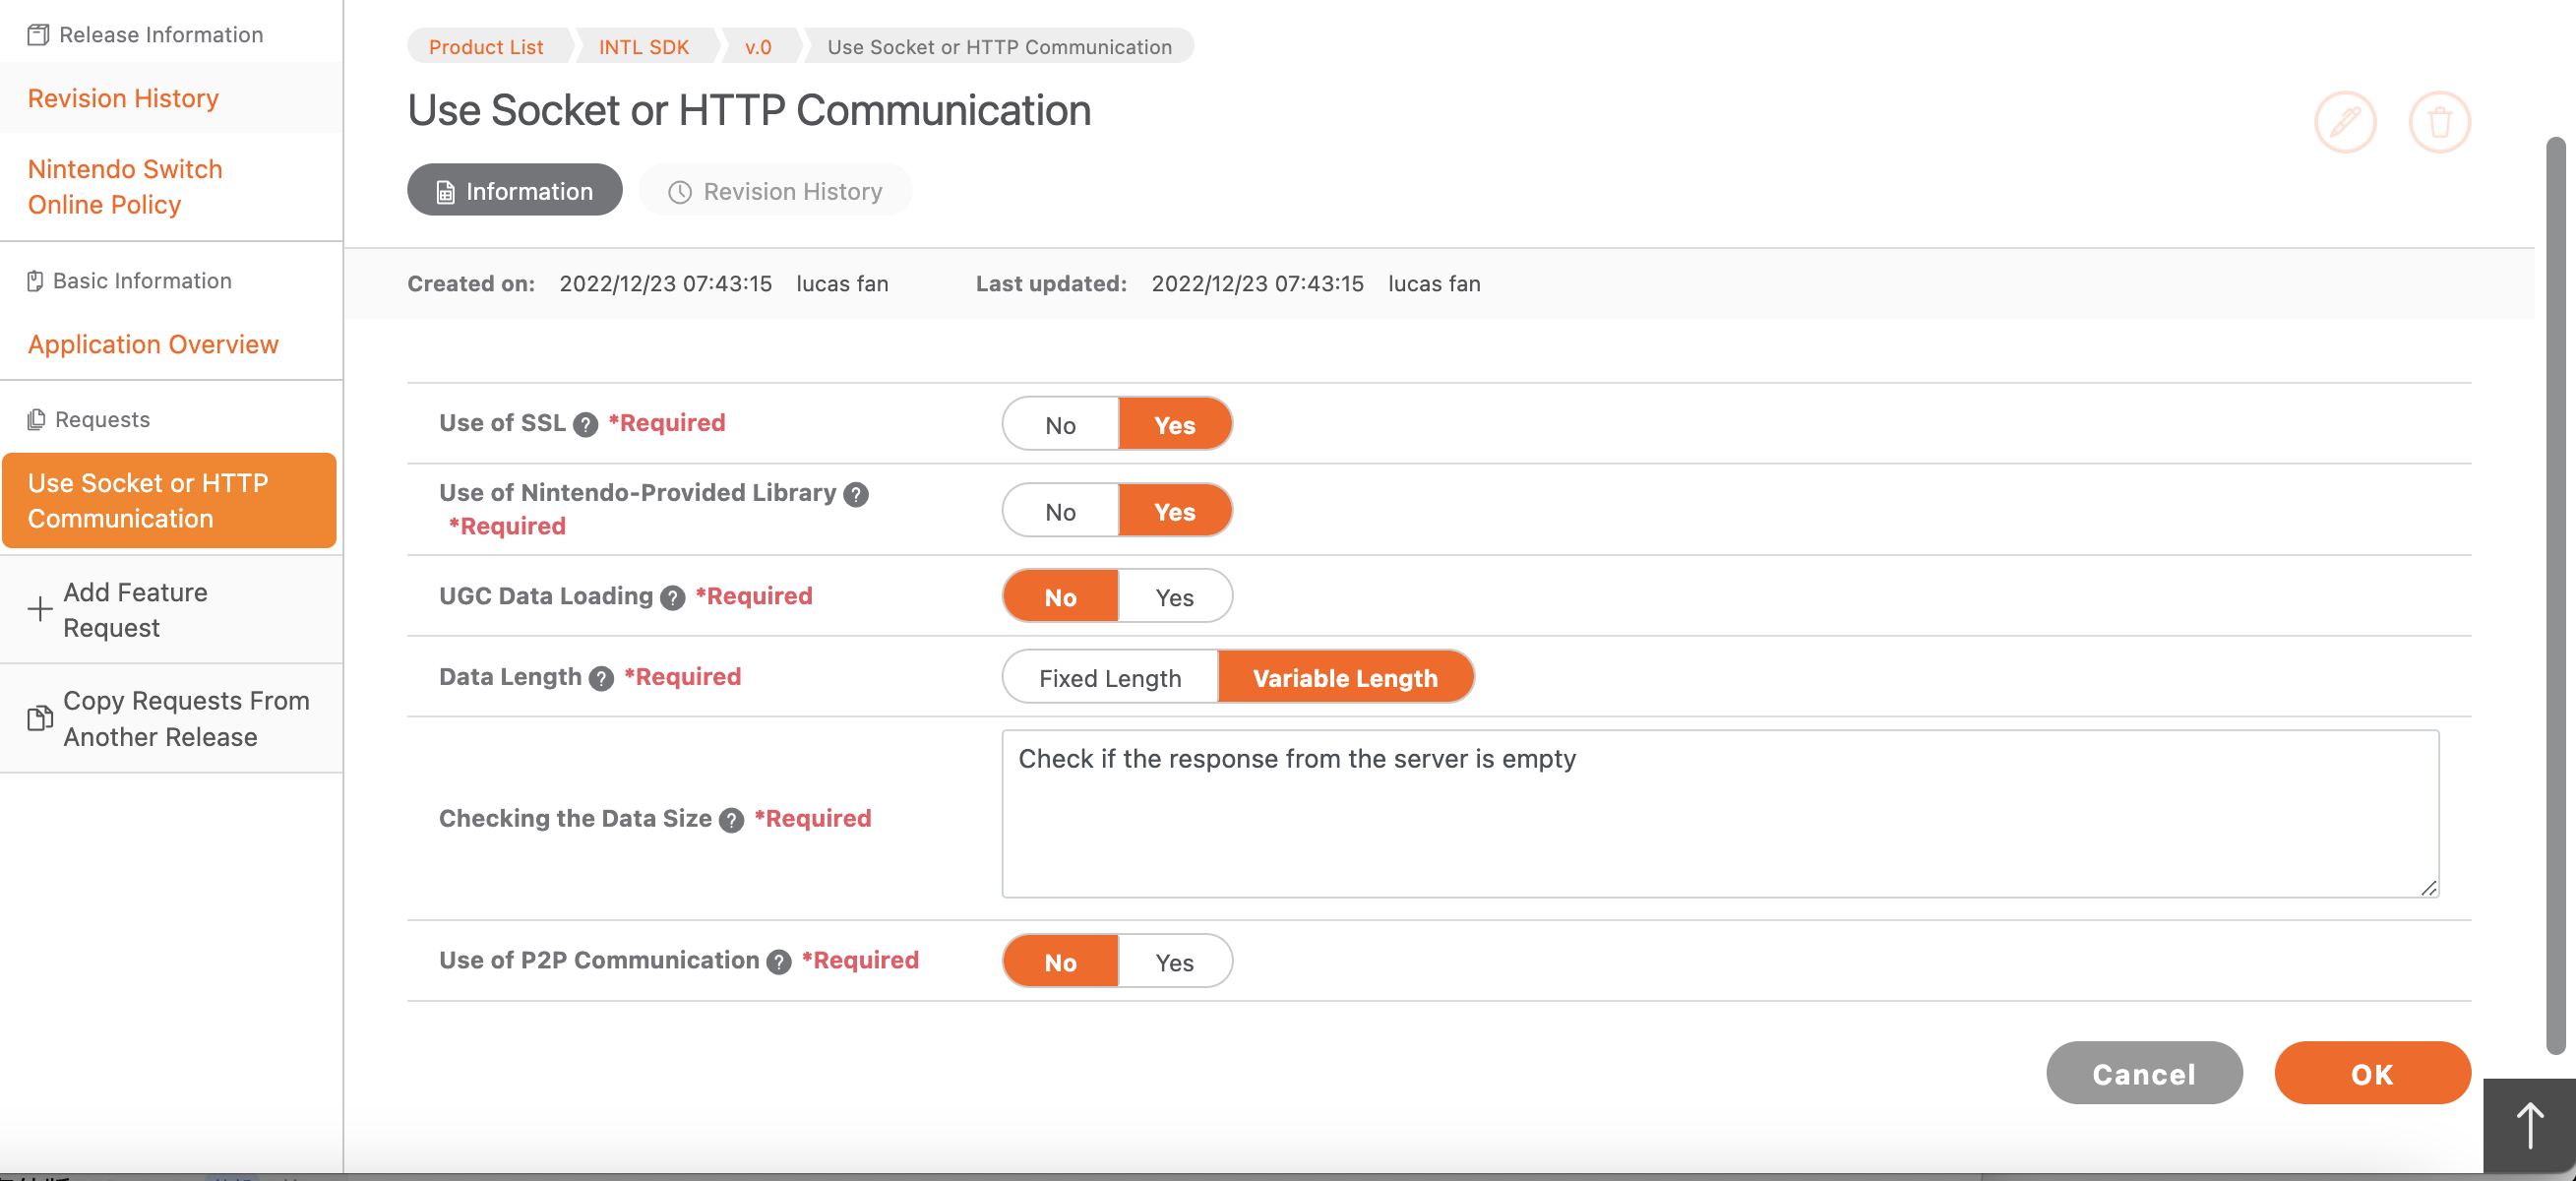
- Enter the network details for the product, then click OK.
4. Apply for a Client ID and Client Secret
A separate set of client_id and client_secret should be applied for the development and release versions, for deployment to different server environments.
-
Log in to OMAS2 Requests with your Nintendo Developer account.
-
Enter the required information.
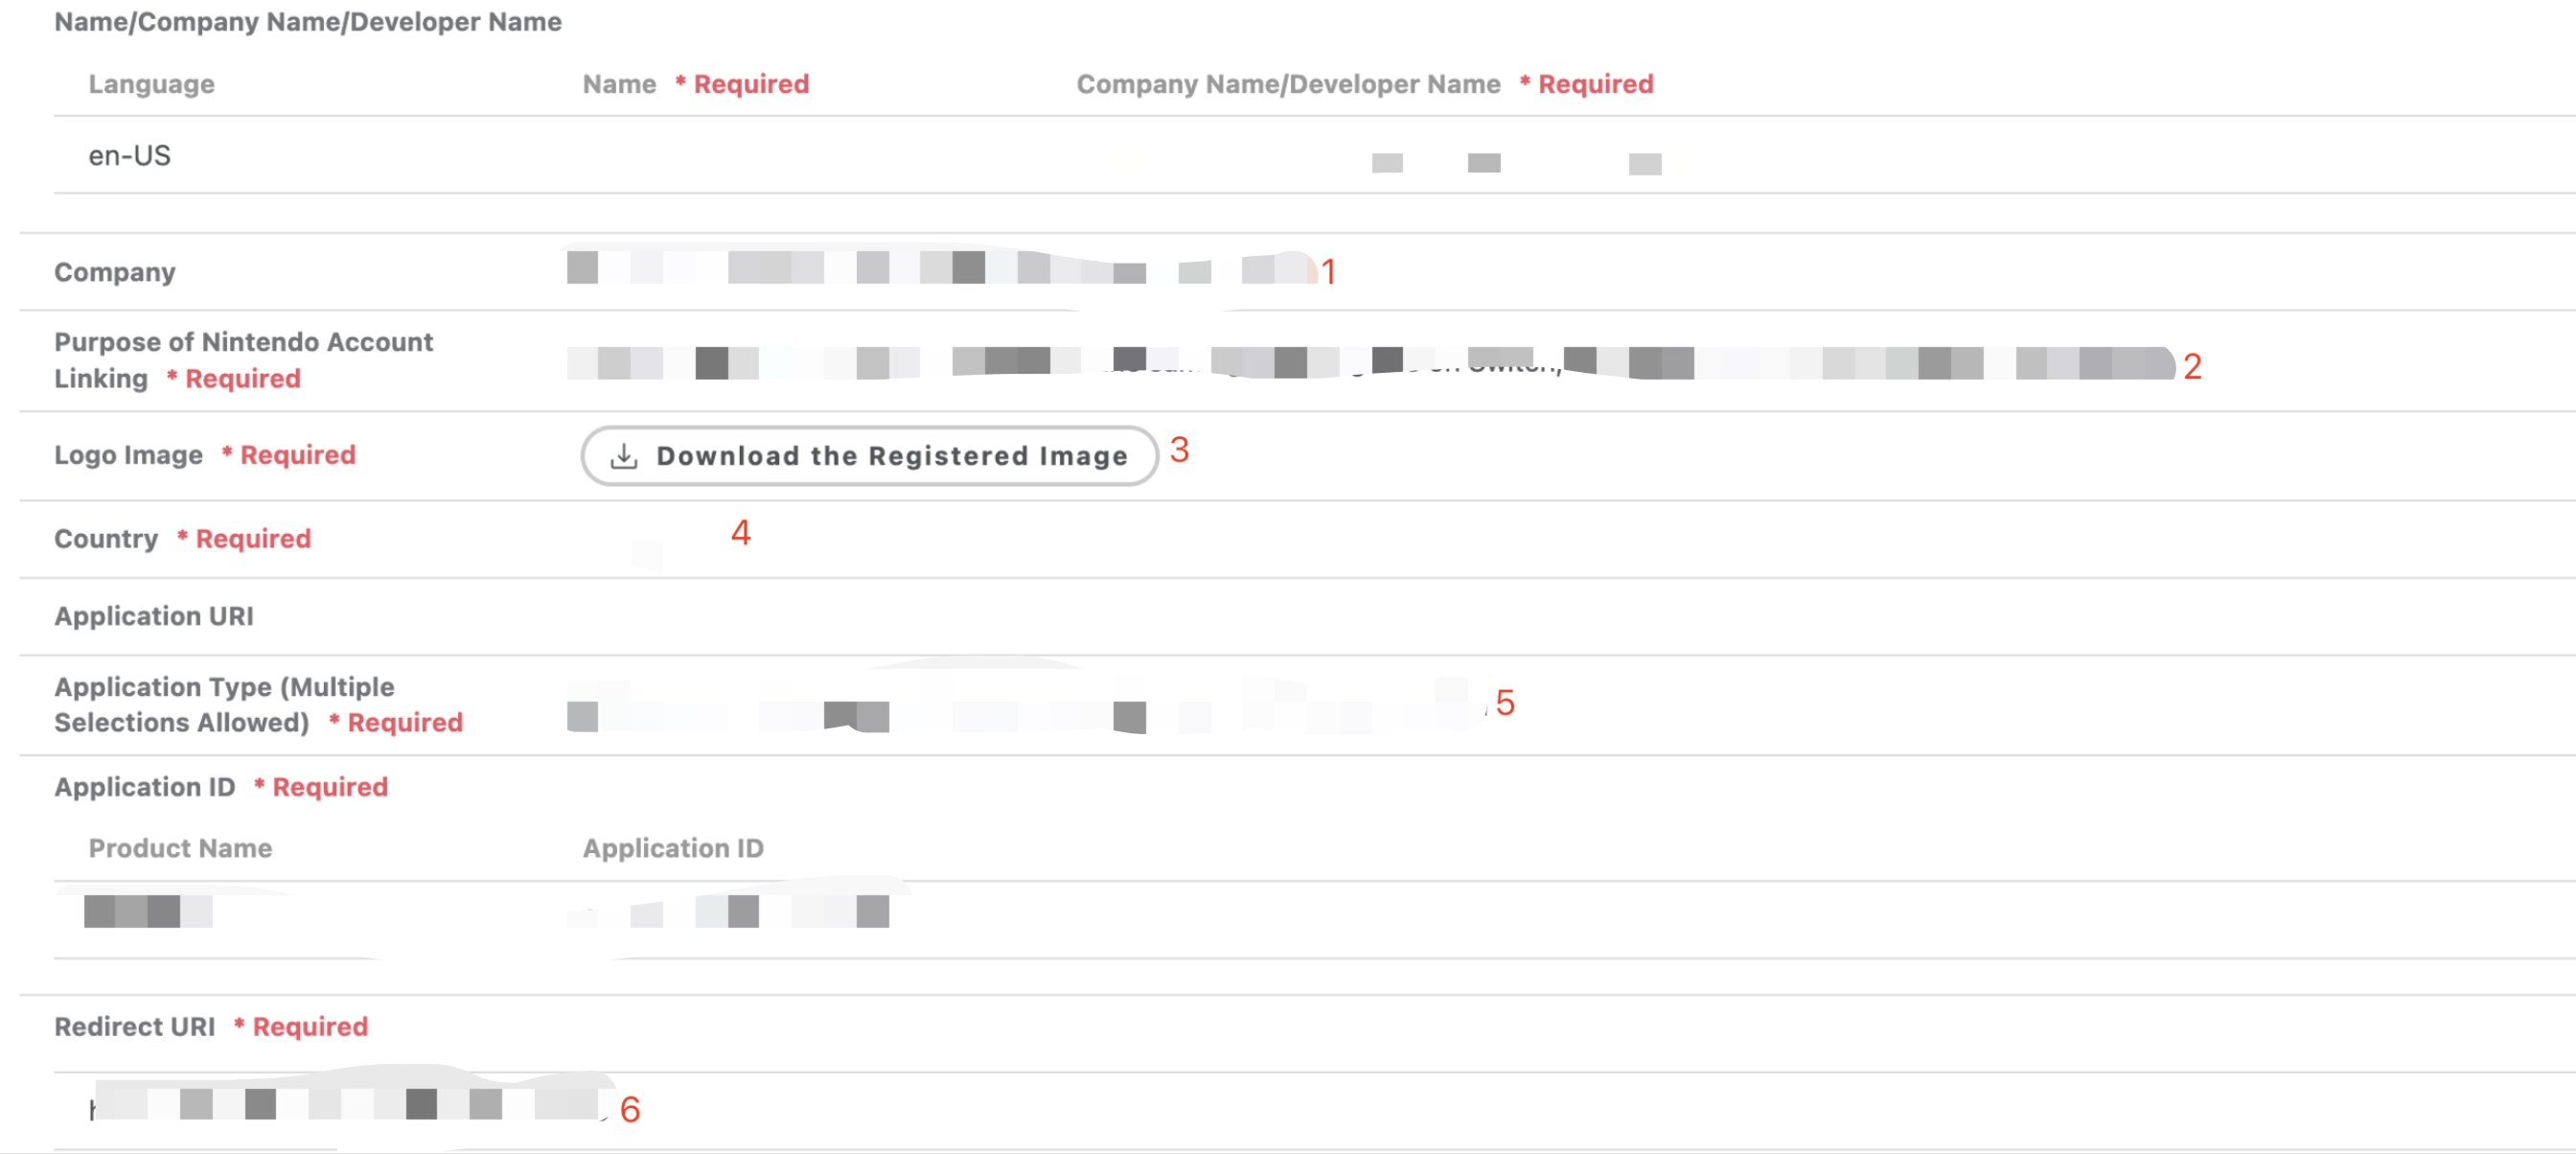 note
noteDo not enter China in the Country field.
During the testing phase, you may enter any redirect URI in the Redirect URI field. However, games should update this field to the actual redirect URI before publishing the game. This field can be modified even after the application is complete.
-
The
client_idandclient_secretfor this product version will be provided once the application is approved.
- Create an account for Player Network Console.
- Create a project for your game, or join an existing project.
- Download the SDK.
- Integrate the SDK.
- Add Nintendo as an authentication method for your project on Player Network Console.
Step 1: Add Nintendo Login
There is no need to configure Nintendo account information in INTLConfig.ini.
- Add an observer to handle authentication callbacks.
//configure callback
FINTLAuthEvent authEvent;
authEvent.AddUObject(this, &OnAuthResult_Implementation);
UINTLSDKAPI::SetAuthResultObserver(authEvent);
// Remove callbacks
UINTLSDKAPI::GetAuthResultObserver().Clear();

void OnAuthResult_Implementation(FINTLAuthResult ret)
{
    UE_LOG(LogTemp, Warning, TEXT("MethodID: %d"), ret.MethodId);
}

void OnAuthResult_Implementation(FINTLAuthResult ret)
{
    UE_LOG(LogTemp, Warning, TEXT("MethodID: %d"), ret.MethodId);
} - Call the
AutoLoginmethod.UINTLSDKAPI::AutoLogin(); - Call the
Loginmethod to ask for user input if auto-login fails.UINTLSDKAPI::Login(EINTLLoginChannel::kChannelNintendo); - Sync client authentication state with the game's backend and wait for the final authentication result.
Step 2: Package and configure URL allowlist
For Nintendo, an allowlist has to be configured to load URLs with the system browser. Player Network SDK has provided a list of URLs that are required in the LI PASS compliance process, the URLs should be added to the URL allowlist in the game project.
The AccessibleUrls.txt file can be found within the Switch folder under the INTLCore plugin:
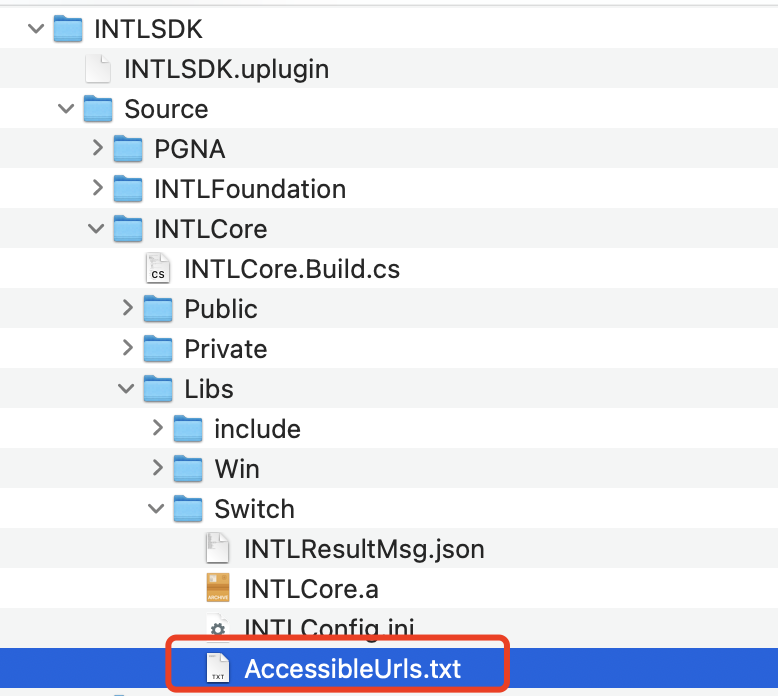
The corresponding allowlist URLs in AccessibleUrls.txt are:
^https://test\.account\.levelinfinite\.com/(.*)
^https://account\.levelinfinite\.com/(.*)
^https://www\.levelinfinite\.com/(.*)
^https://test\.account\.levelinfinite\.com/(.*)
^https://test-common-web\.intlgame\.com/(.*)
^https://common-web\.intlgame\.com/(.*)
^https://test\.intlgame\.com/(.*)
When building the package for Nintendo, the Application Id has to be configured in the project settings by entering the Application ID provided by Nintendo.
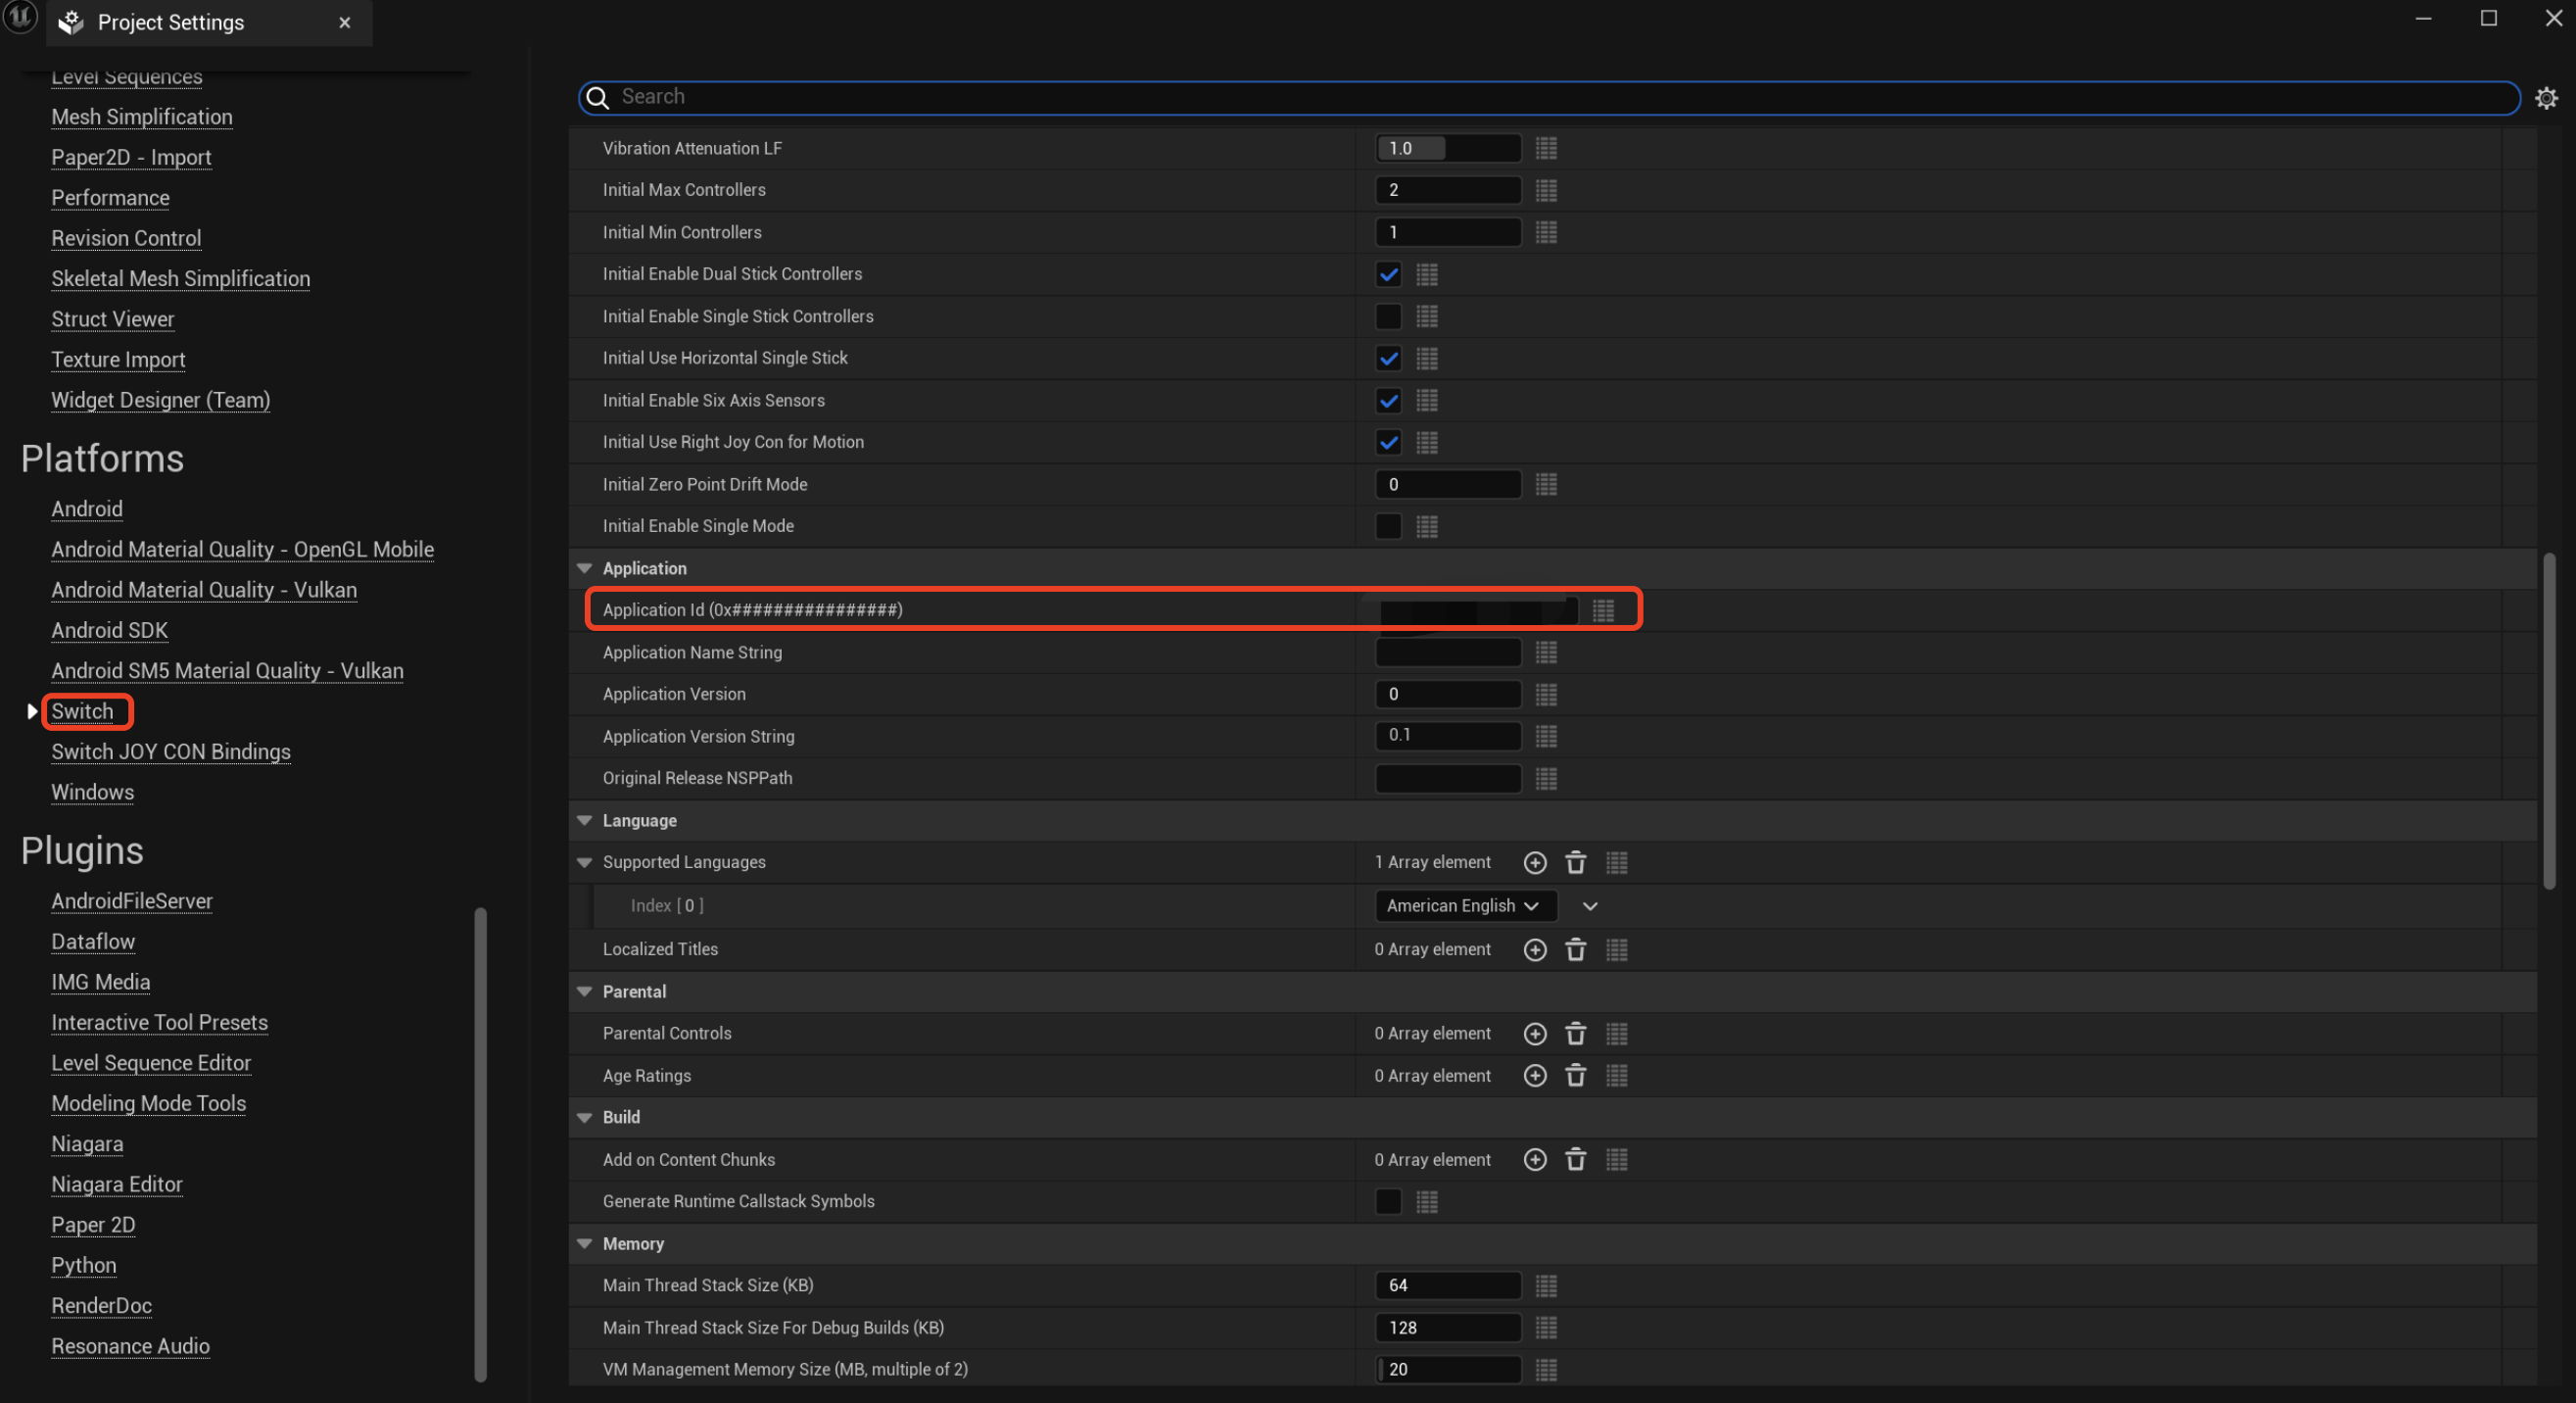
Step 3: Test the login function
Search for the keyword "AuthResult" in the Player Network SDK logs to verify if the correct channel name and OpenID are returned. If they are, it indicates a successful configuration and the login function has been added successfully.