Windows
This article guides you through setting up Epic as an identity provider, enabling your Windows game to access Player Network authentication services.
Prerequisites
- Set up your app in Epic Developer Portal.
- Add developers to your organization as members with the appropriate role permissions.
- Create an account for Player Network Console.
- Create a new project for your game, or join an existing one.
- Download the SDK.
- Integrate the SDK.
- Add Epic as an authentication method for your project on Player Network Console.
Step 1: Configure the SDK for Epic login
-
Select your product in Epic Developer Portal.
-
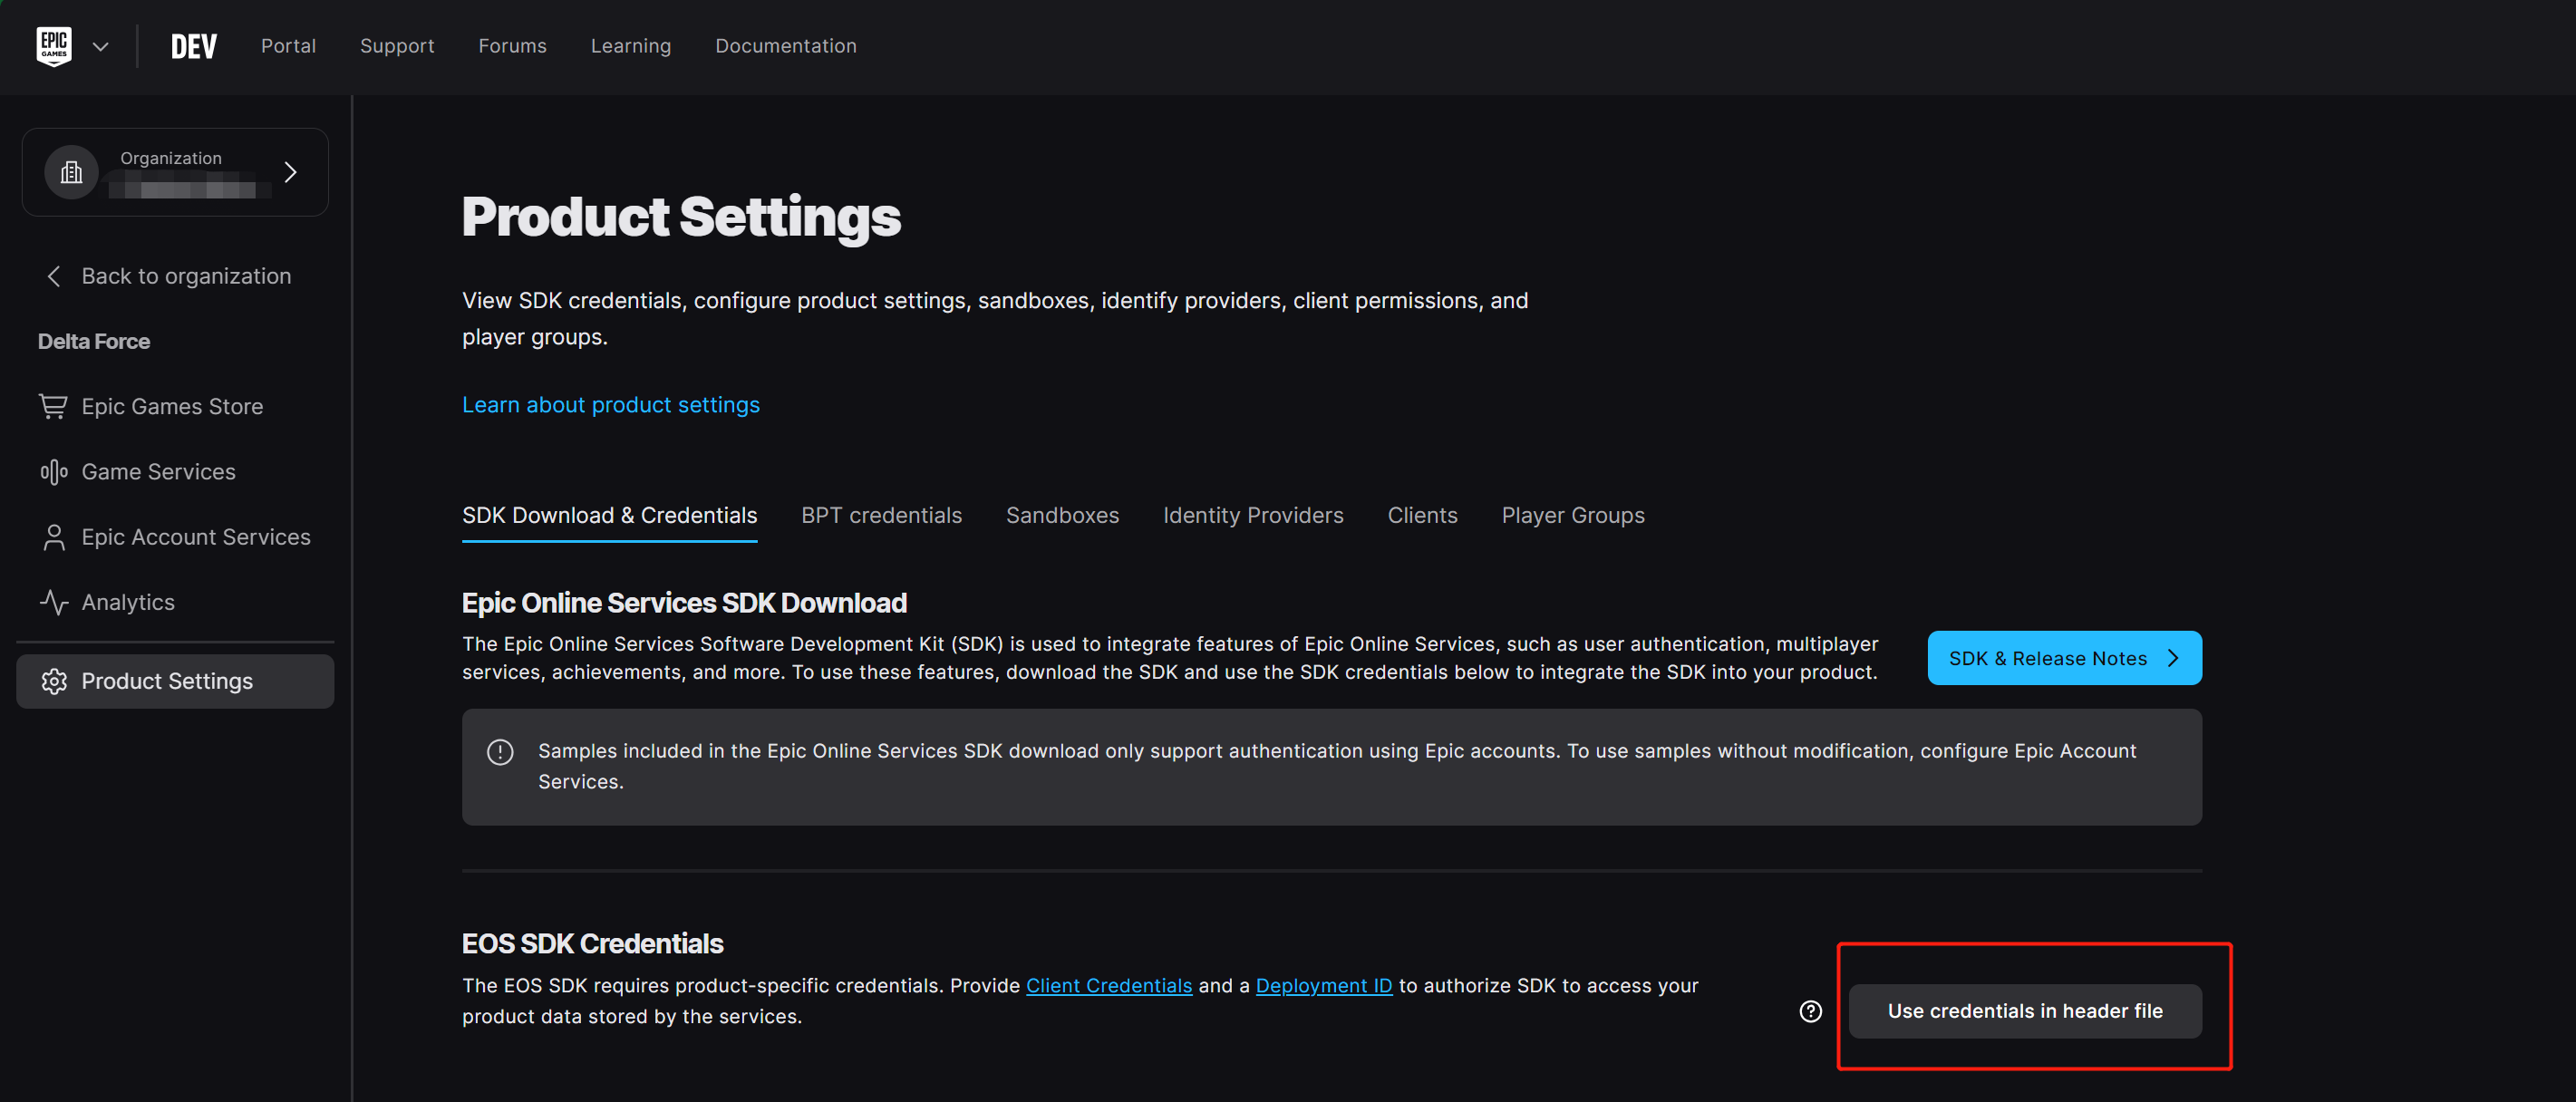
Click Product Settings, then select SDK Download & Credentials.
-
Click Use credentials in header file under EOS SDK Credentials, to use the header file generation function.
-
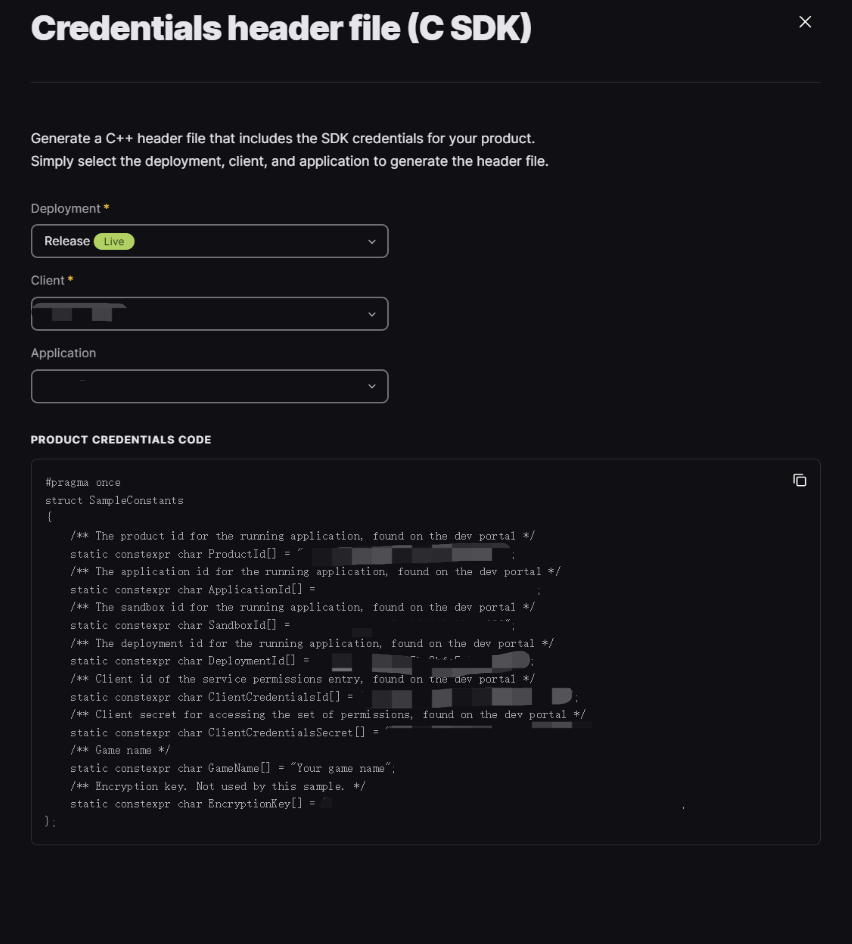
Complete the required fields, then click I understand after confirming the displayed information. The generated information can be copied from the bottom by clicking the copy icon at the top right.
- Deployment: Deployment environment, recommended to select Live to skip having to configure again when the product is released.
- Client: Client name.
- Application: Product name.
-
Configure INTLConfig.ini with the generated information.
[Epic]
EPIC_PRODUCT_NAME = {INTL_EPIC_PRODUCT_NAME}
EPIC_PRODUCT_VERSION = {INTL_EPIC_PRODUCT_VERSION}
EPIC_PRODUCT_ID = {INTL_EPIC_PRODUCT_ID}
EPIC_SANDBOX_ID = {INTL_EPIC_SANDBOX_ID}
EPIC_DEPLOYMENT_ID = {INTL_EPIC_DEPLOYMENT_ID}
EPIC_CLIENT_ID = {INTL_EPIC_CLIENT_ID}
EPIC_CLIENT_SECRET = {INTL_EPIC_CLIENT_SECRET}- Replace
{INTL_EPIC_PRODUCT_NAME}with your product name. - Replace
{INTL_EPIC_PRODUCT_VERSION}with a custom string that represents your product version number, such as "1.0". - Replace
{INTL_EPIC_PRODUCT_ID}with theProductId[]. - Replace
{INTL_EPIC_SANDBOX_ID}with theSandBoxId[]. - Replace
{INTL_EPIC_DEPLOYMENT_ID}with theDeploymentId[]. - Replace
{INTL_EPIC_CLIENT_ID}with theClientCredentialsId[]. - Replace
{INTL_EPIC_CLIENT_SECRET}with theClientCredentialsSecret[].
- Replace
Step 2: Add Epic login
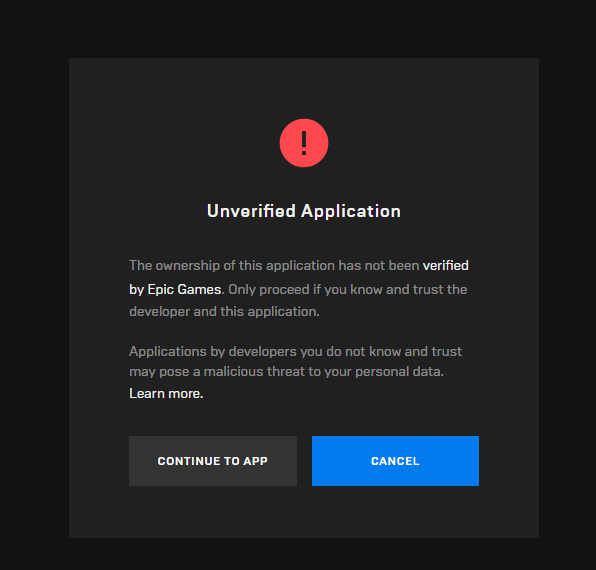
If your game has not been launched on Epic Games yet, the following warning will appear when attempting to log in. Only project team members will be able to log in normally.
-
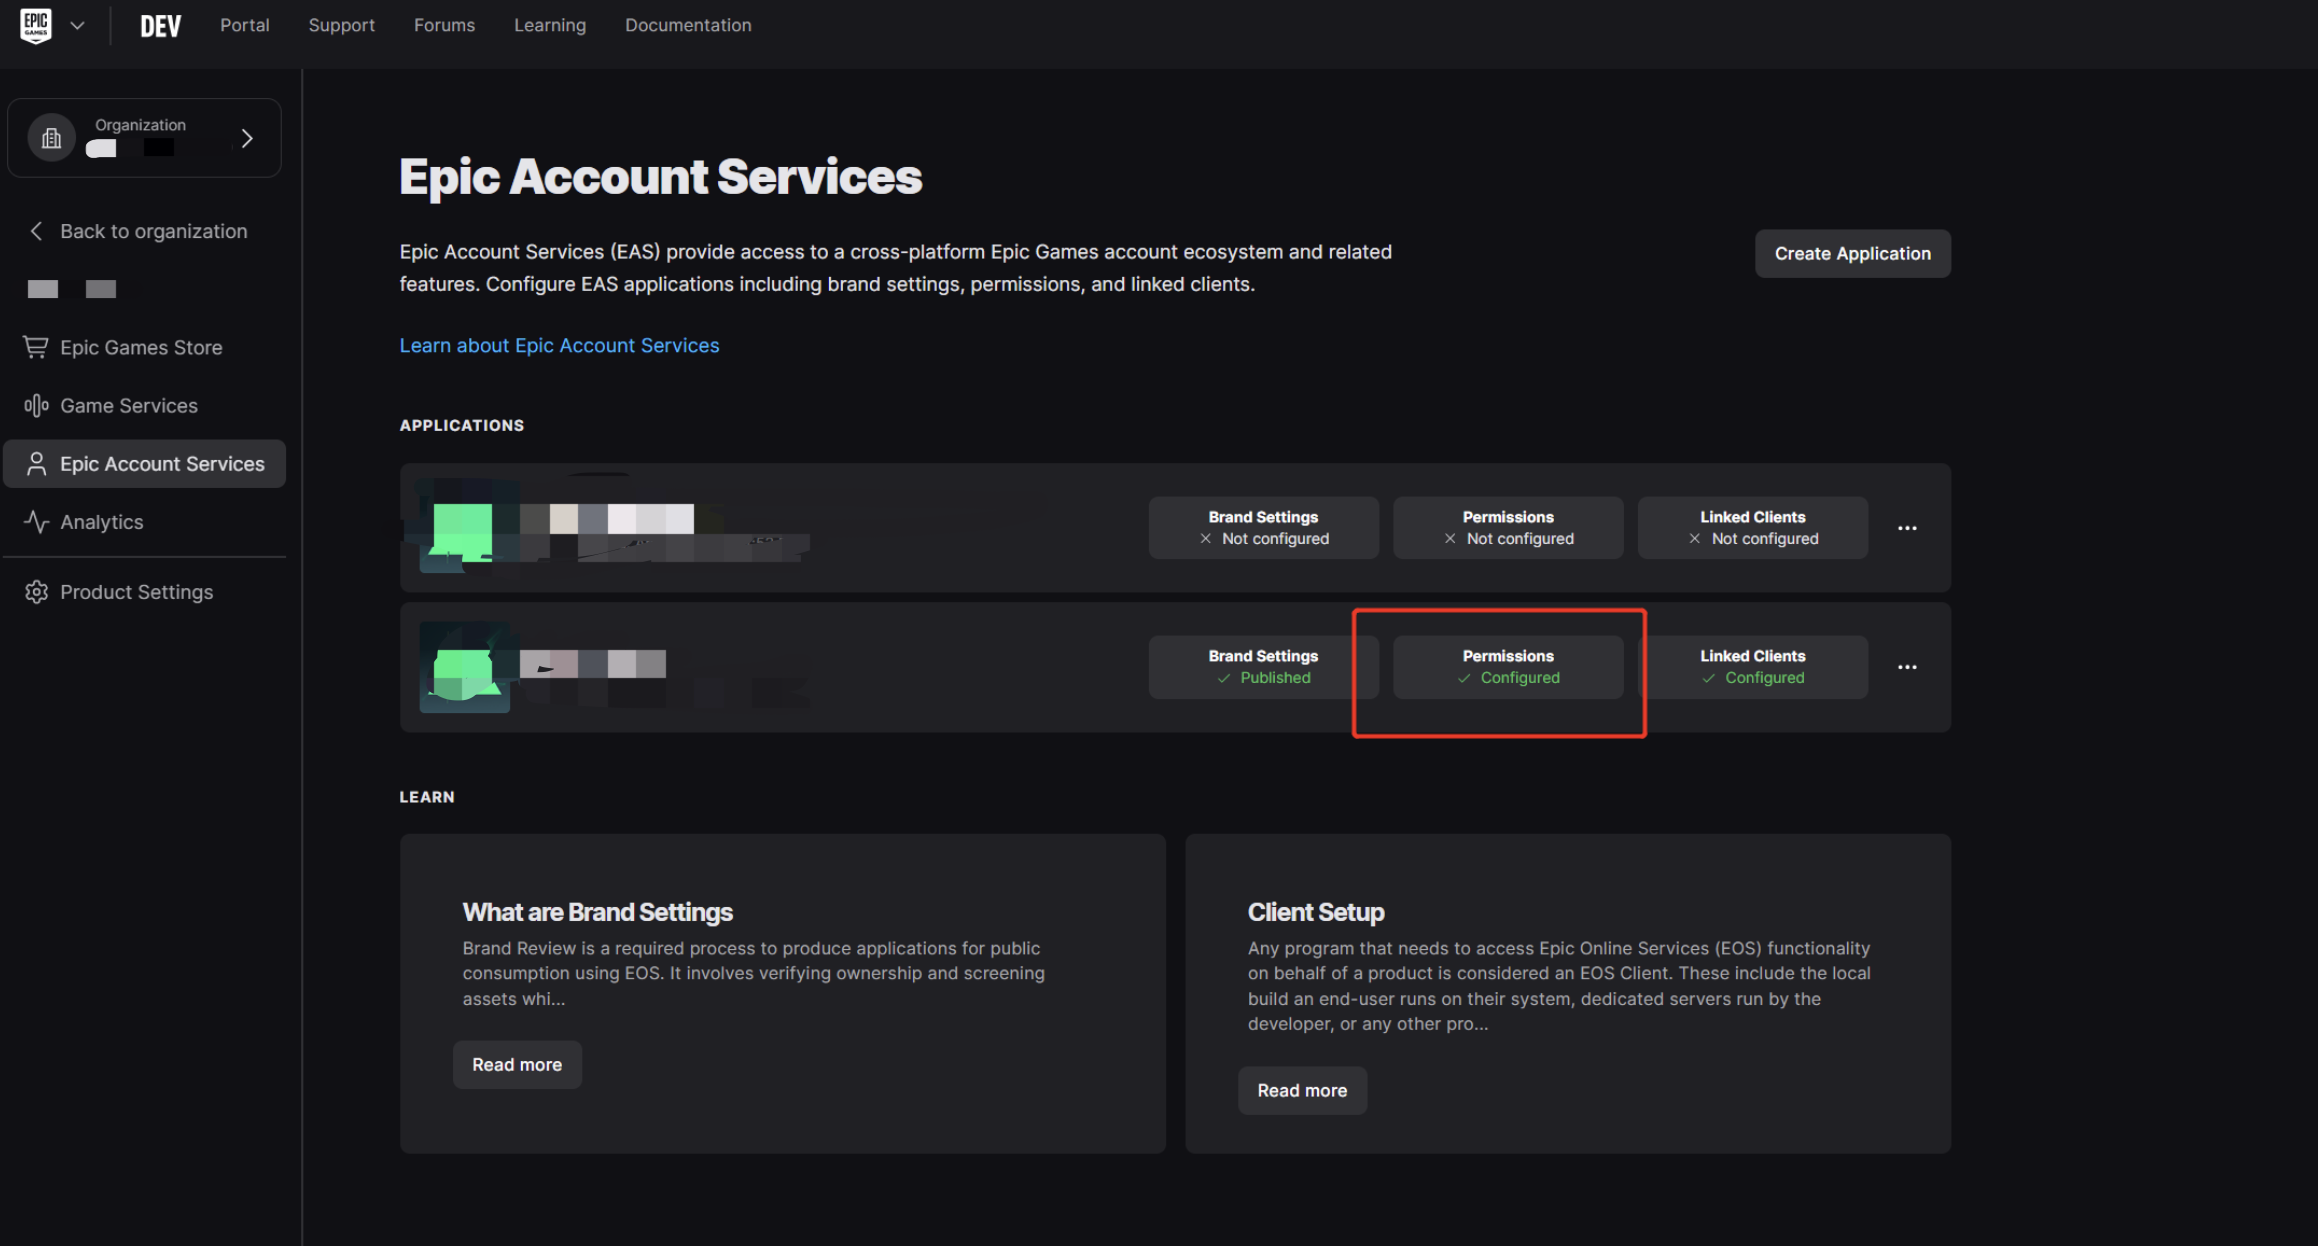
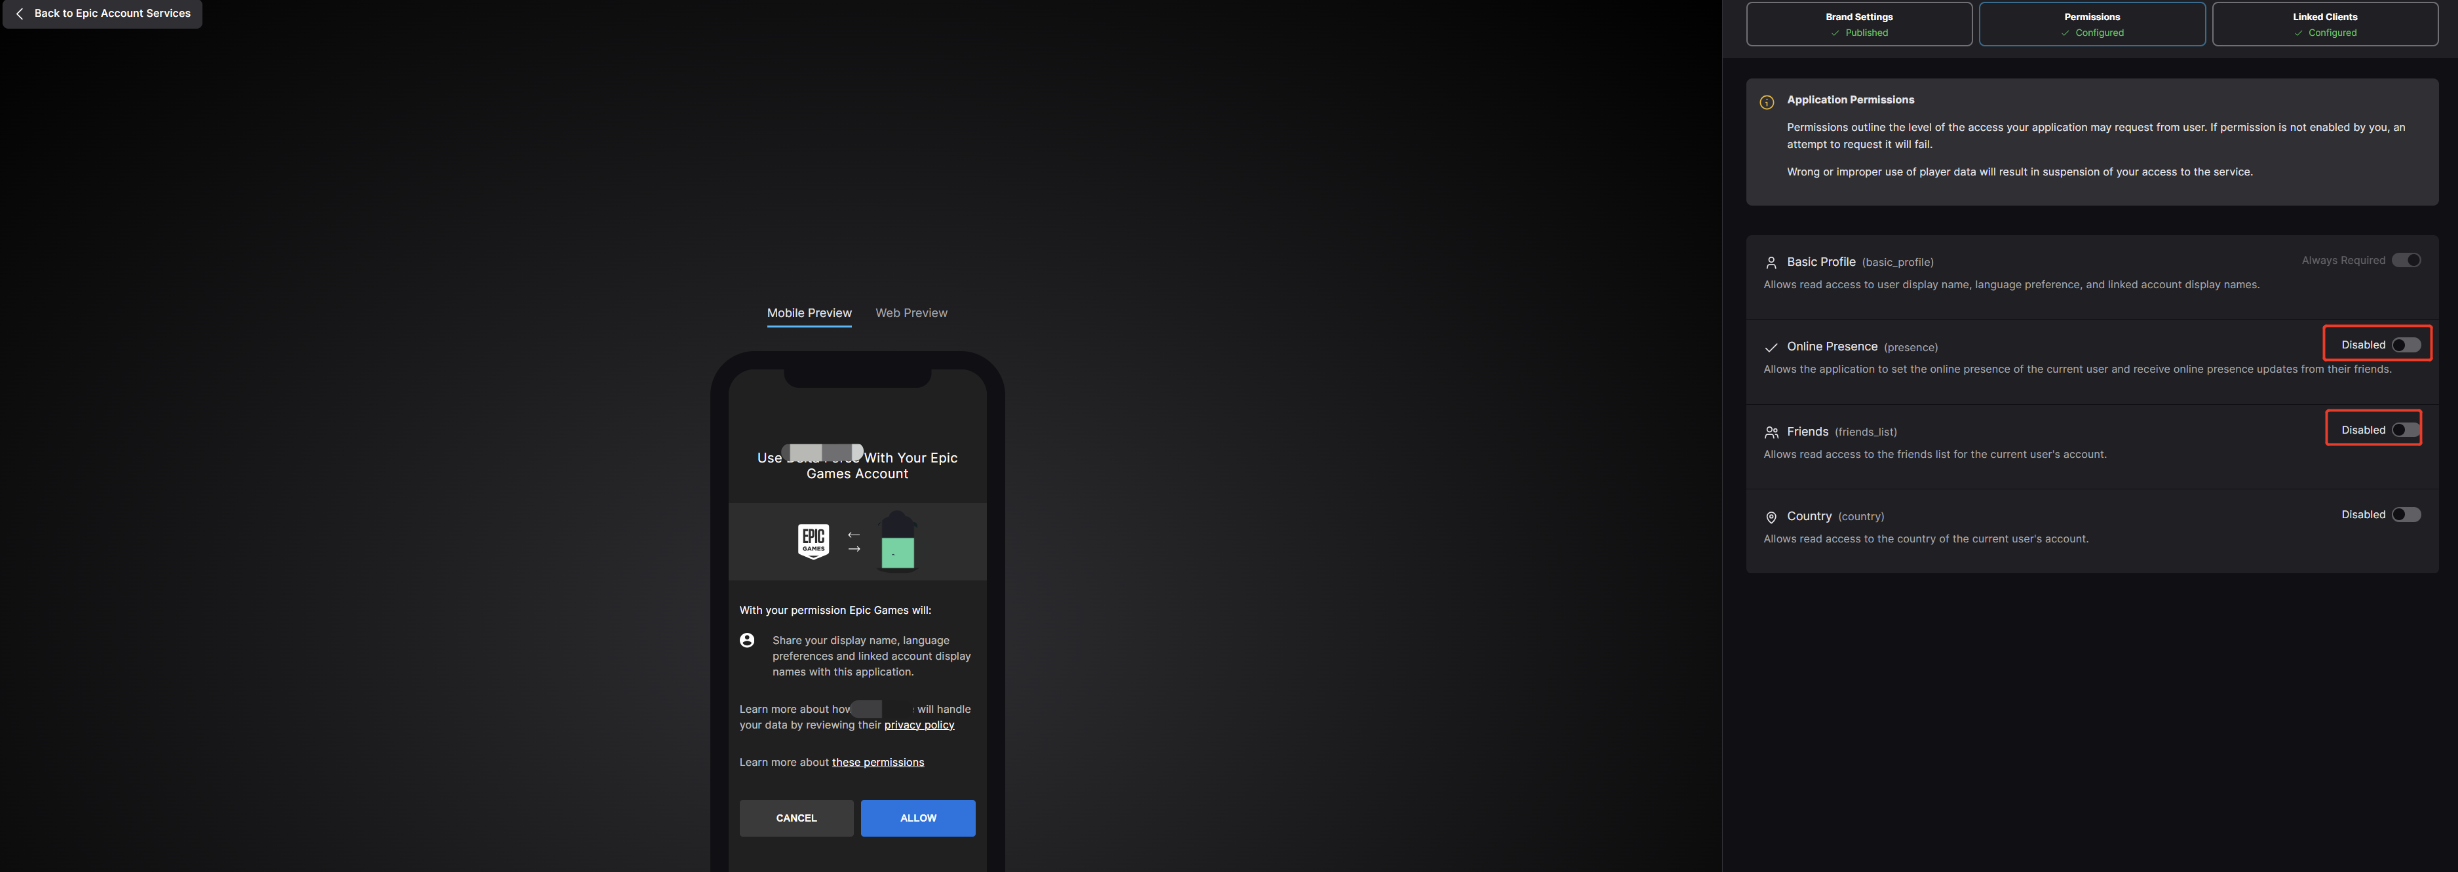
Configure the required permissions for login from the Epic Account Services page. For more information, see Epic Account Services Data Privacy and Visibility.
- basic_profile: Basic profile is the minimum level of access required to retrieve any information about the Epic account.
- friends_list: Apps can access Epic account's friends list through Friends List Access.
- presence: Presence access level enables applications to access the account's presence information.
-
Call the
UpdateSDKmethod to ensure that the asynchronous callback feature of Epic functions properly.
The login method supported for Windows games is the AccountPortal login type. For this type, Epic EOS SDK will open the login page in the system browser to log in. For more information, see Persistent Login for Epic Account Users Outside of the Epic Games Launcher.
Epic supports transferring the login state from a parent process to a child process. Consequently, the child process can access the login state information of the Epic account that is logged into the parent process, without requiring additional user input. This process is made possible by the use of a refresh token. For more information, see the EOS API reference page for EOS_ELoginCredentialType.
Usage scenario: If a game requires launching via a launcher, the game will open following the user's login to Epic in the launcher. Given that the launcher and the game operate in different processes, the game process cannot directly access the Epic login state from the launcher. However, if the game requires the Epic login state (such as for payment), it can log in to Epic using the refresh token, eliminating the need for player input.
Player Network SDK facilitates obtaining the refresh token for the Epic channel. Upon successful login to Epic via the SDK, it will return the Epic refresh token in the ChannelInfo field of the login result. Once the game process receives the refresh token from the parent process, it can use this token to log in to Epic.
-
Add an observer to handle authentication callbacks.
- Unity
- Unreal Engine
// Add callbacks
public void AddAuthObserver()
{
    INTLAPI.AddAuthResultObserver(OnAuthResultEvent);
}

// Remove callbacks
public void RemoveAuthObserver()
{
    INTLAPI.RemoveAuthResultObserver(OnAuthResultEvent);
}

// Process the INTLAuthResult callback
public void OnAuthResultEvent(INTLAuthResult ret)
{
    Debug.Log($"MethodID: {ret.MethodId}");

    string methodTag = "";
    if (authRet.MethodId == (int)INTLMethodID.INTL_AUTH_LOGIN)
    {
        methodTag = "Login";
    }
    else if (authRet.MethodId == (int)INTLMethodID.INTL_AUTH_BIND)
    {
        methodTag = "Bind";
    }
    else if (authRet.MethodId == (int)INTLMethodID.INTL_AUTH_AUTOLOGIN)
    {
        methodTag = "AutoLogin";
    }
    else if (authRet.MethodId == (int)INTLMethodID.INTL_AUTH_QUERY_USER_INFO)
    {
        methodTag = "QueryUserInfo";
    }
    else if (authRet.MethodId == (int)INTLMethodID.INTL_AUTH_GET_AUTH_RESULT)
    {
        methodTag = "GetAuthResult";
    }
}
C++ Event Handling (above v1.15)
//configure callback
FINTLAuthEvent authEvent;
authEvent.AddUObject(this, &OnAuthResult_Implementation);
UINTLSDKAPI::SetAuthResultObserver(authEvent);
// Remove callbacks
UINTLSDKAPI::GetAuthResultObserver().Clear();
void OnAuthResult_Implementation(FINTLAuthResult ret)
{
UE_LOG(LogTemp, Warning, TEXT("MethodID: %d"), ret.MethodId);
}Unreal Event Handling
void OnAuthResult_Implementation(FINTLAuthResult ret)
{
    UE_LOG(LogTemp, Warning, TEXT("MethodID: %d"), ret.MethodId);
} -
Call the
AutoLoginmethod.- Unity
- Unreal Engine
INTLAPI.AutoLogin();UINTLSDKAPI::AutoLogin(); -
Call the
Loginmethod to ask for user input if auto-login fails.- Unity
- Unreal Engine
string refreshToken; //refresh token from another proccess
StringBuilder Extra_Json = new StringBuilder();
Extra_Json.Append("{");
Extra_Json.Append("\"")
    .Append("LoginMode")
    .Append("\"")
    .Append(":")
    .Append("\"")
    .Append("RefreshToken")
    .Append("\",");
Extra_Json.Append("\"")
    .Append("Token")
    .Append("\"")
    .Append(":")
    .Append("\"")
    .Append(refreshTokentoken)
    .Append("\"");
Extra_Json.Append("}");
string channel = "Epic";
string permissions = "basic_profile,friends_list,presence"; //permissions for epic
string extraJson = Extra_Json.ToString();

INTLAPI.Login(channel, permissions, extraJson);
FString RefreshToken;// refresh token from another proccess
const auto Permissions = TEXT("basic_profile,friends_list,presence"); //permissions for epic
FString Extra_JSON = TEXT("");
const TSharedRef<TJsonWriter<>> JsonWriter = TJsonWriterFactory<>::Create(&Extra_JSON);
JsonWriter->WriteObjectStart();
JsonWriter->WriteValue(TEXT("LoginMode"), TEXT("RefreshToken"));
JsonWriter->WriteValue(TEXT("Token"), RefreshToken);
JsonWriter->WriteObjectEnd();
JsonWriter->Close();
UINTLSDKAPI::Login(EINTLLoginChannel::kChannelEpic, Permissions, Extra_JSON); -
Sync client authentication state with the game's backend and wait for the final authentication result.
Step 3: Test the login function
Search for the keyword "AuthResult" in the Player Network SDK logs to verify if the correct channel name and OpenID are returned. If they are, it indicates a successful configuration and the login function has been added successfully.