Web
This article guides you through setting up Apple as an identity provider, enabling your iOS game to access Player Network authentication services.
Prerequisites
1. Set up the Apple app in Apple Developer
1. Create a Services ID for web login
If you are using an existing Services ID, select the corresponding Services ID from the Identifiers page, enable Sign in with Apple under Edit your Services ID Configuration, then click Configure to continue with step 6.
-
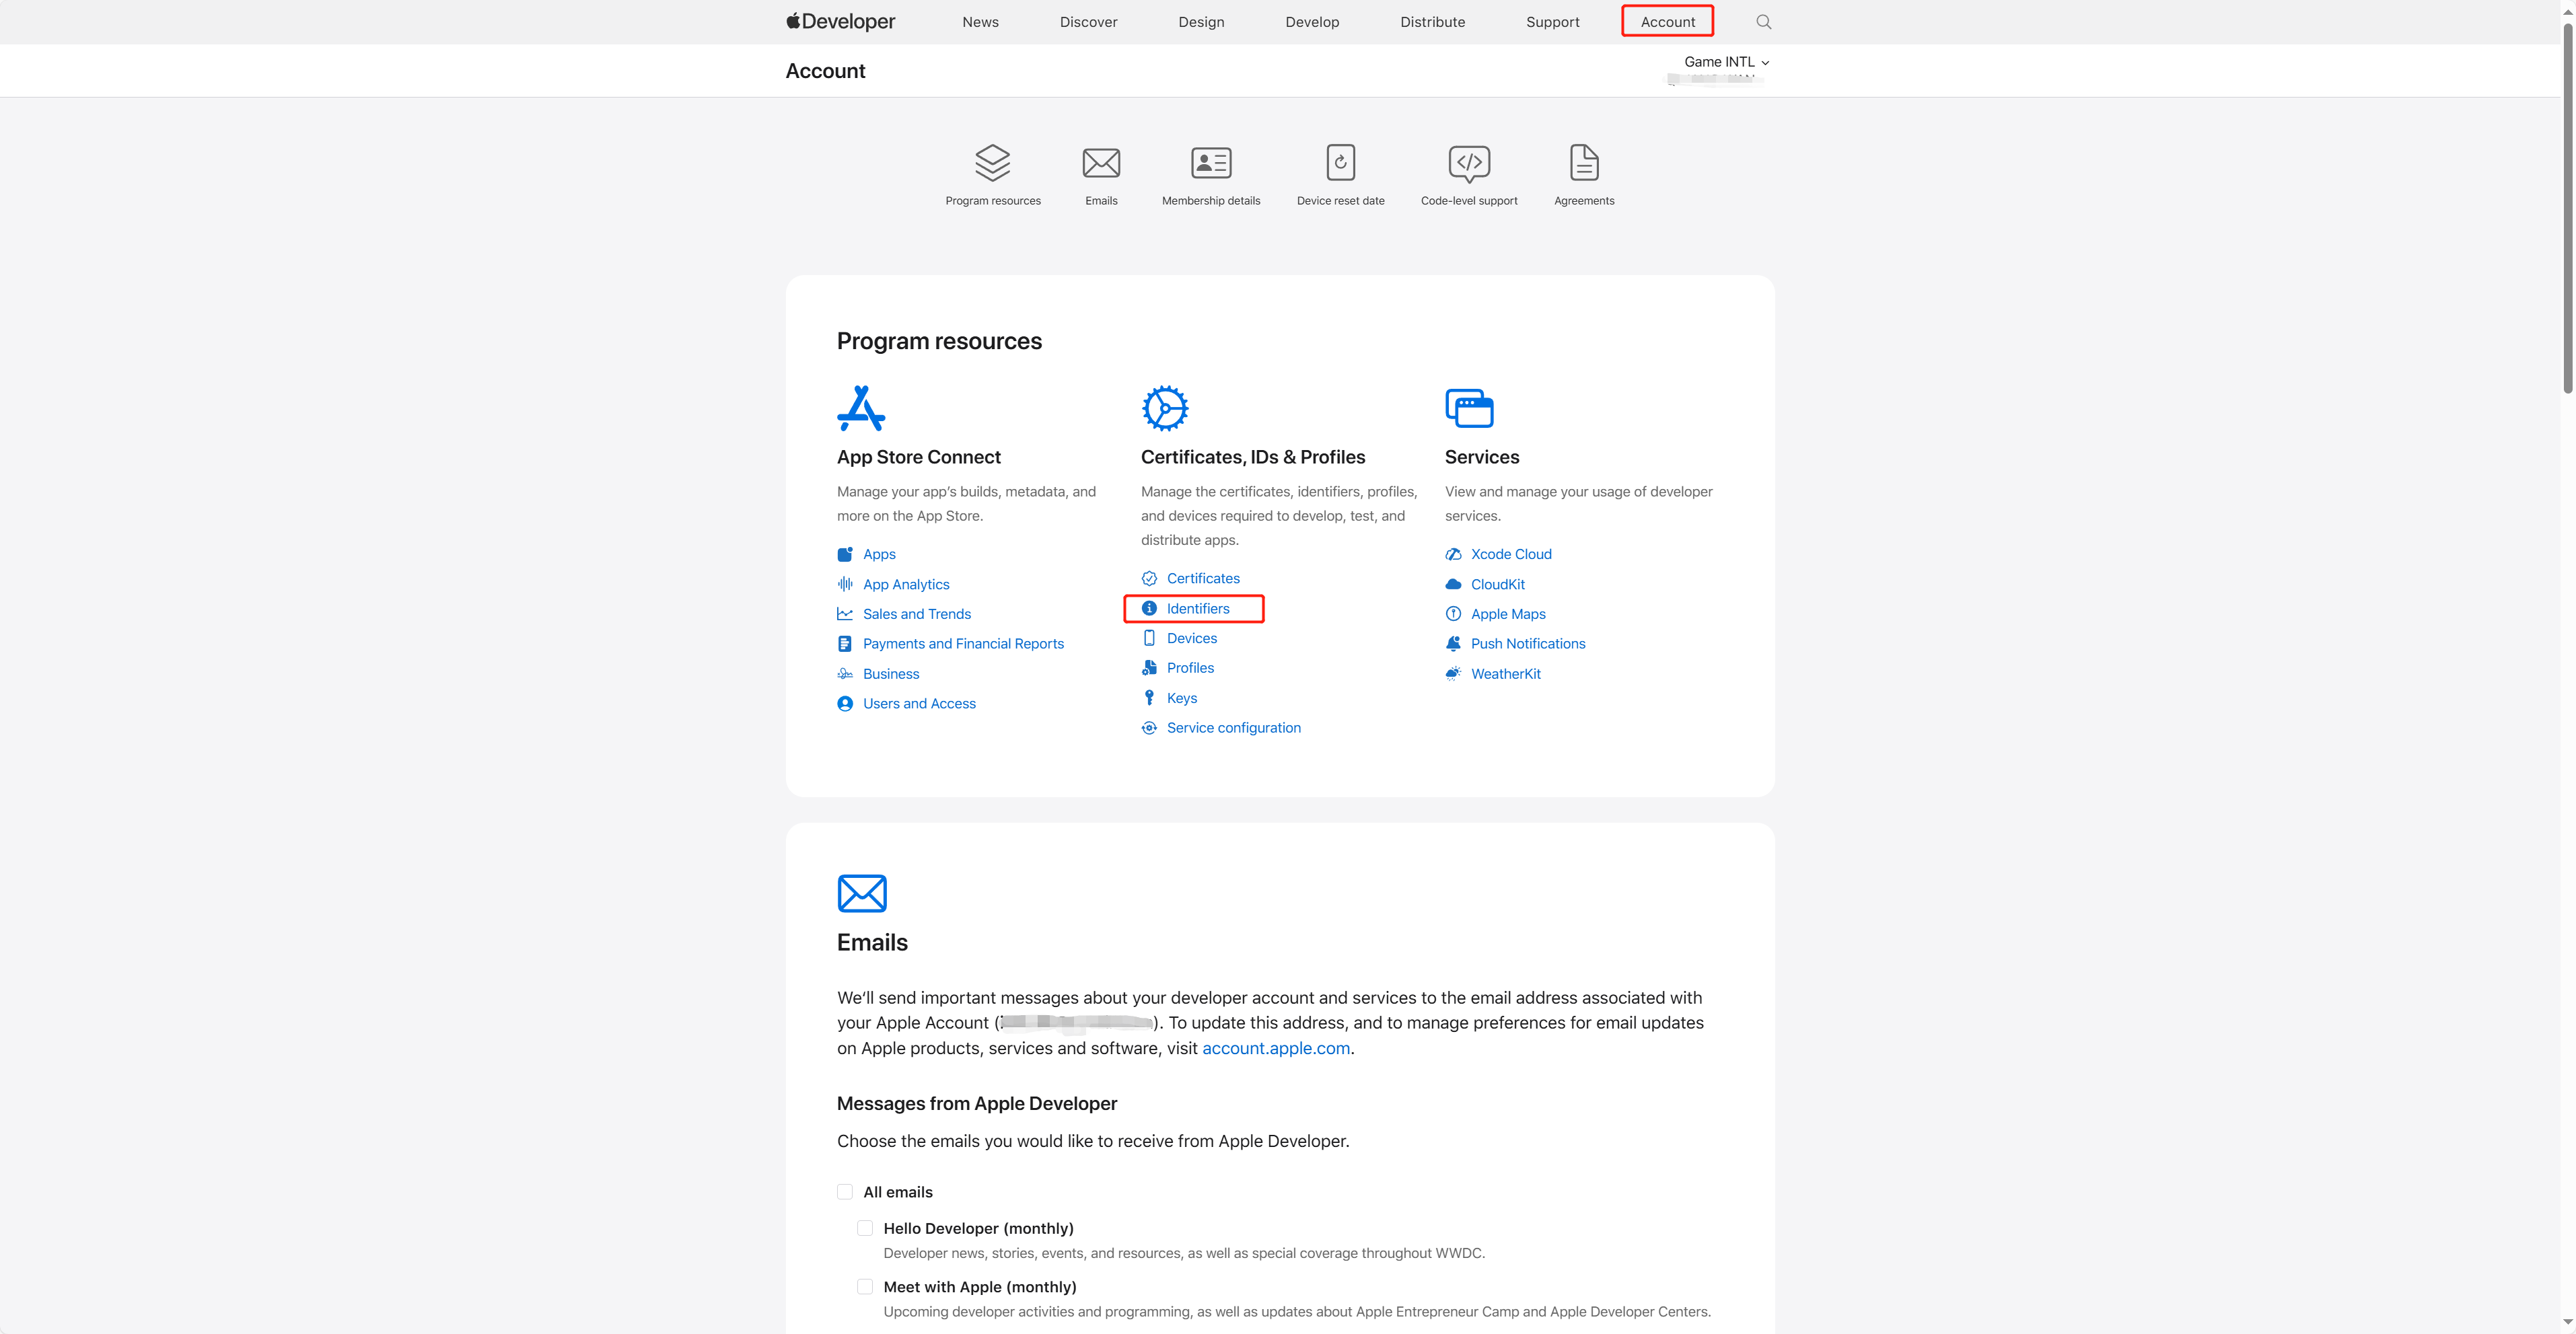
Log in to the Apple Developer. From the top navigation bar, click Account, then select Identifiers under Certificates, IDs & Profiles.
-
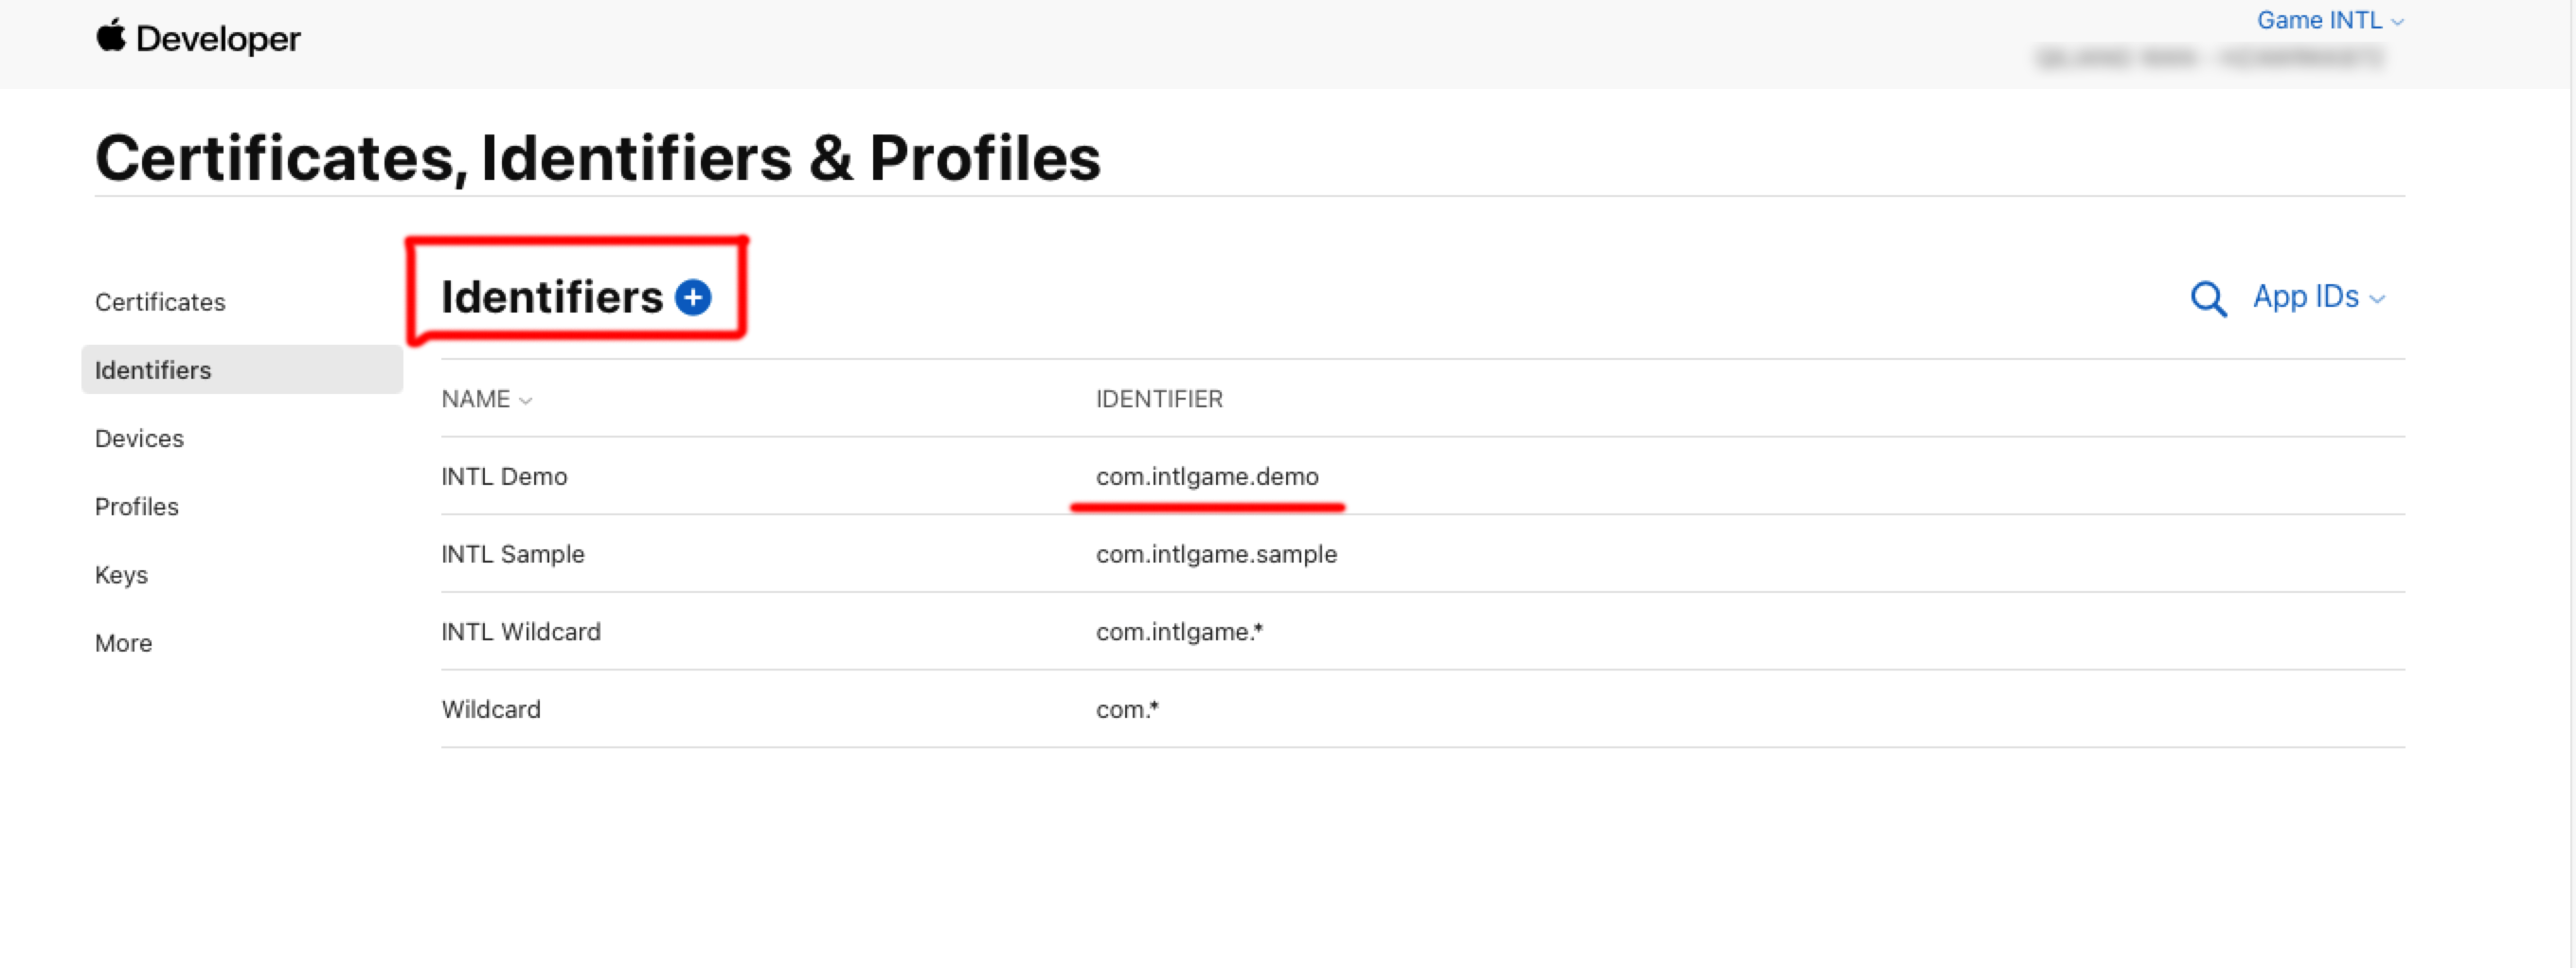
Click the blue add icon (+).
-
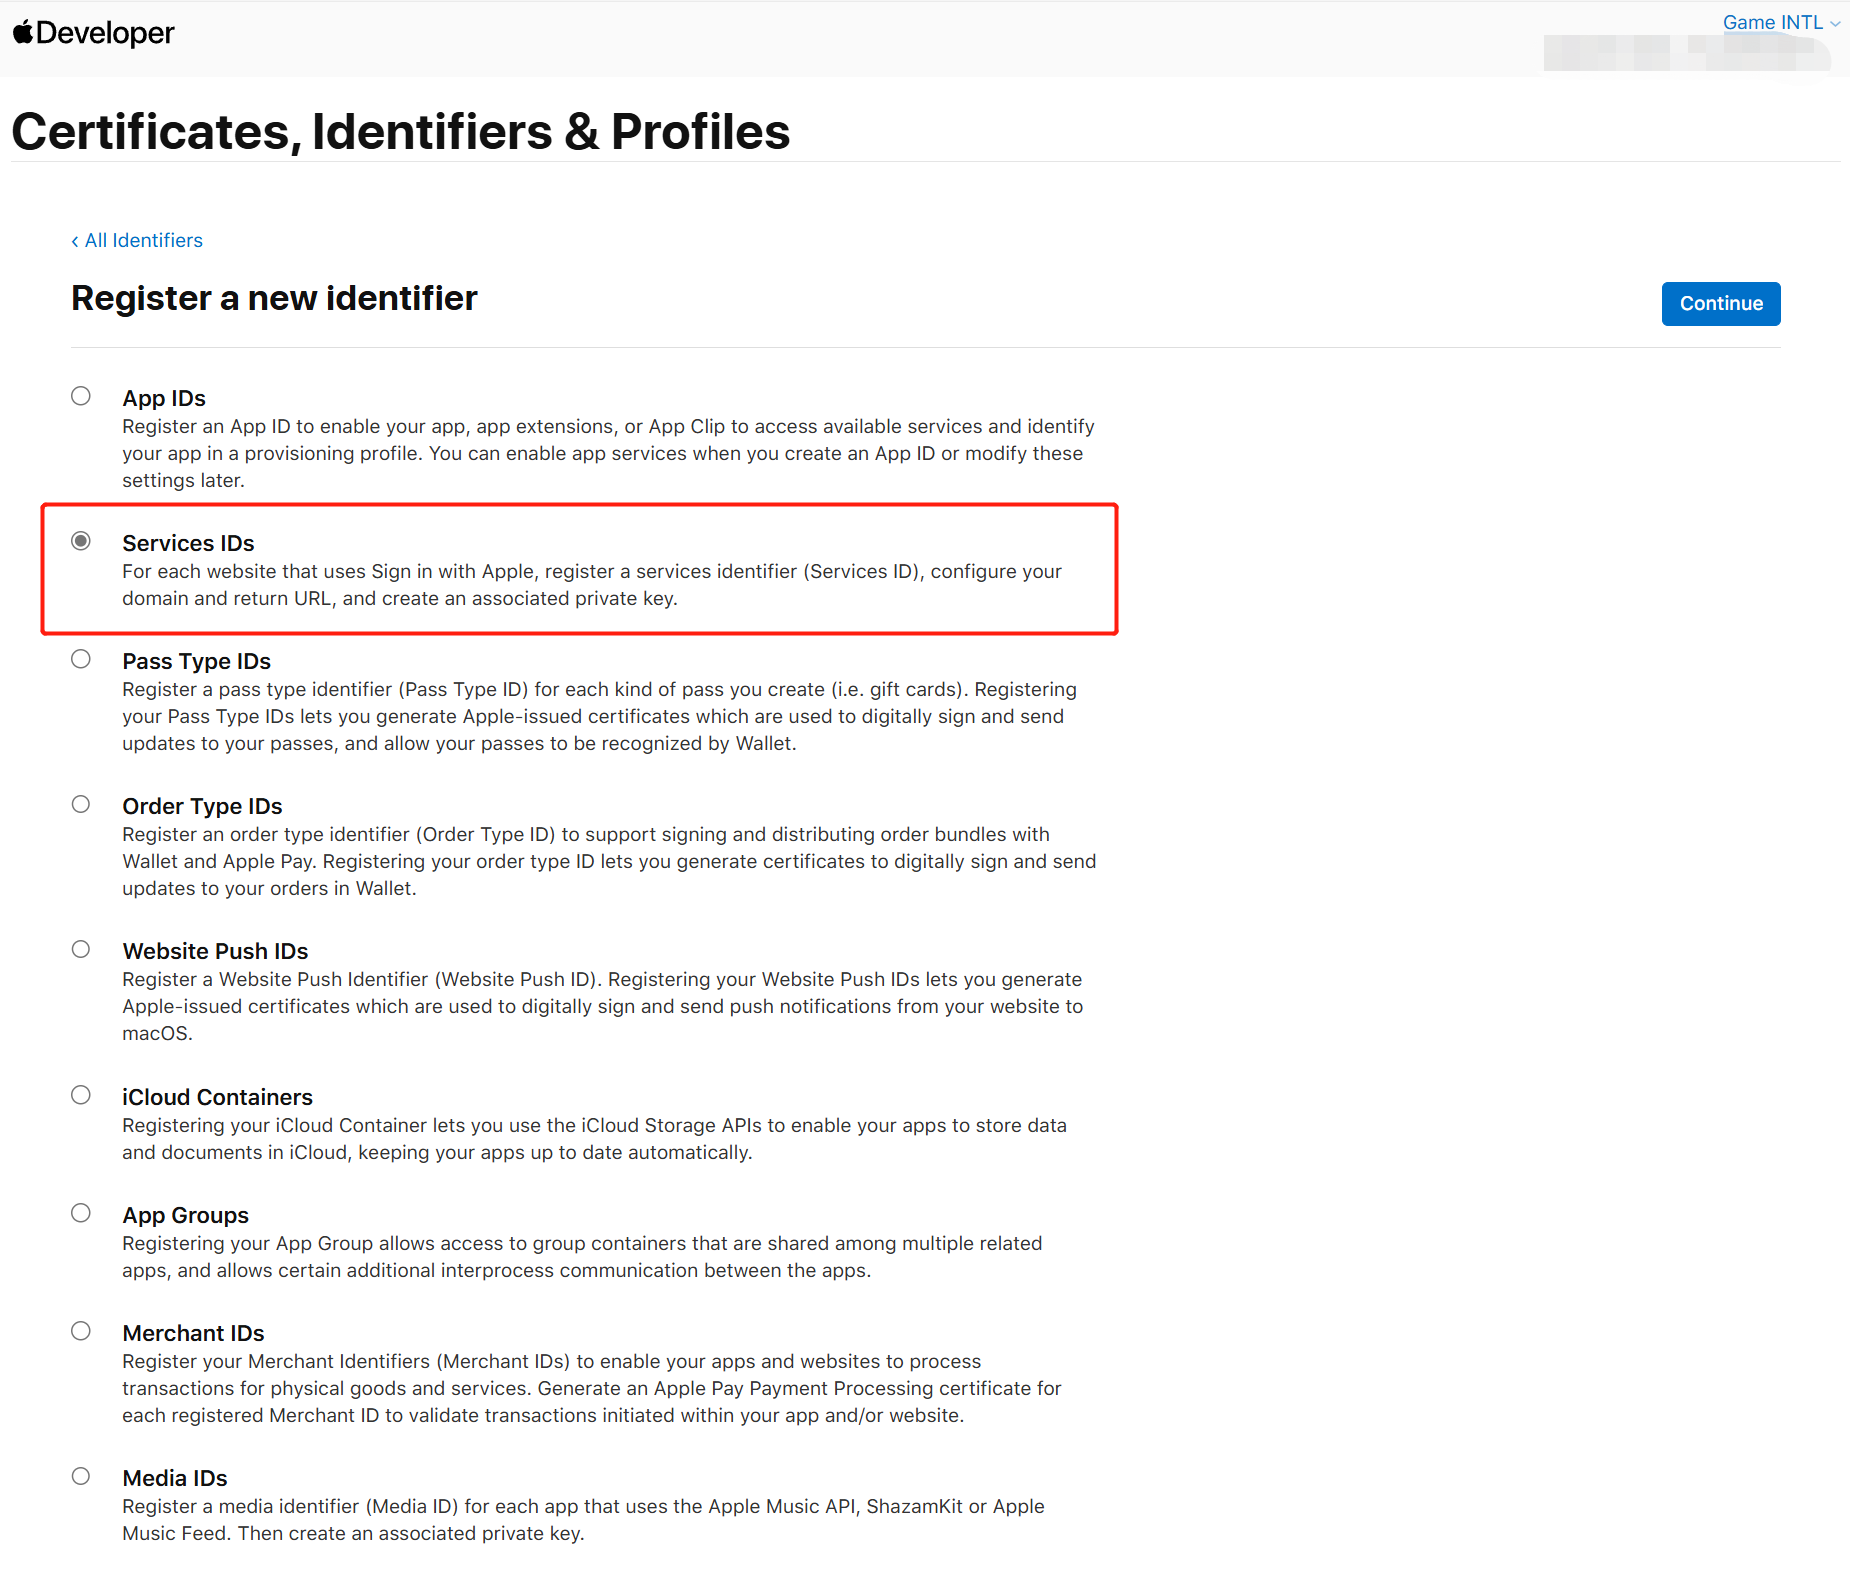
Select Services IDs and click Continue.
-
Enter the Description and Identifier.
- Description: The name or description of the game app.
- Identifier: The unique identifier for web.

-
Under Capabilities, enable Sign in with Apple and click Configure.
-
Under Return URLs, add the redirect links provided by Player Network, then click Save.
- North America: https://na-webproxy.intlgame.com/v2/webproxy/appleredirect
- Singapore and other regions: https://sg-webproxy.intlgame.com/v2/webproxy/appleredirect
- Testing: https://test-webproxy.intlgame.com/v2/webproxy/appleredirect
- aws-North America: https://aws-na-webproxy.intlgame.com/v2/webproxy/appleredirect

-
Click Continue > Register to create the Services ID for web login.
2. Create a private key to access services
Create a private key used to calculate the client_secret and the corresponding Key ID.
-
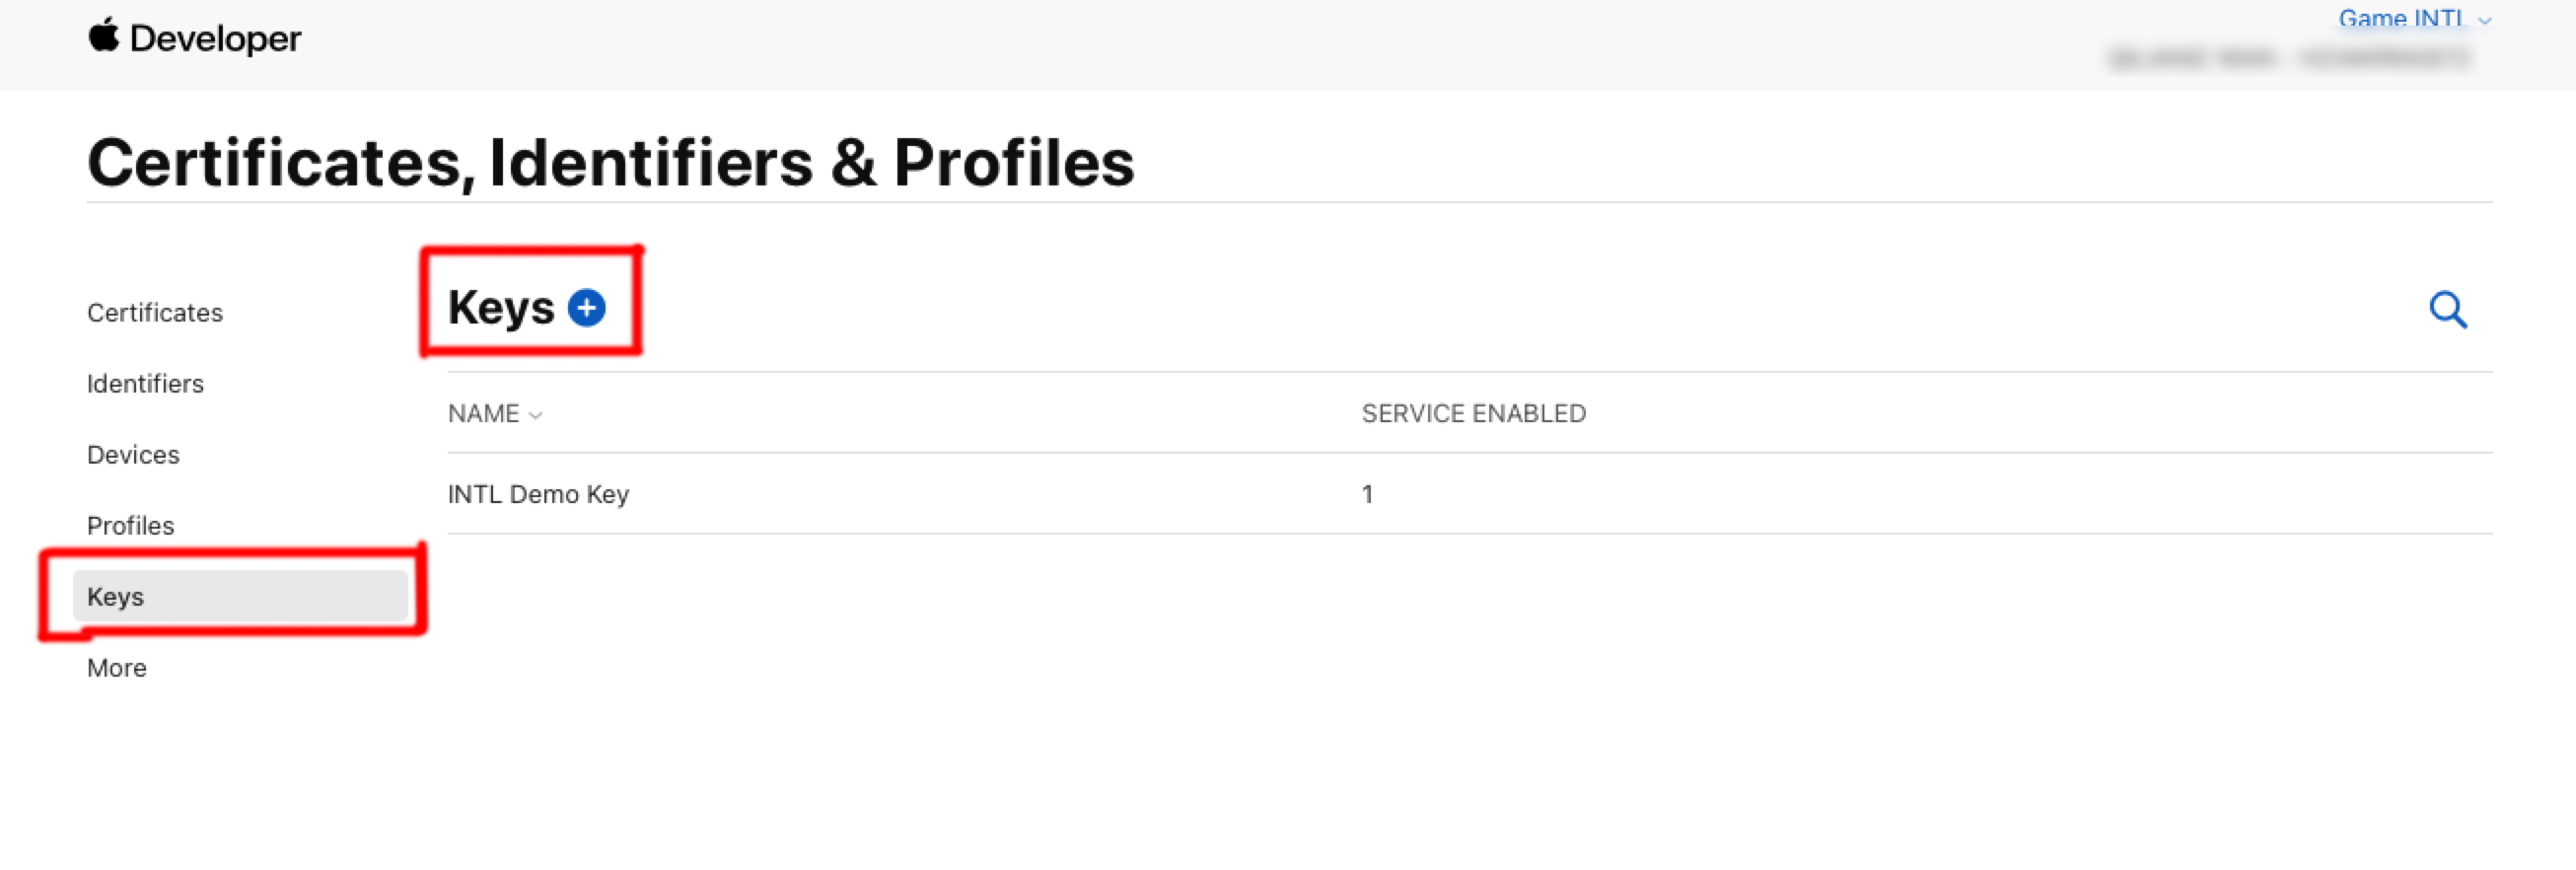
In the Certificates, Identifiers & Profiles sidebar, select Keys.
-
Click the the blue add icon (+).
-
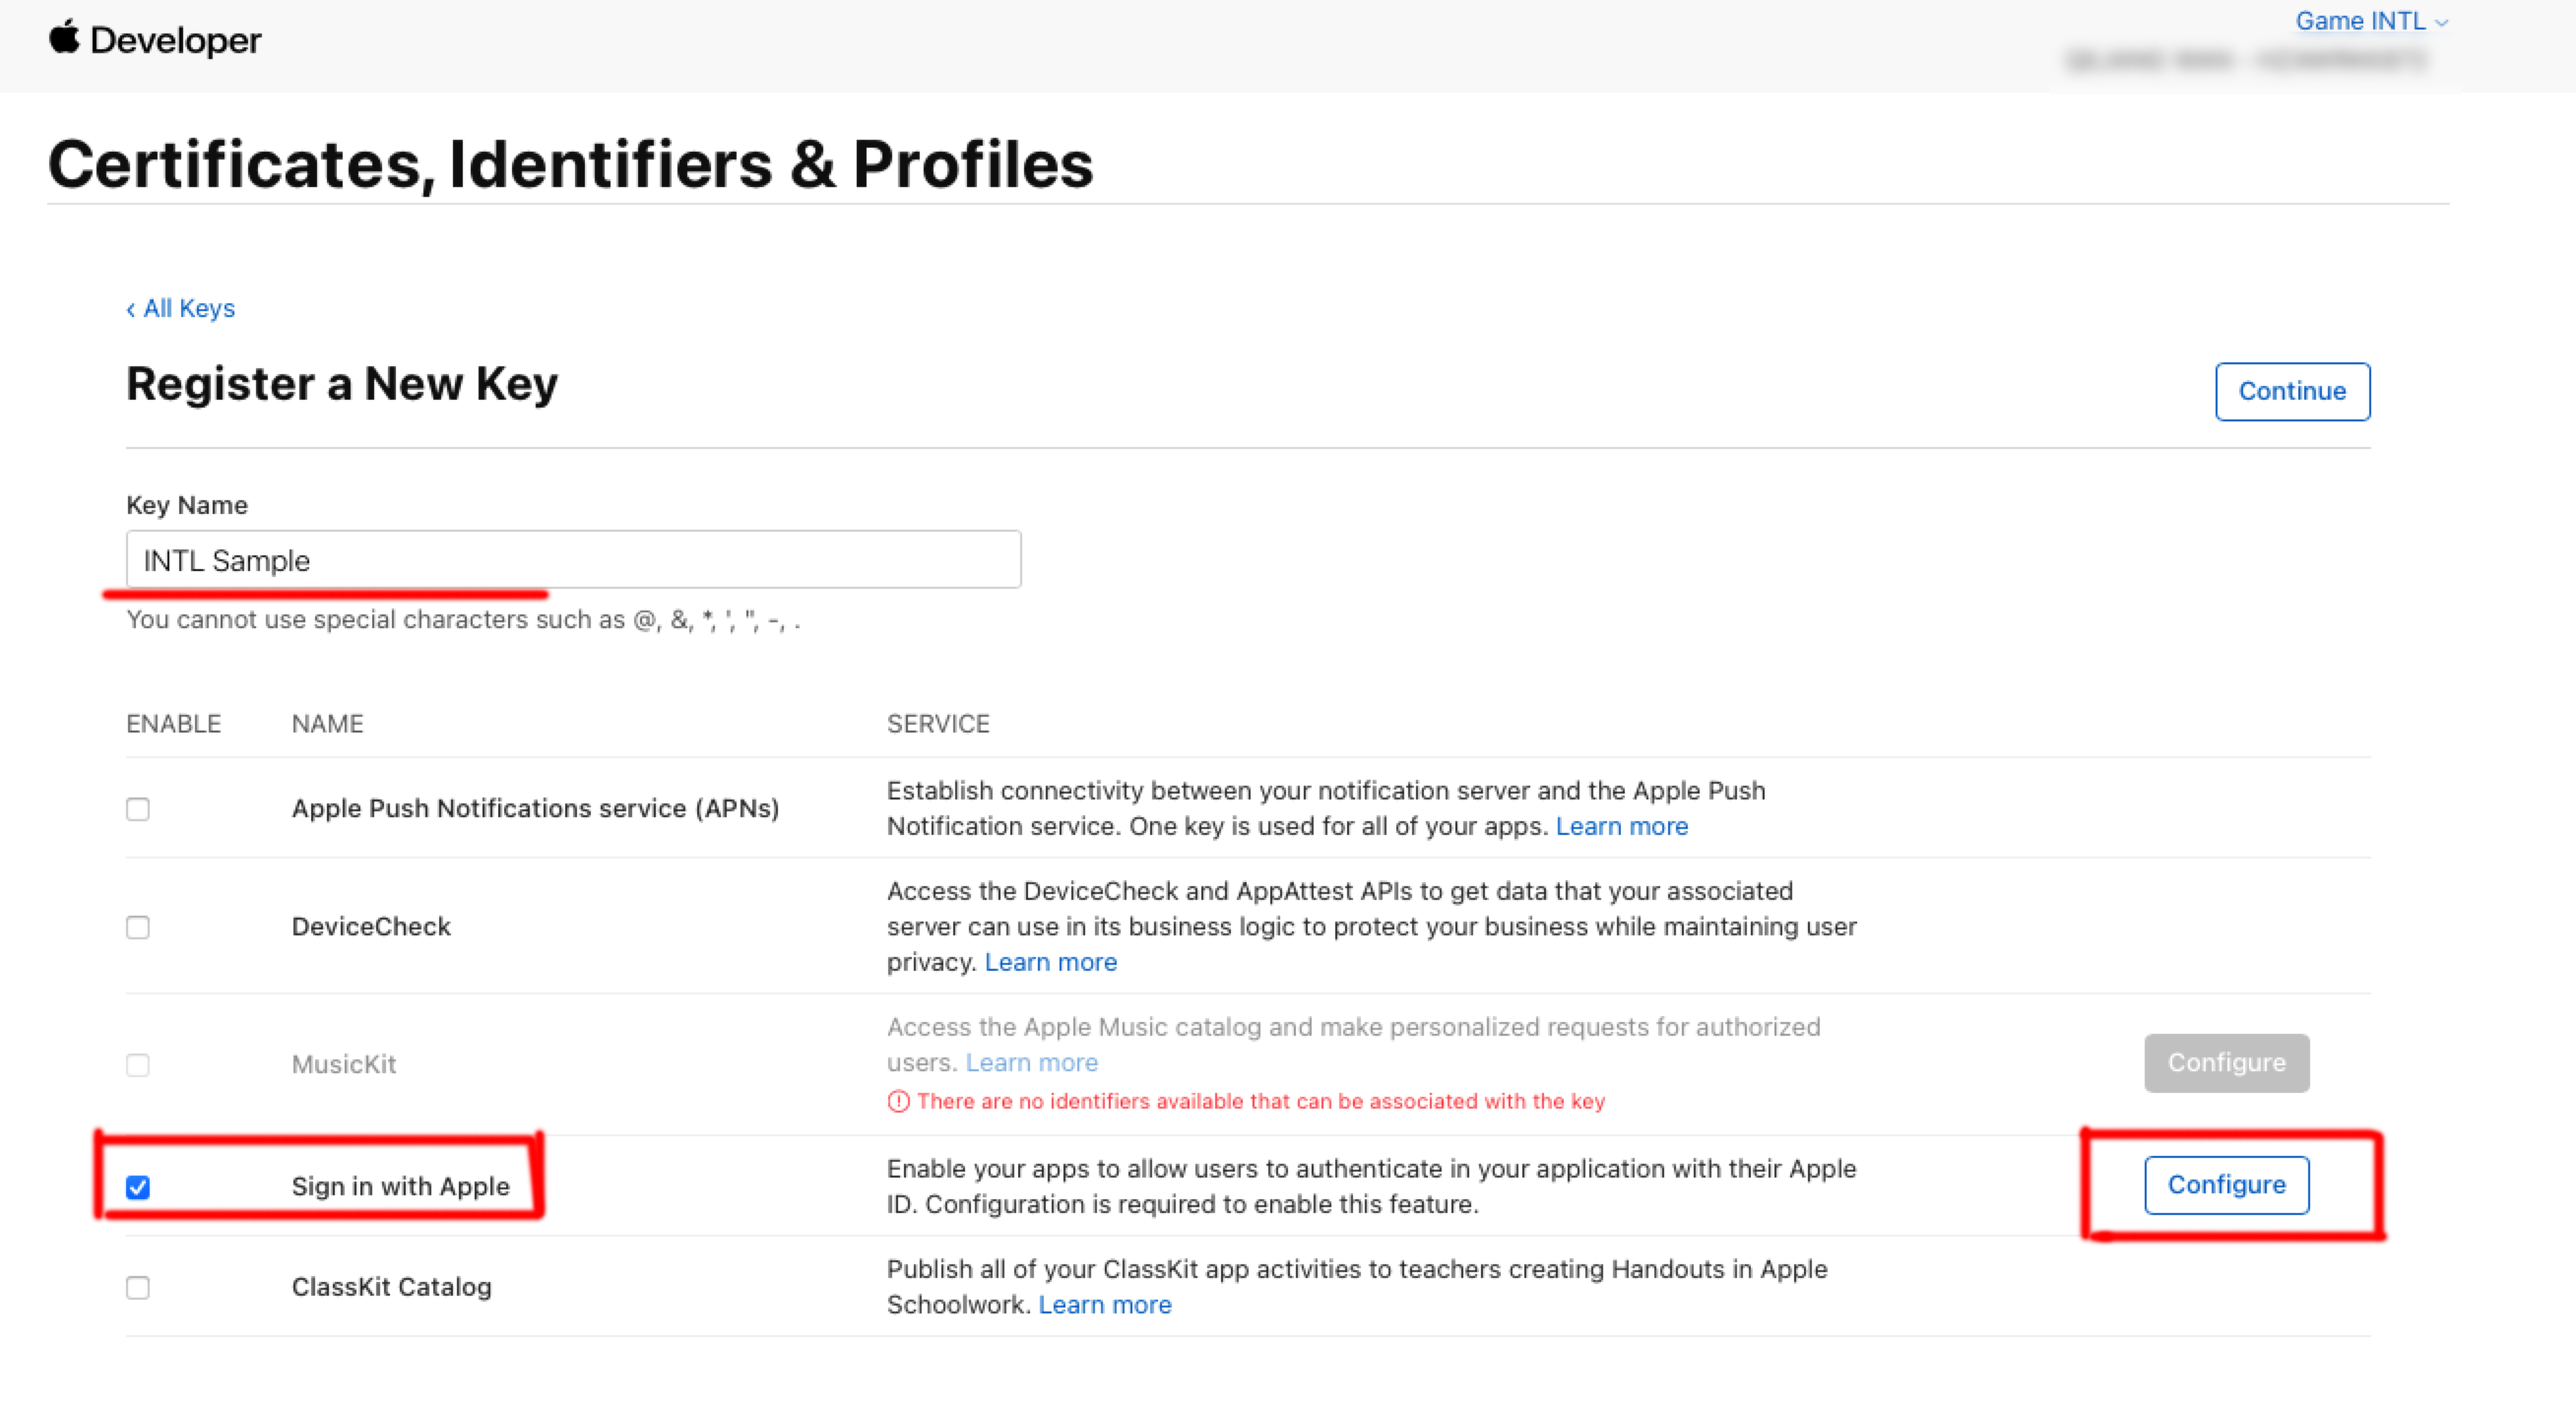
Under Key Name, enter a unique name for the key.
-
Select the checkbox next to Sign in with Apple, and click Configure.
-
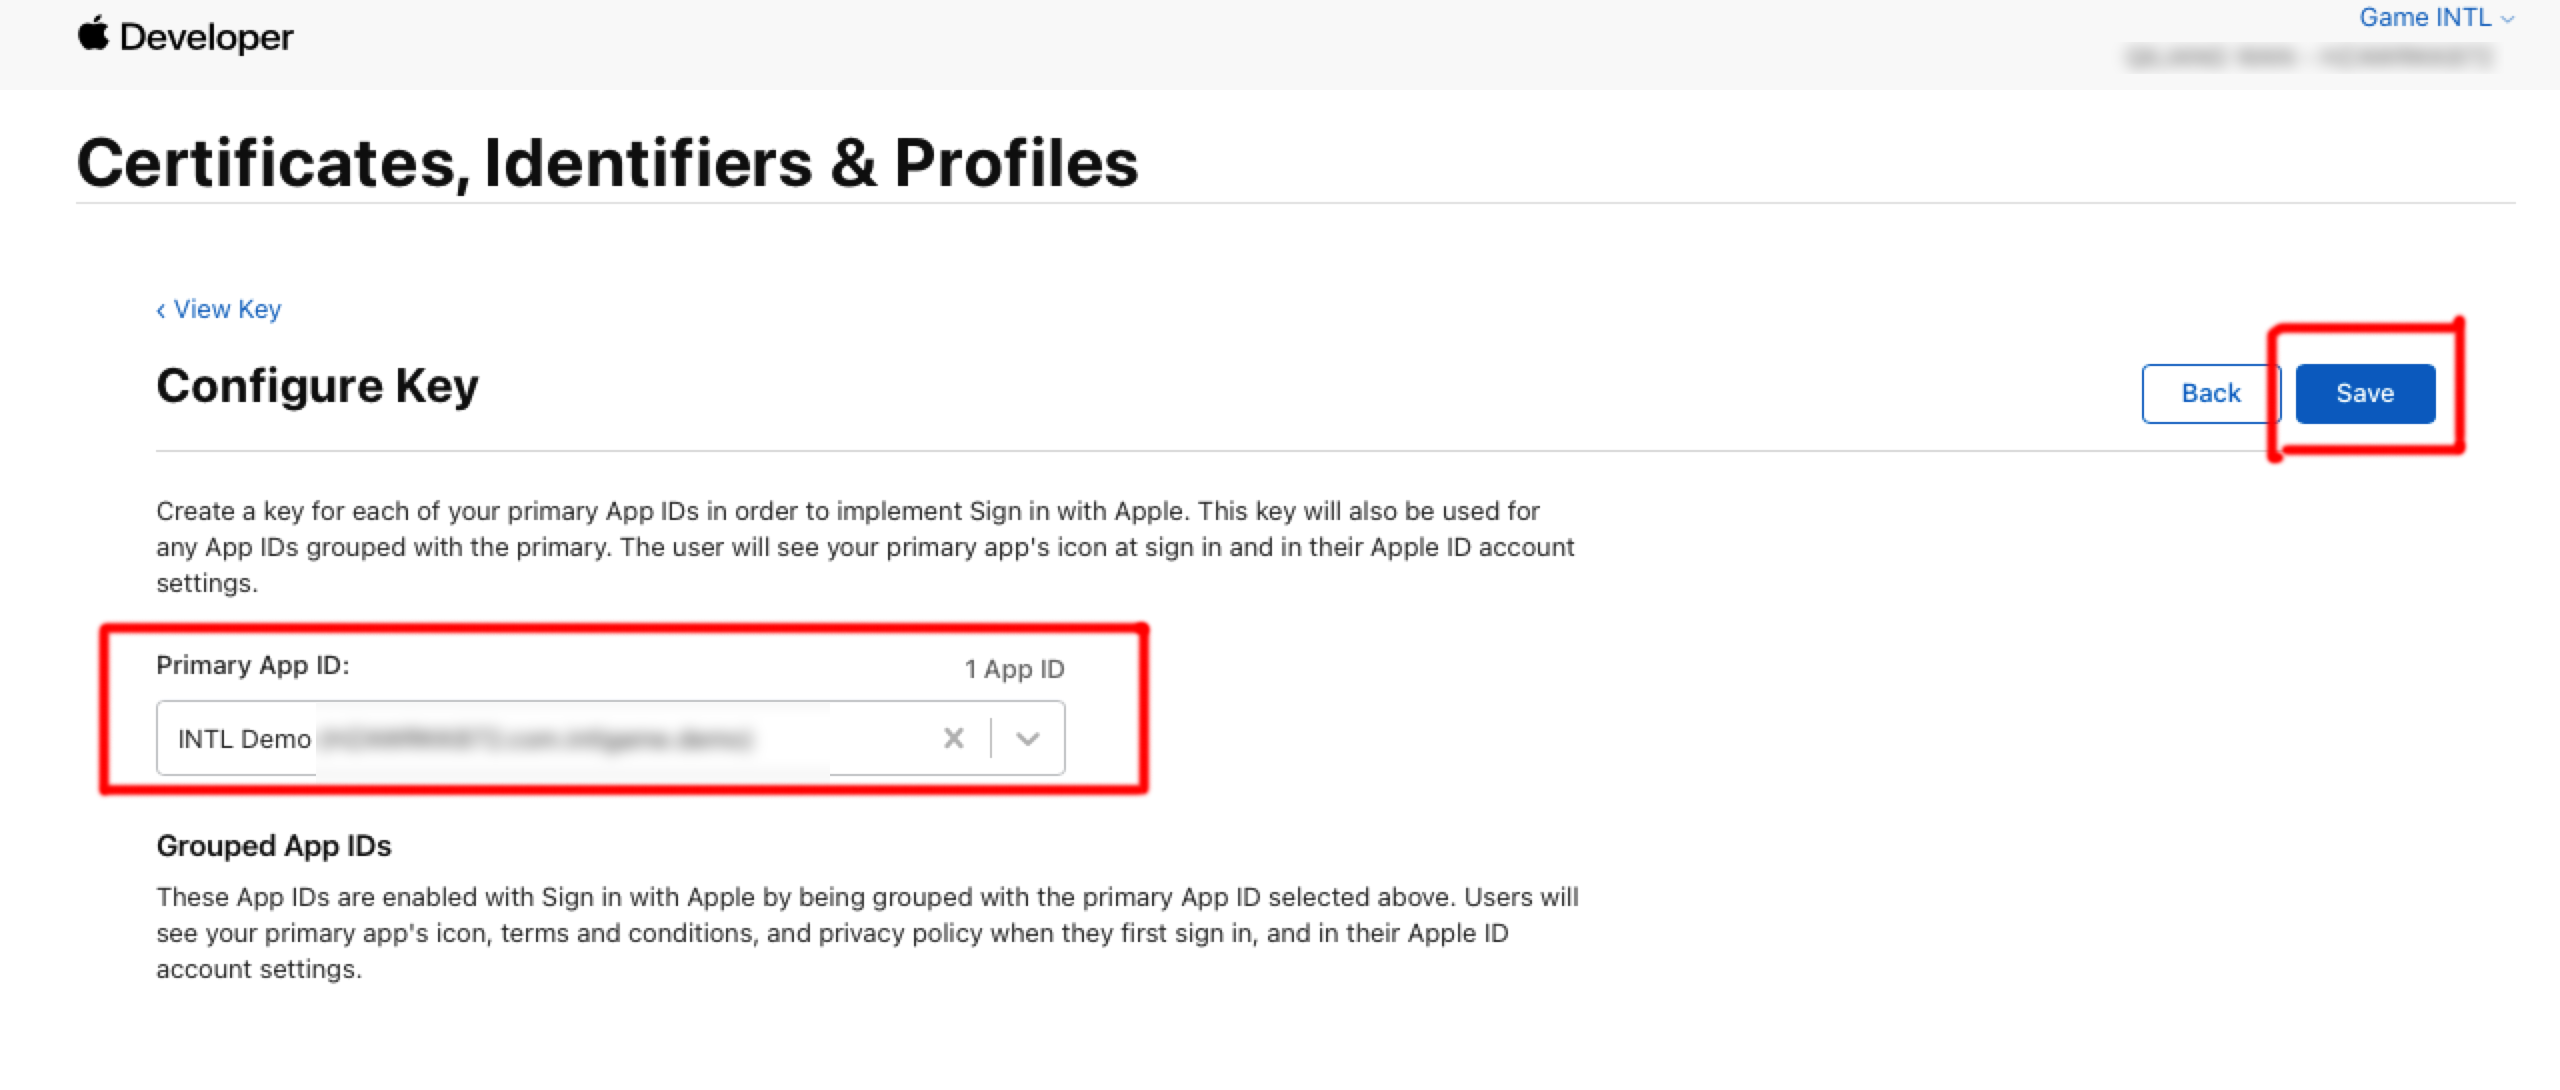
Under Primary App ID, select the Service ID created in Step 1 and click Save.
-
Click Continue.
-
Click Register to generate the key, and note down the Key ID.
-
Click Download to download the key file (you can only DOWNLOAD IT ONCE, DO NOT lose it) which is saved as a text file with a .p8 file extension.
3. Get the Team ID
- Log in to the Apple Developer.
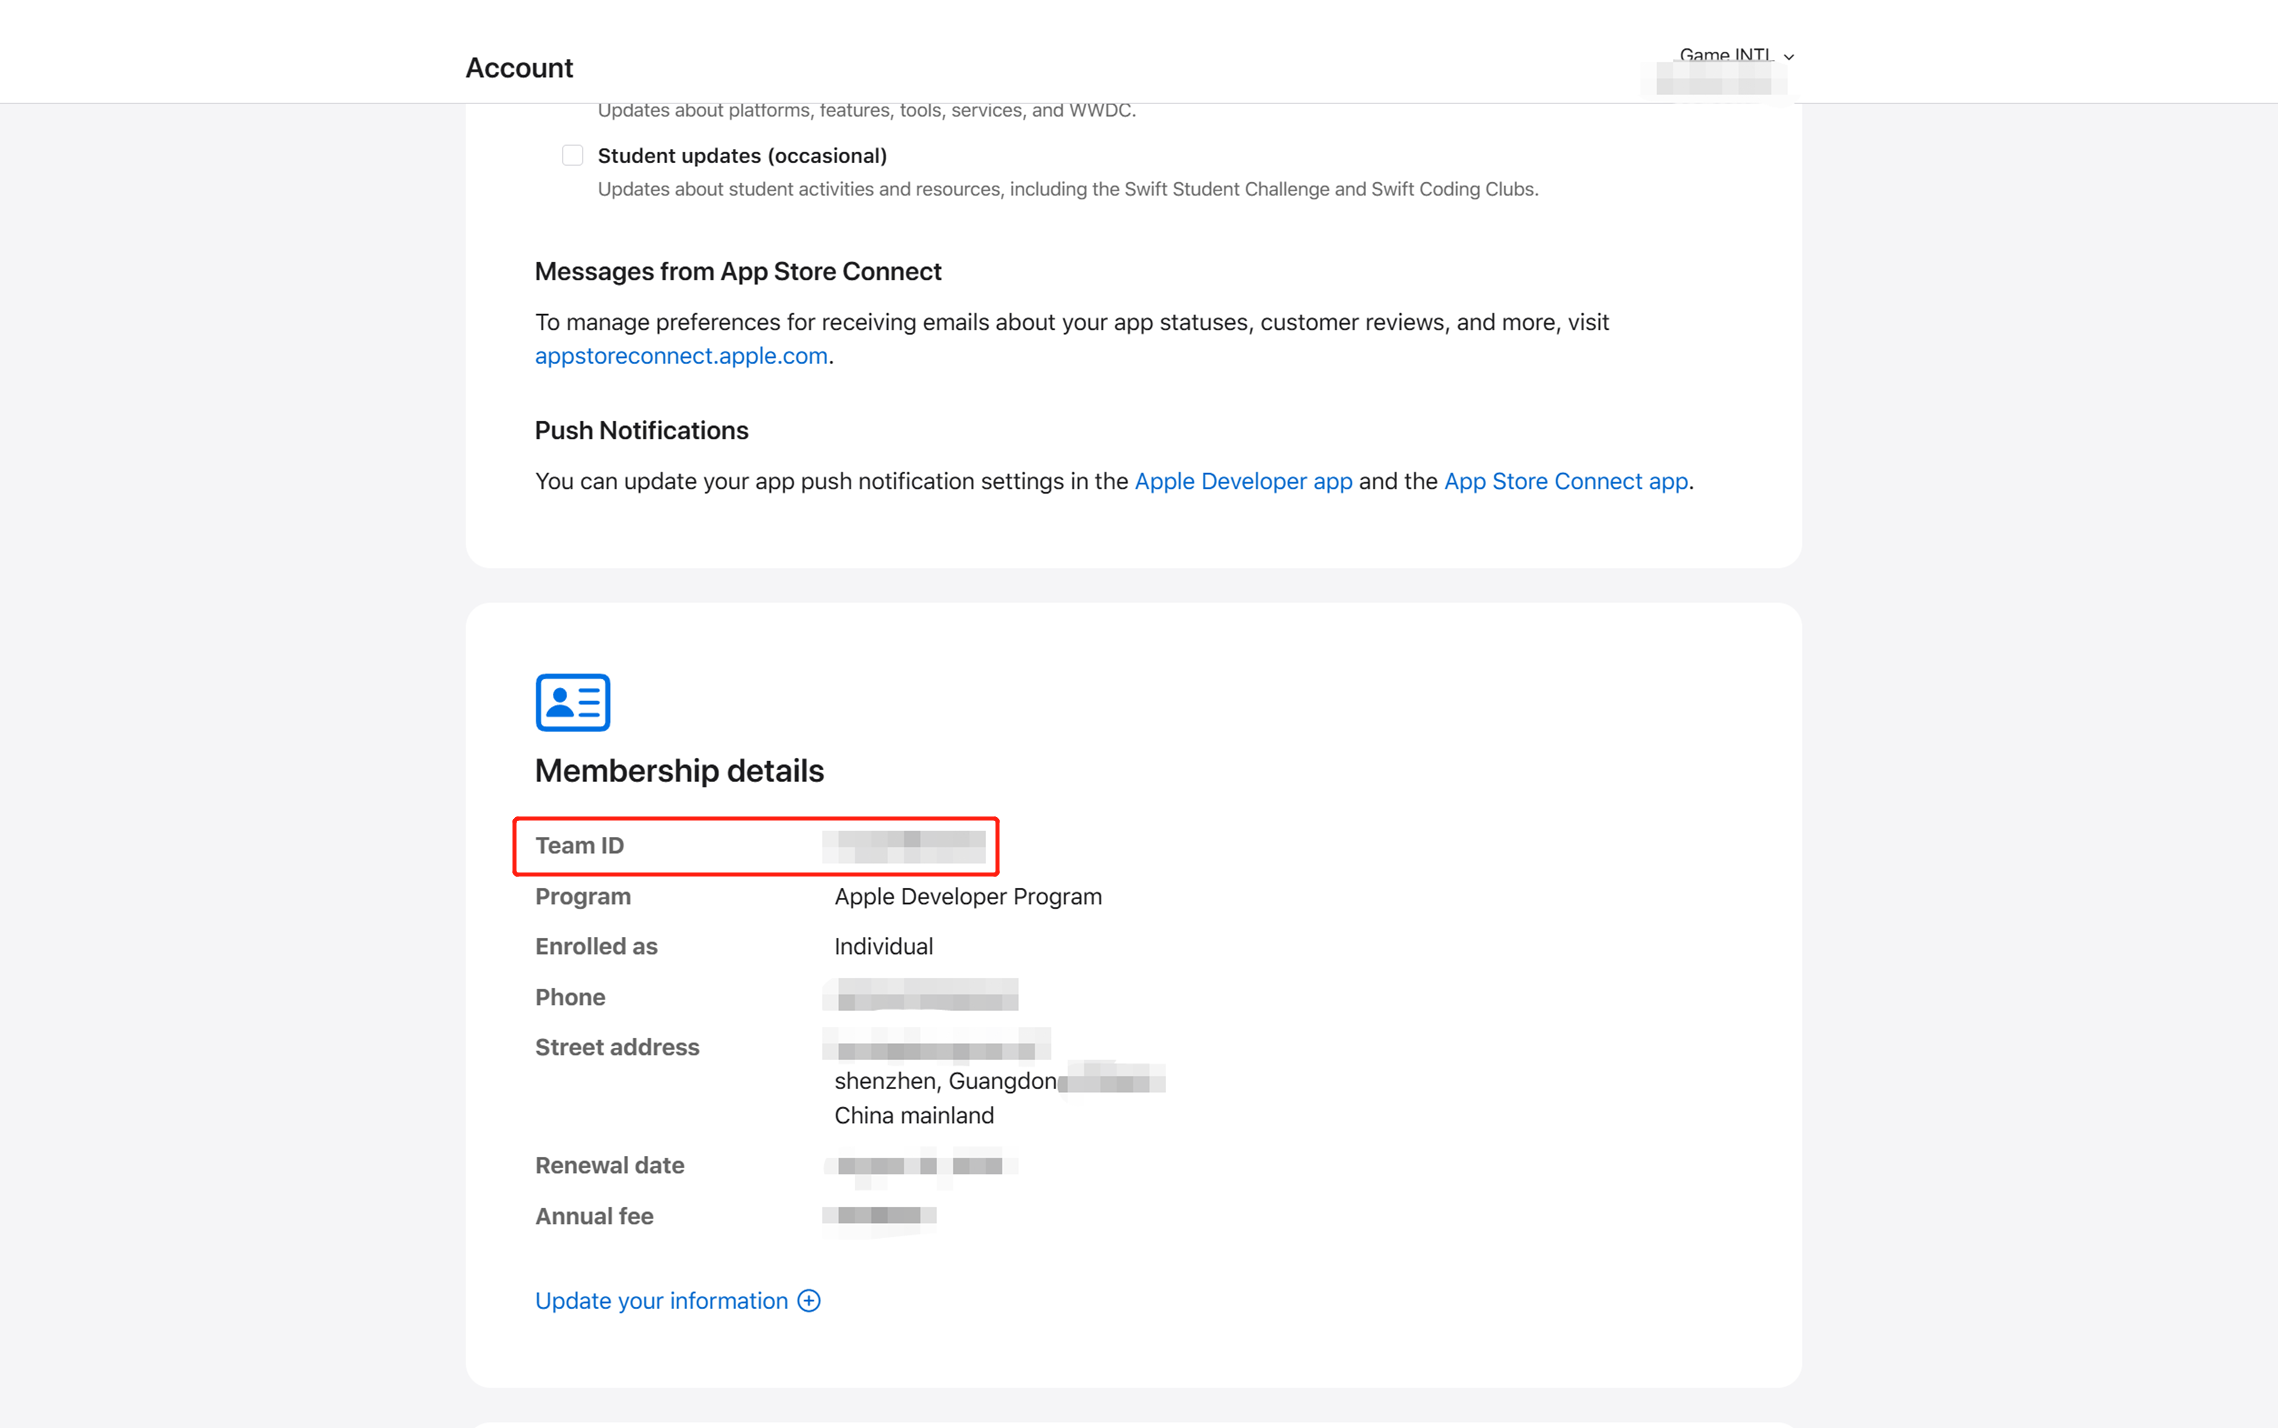
- In the top navigation bar , tap Account and scroll down to find Membership details to view your team ID.
For more information about configurations on Apple Developer, see What the Heck is Sign In with Apple?.
- Create an account for Player Network Console.
- Create a new project for your game, or join an existing one.
- Add Apple as an authentication method for your project on Player Network Console.
For more details about integrating the SDK for other third-party channels, see JavaScript SDK.
Step 1: Install the JavaScript SDK
Install the SDK package from the production environment when launching the game. The SDK package from the test environment is only used for integration testing.
Install the JavaScript SDK from npm or CDN.
- npm
- CDN
$ npm install @intlsdk/account-api
// SDK production version package
<script src="https://common-web.intlgame.com/sdk-cdn/account-api/latest/index.umd.js"></script>
Step 2: Instantiate the SDK
Set env to the test environment during the integration testing and env to the corresponding production environment when launching the game.
const accountApi = new IntlgameAccountApi({
  env: "test", // SDK environment
  gameID: 11,
});
| Parameter | Type | Description | Remark |
|---|---|---|---|
| env | string | SDK environment For more information, see Retrieve cluster information. | Required |
| gameID | number | Unique game ID assigned by Player Network | Required |
Step 3: Implement web login
After instantiating the accountApi component, call the thirdAuthorize method to request the access token from Discord.
accountApi.thirdAuthorize({
    third_type: 'apple',
    extra: {
        appleAppId: 'xxxxx', // Required for apple login
    }
}).then(
(res) => {
    console.log(res);
});
With the Discord token returned, call the intlAuthorize method to get the Player Network SDK OpenID and token to log in to your website.
accountApi.intlAuthorize({
    third_type: 'apple',
    channel_info: {
        code: "EAAI2lTrXAZBwBAC"
        user_name: "EAAI2lTrXAZBwBAC"
    }
}).then(
(res) => {
    console.log(res);
});
Call the intlLogout method to log out from your website.
accountApi.intlLogout({
    token: '4567xsdfsd',
    openid: 'xxxxxxxx',
    channel_id: 11,
}).then(
(res) => {
    console.log(res);
});