Manage Accounts
Player account query
Choose to query a single player account, or simultaneously query multiple player accounts. Detailed information about the accounts will be returned as Query results.
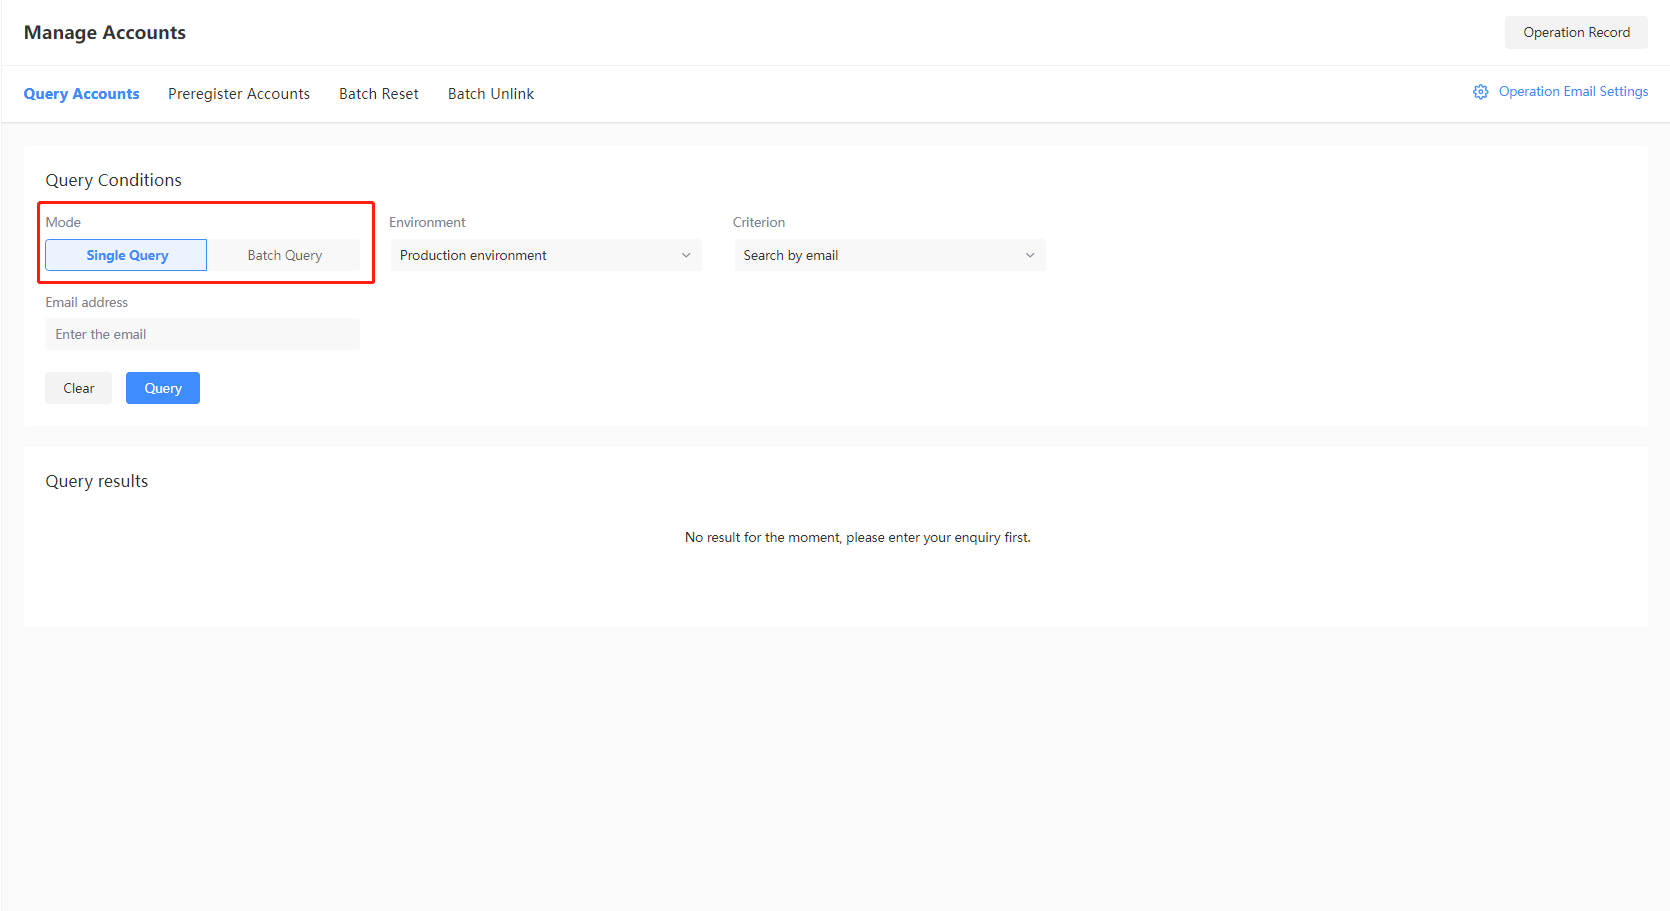
Single account
-
Log in to the Player Network Console.
-
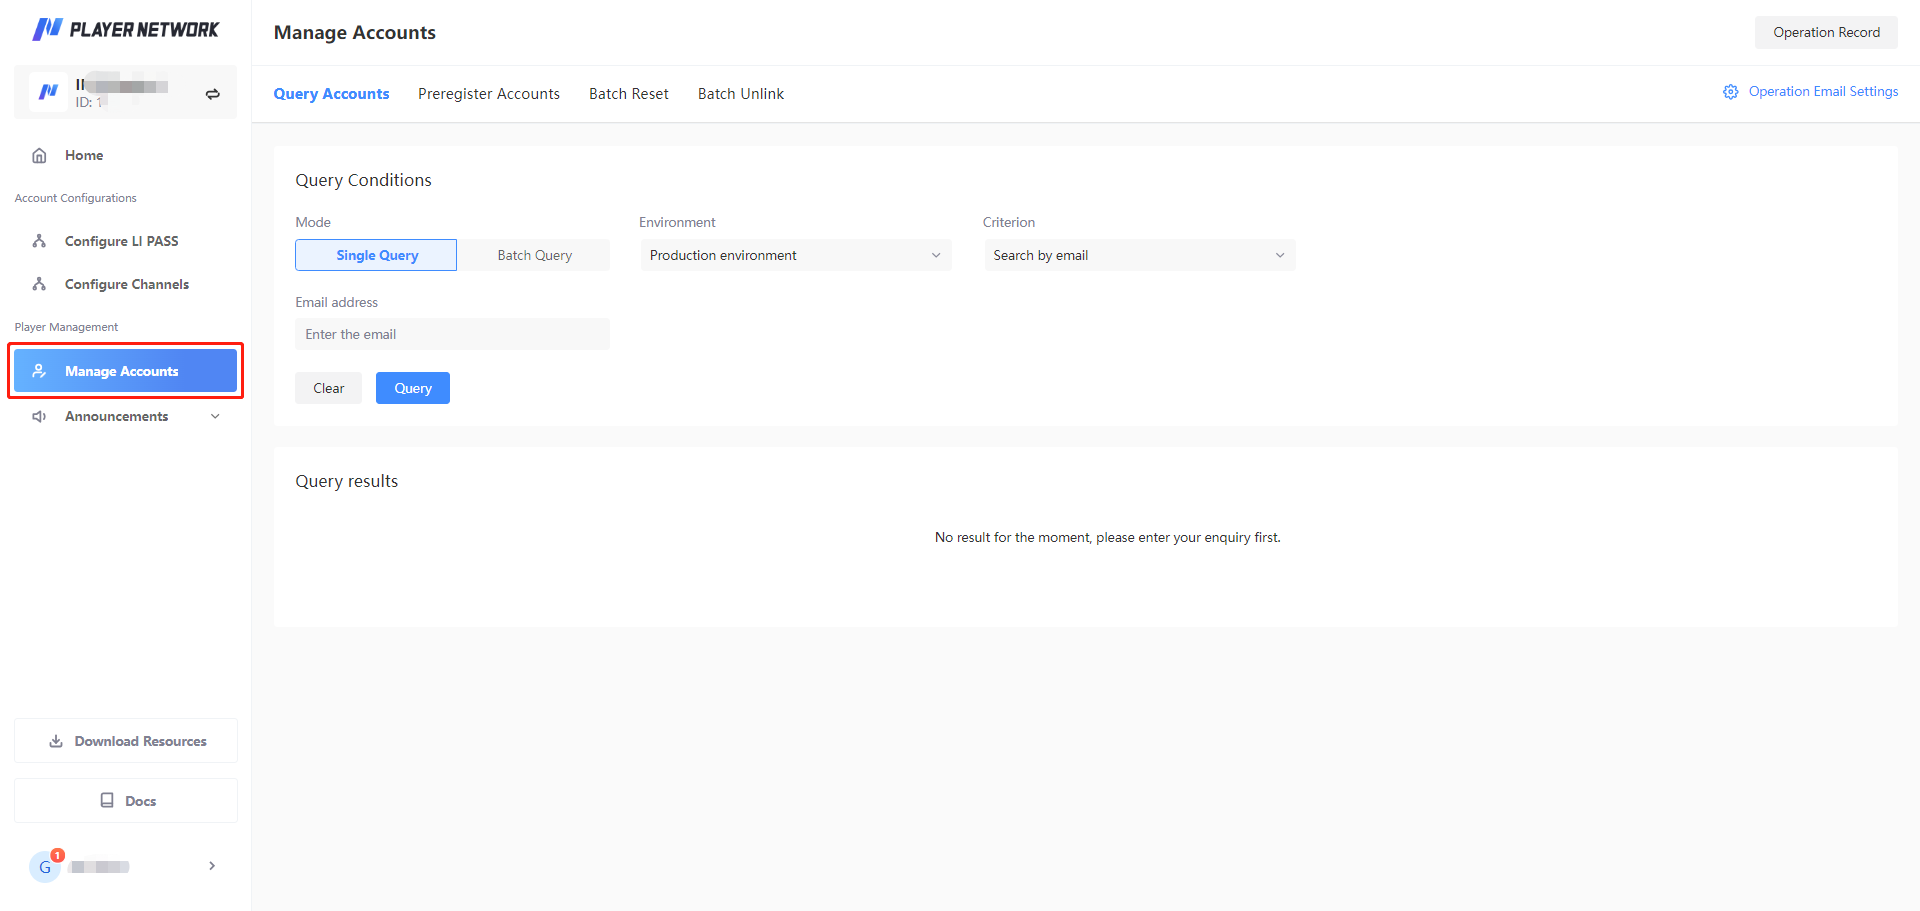
In the left sidebar, select Manage Accounts > Query Accounts under Player Management.
-
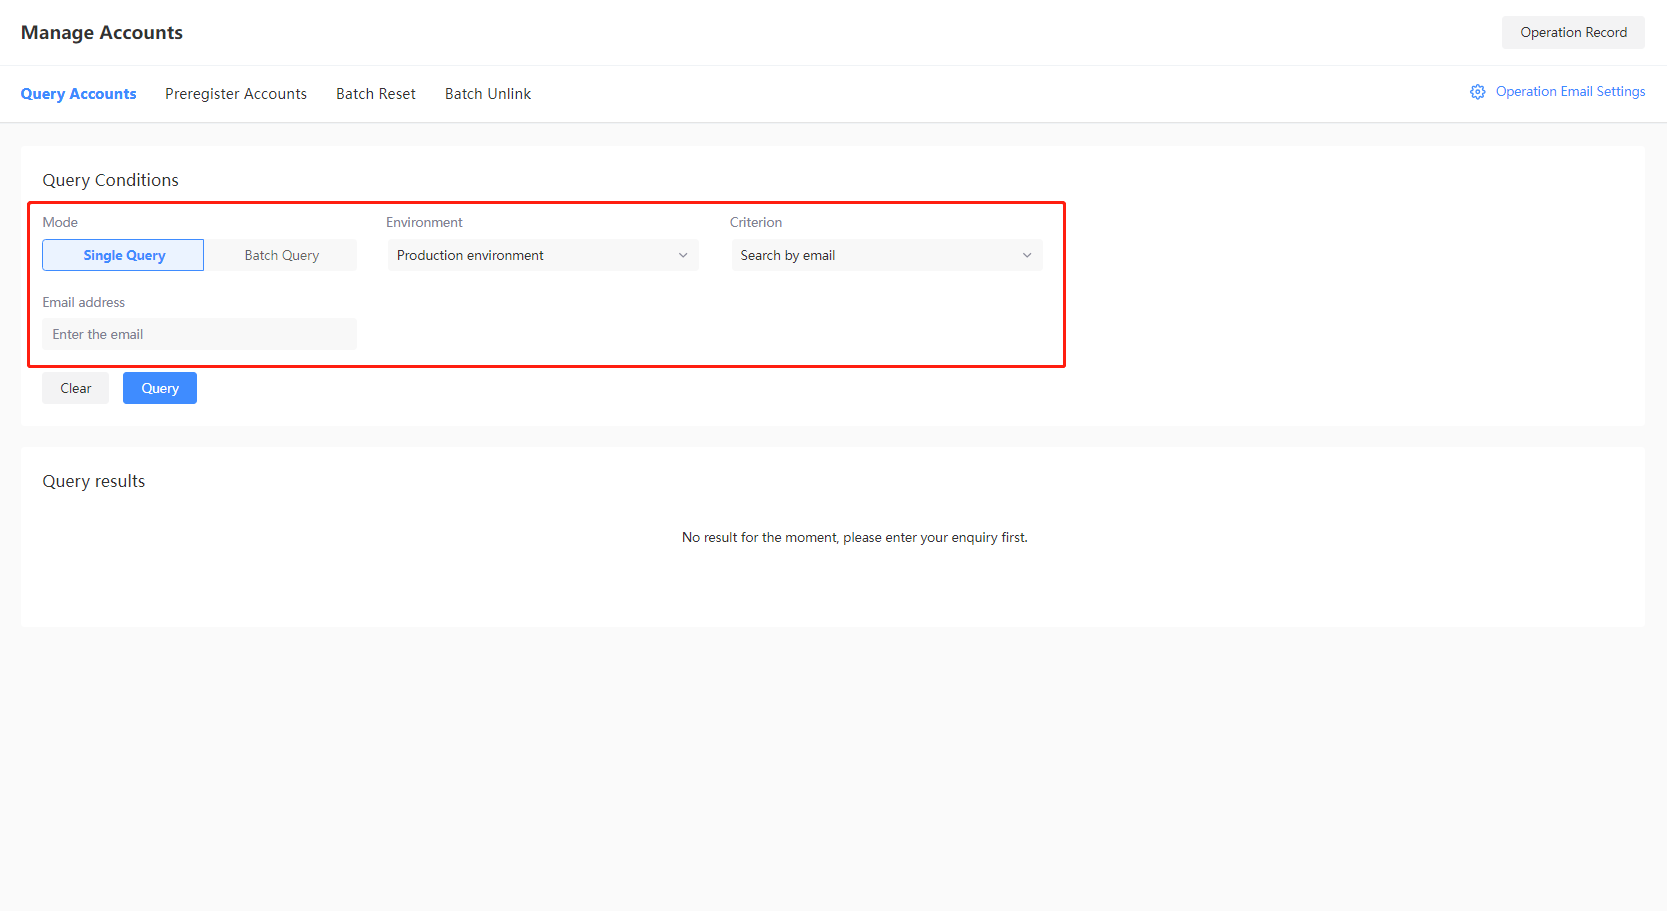
Click Single Query, select the Environment of the player account, then choose a Criterion for the query:
- Query account with game OpenID: A standardized identifier that can be used to verify player identity across multiple channels.
- Query account with channel ID: A single-channel identifier that facilitates quick player identification across different channels.
This refers to the unique ID of a player within a specific channel, and differs from the the UID displayed in-game, which typically refers to the player ID itself. - Search by email: The personal email address linked to the player account.
- Query account with LI PASS: The username of the player's LI PASS.
-
Enter the information according to the chosen Criterion, then click Query to begin the query.
-
The result from the query will be displayed below, where the account information can be verified or modified if required.

Multiple accounts
-
Log in to the Player Network Console.
-
In the left sidebar, select Manage Accounts > Query Accounts under Player Management.

-
Click Batch Query, select the Environment of the player account, then choose a Criterion for the query:
- Query account with game OpenID: A standardized identifier that can be used to verify player identity across multiple channels.
- Query account with channel ID: A single-channel identifier that facilitates quick player identification across different channels.
This refers to the unique ID of a player within a specific channel, and differs from the the UID displayed in-game, which typically refers to the player ID itself. - Query account with email: The personal email address linked to the player account.
- Query game OpenID with email: Only return the OpenID of the account.

-
Click template to download the template for your selected Criterion. Enter the player information into the template, then click Select File to upload it.

-
Click Query to start the query. The estimated time required and the query progress can be viewed at the bottom of the page.

-
From the top right of the page, click Operation Record, then click Download File for the corresponding result to export the batch query results to a file.

Due to player data compliance restrictions, IP addresses belonging to China and Hong Kong will be unable to view the complete email address of players.
Query results
Details of the player accounts found through the query include the following sections:
Basic Information: Includes information such as the player account platform, registration time, and last login information.
Device and Location Includes the last login location, frequent login locations, last login device, and frequently used devices.
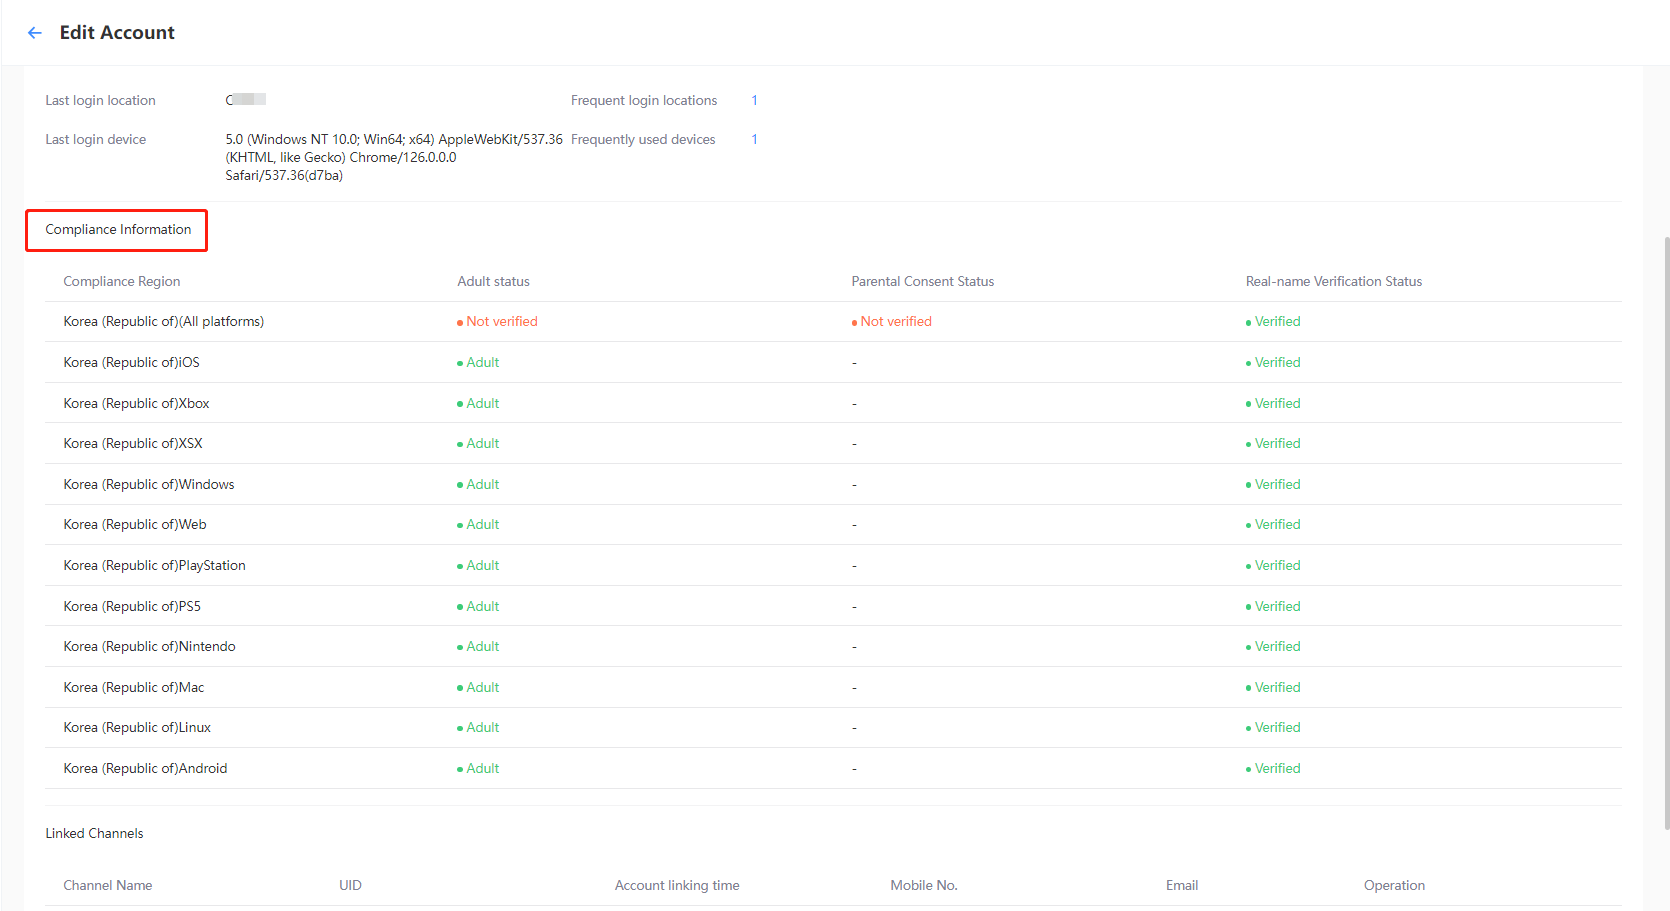
Compliance Information: Includes the compliance region, adult status, parental authorization status, and real-name verification status.
Linked Channels: Includes the time and platform records related to account linking.
Account Security Logs: If sensitive operations have been performed on the player account, the operations will be recorded and displayed, such as linking a channel, enabling 2FA, triggering 2FA.

In order to meet Korean compliance requirements, the compliance information of a Korean player is displayed according to the respective platforms in the Compliance Information section.
Account preregistration
Projects can collect the email addresses of participants through promotional activities or other methods, then use these email addresses to preregister player accounts.
Single account
-
Log in to the Player Network Console.
-
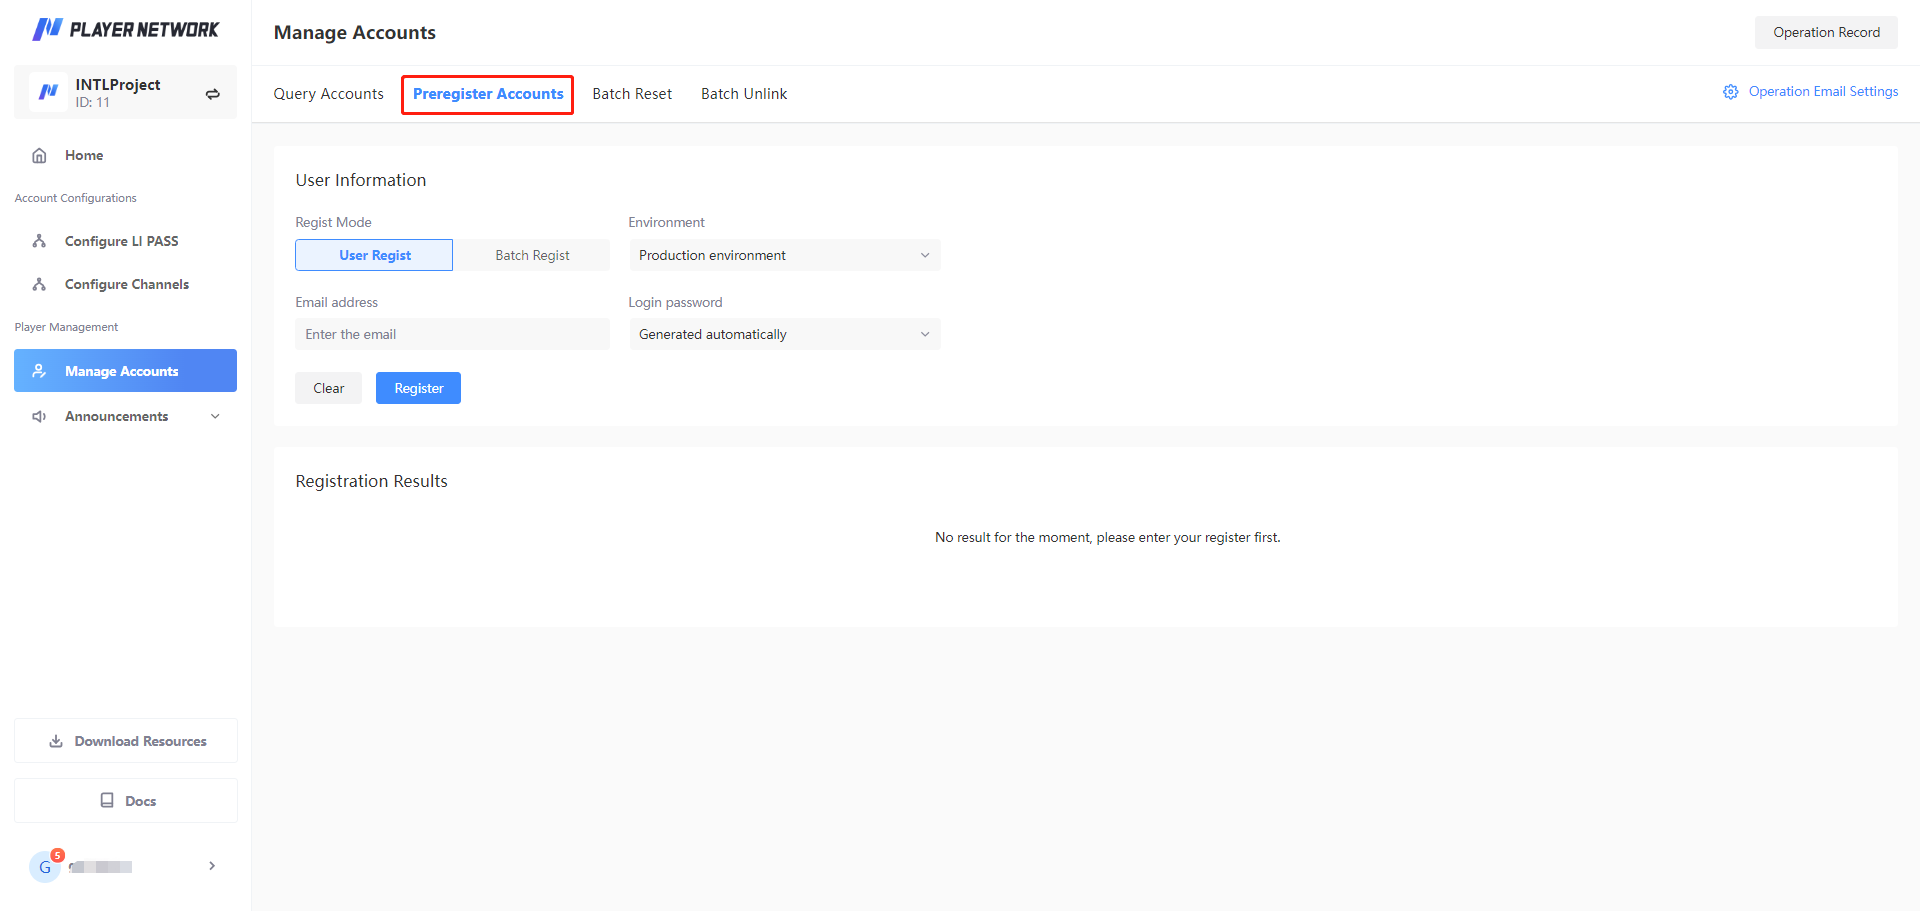
In the left sidebar, select Manage Accounts under Player Management, then click Preregister Accounts.
-
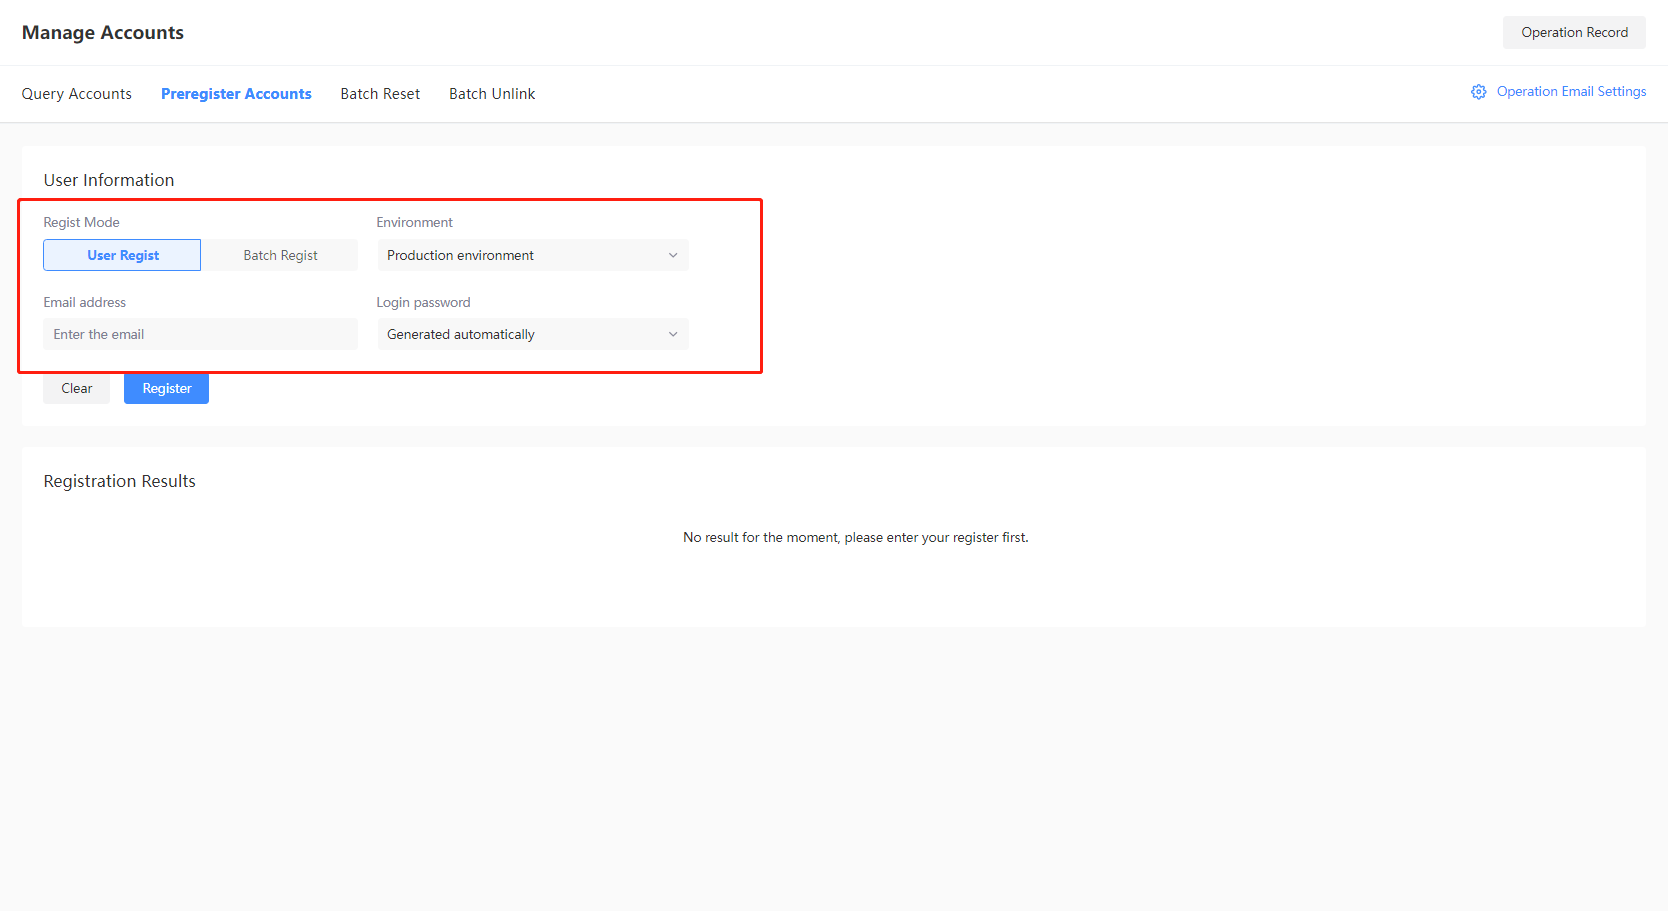
Click User Regist, then fill in the required information.
info- Email: A single email address.
- Login password: Choose to generate a random password automatically, or set it manually.
-
Verify that the preregistration information is correct, click Register to complete the preregistration.
Detailed account information such as password, OpenID, UID will be available for confirmation after successful creation of the account.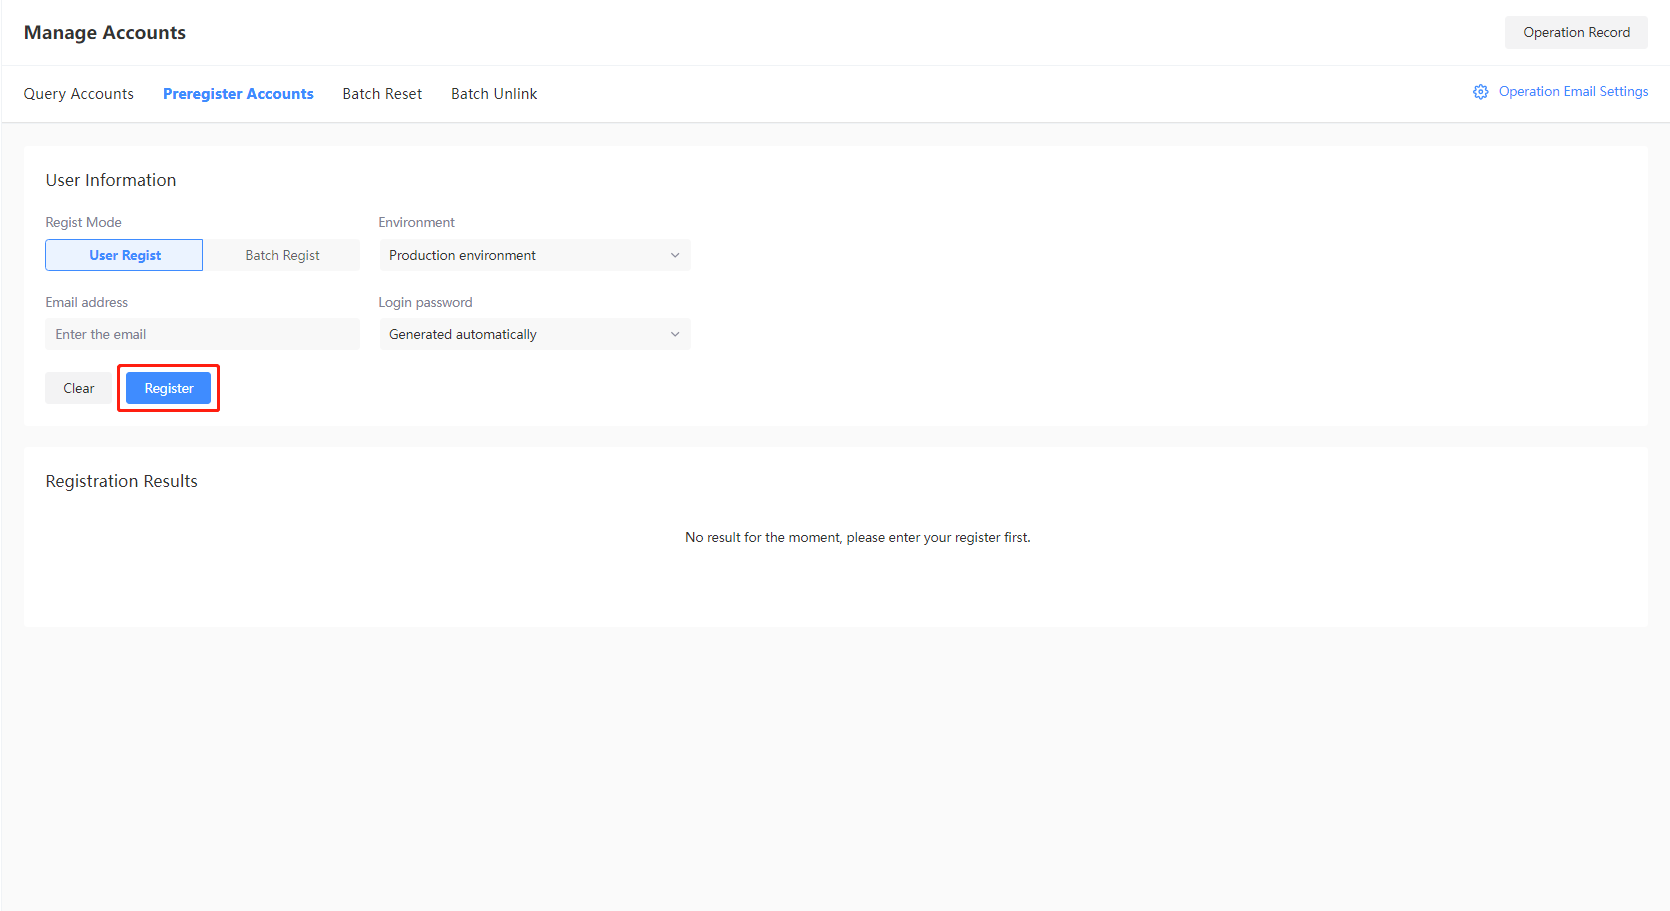
Multiple accounts
-
Log in to the Player Network Console.
-
In the left sidebar, select Manage Accounts under Player Management, then click Preregister Accounts.

-
Click Batch Regist, then select the environment of the account.

-
Click template to download a blank template. Enter the required information in the template according to the column headers, then click Upload to submit the user list.

-
Enter a Task name for your batch preregistration task, to retrieve the results after successful execution.

-
Click Register to start the batch preregistration task.

-
[Optional] Click Cancel to pause the batch preregistration task.

-
[Optional] Click Export to save the results to a file.

-
[Optional] Click Manage to manage the registered accounts, supported operations include Change Password, Delete Account, View Details.


Player account linking and email change
This function supports the following operations on a player account:
- Unlink third-party channels
- Change linked email address
- Unlink email address
Unlink third-party channels
To unlink third-party channels and guest accounts associated with the current OpenID.
If the current login method is the only login method for the game account, it cannot be unlinked.
Single account
-
Use the Player account query function to locate the player account.
-
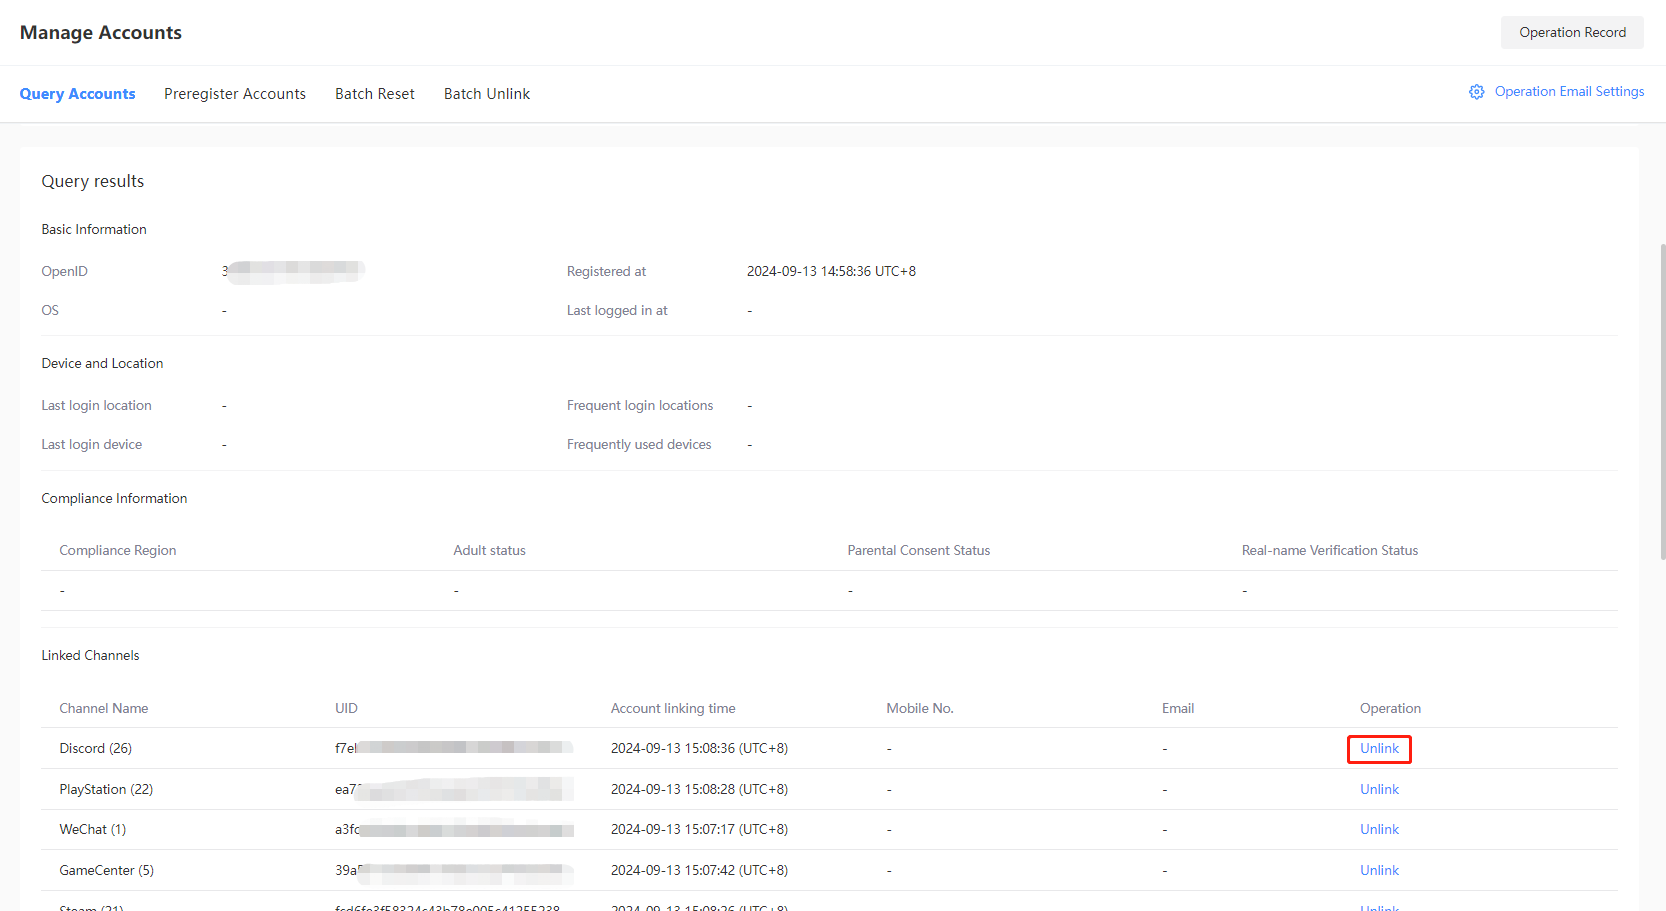
From the Linked Channels module in the query results page, click Unlink for the channel account.
-
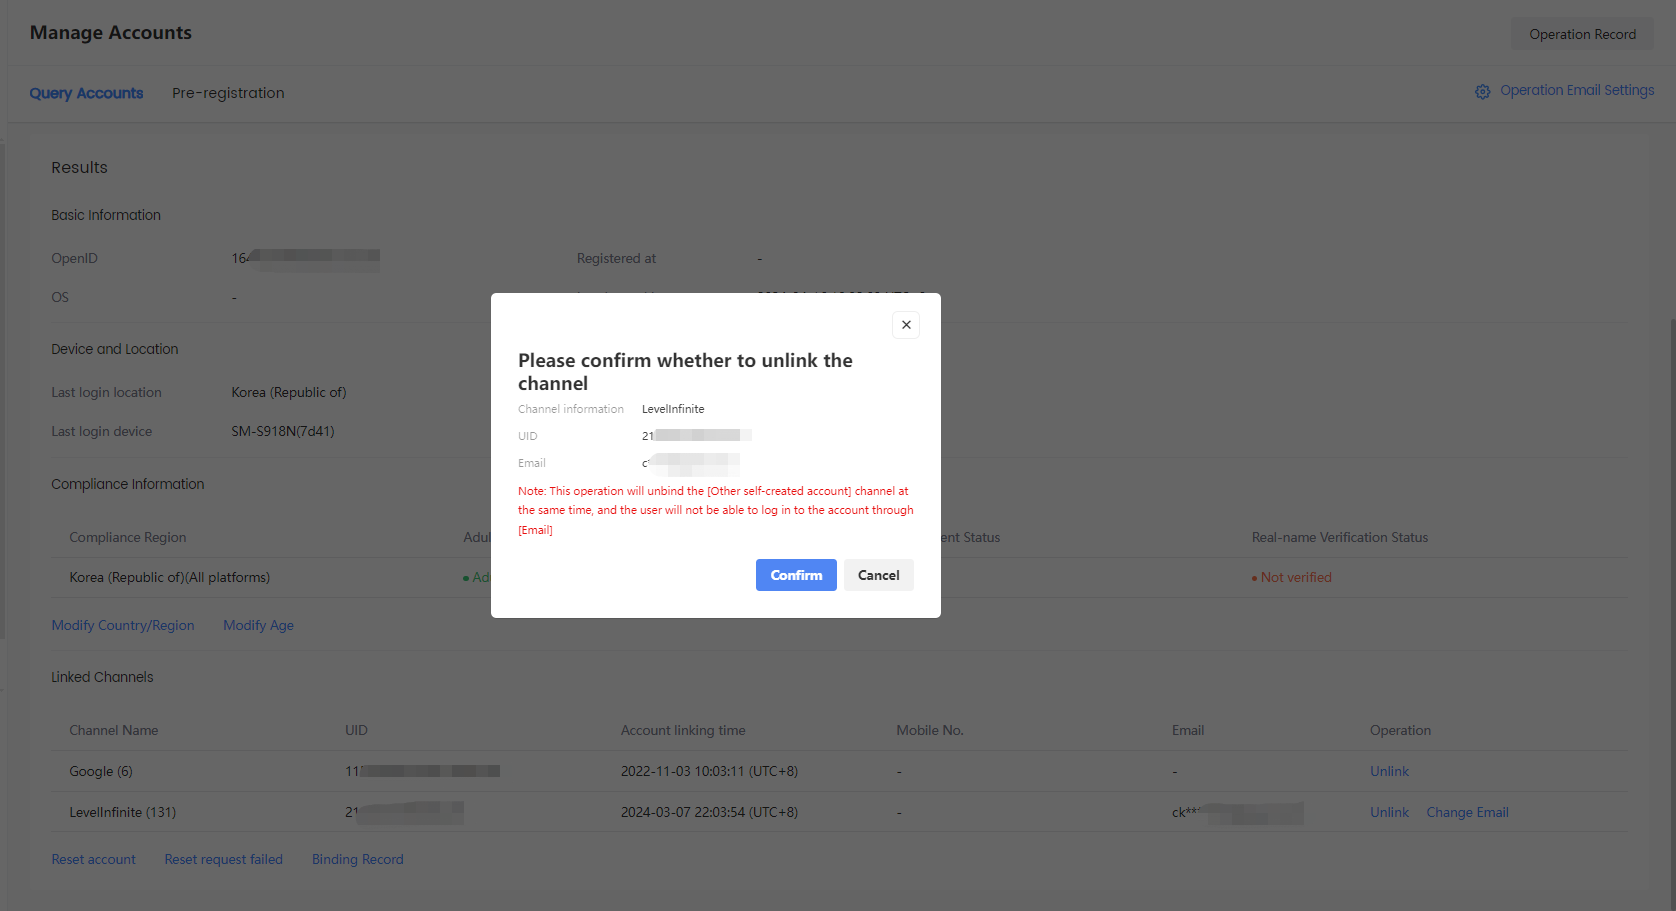
Click Confirm in the confirmation popup to complete the unlink operation.
Multiple accounts
-
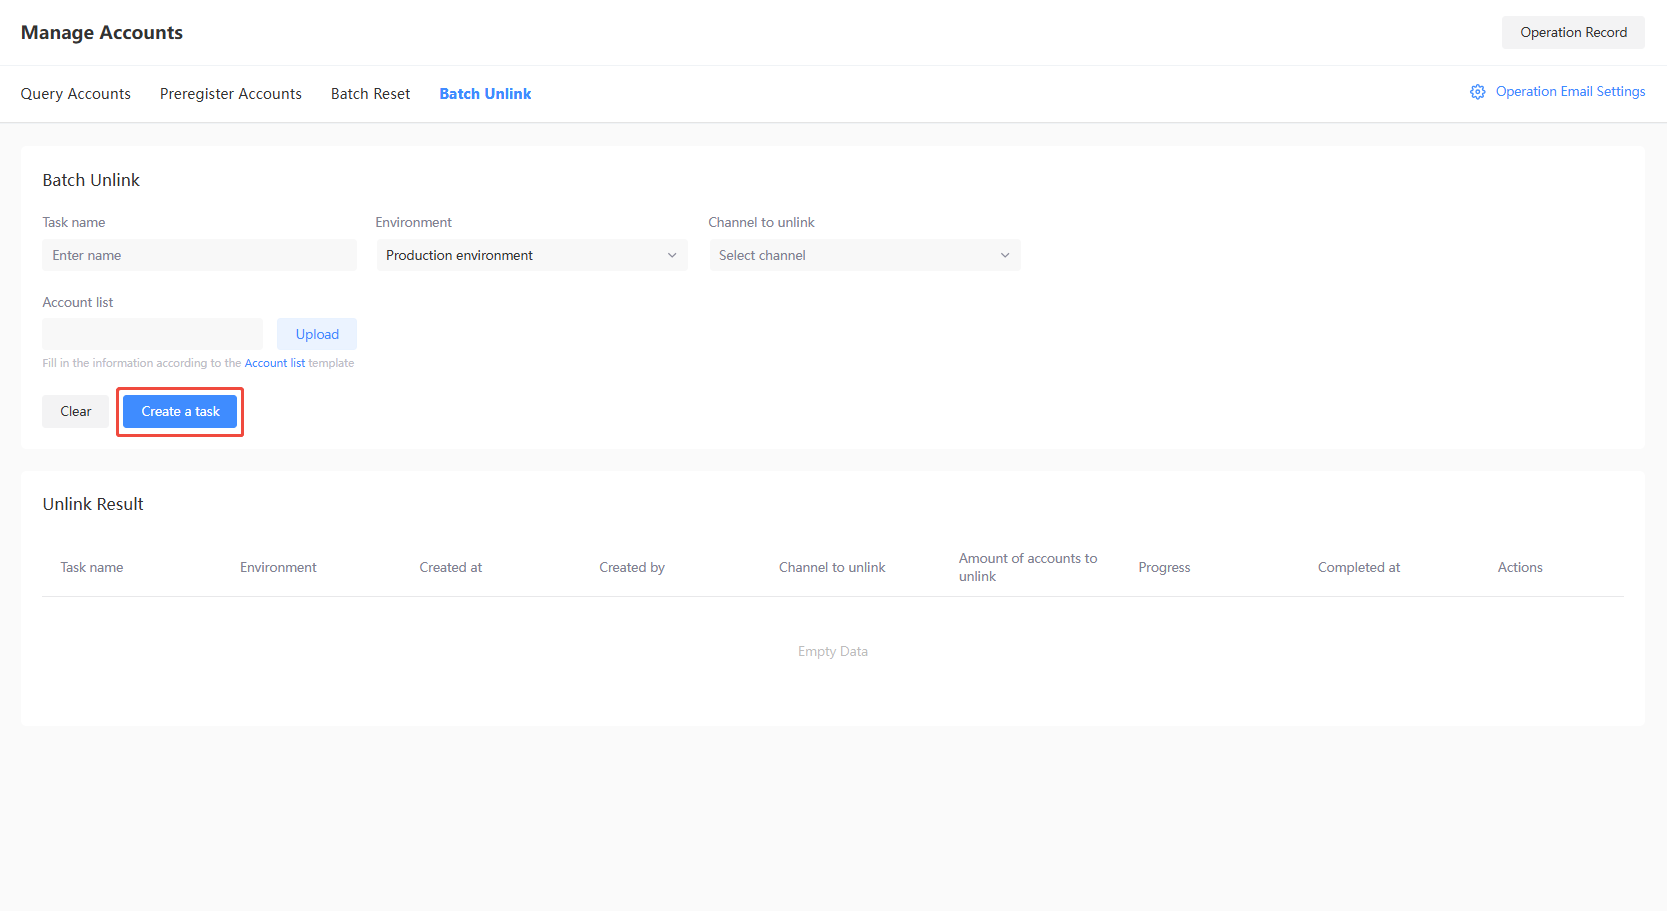
In the left sidebar, select Manage Accounts under Player Management, then click Batch Unlink.

-
Enter a name for the task, then select the environment of the account and third-party channel to unlink.

-
Click template to download a blank template file, then enter the required information in the template according to the column headers.

-
Click Upload to upload the list of users, then click Create a task to start the task. The progress of the task can be seen at the bottom of the page.

-
[Optional] Click Detail to go to the task results page, where you can view more details and manage the account information.

-
[Optional] Click Export Result to save the results to a file.

Change email address
To change the email address linked with the player account.
-
Use the Player account query function to locate the player account.
-
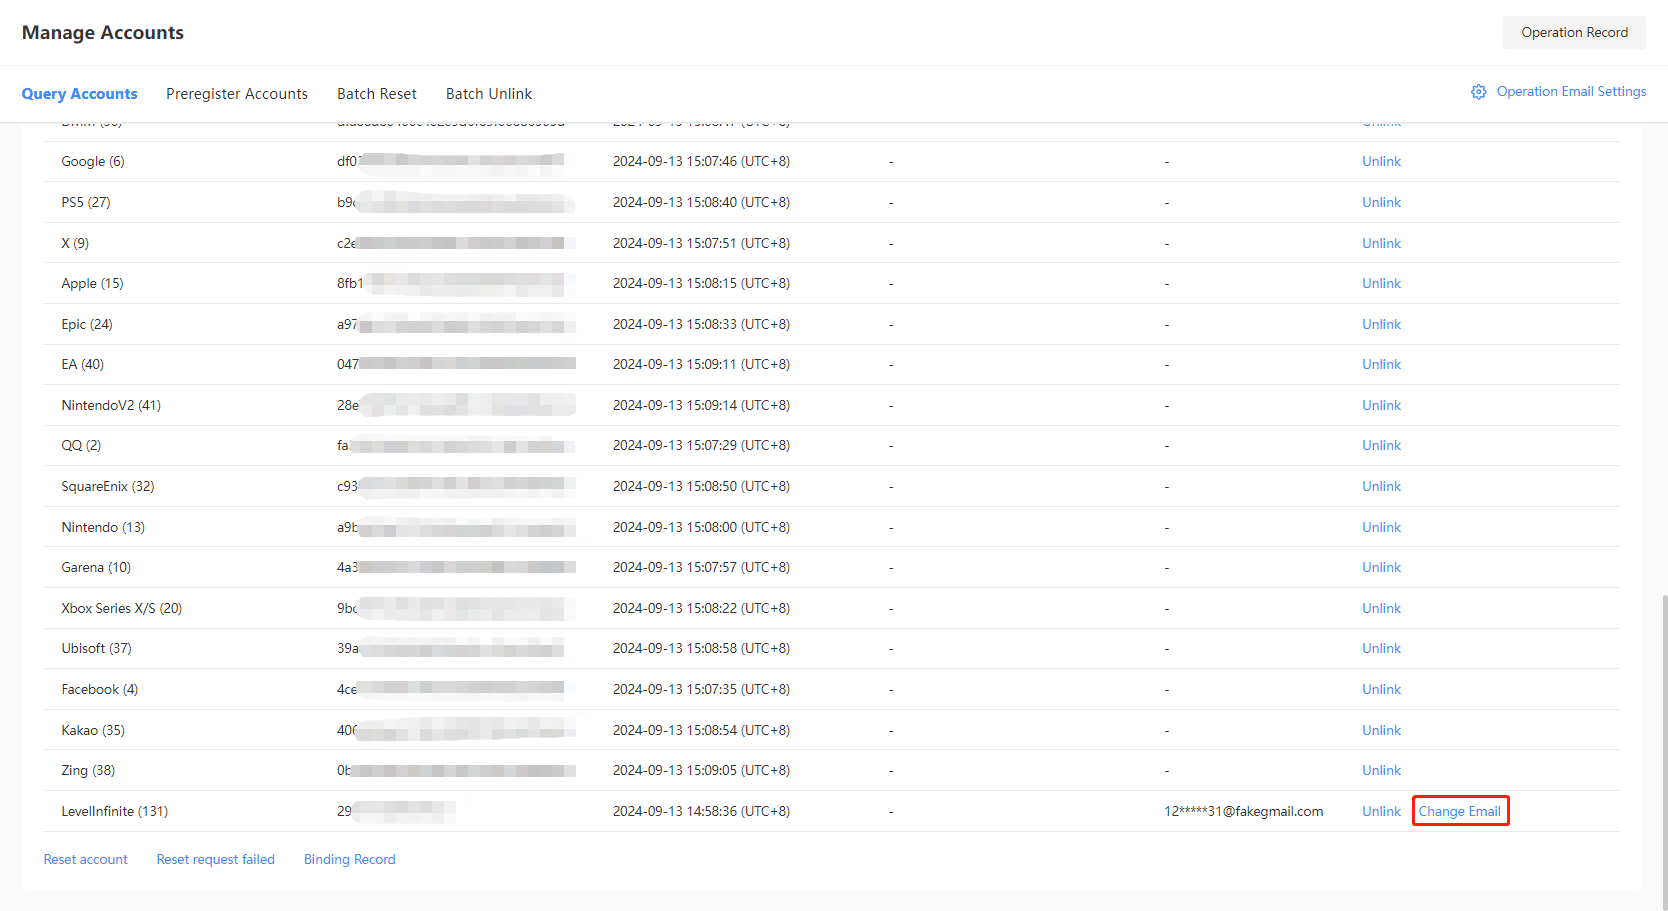
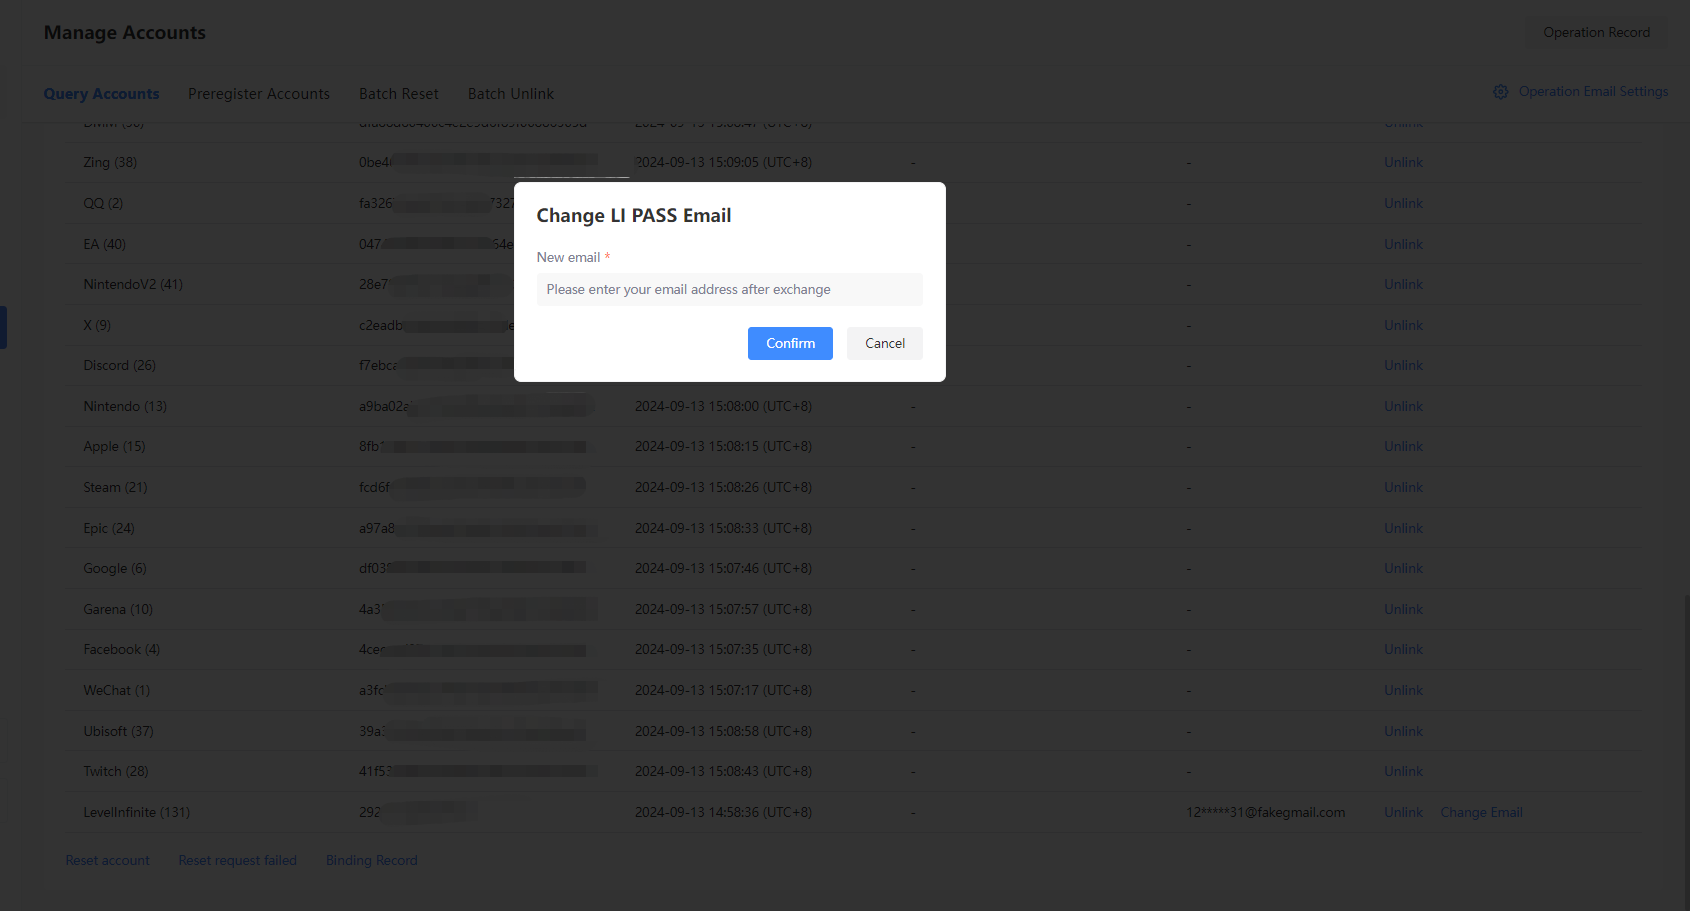
From the Linked Channels module in the query results page, click Change Email for the channel account.
-
Enter the email address to be linked to in the popup, then click Confirm to complete the operation.
Unlink email address
To unlink the email address linked with the current OpenID. After unlinking, the player will be unable to log in to their game account through the "Email + Password/Verification code" method.
-
Use the Player account query function to locate the player account.
-
From the Linked Channels module in the query results page, click Unlink for the corresponding account.

-
Click Confirm in the confirmation popup to complete the unlink operation.

Player account reset and deletion
This function supports the following operations on a player account:
- Reset player account
- Notify player of review results
- Delete player account
Reset player account
Account reset is an irreversible action, please handle with caution.
The reset account function deletes all channel accounts (third-party, guest, email) that are associated with the specified OpenID, then links it to the provided email address. An email will also be sent to notify the account holder of the results.
When a player requests to recover their account and has passed the internal review process, the customer service team may use this function to reset their account.
Single account
-
Use the Player account query function to locate the player account.
-
From the Linked Channels module in the query results page, click Reset account.

-
Enter the new email address provided by the player in the popup.

-
To notify the player of the results automatically, toggle on the corresponding button and select the Email language for the template.
 note
noteBefore using this feature, a template for the selected language must first be set. Click Template to go to the email template configuration page.
For more information, see Email Template Configuration. -
After confirming the information, click Confirm to perform the reset.
Multiple accounts
-
In the left sidebar, select Manage Accounts under Player Management, then click Batch Reset.

-
Enter a name for the task, then select the environment of the account.

-
Choose Do not notify players, or Email players in the specified email language.

-
Click template to download a blank template file, then enter the required information in the template according to the column headers.

-
Click Upload to upload the user list template, the list of users, then click Reset to start the task.

-
[Optional] To stop executing the batch reset task, click Cancel and then Confirm in the confirmation popup.

-
[Optional] Click Detail to go to the task results page, where you can view more details and manage the account information.

-
[Optional] Click Export Result to save the results to a file.

Reset request failed
When a player requests to recover their account but did not pass the internal review process, use this function to notify the player of the results.
An email will be sent to notify the player that their application was unsuccessful.
-
Use the Player account query function to locate the player account.
-
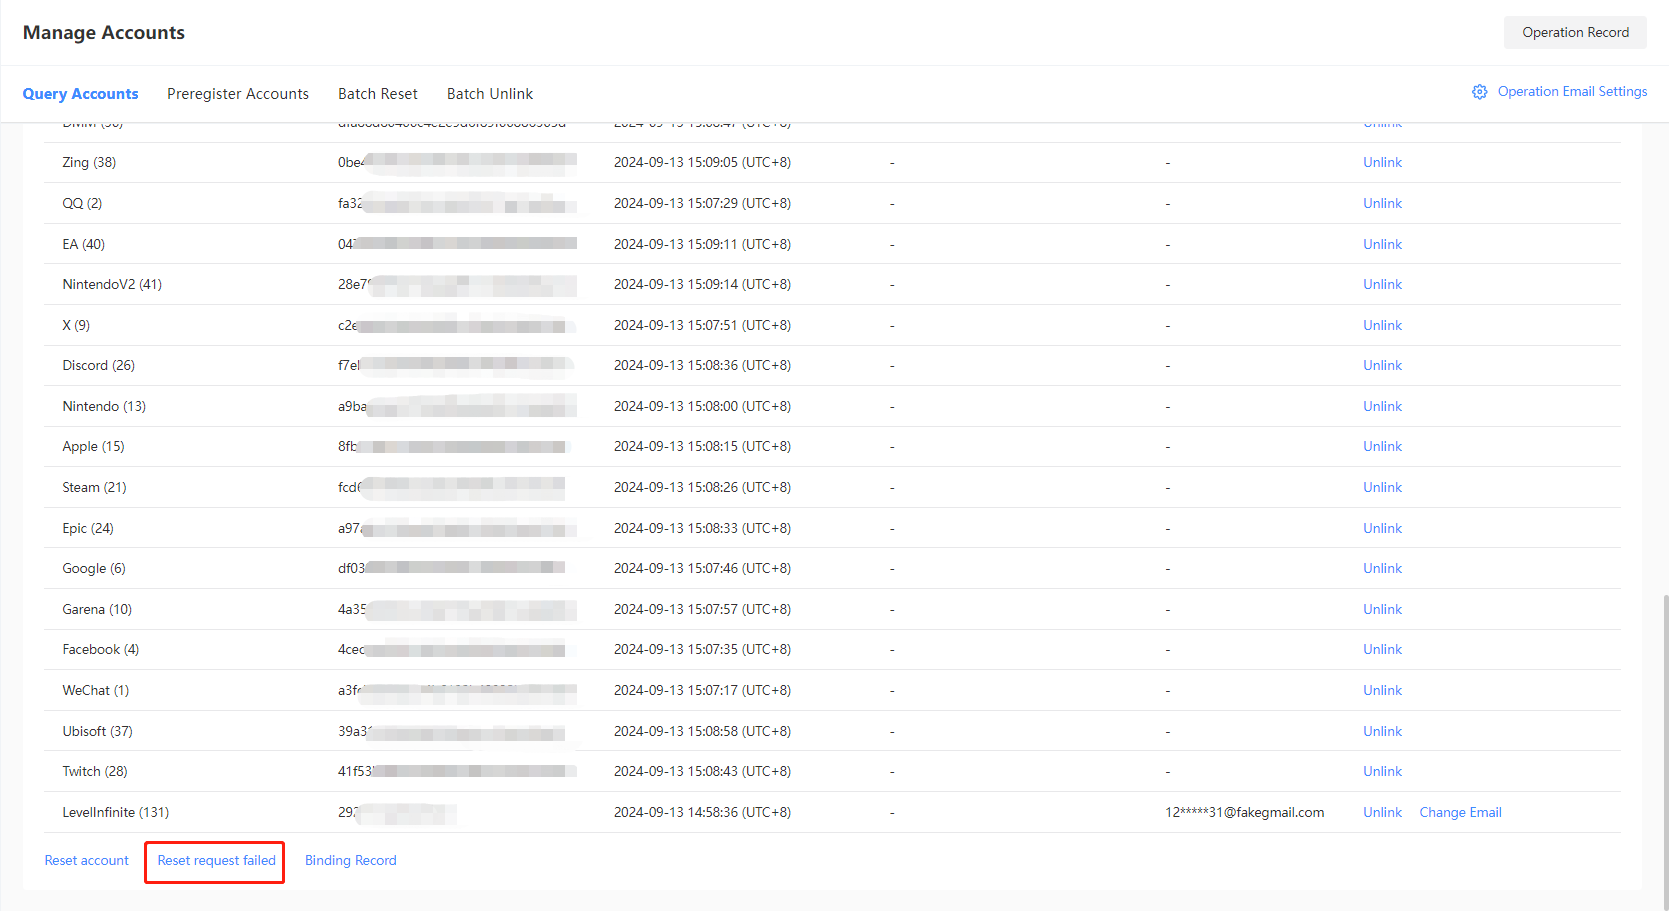
Click Reset request failed.
-
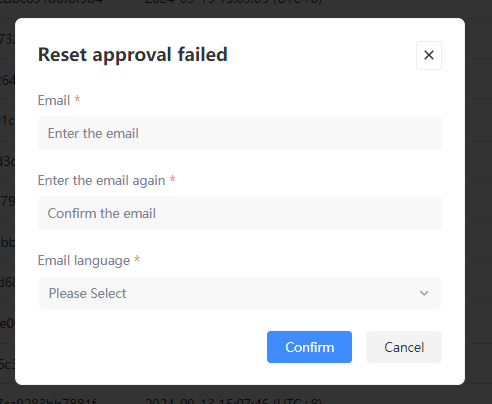
Enter the email address provided by the player, then select the Email language.
-
After confirming the information, click Confirm to notify the player that their application was unsuccessful.
Delete account
Account deletion is an irreversible action, please handle with caution.
The delete account function deletes all associated channel accounts, together with the specified OpenID.
To avoid having to prepare a large number of email addresses during the testing process, this function can be used to remove email addresses that are tied to an OpenID. After removal, the email addresses can then be reused, thereby saving testing time.
The delete account function is only available for the test environment, and the Delete account button will not be visible for the production environment.
- Use the Player account query function to locate the player account.
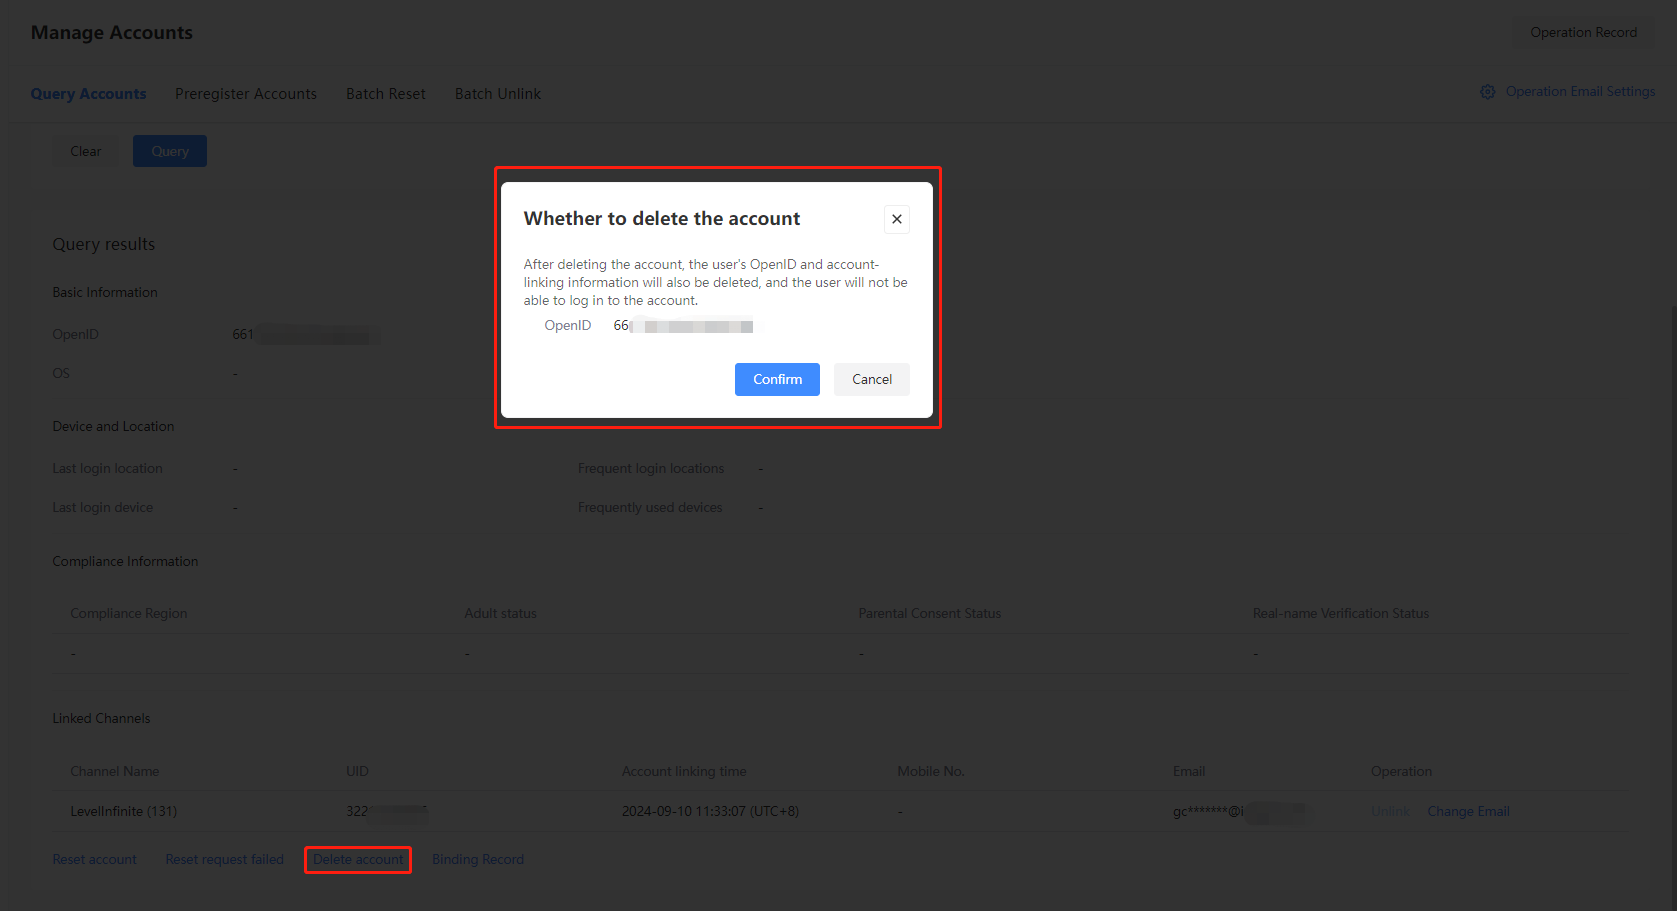
- Click Delete account.
- Click Confirm to delete the player account.
Email template configuration
Follow the below steps to configure email templates.
-
Log in to the Player Network Console.
-
In the left sidebar, select Manage Accounts under Player Management.
-
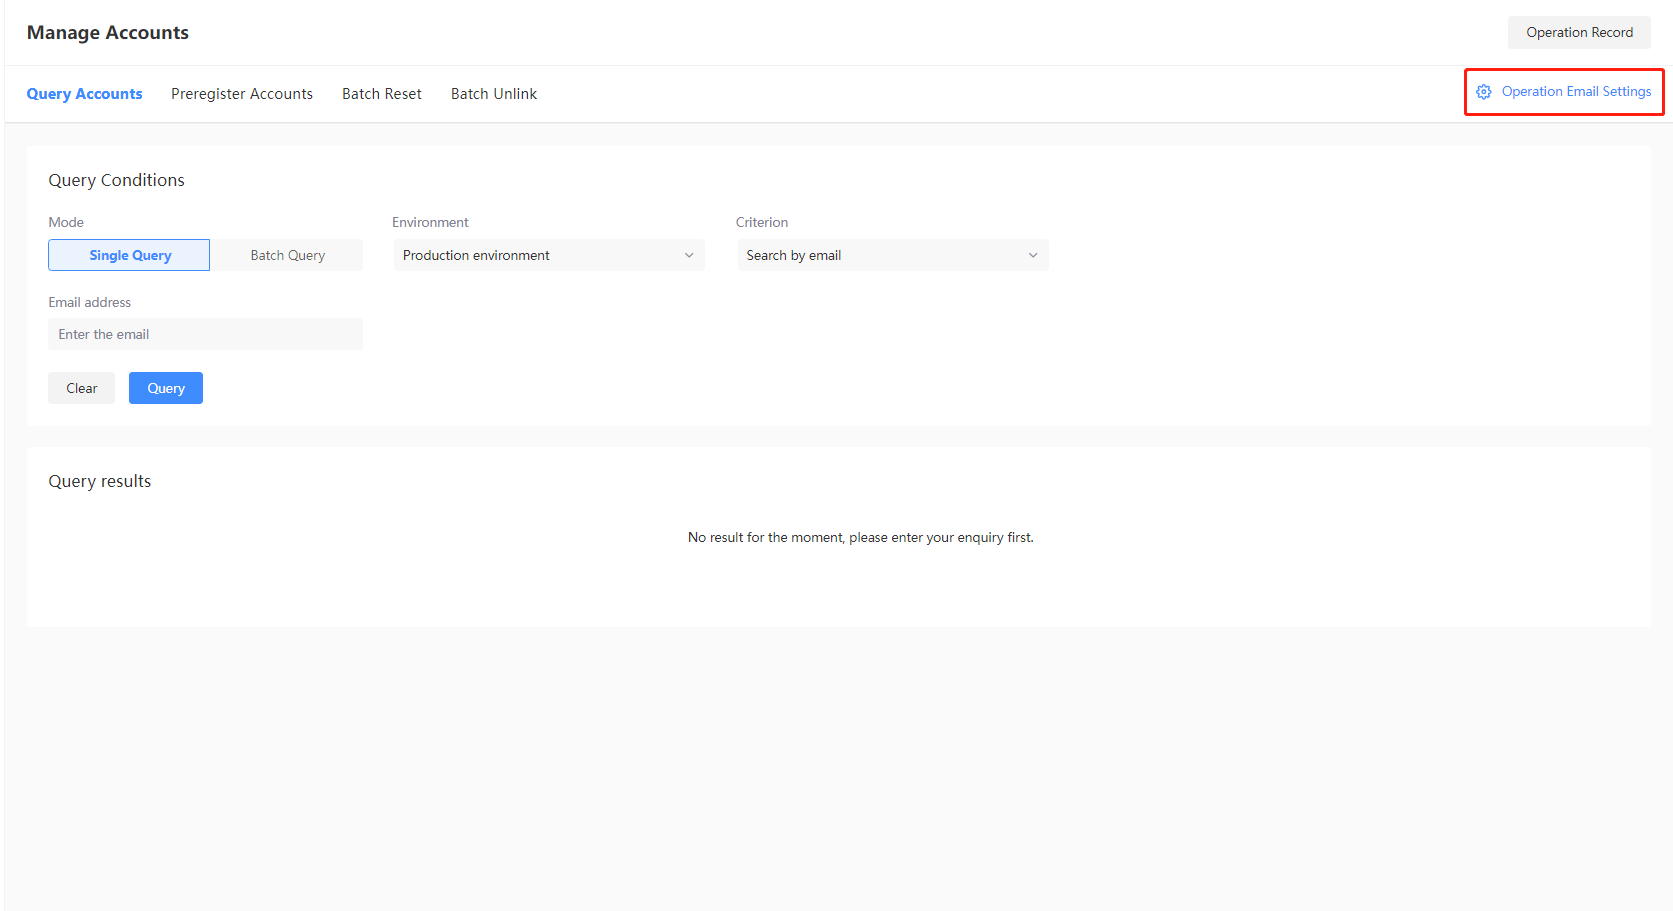
Click Operation Email Settings at the top of the page to enter the email template configuration page.
-
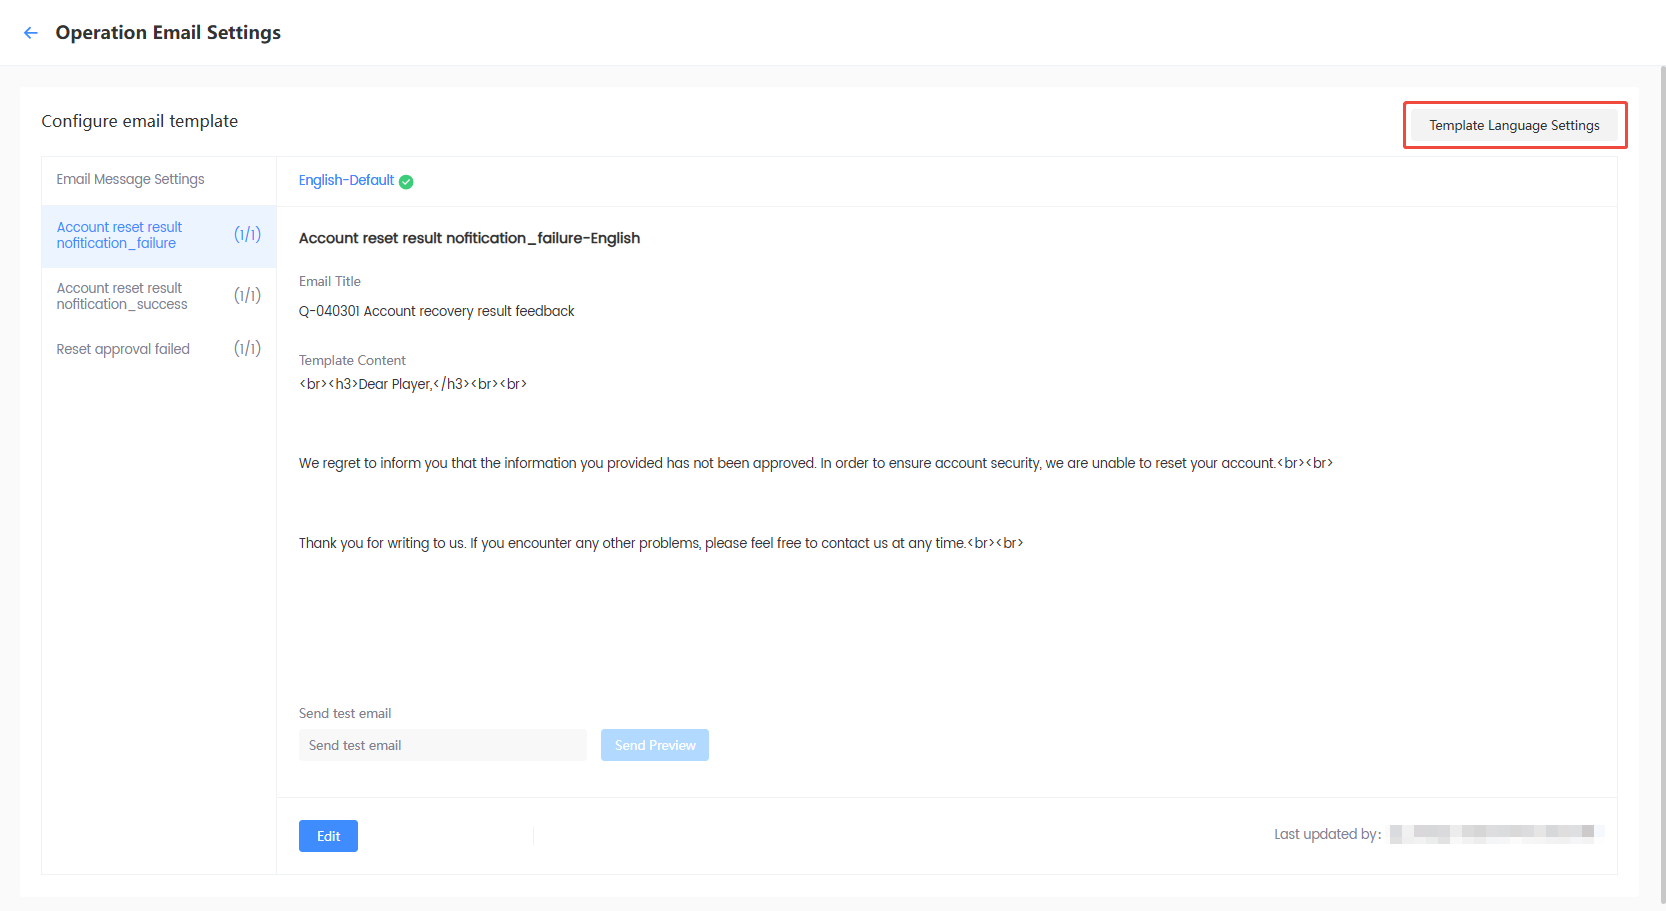
[Optional] Operation emails are provided in English by default. To configure for other languages:
-
Click Template Language Settings.
-
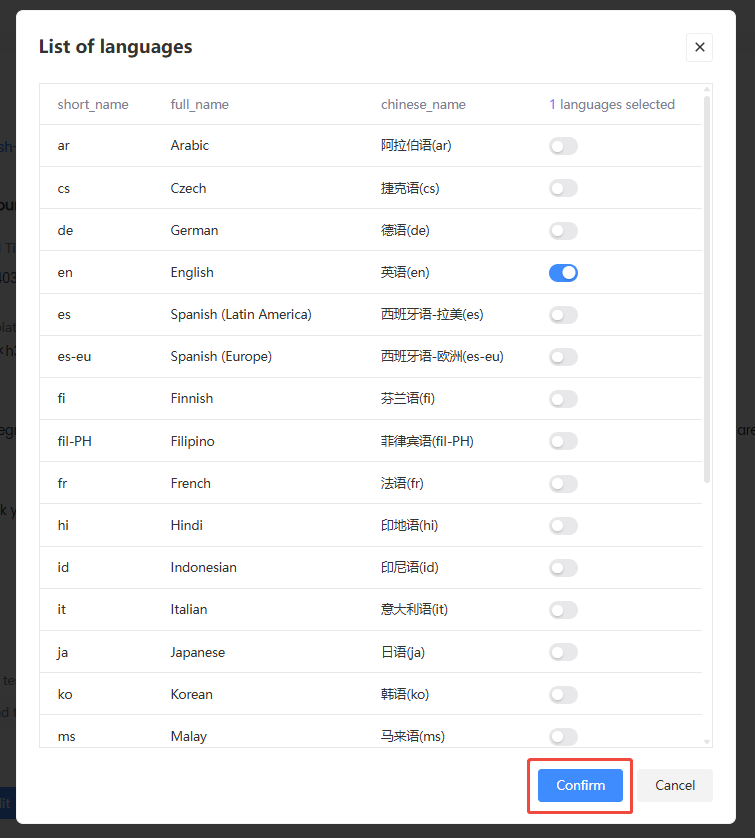
Select the required languages, then click Confirm to save the current configuration.
-
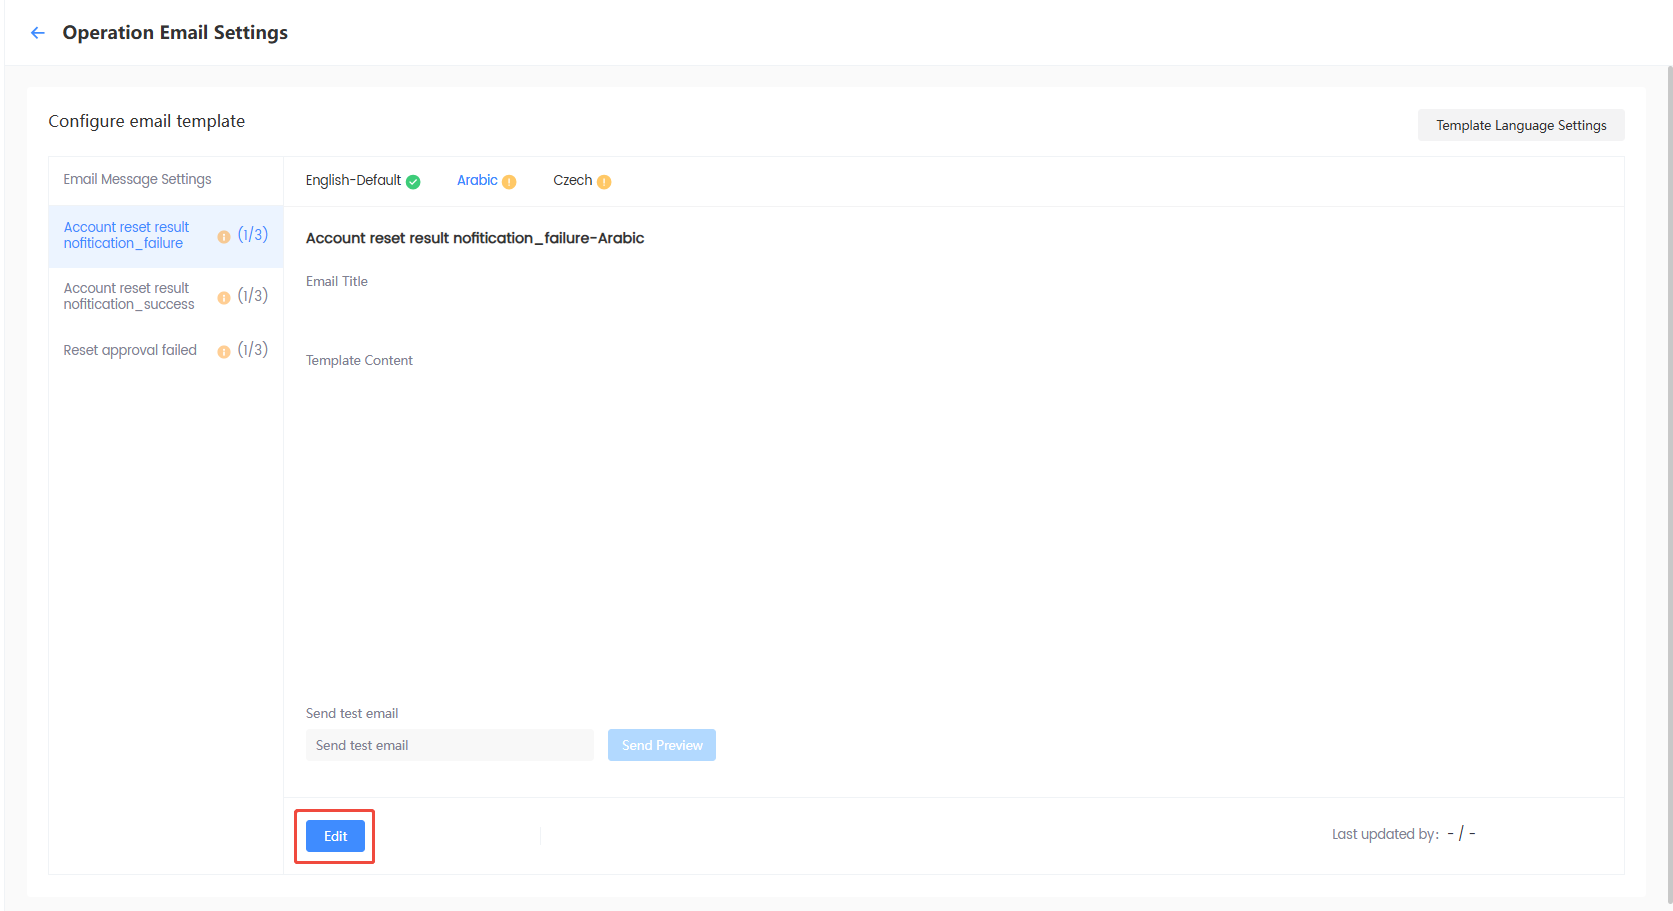
Click Edit to configure the email template for each selected language.
-
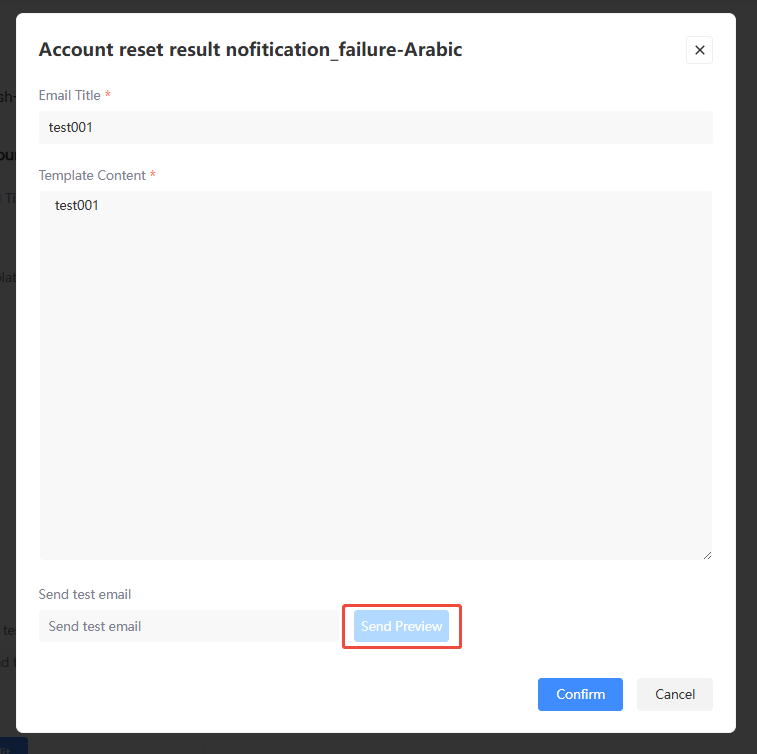
To verify the configured settings, enter an email address for testing under Send test email, then click Send Preview.
-
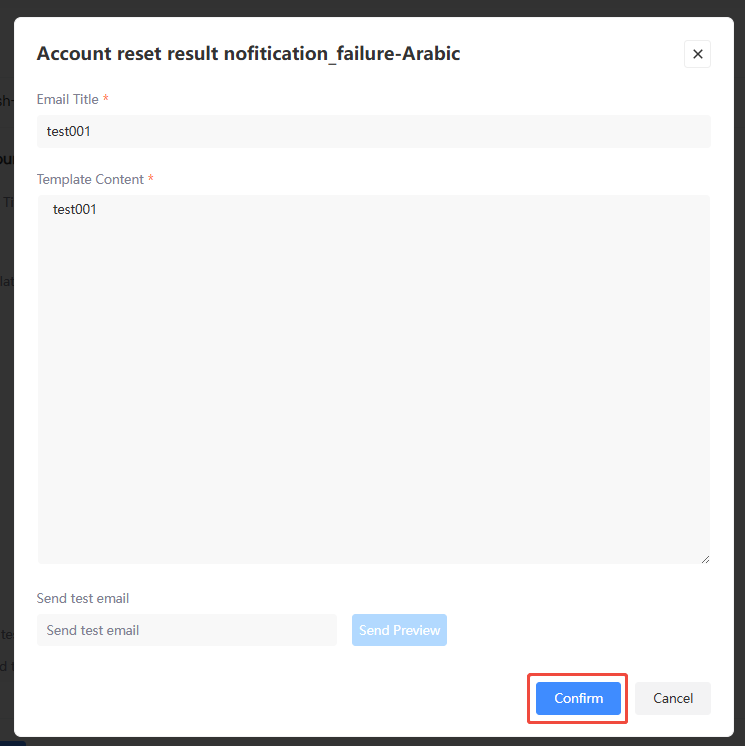
After confirming that the email appears as intended, click Confirm to save.
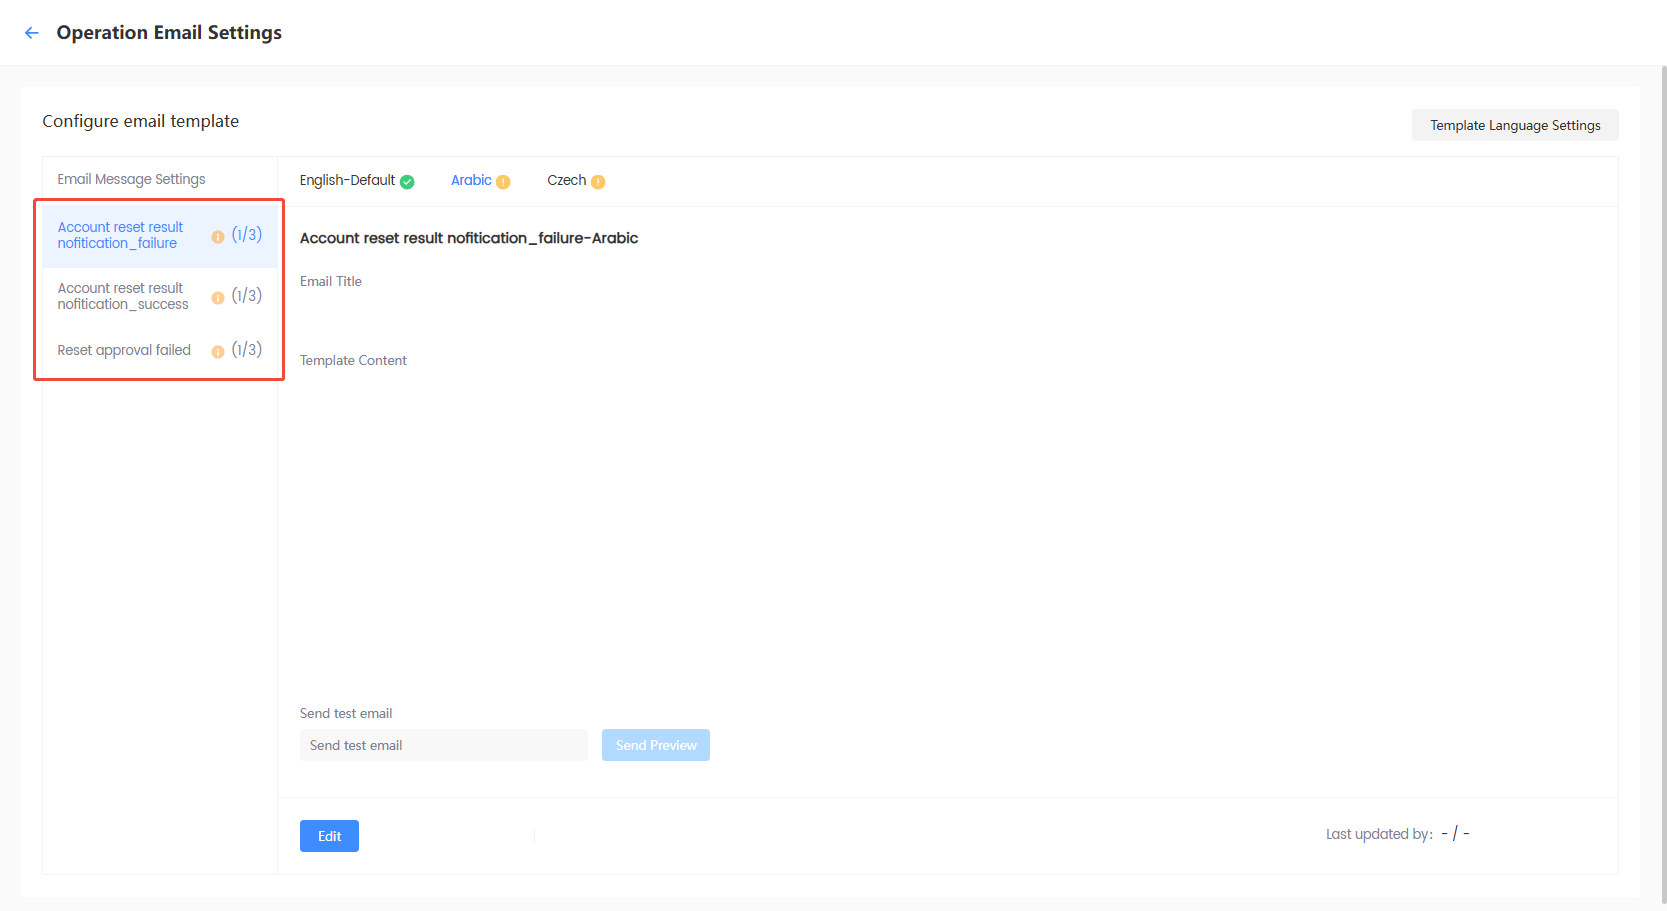
noteCurrently, 3 types of email content are supported:
- Account reset result nofitication_failure
- Account reset result nofitication_success
- Reset approval failed
-