Configure Announcements
Game operators are required to make sure that players are aware of all types of game updates via regular in-game announcements or popups. For example, when a new summer event is added to the game, game operators can post an announcement on the bulletin board inside the game to inform players and encourage active participation. Generally, announcements follow a predetermined format, and is usually turned into a template so that they can be quickly created and posted.
Announcement publishing workflow
All announcements, from preview to publish in the production environment, adhere to the established procedures depicted below.

| Announcement status (The current publication status) | Editing | Preview in test environment | Preview in production environment | Publish in production environment |
|---|---|---|---|---|
| Editing | Edit announcement | Preview in test environment before going offline, the status is changed to: Preview in test environment | Preview in production environment before going offline, the status is changed to: Preview in production environment | Publish in production environment before going offline, the status is changed to: Publish in production environment |
| Preview (Test Environment) | No such operation can be conducted, unable to edit before the announcement goes offline. | Preview in test environment before going offline (current status) | Preview in production environment before going offline, the status is changed to: Preview in production environment | Publish in production environment before going offline, and the status is changed to: Publish in production environment |
| Preview (Production environment) | No such operation can be conducted, unable to edit before the announcement goes offline. | No such operation can be conducted | Preview in production environment before going offline, and the status is changed to (current status) | Publish in production environment before going offline, the status is changed to: Publish in production environment |
| Publish (Production Environment) | Reviewers can modify published announcement online. | No such operation can be conducted | No such operation can be conducted | Publish in production environment before going offline (current status) |
The term "operation" refers to the operations performed on announcements through the Player Network Console, which includes editing, copying, preview in test environment, preview in production environment, publishing in production environment, and taking offline.
Settings
Before configuring announcements, it is recommended to complete the configurations for region and server, and announcement approval settings.
Region Configurations
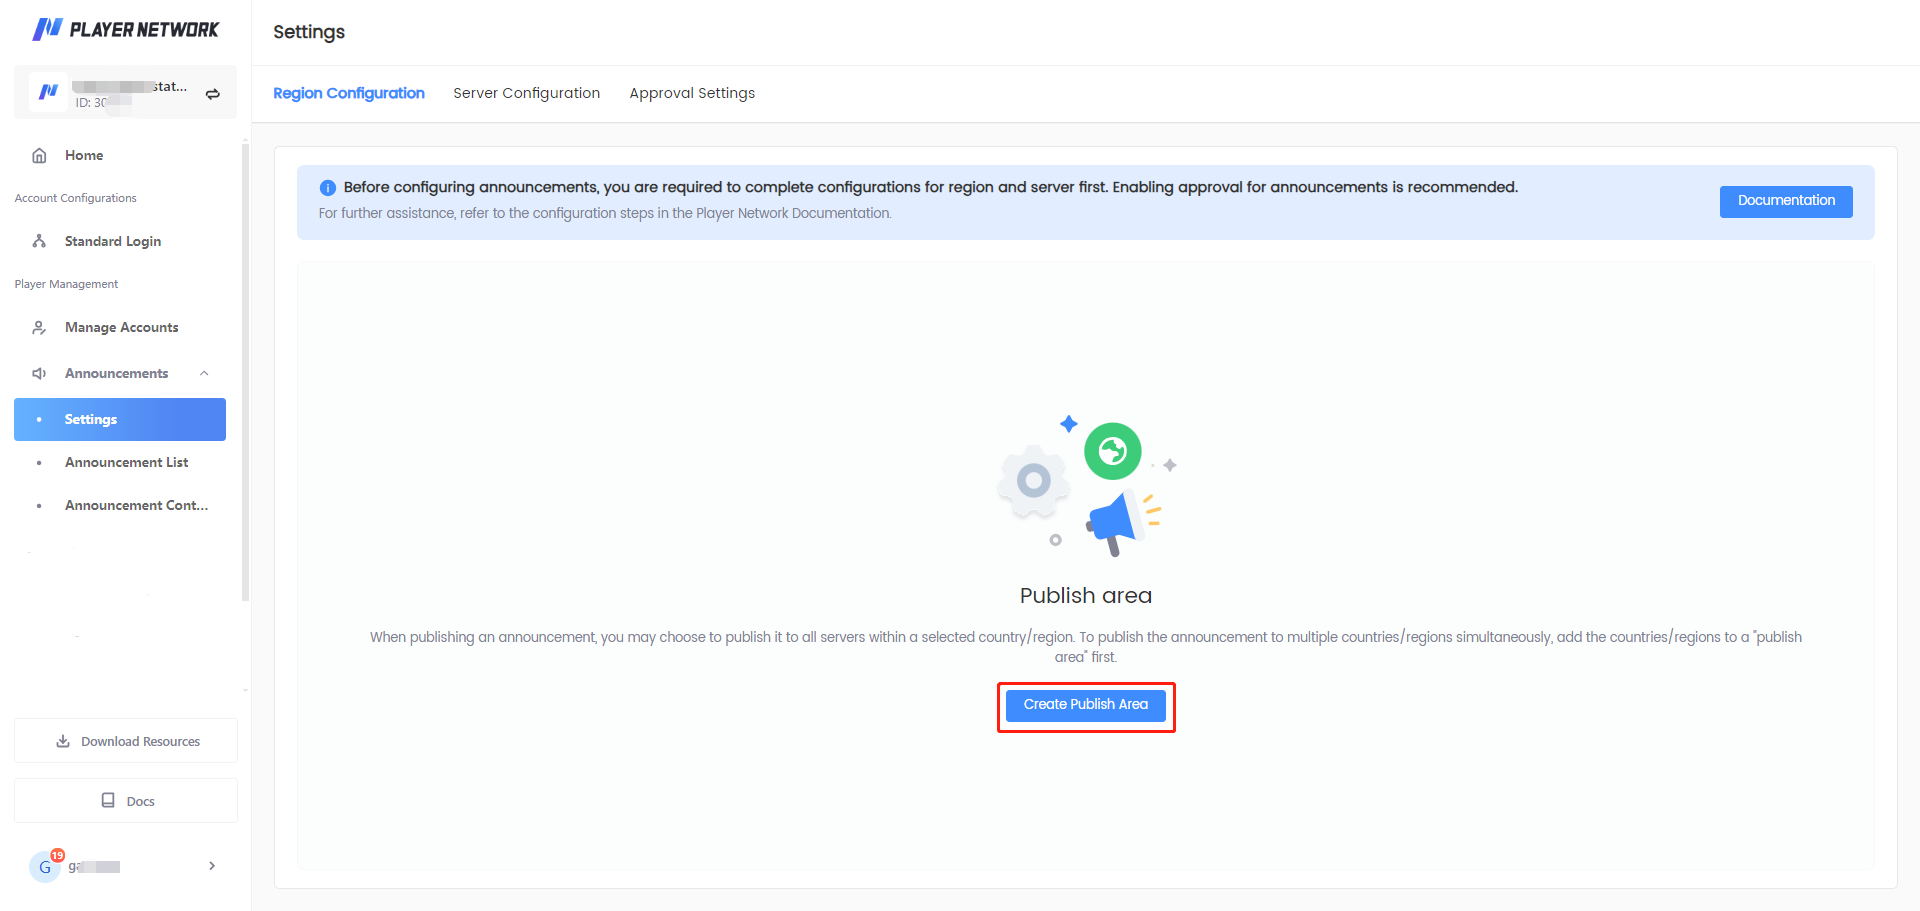
When publishing an announcement, the operator needs to select the publish area of the announcement. To publish the announcement to multiple countries/regions simultaneously, add the countries/regions to a publish area first. All created publish areas can be found in the respective dropdown box when previewing in test environment, previewing in production environment, and publishing announcements to the production environment.
-
Log in to the Player Network Console.
-
In the left sidebar, click Announcements > Settings under Player Management.
-
Click Region Configurations > Create Publish Area.
-
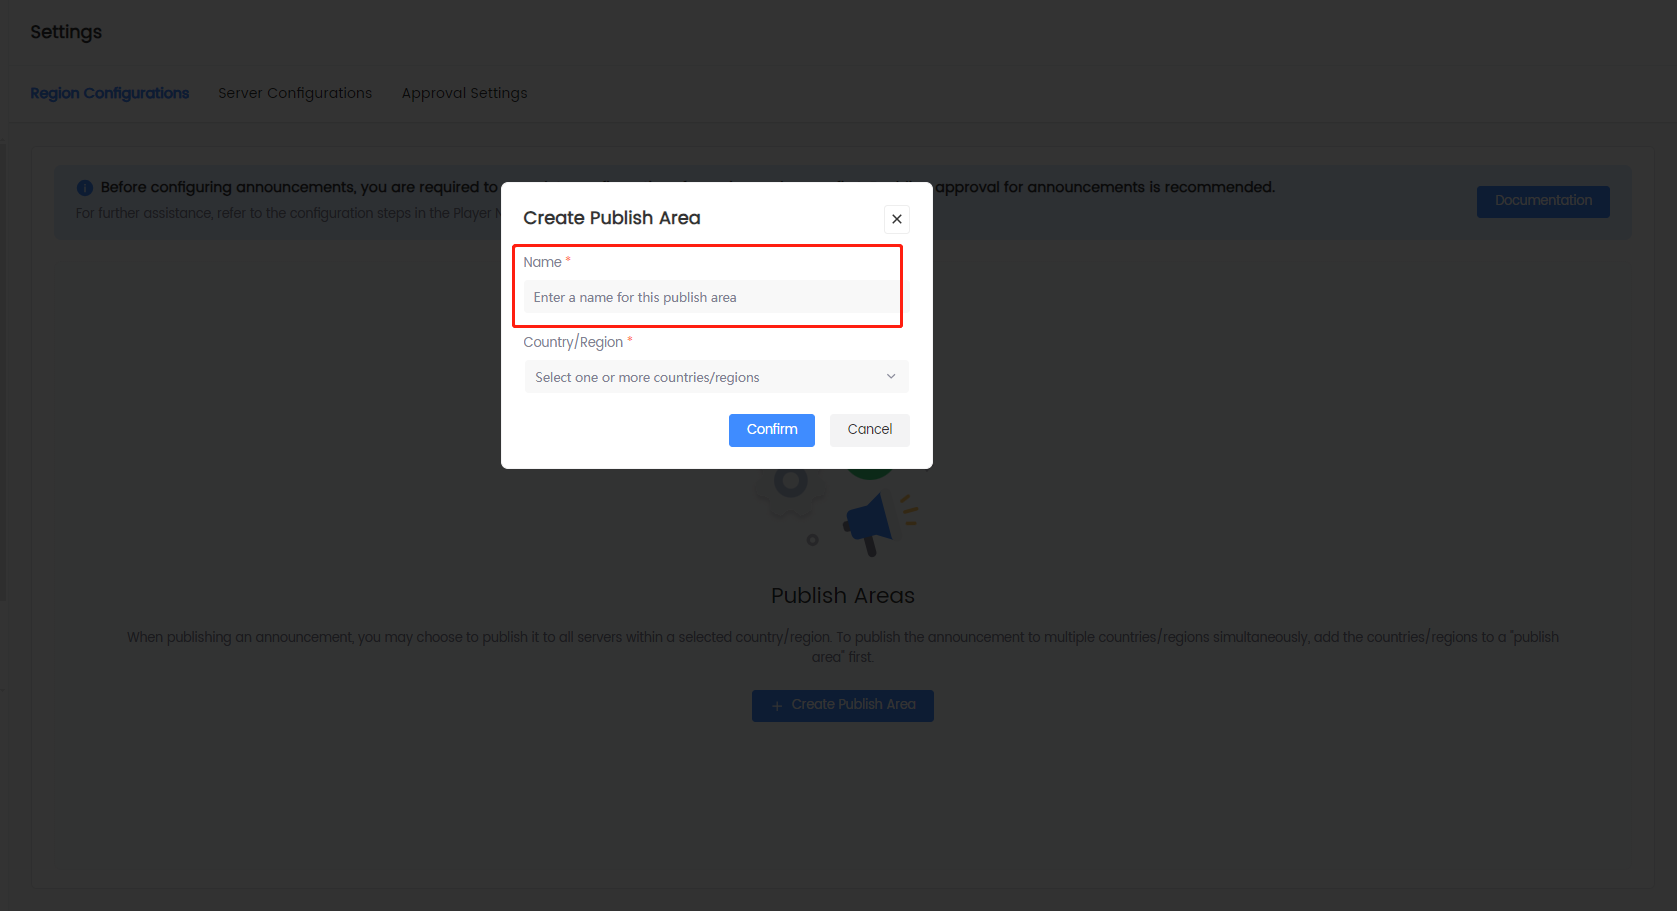
In the Create Publish Area popup window, enter a name in the Name field to specify the region group, and select the desired Countries/Regions.
-
Click Confirm to complete the creation of the publish area.
Announcement operators can view, edit, or delete existing publish areas in the publish area list.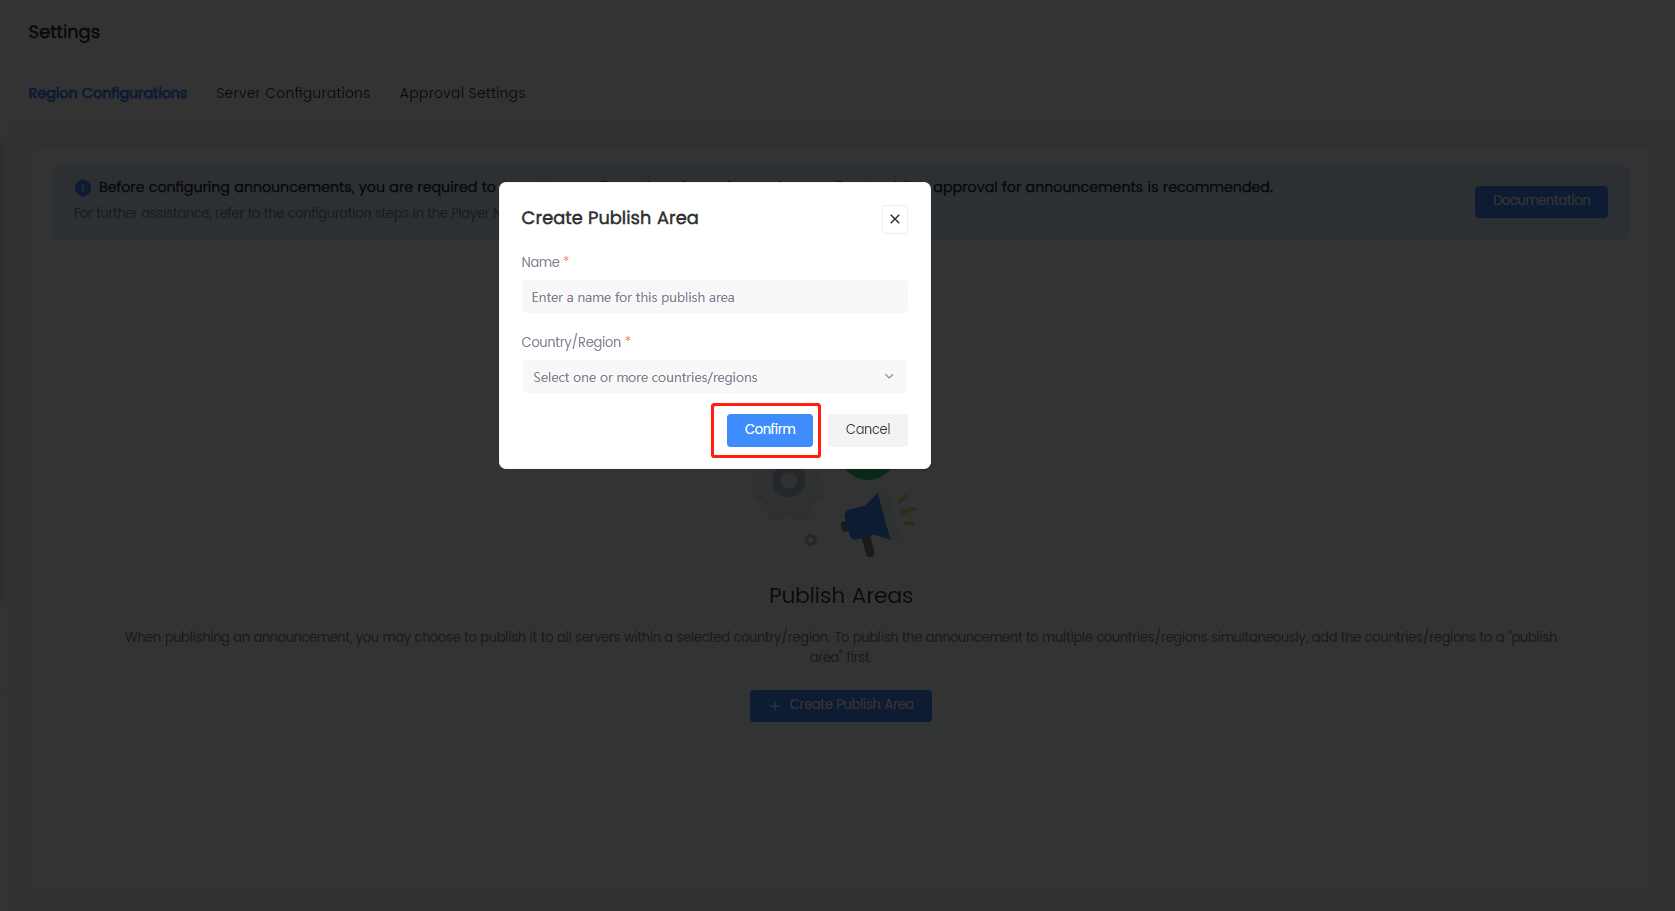
Server Configurations
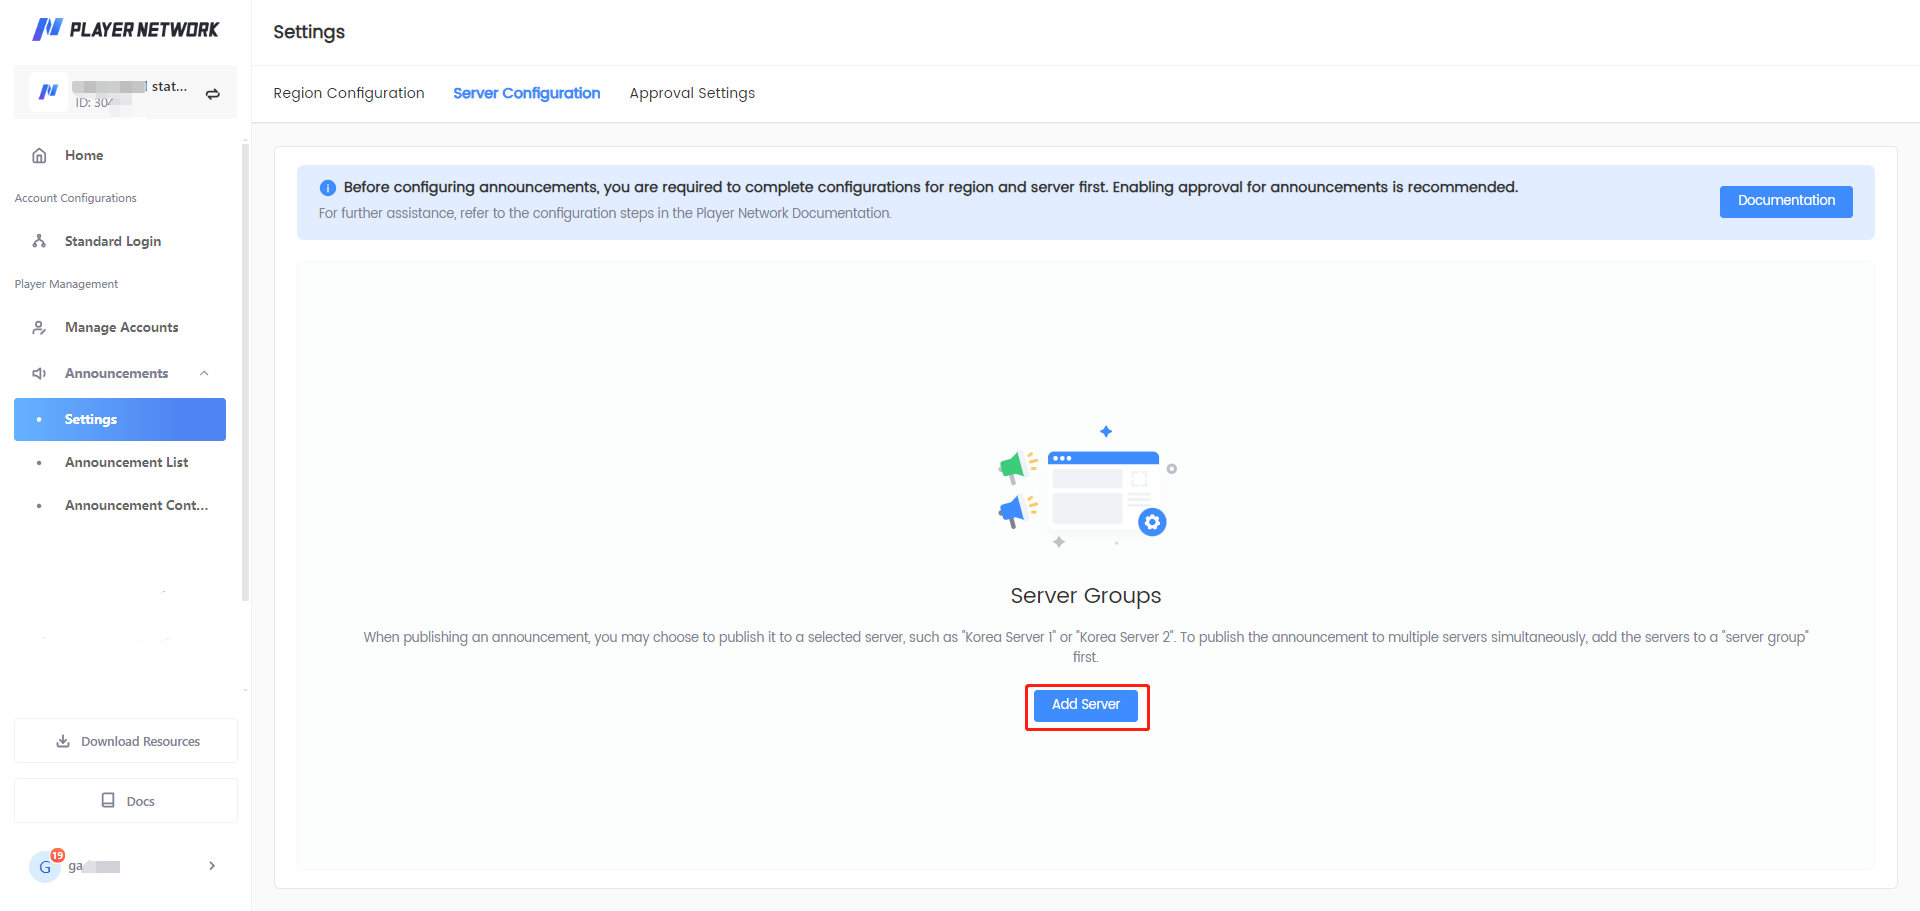
When publishing announcements, operators can select the server group for the announcement publication based on their needs.
-
Log in to the Player Network Console.
-
In the left sidebar, click Announcements > Settings under Player Management.
-
Click Server Configurations > Create Server Group.
-
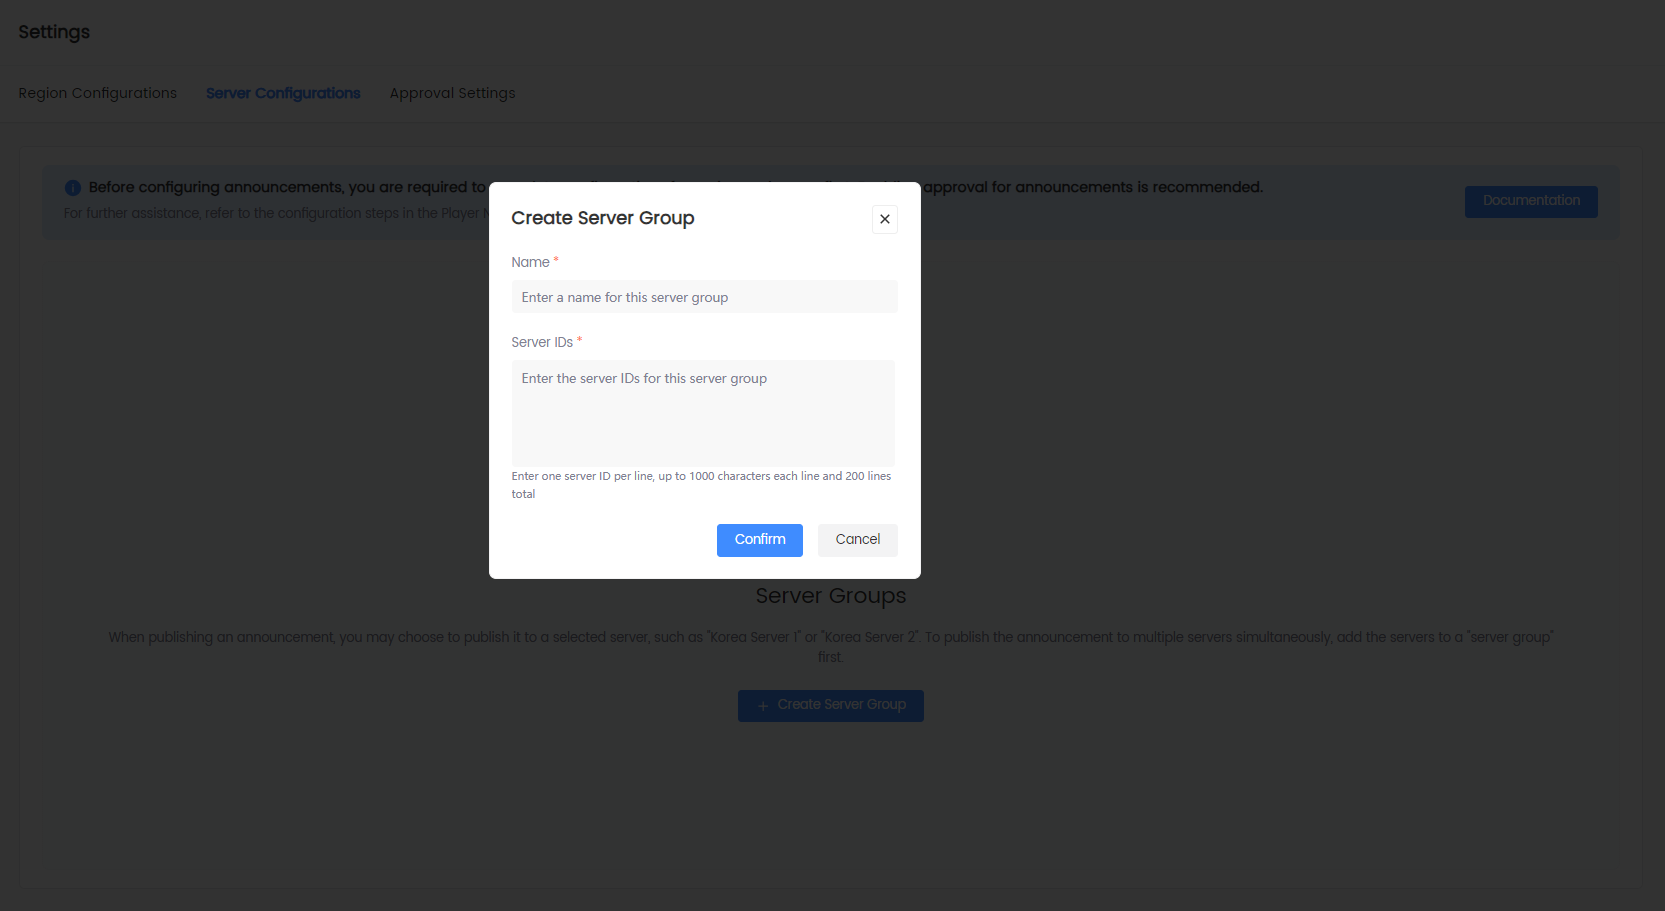
In the Create Server Group popup window, specify the Name field, and enter the ID in the Server IDs field to identify the corresponding server.
-
Click Confirm to complete the creation of the server group.
Announcement operators can view, edit, or delete existing server groups in the server group list.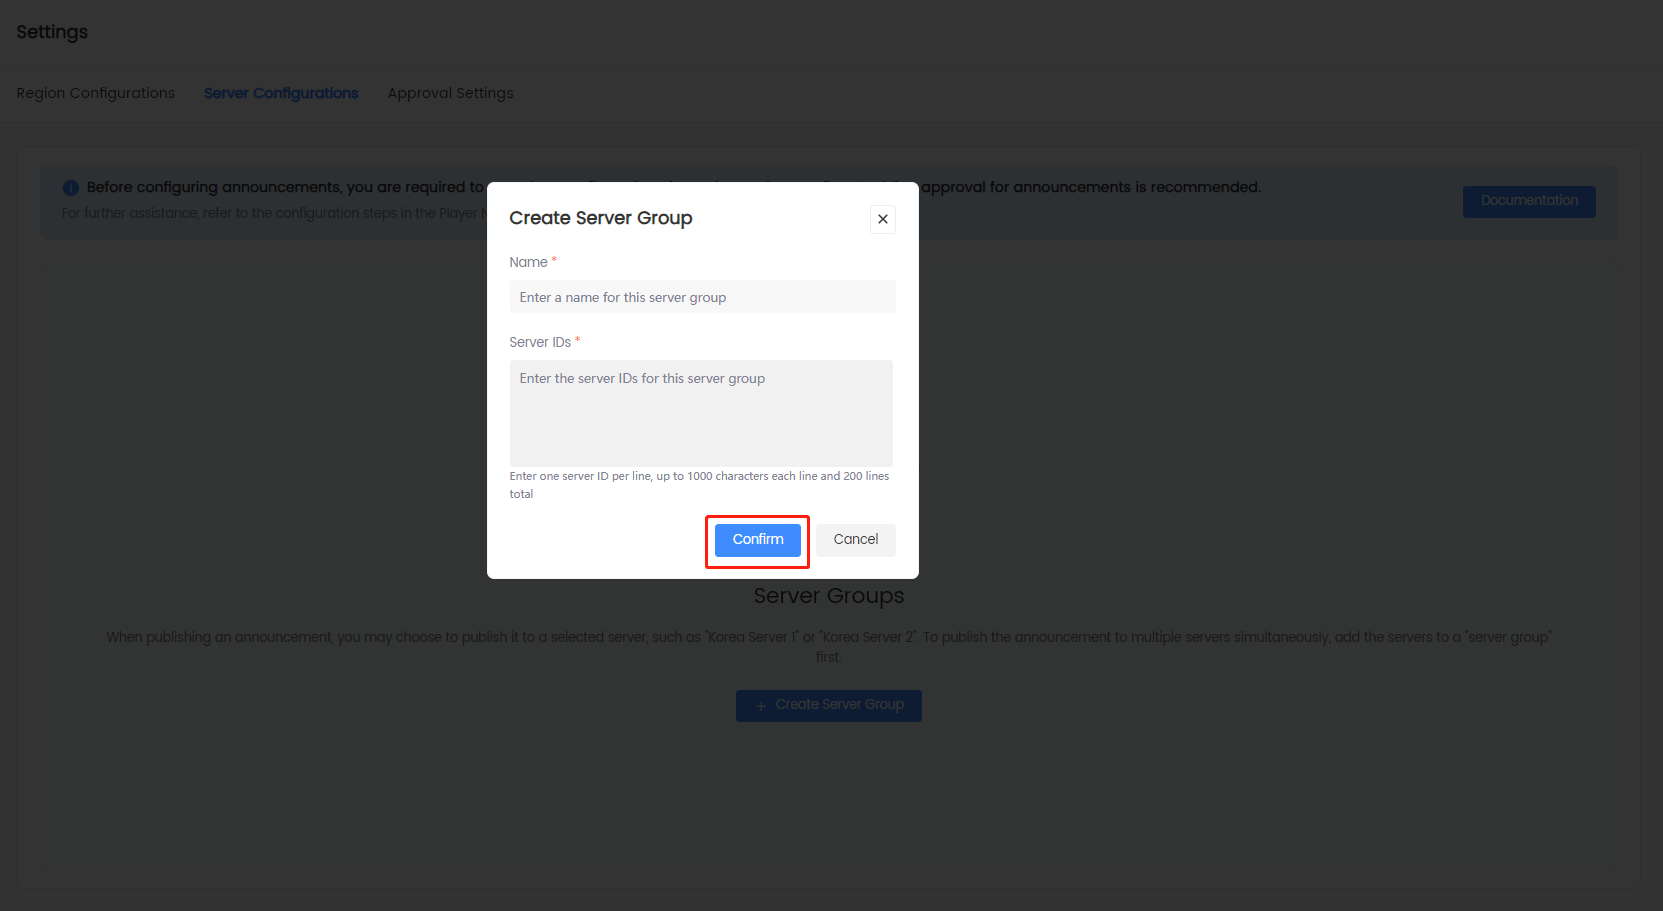
Approval Settings
To ensure the secure use of announcement configurations, assign reviewers to approve or reject the publication and delisting operations.
First approval setting configuration
At least one reviewer must have been added before the approval function can be enabled for the first time.
-
Log in to the Player Network Console.
-
In the left sidebar, click Announcements > Settings under Player Management.
-
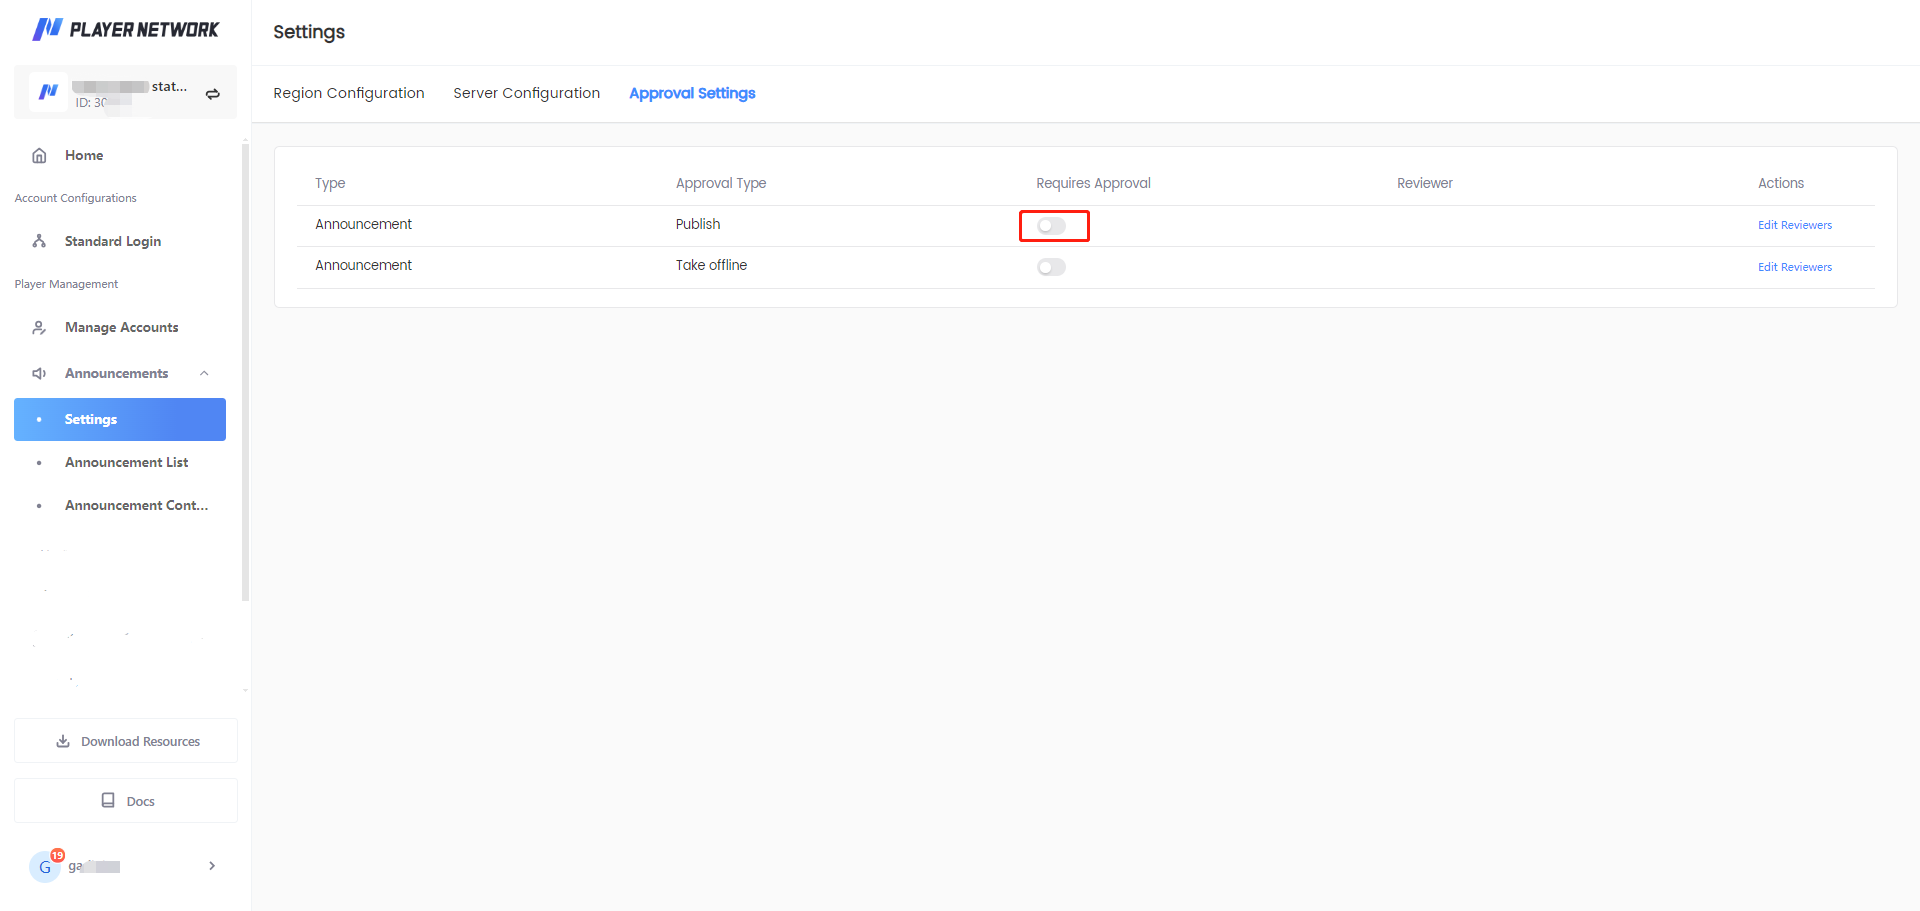
Click Approval Settings. Under Requires Approval, toggle on the switch for publishing or delisting approvals based on your needs.
-
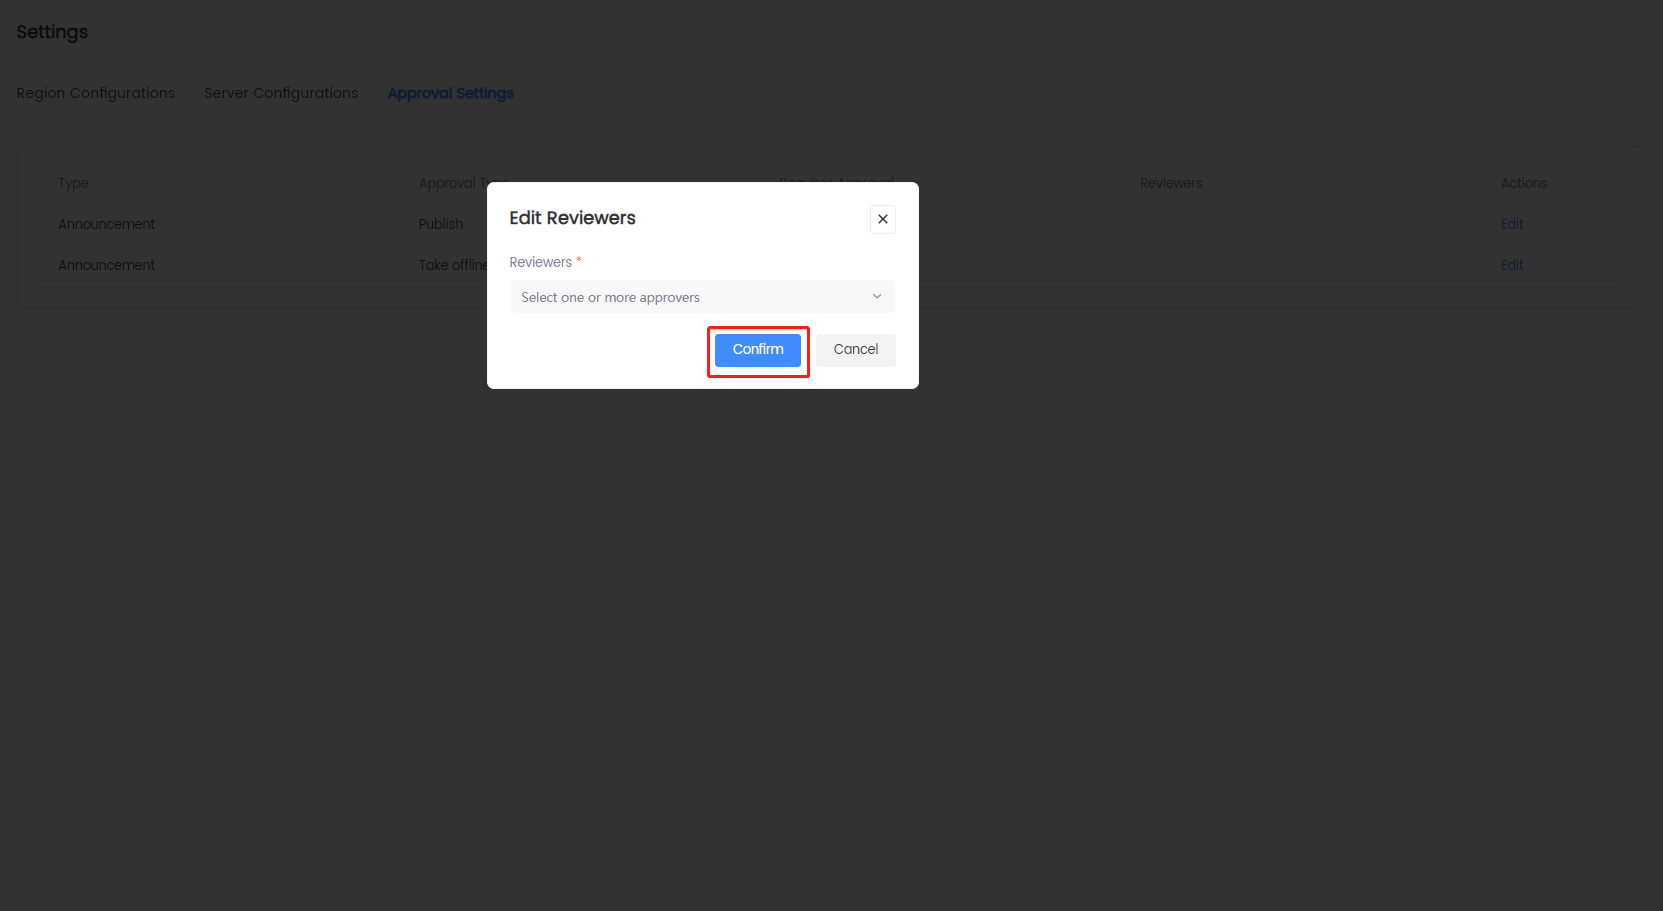
In the Edit Reviewers popup window, click the Reviewers dropdown menu to select or enter the username of the reviewer, and click Confirm to complete the approval setting.
Add announcement reviewer
-
Log in to the Player Network Console.
-
In the left sidebar, click Announcements > Settings under Player Management.
-
Click Approval Settings, browse to the desire operation and click Edit under Actions.
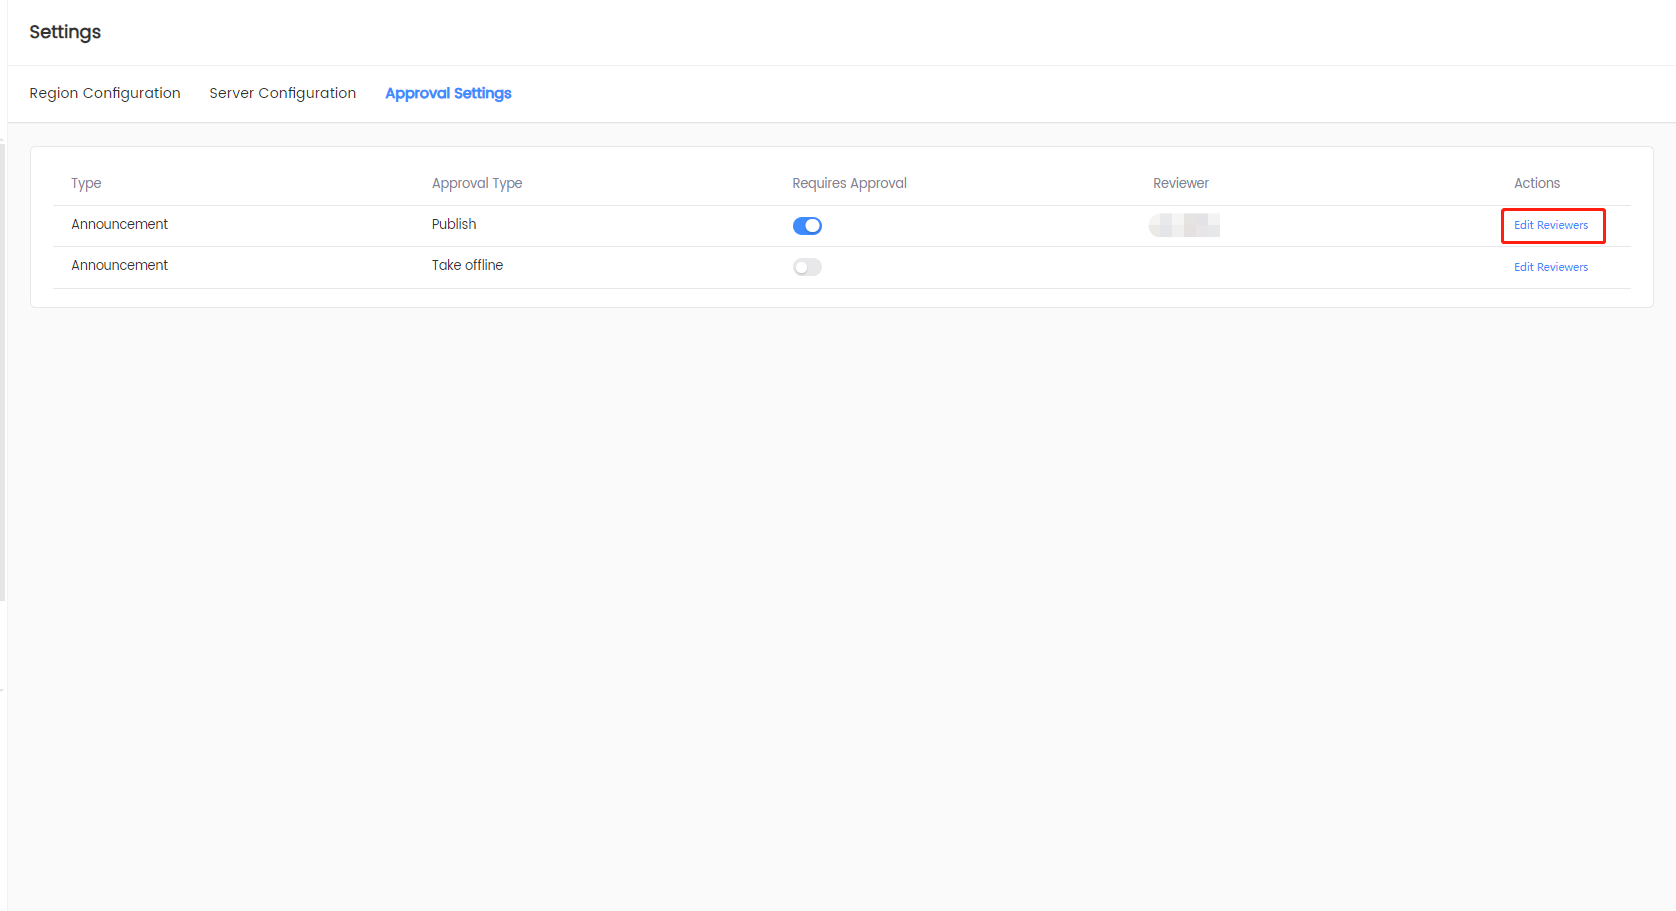
-
In the Edit Reviewers popup window, click the Reviewers dropdown menu to select the username to assign the user with approval authority, and click Confirm.
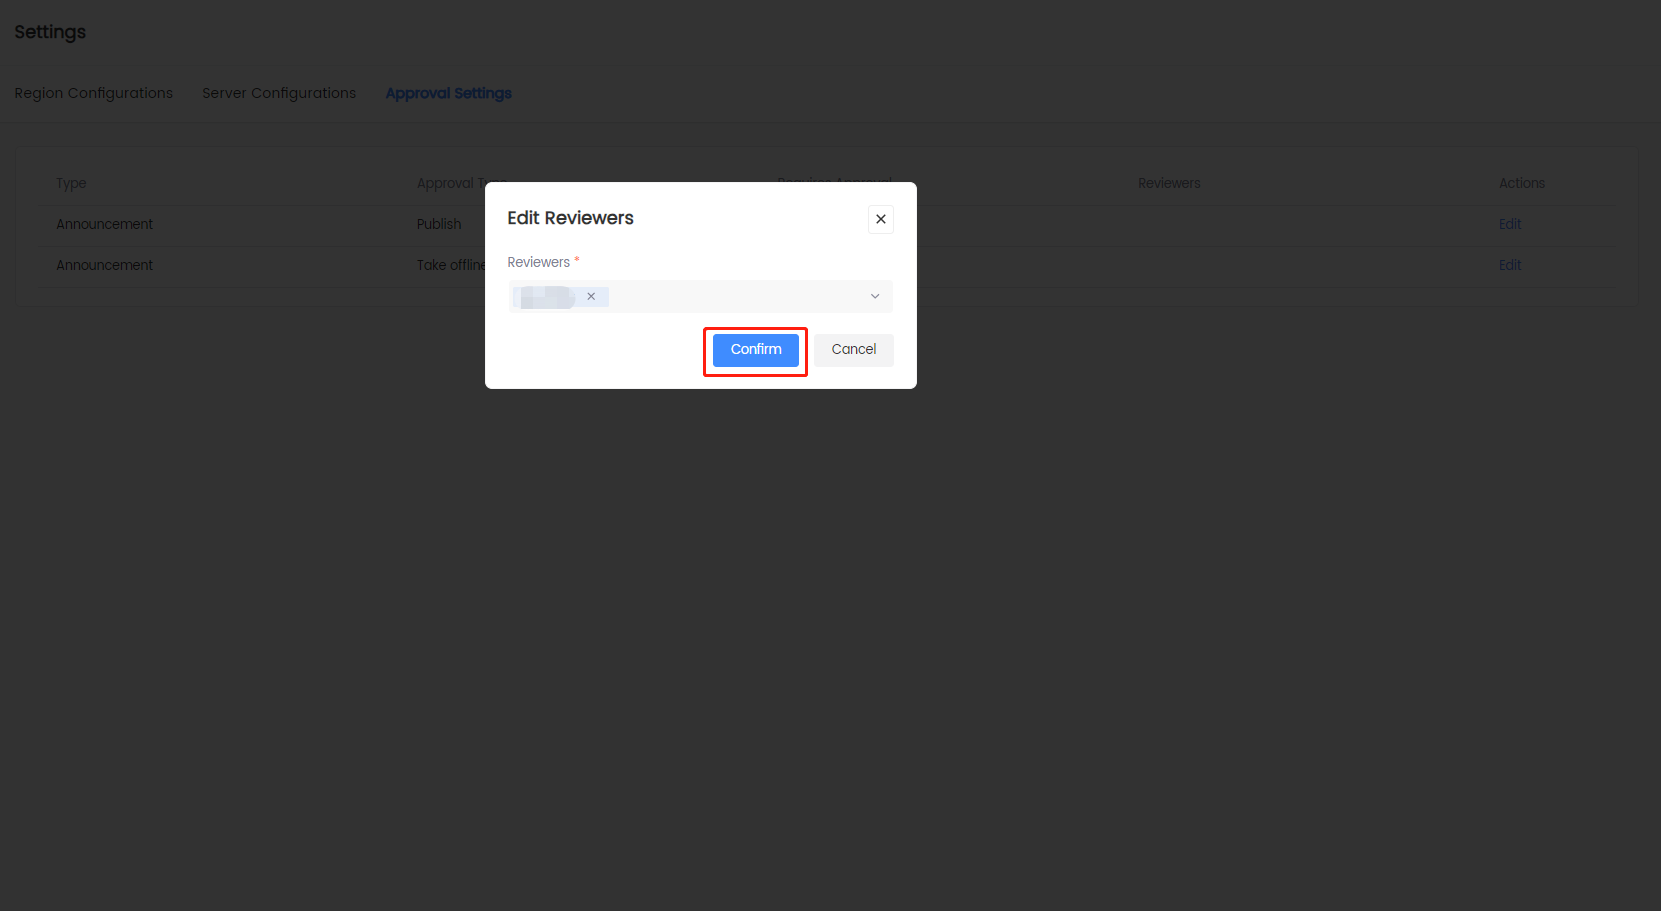
Delete announcement reviewer
-
Log in to the Player Network Console.
-
In the left sidebar, click Announcements > Settings under Player Management.
-
Click Approval Settings, browse to the desire operation and click Edit under Actions.

-
In the Edit Reviewers popup window, click the delete button next to the username to remove the user, and click Confirm.
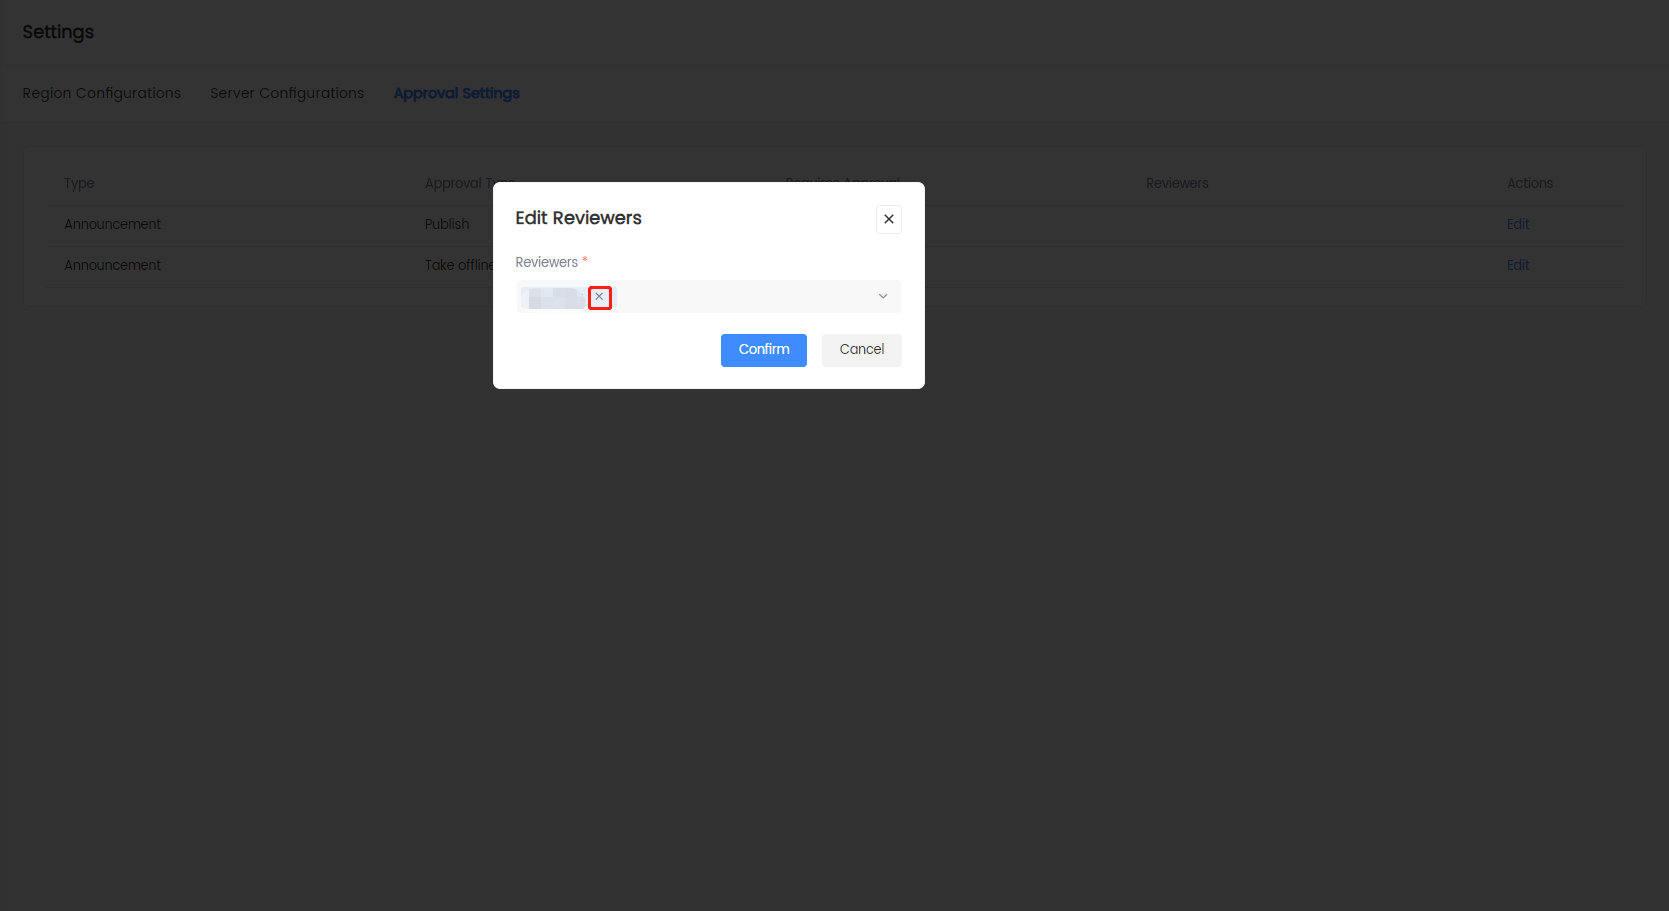
Disable announcement approval
-
Log in to the Player Network Console.
-
In the left sidebar, click Announcements > Settings under Player Management.
-
Click Approval Settings. Under Requires Approval, toggle off the switch for publishing or delisting approvals based on your needs. Disabling the approval will not clear the list of approvers.
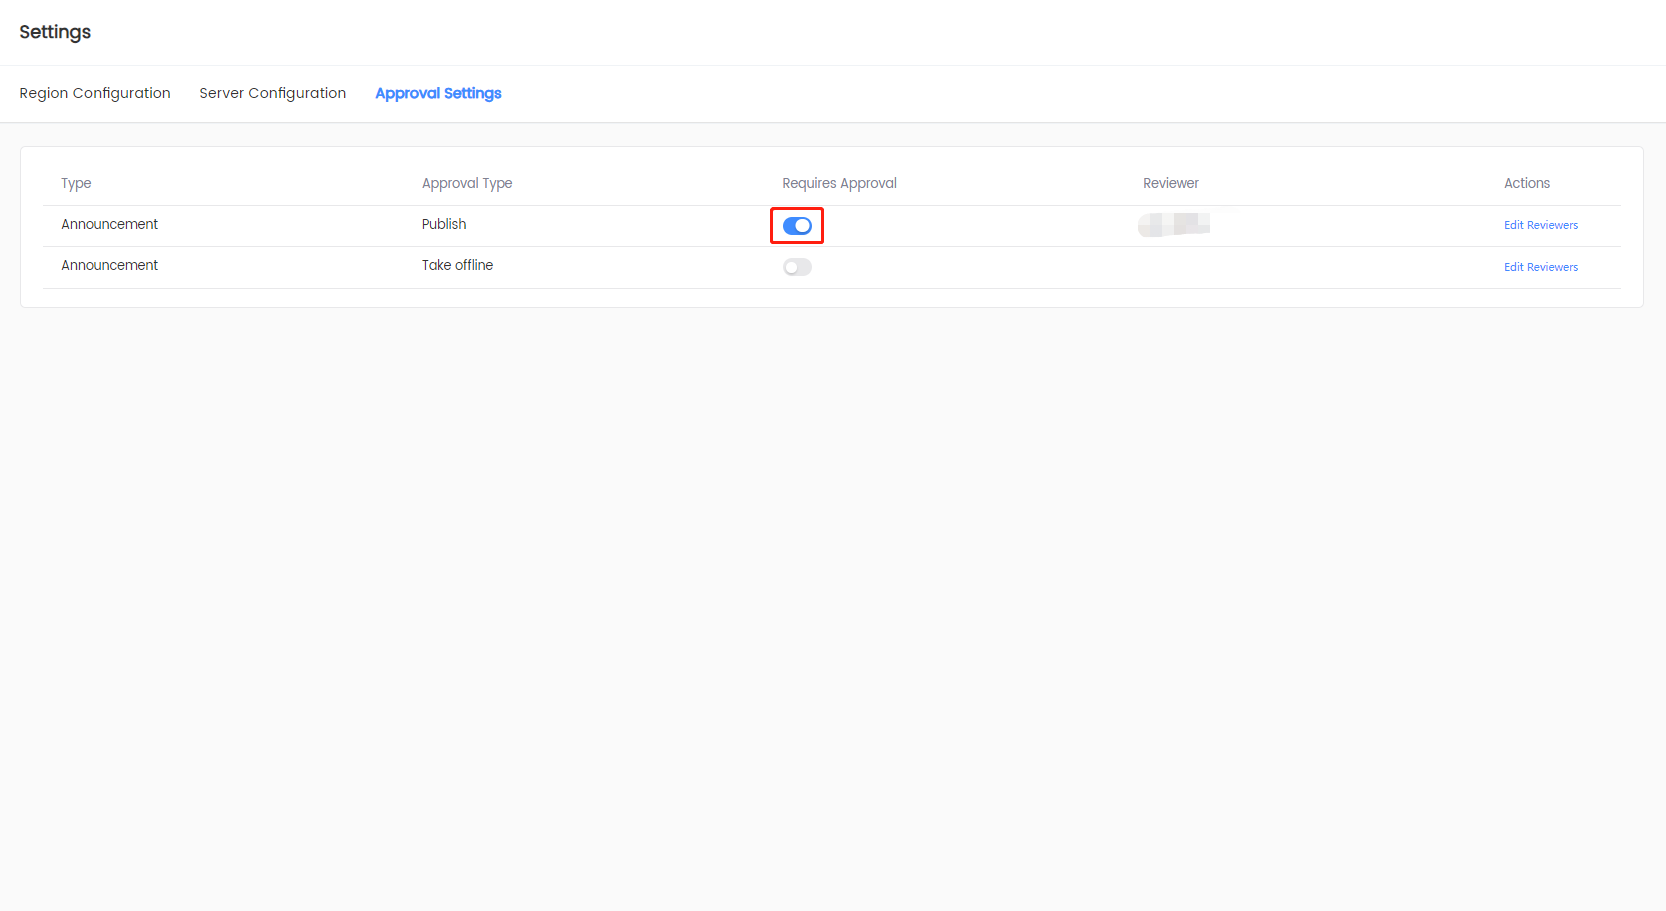
Announcement List
Here you can configure announcements, conduct tests in test or production environments based on your needs, or edit announcements online.
Create templates
Templates are a great way to standardize the design and content of announcements. By creating a template, game operators can set up similar announcements quickly and easily. For example, a game can create a template for a text announcement on a bulletin board. When announcements with different text content are needed, the game can easily create new announcements with the same design but different text content using the template.
A template only defines the style of the announcement, and contains no actual announcement content.
Currently, the time zone field cannot be customized in a template, and the default time zone is UTC+0 (London time).
-
Log in to the Player Network Console.
-
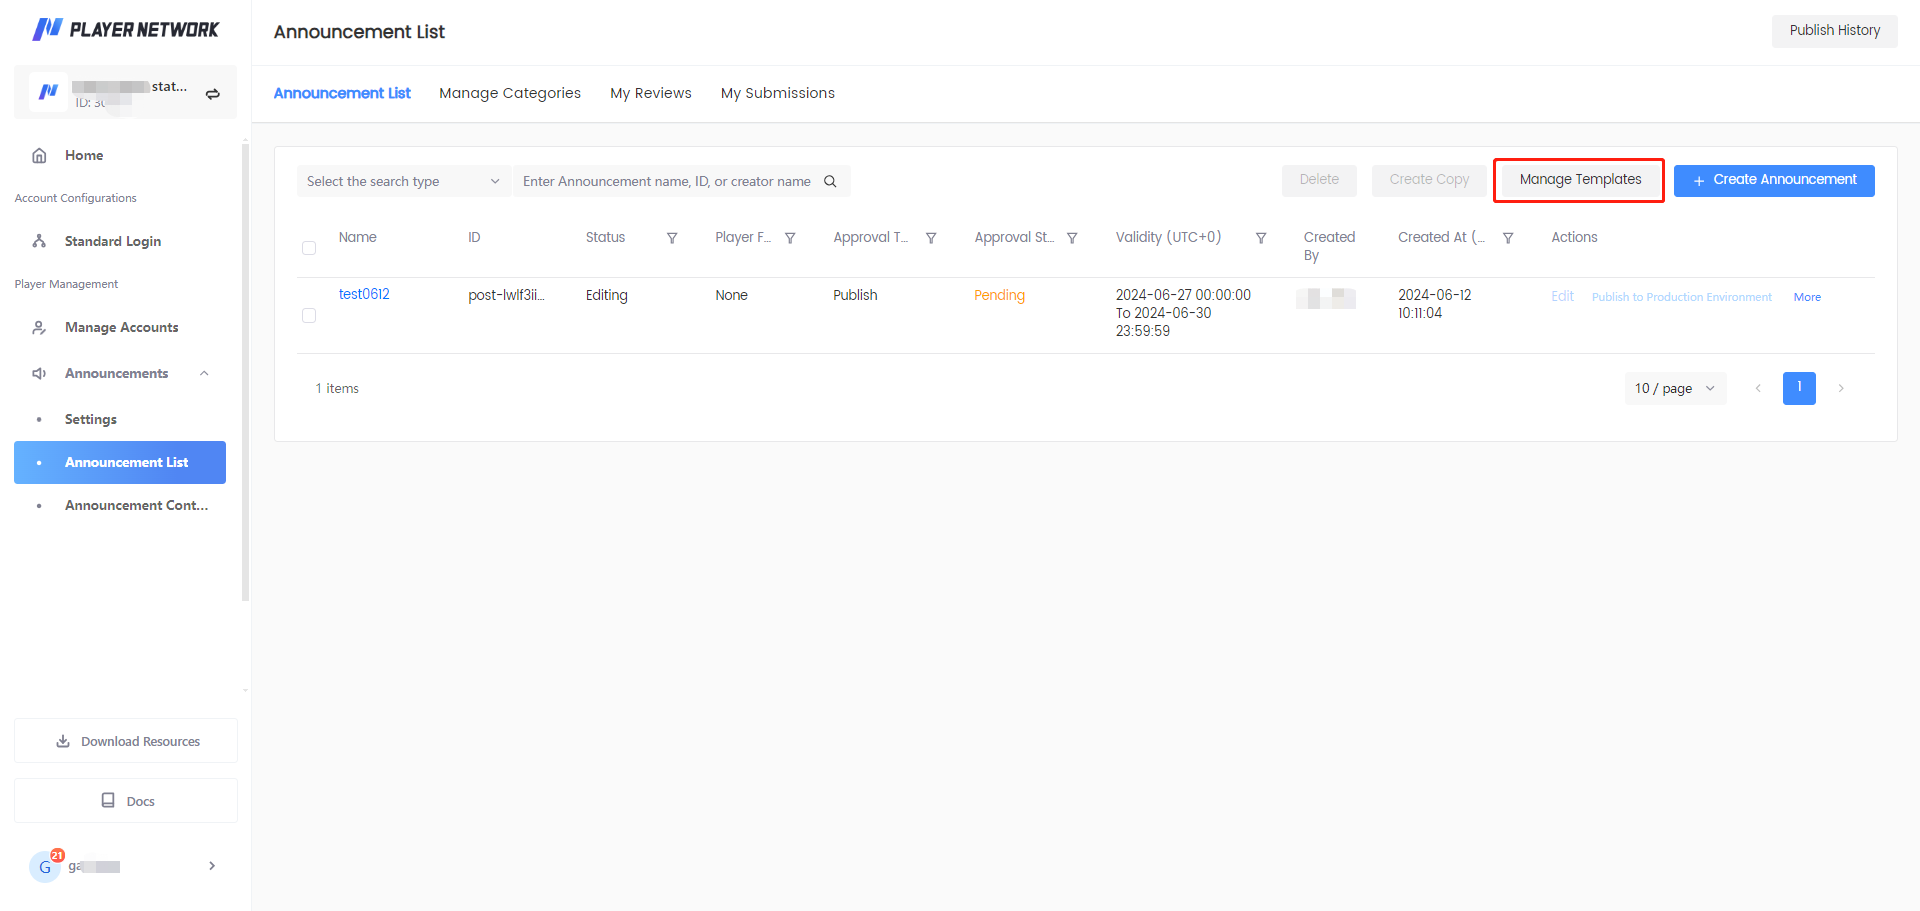
In the left sidebar, click Announcements > Announcement List under Player Management.
-
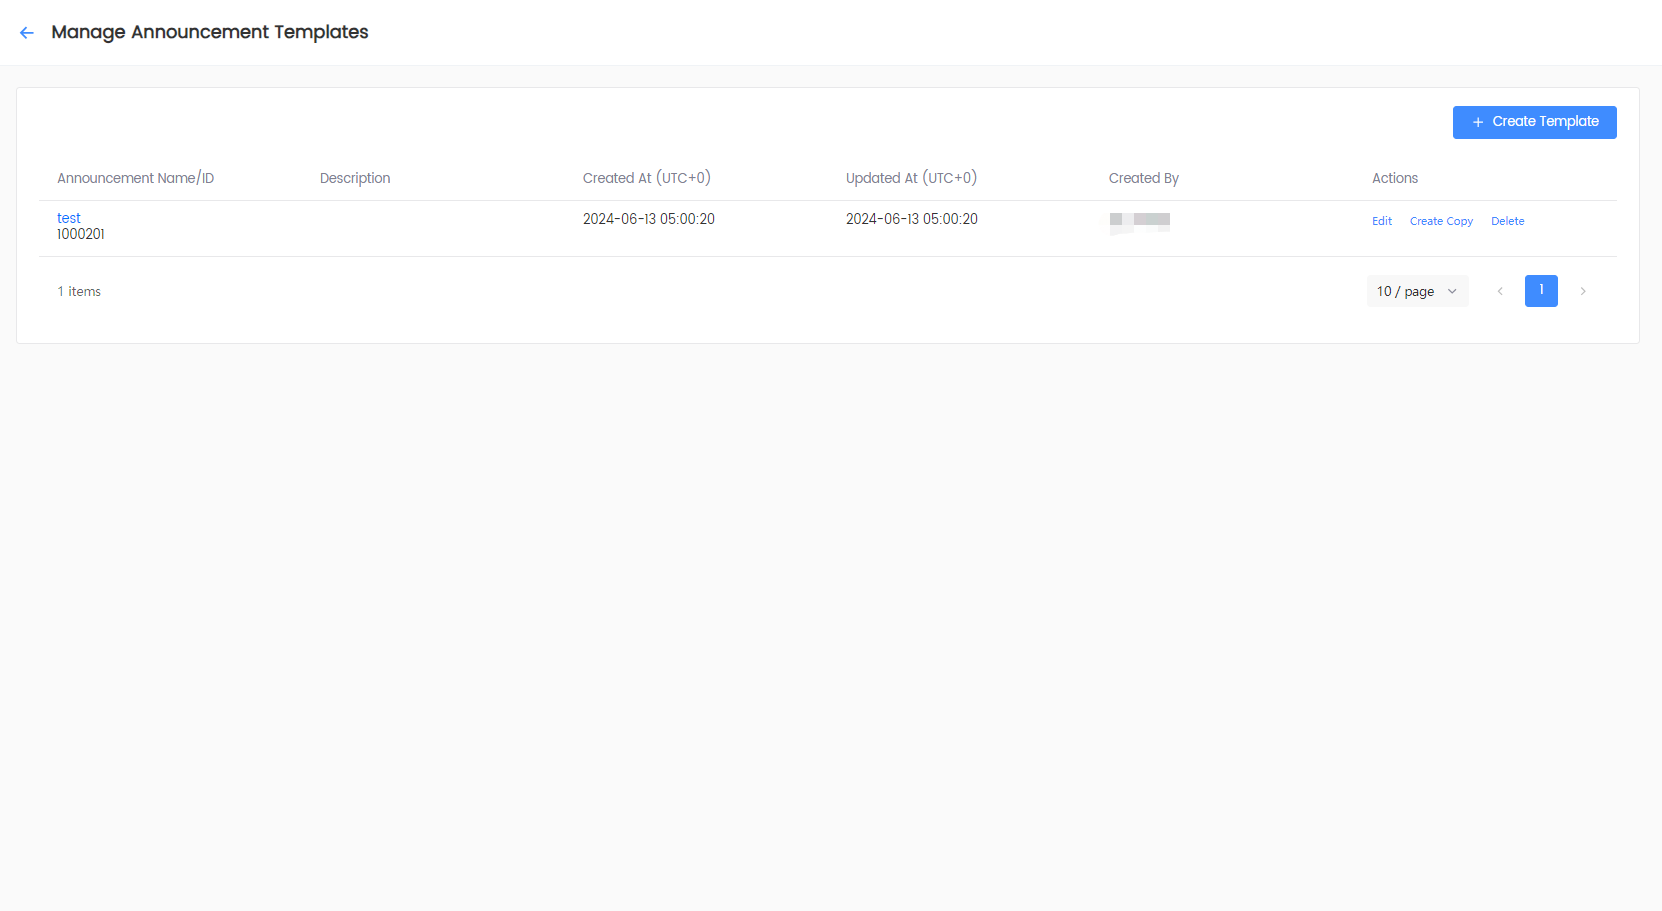
Click Manage Template.
-
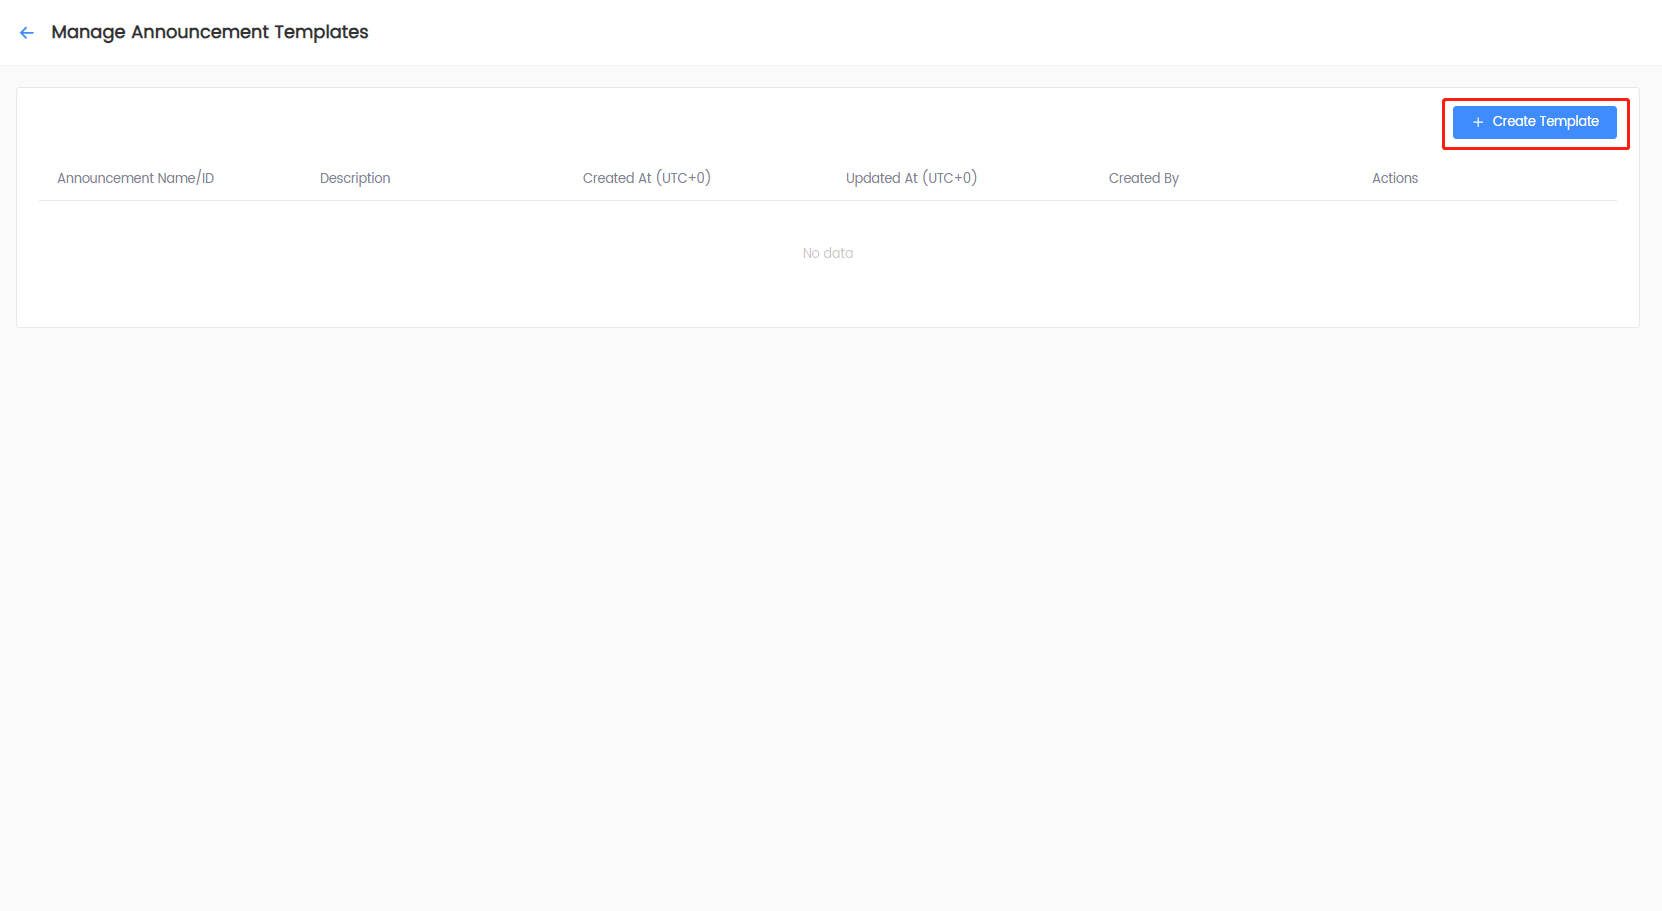
On the Manage Announcement Templates page, click Create Template.
-
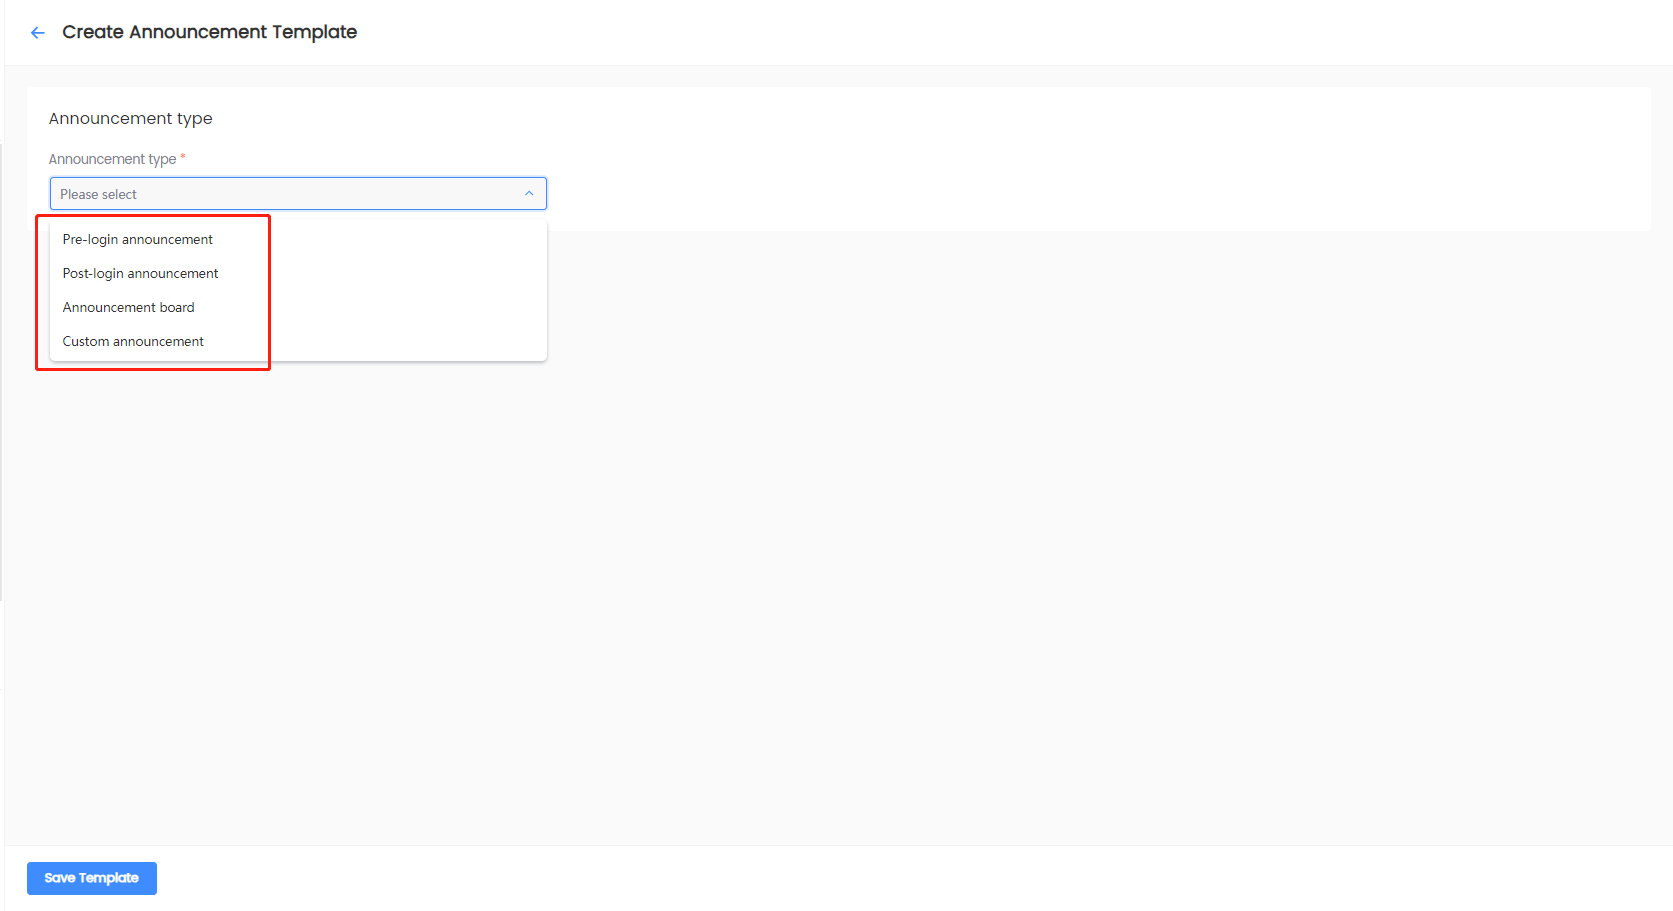
Click the Announcement type dropdown to select the appropriate option for the template.
The announcement type is only a label for the announcement, game client developers are required to implement the specific logic for the announcement type.
-
Specify the Template name and click Save Template.
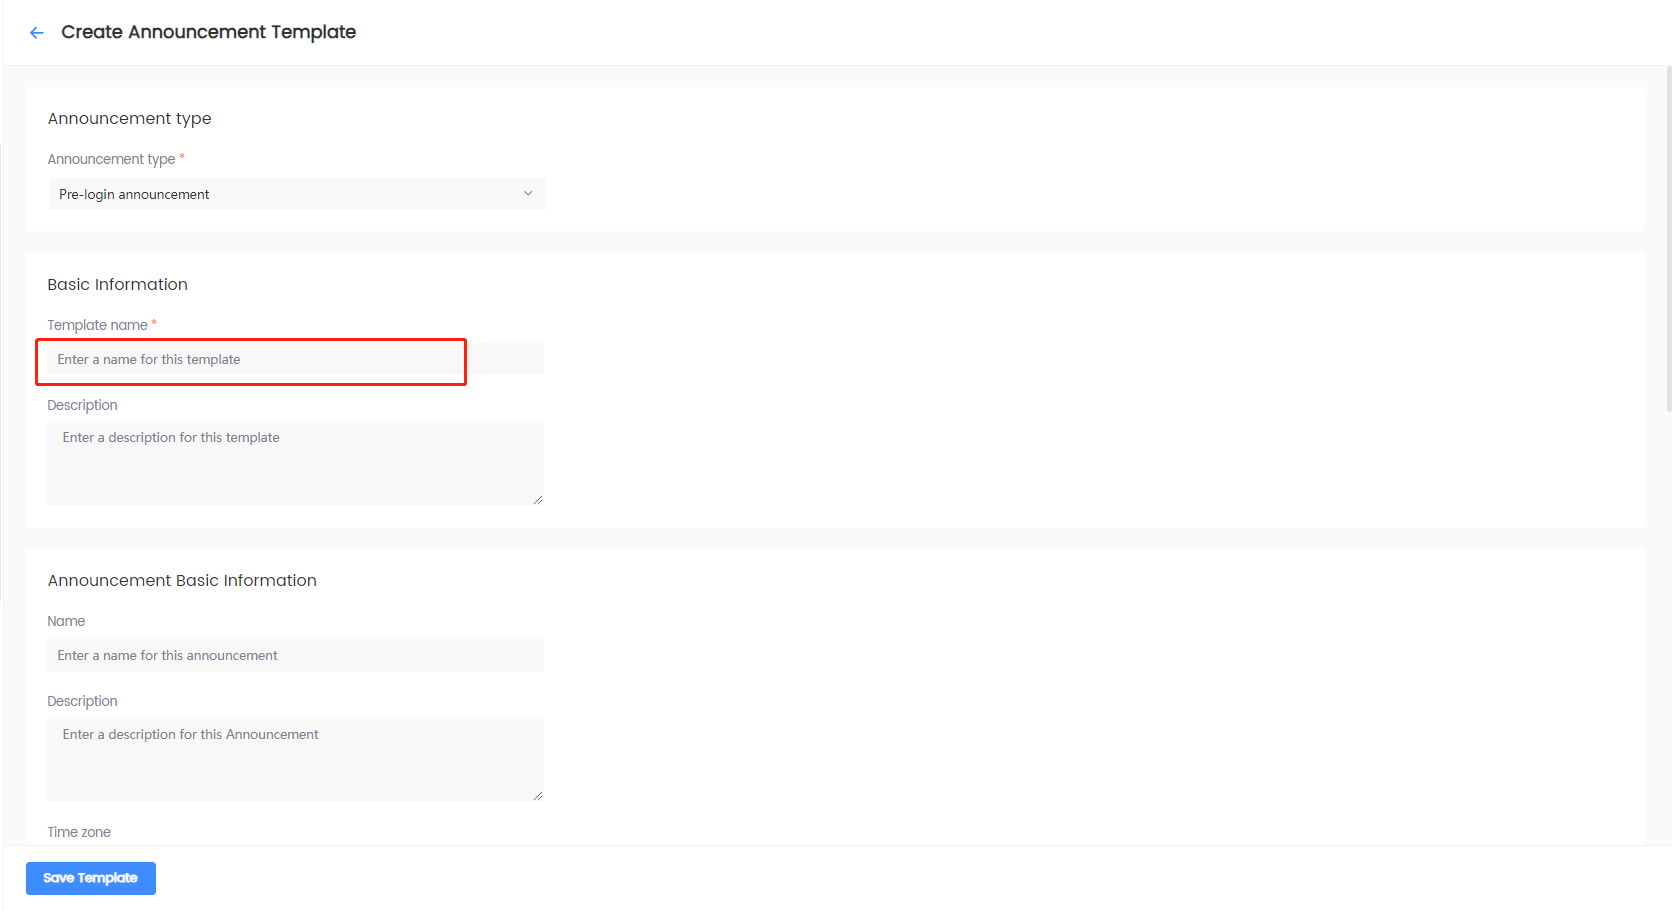
The Manage Announcement Templates page displays the saved templates that you can use to create announcements.
Create announcements
Create pre-login announcements
-
Log in to the Player Network Console.
-
In the left sidebar, click Announcements > Announcement List under Player Management.
-
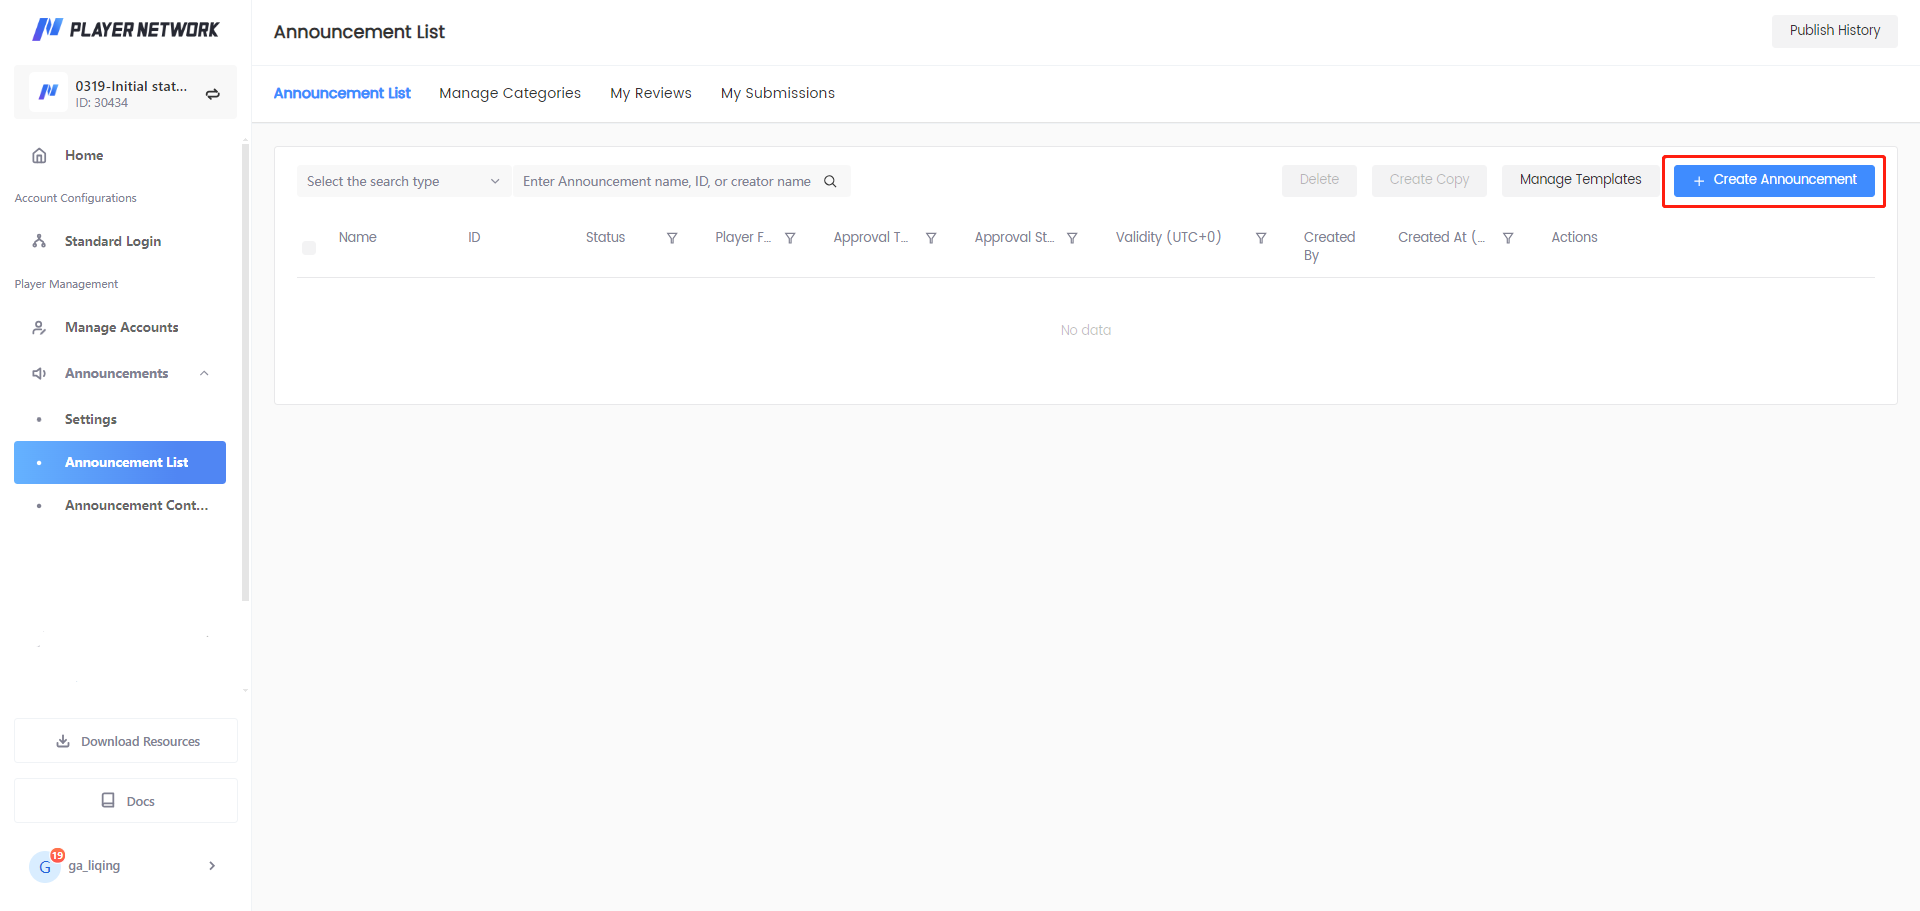
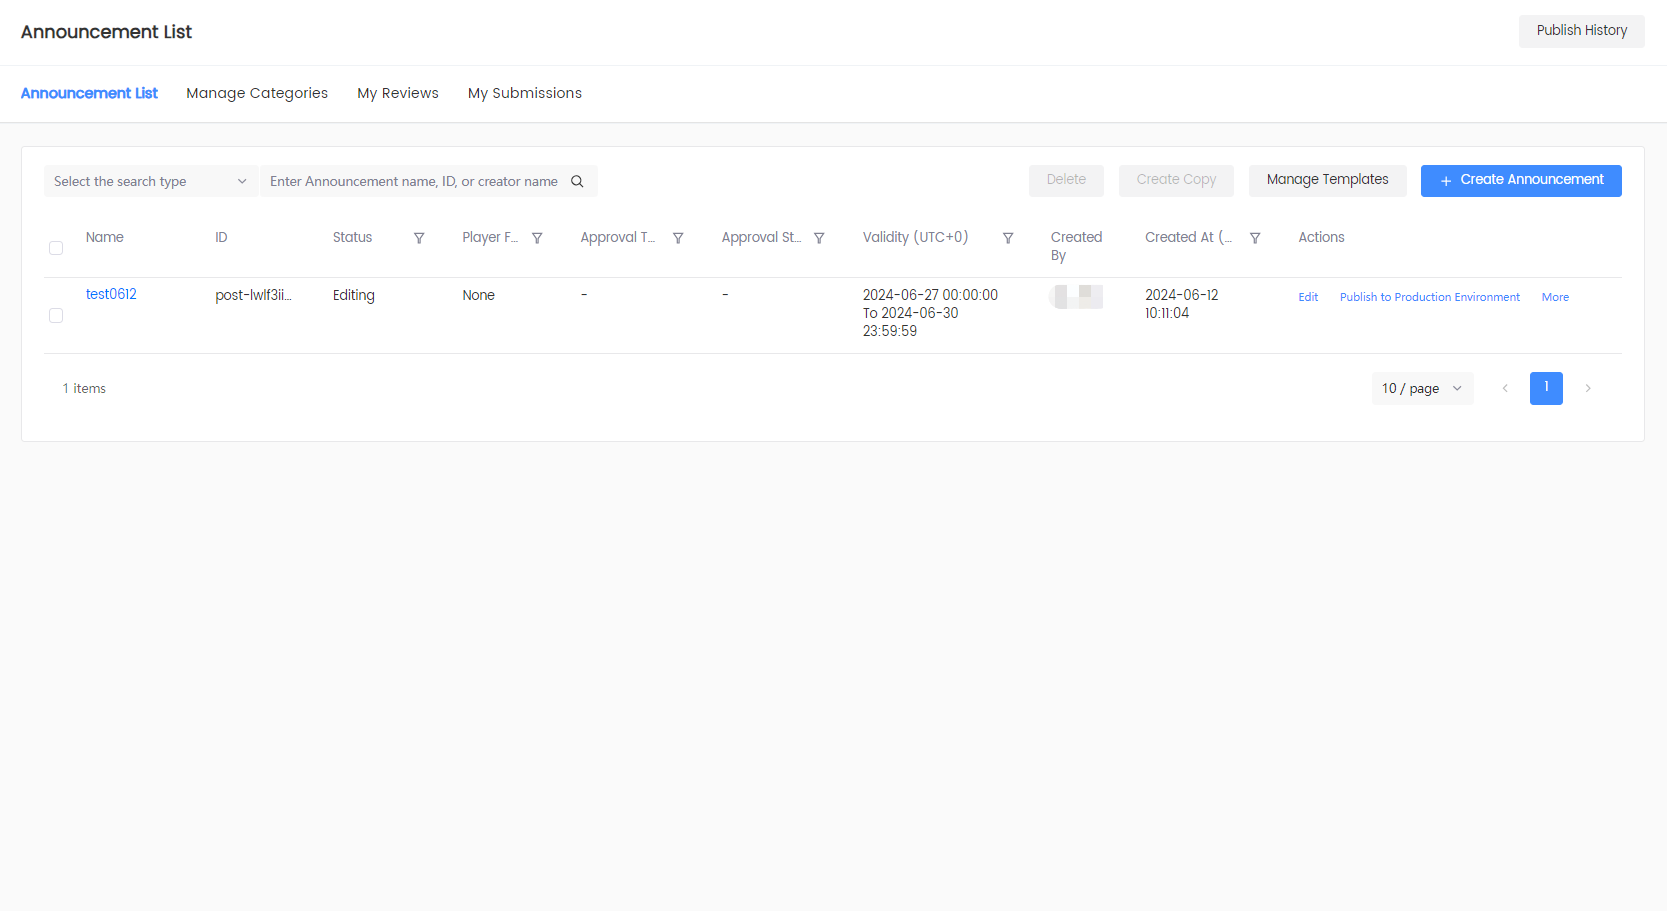
Click Create Announcement.
-
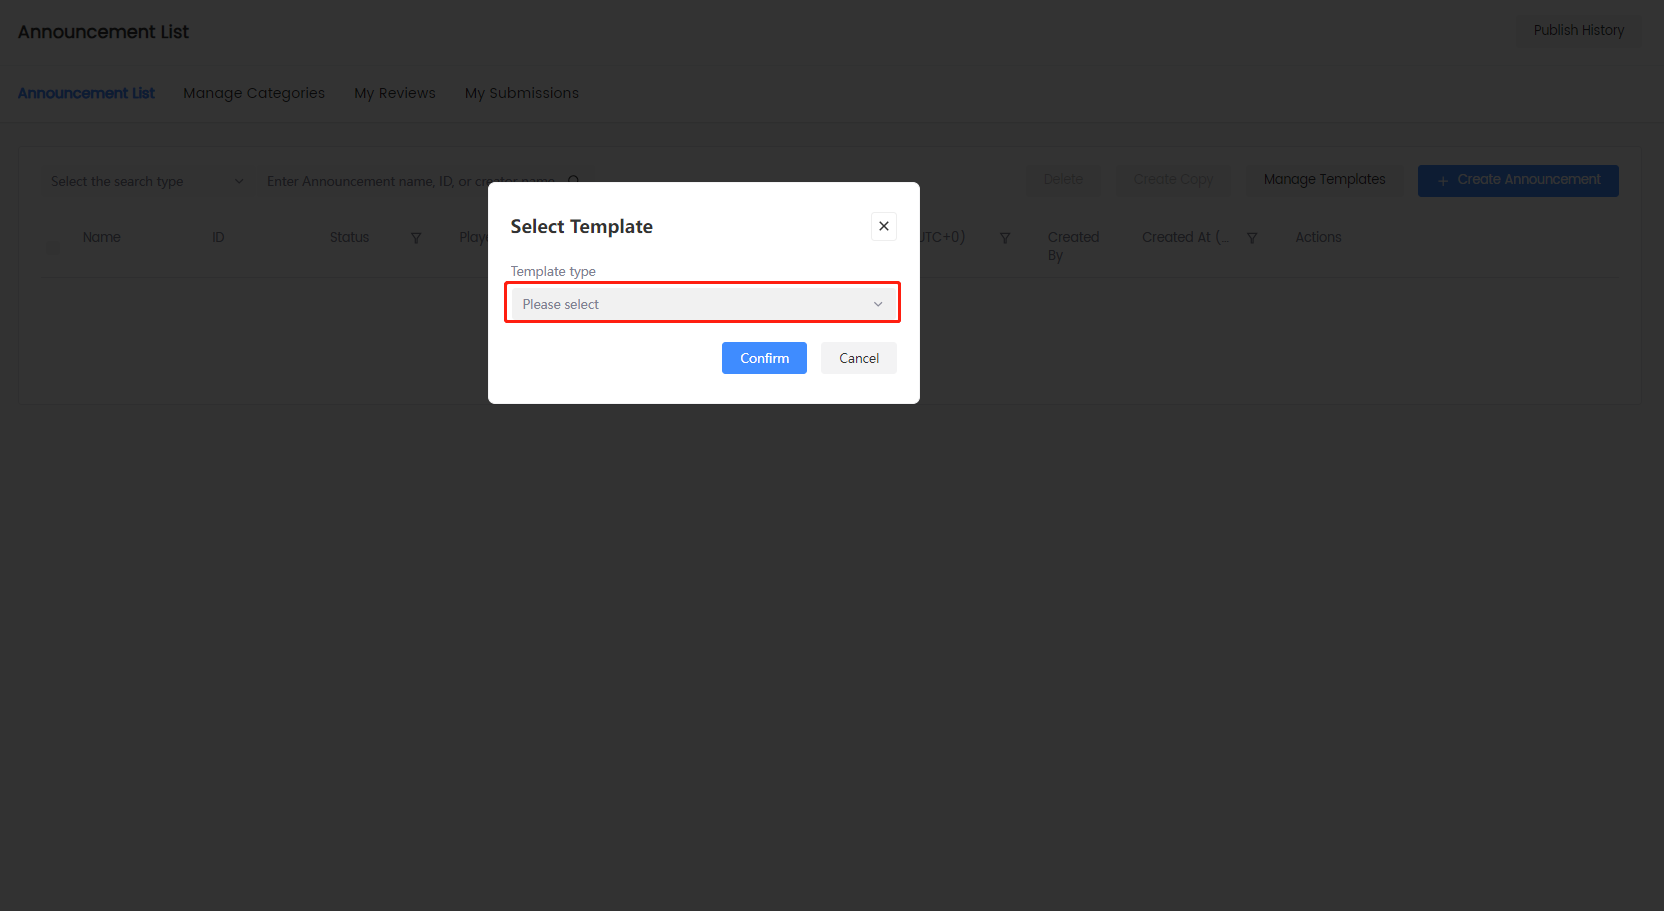
In the Select Template popup, select an appropriate template and click Confirm.
-
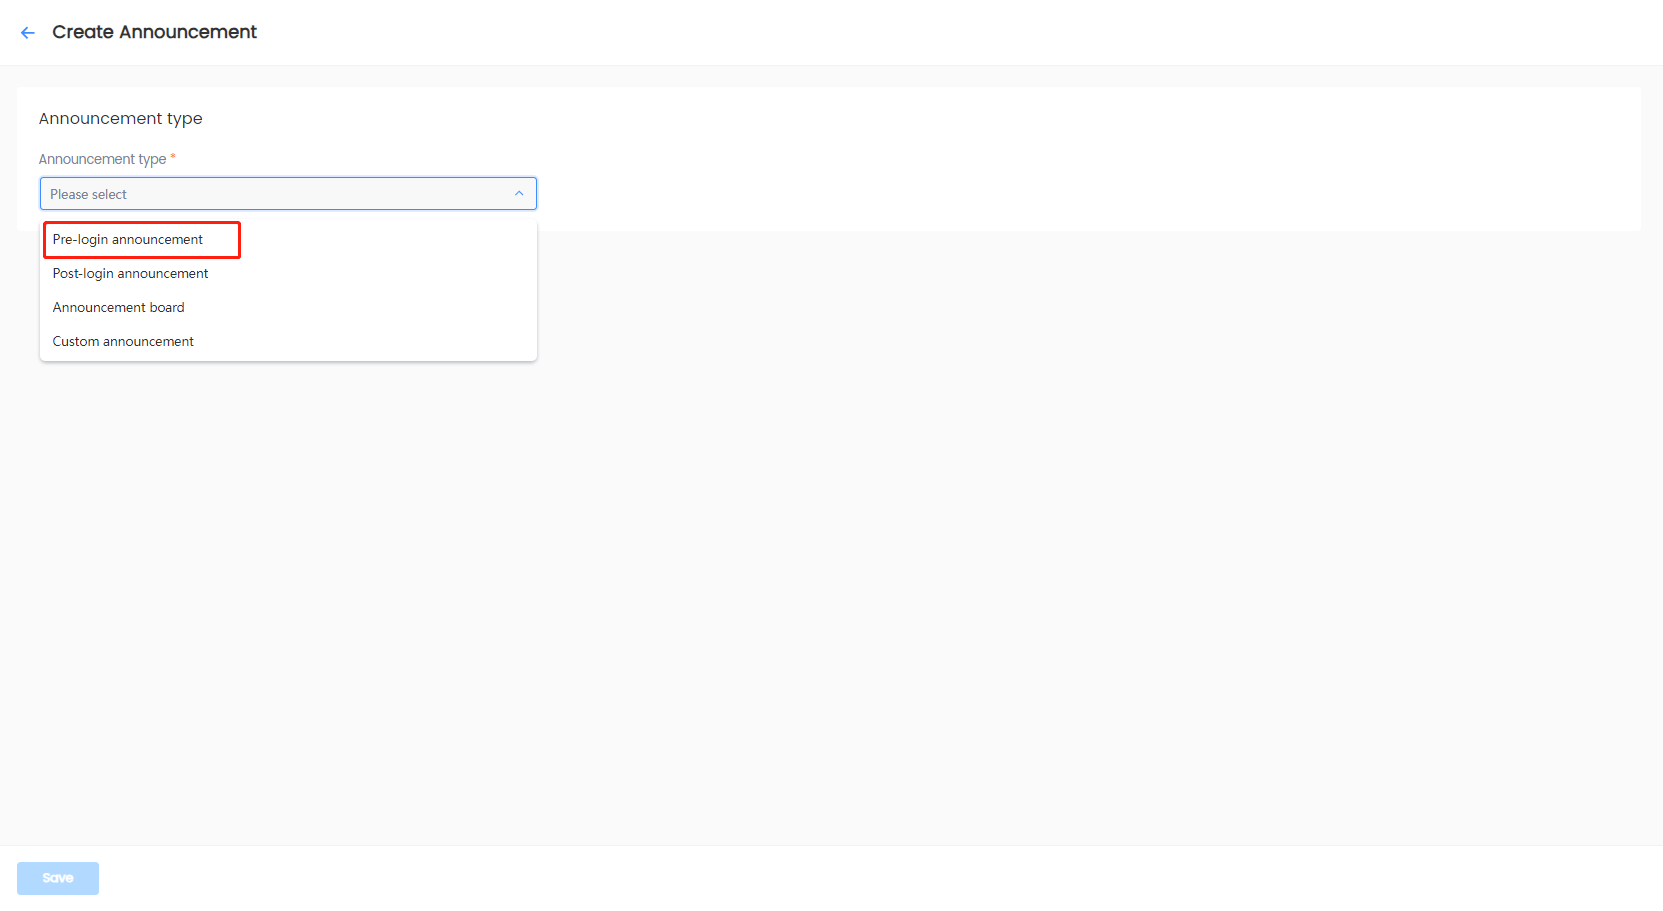
On the Create Announcement page, click the Announcement type dropdown, and select Pre-login announcement.
-
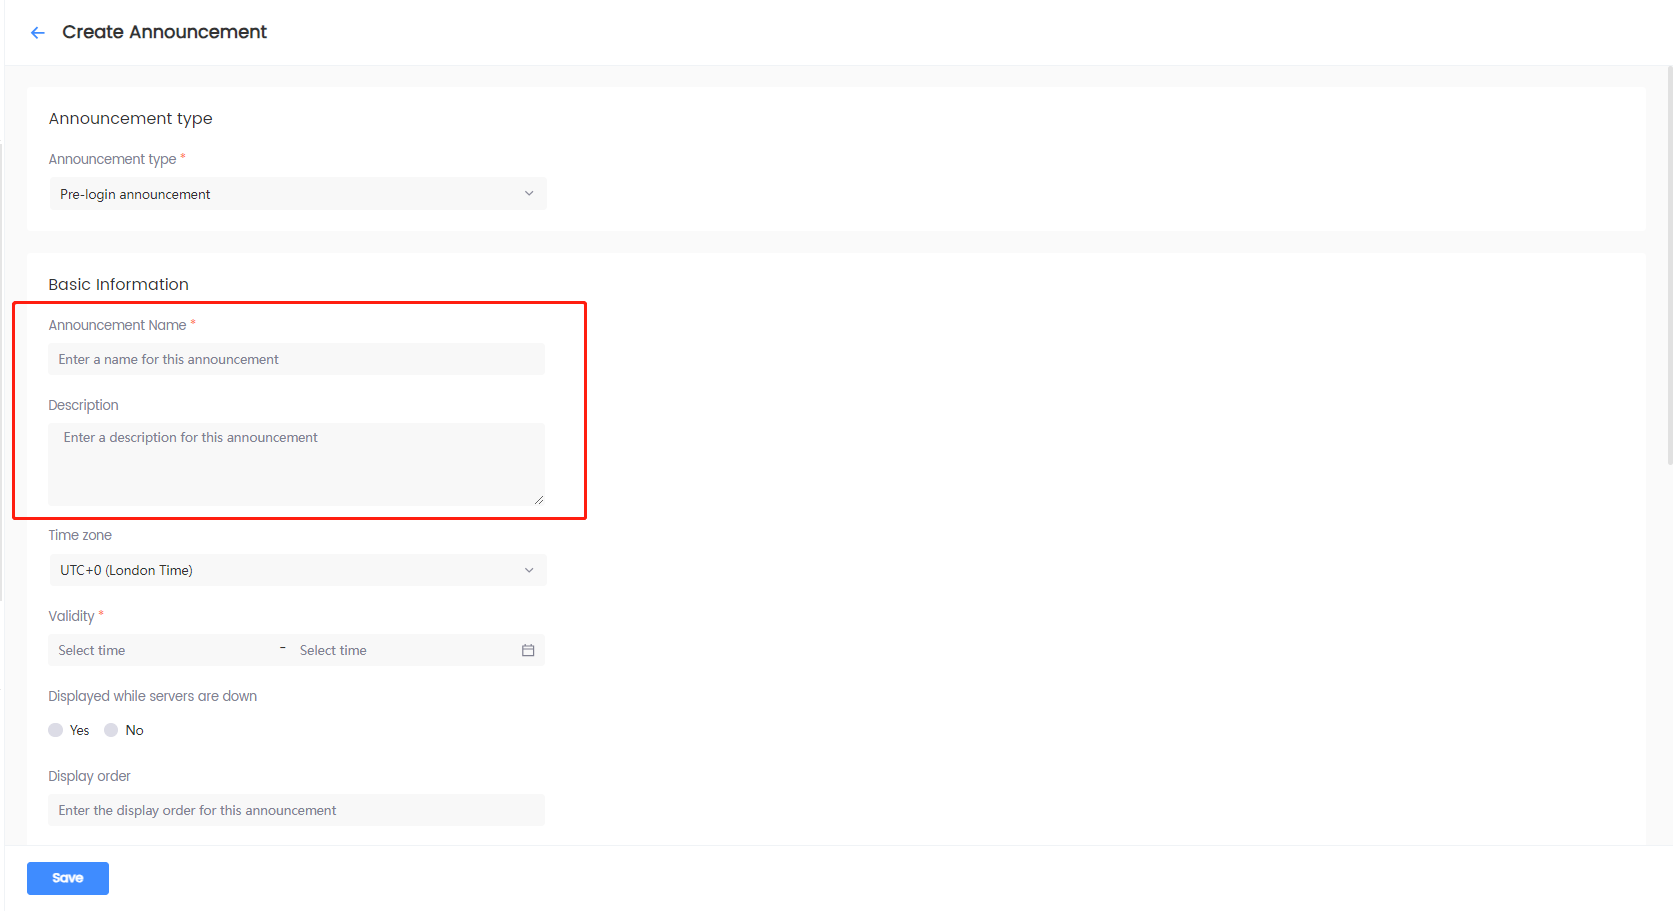
Under Basic Information, specify the following details:
-
Enter the Announcement name and Description.
-
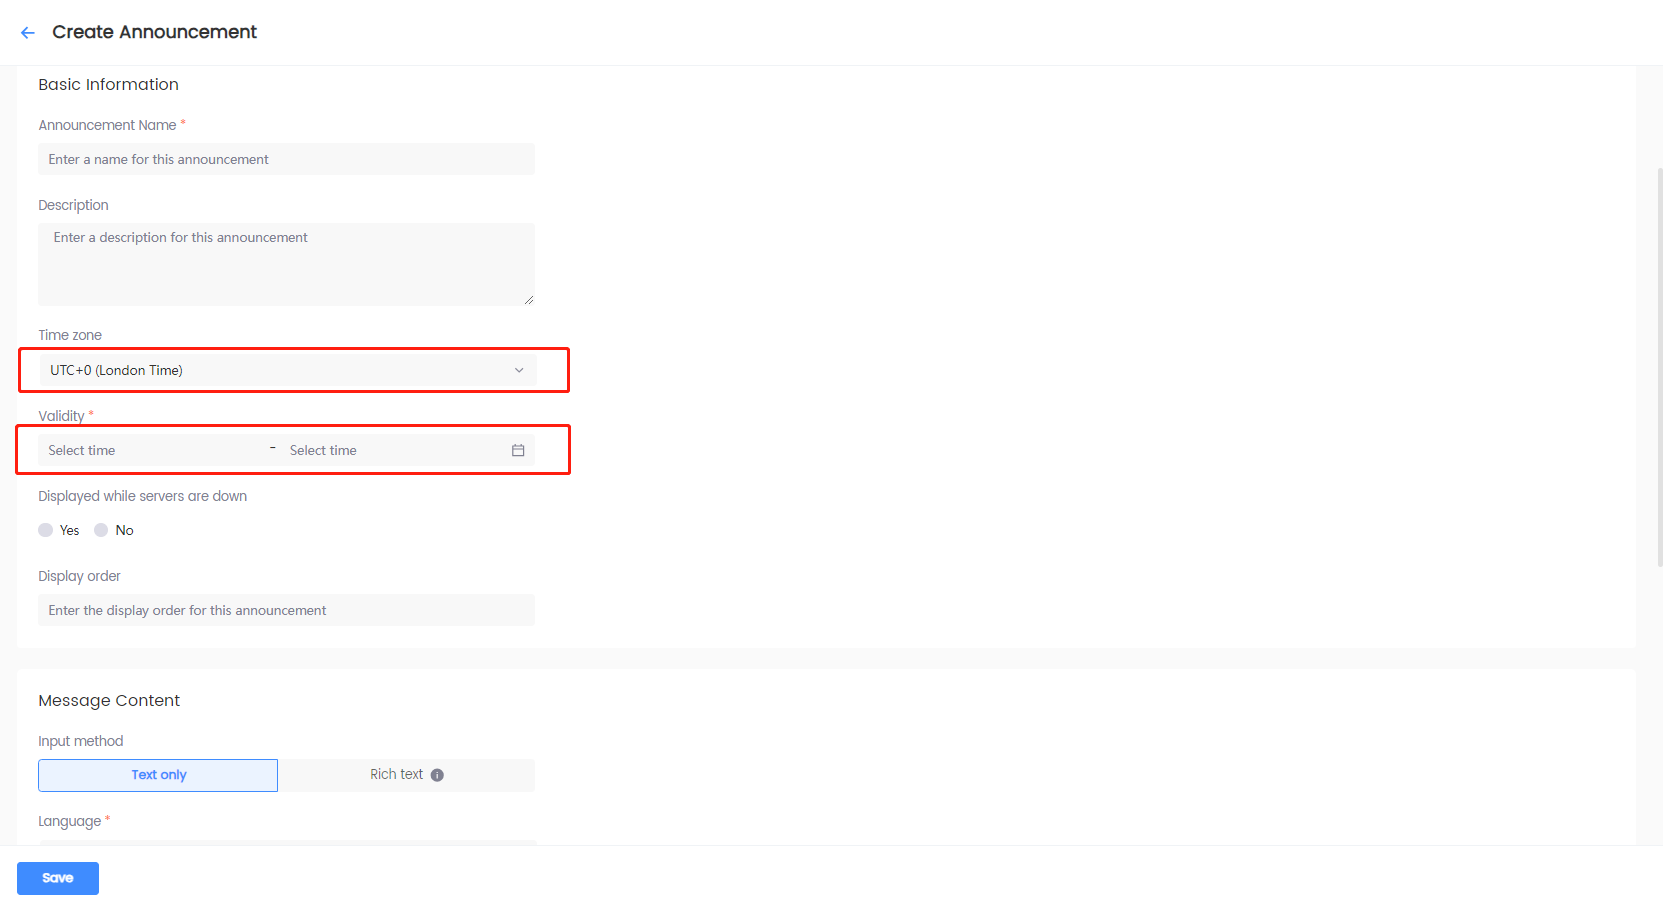
Select the Time zone, and the Validity of the time zone.
 note
noteThe start time specifies when to start showing the announcement in the game, and the end time specifies when to stop showing the announcement in the game. For more information, see the
StartTimeandEndTimevariables in INTLNoticeResult data structure for Unity SDK or FINTLNoticeResult data structure for Unreal Engine SDK. -
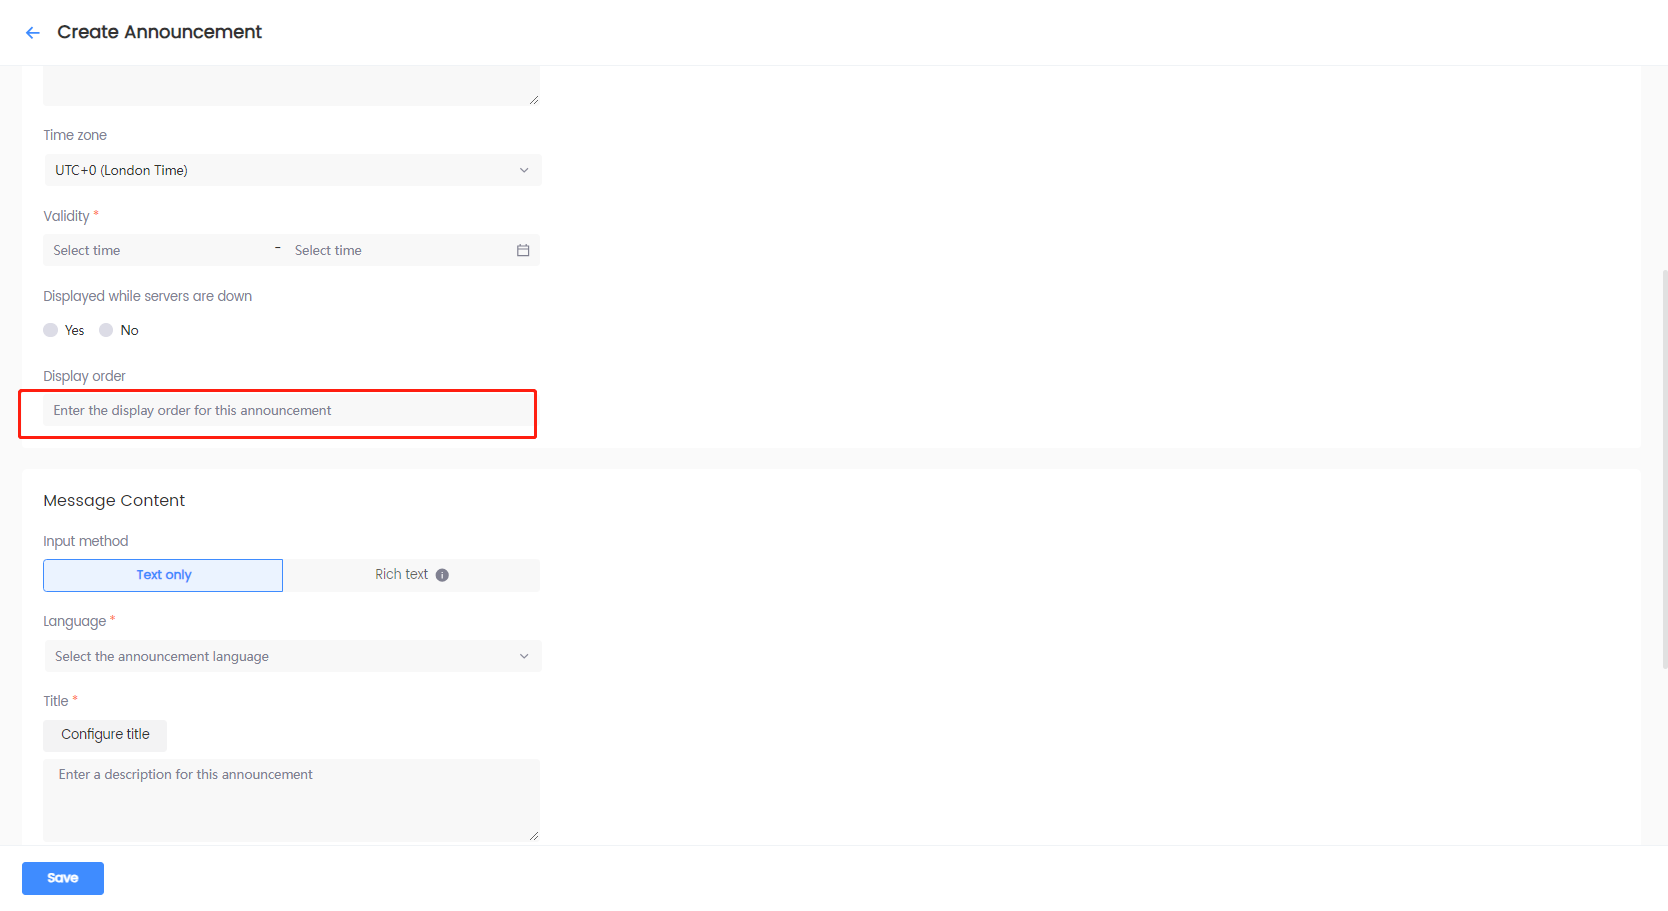
Select whether to show the announcement while the servers are down.
noteThis field can be customized depending on your needs.
-
[Optional] When there are multiple pre-login announcements, specify the order of the announcements.
-
-
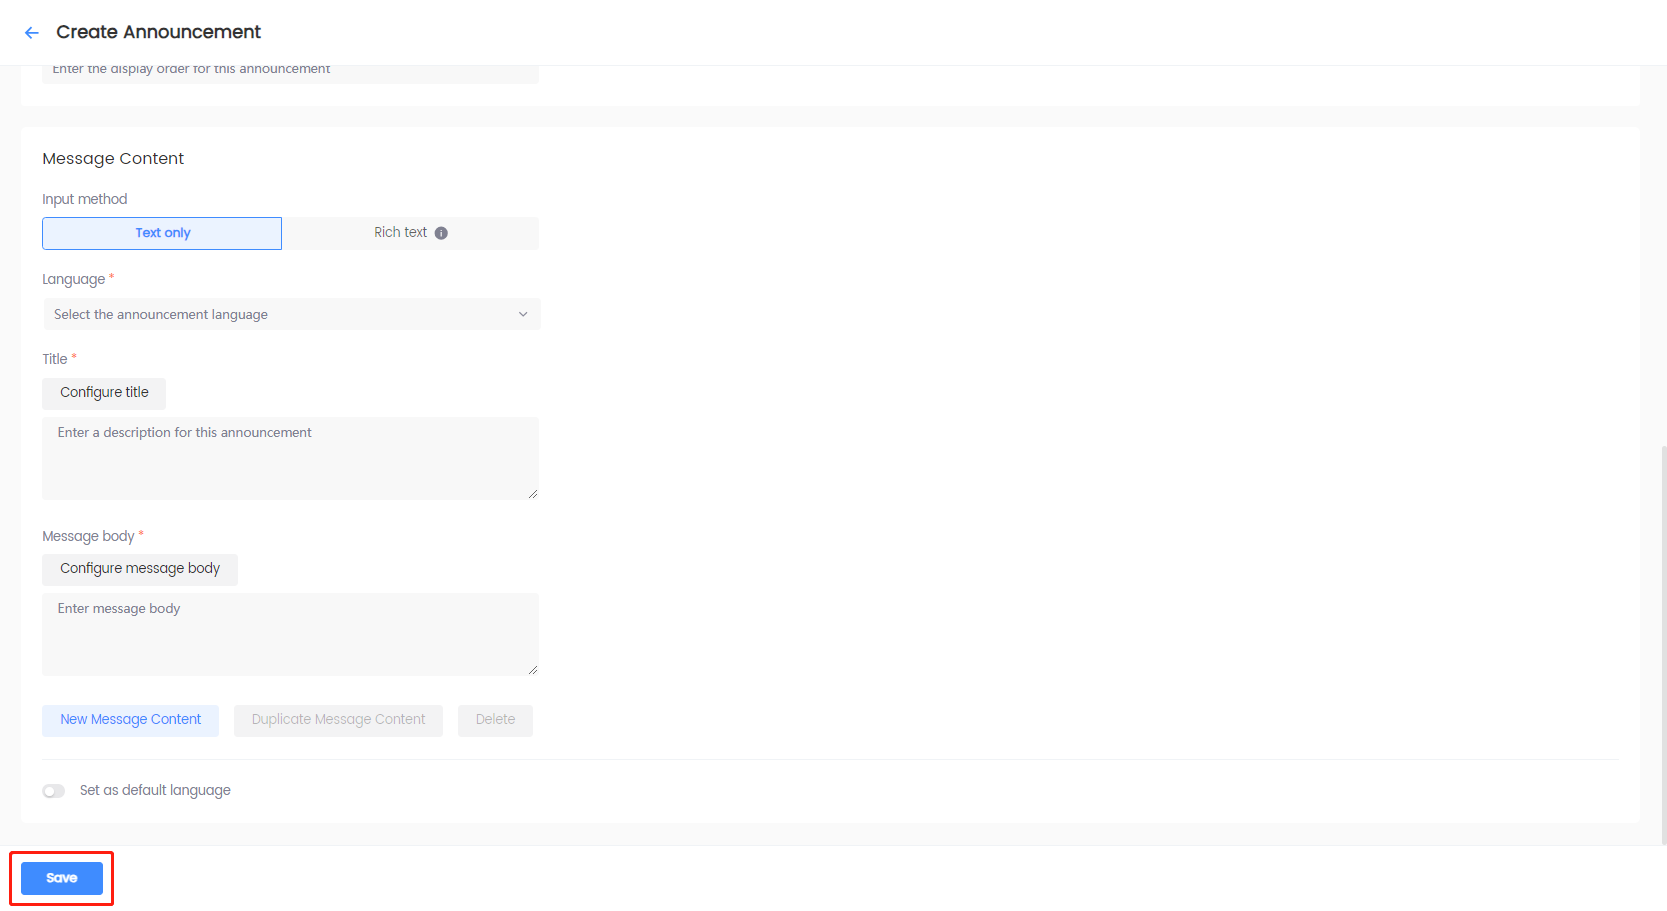
Under Message Content, specify the following details:
-
Select the preferred input method. Supports both plain text and rich text input methods.
noteThe rich text editor can be used to edit the announcement content, which supports rich text functions such as bold text, changing font and font size, custom font colors, and hyperlinks.
Player Network SDK WebView is recommended for the display of rich text content.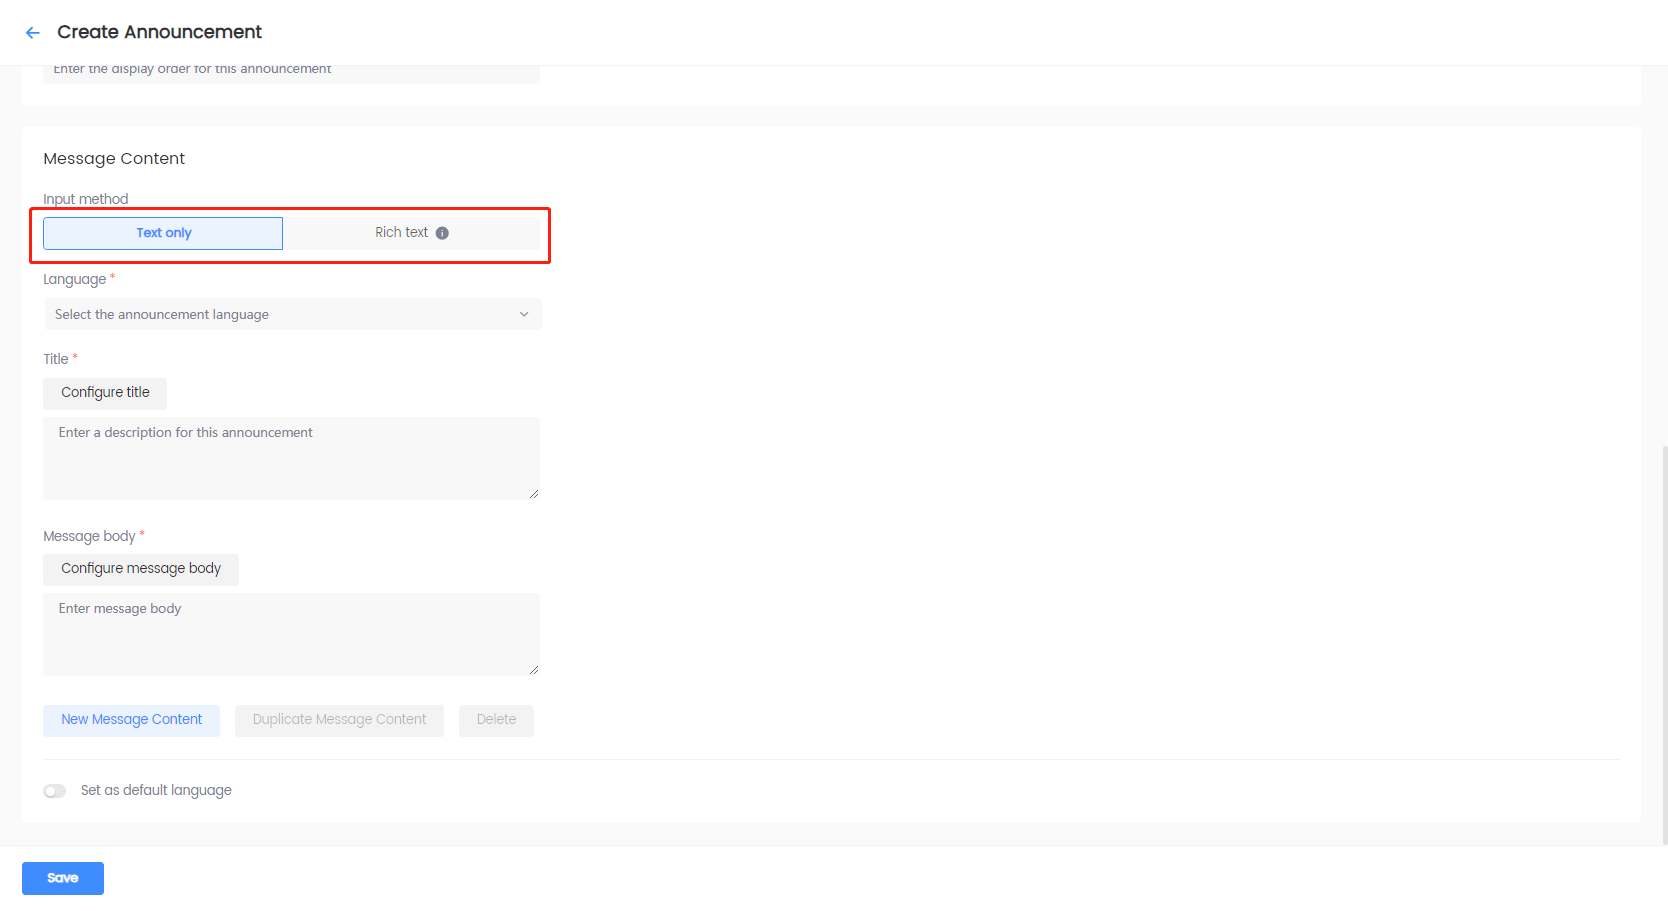
-
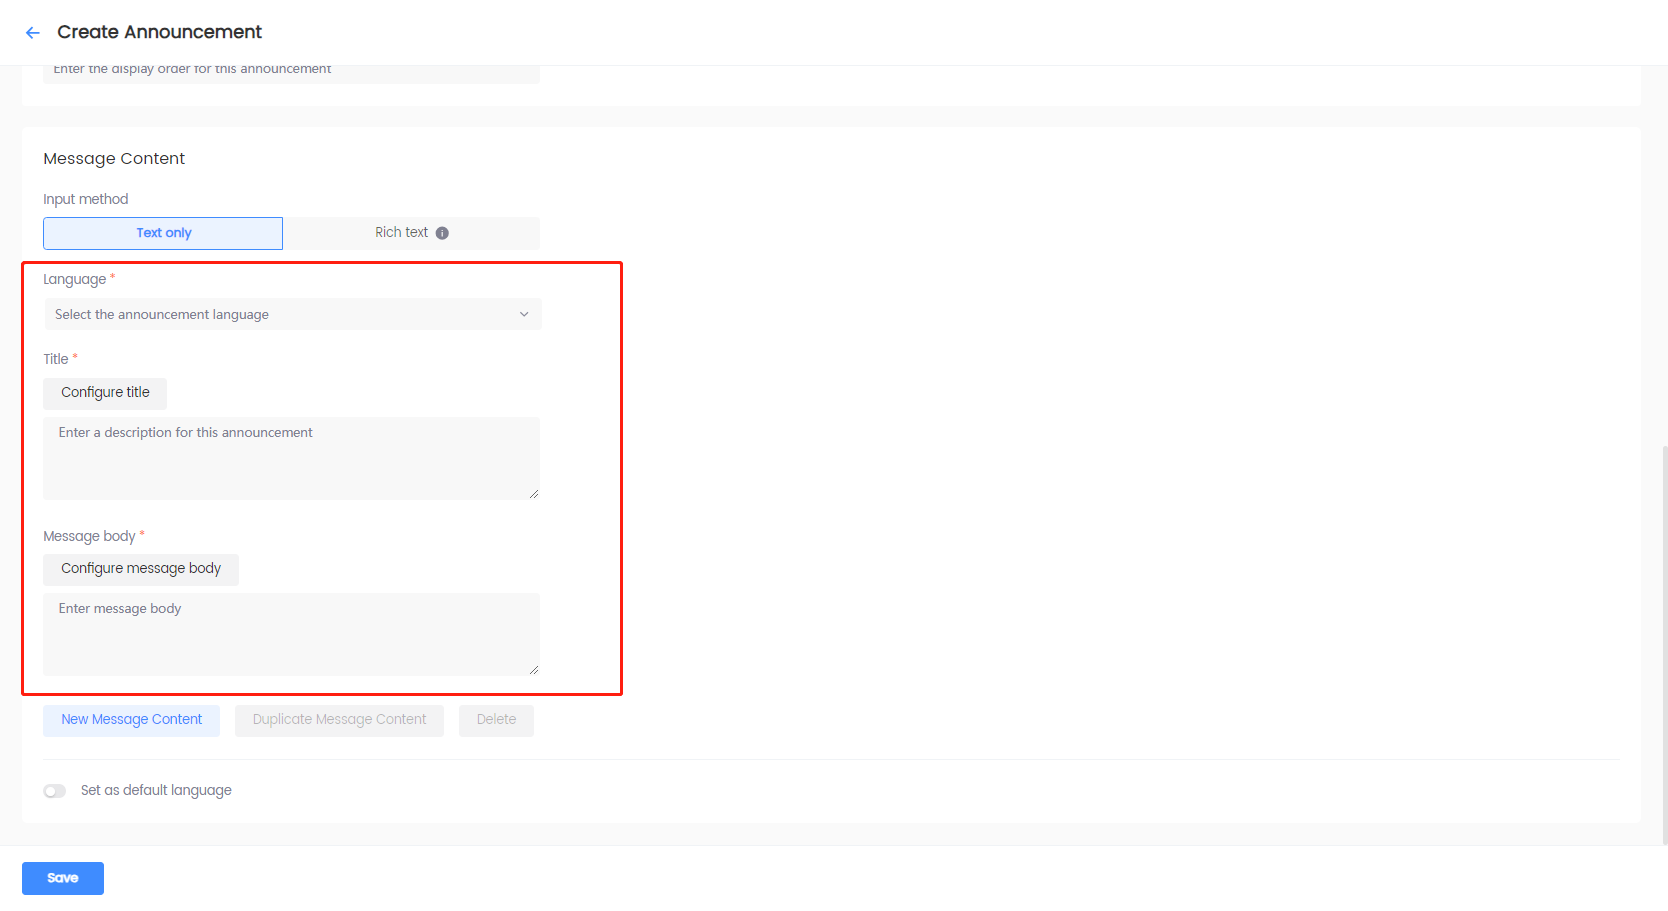
Select a language, and specify Title and Message body.
-
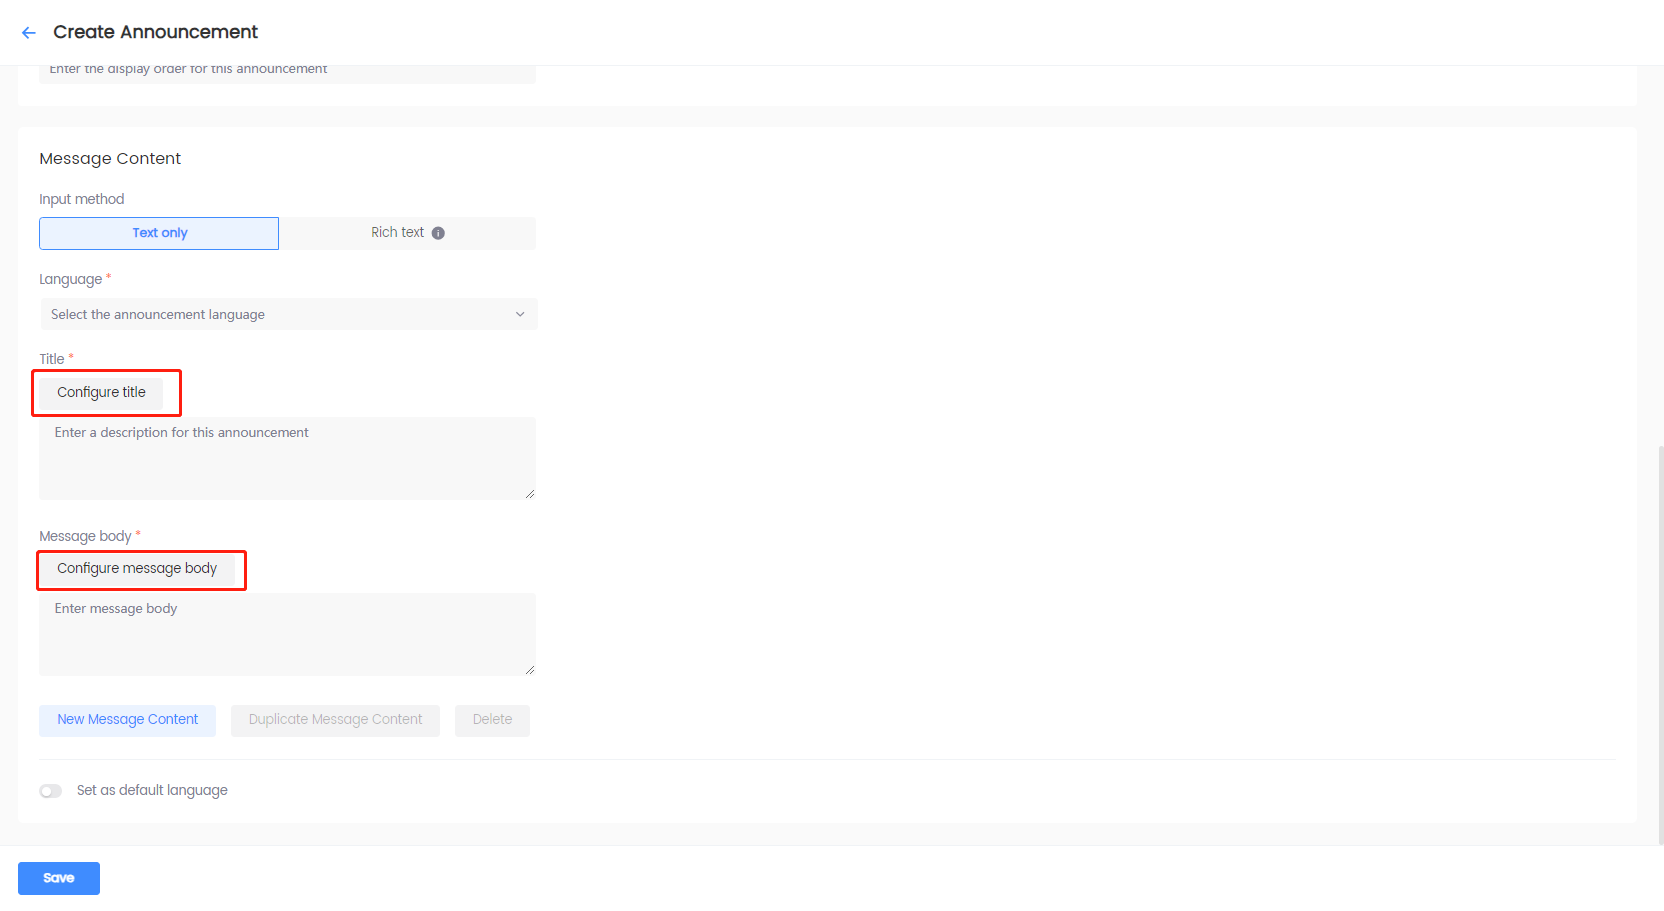
[Optional] Click Configure title or Configure message body to select a translation entry. To configure the content of a translation entry, see Manage Contents.
 note
noteWhen the field is configured to use translation entries, editing of Language, Title, Message body, Duplicate Message Content, and Delete is disabled. Remove the translation entry to enable editing.
-
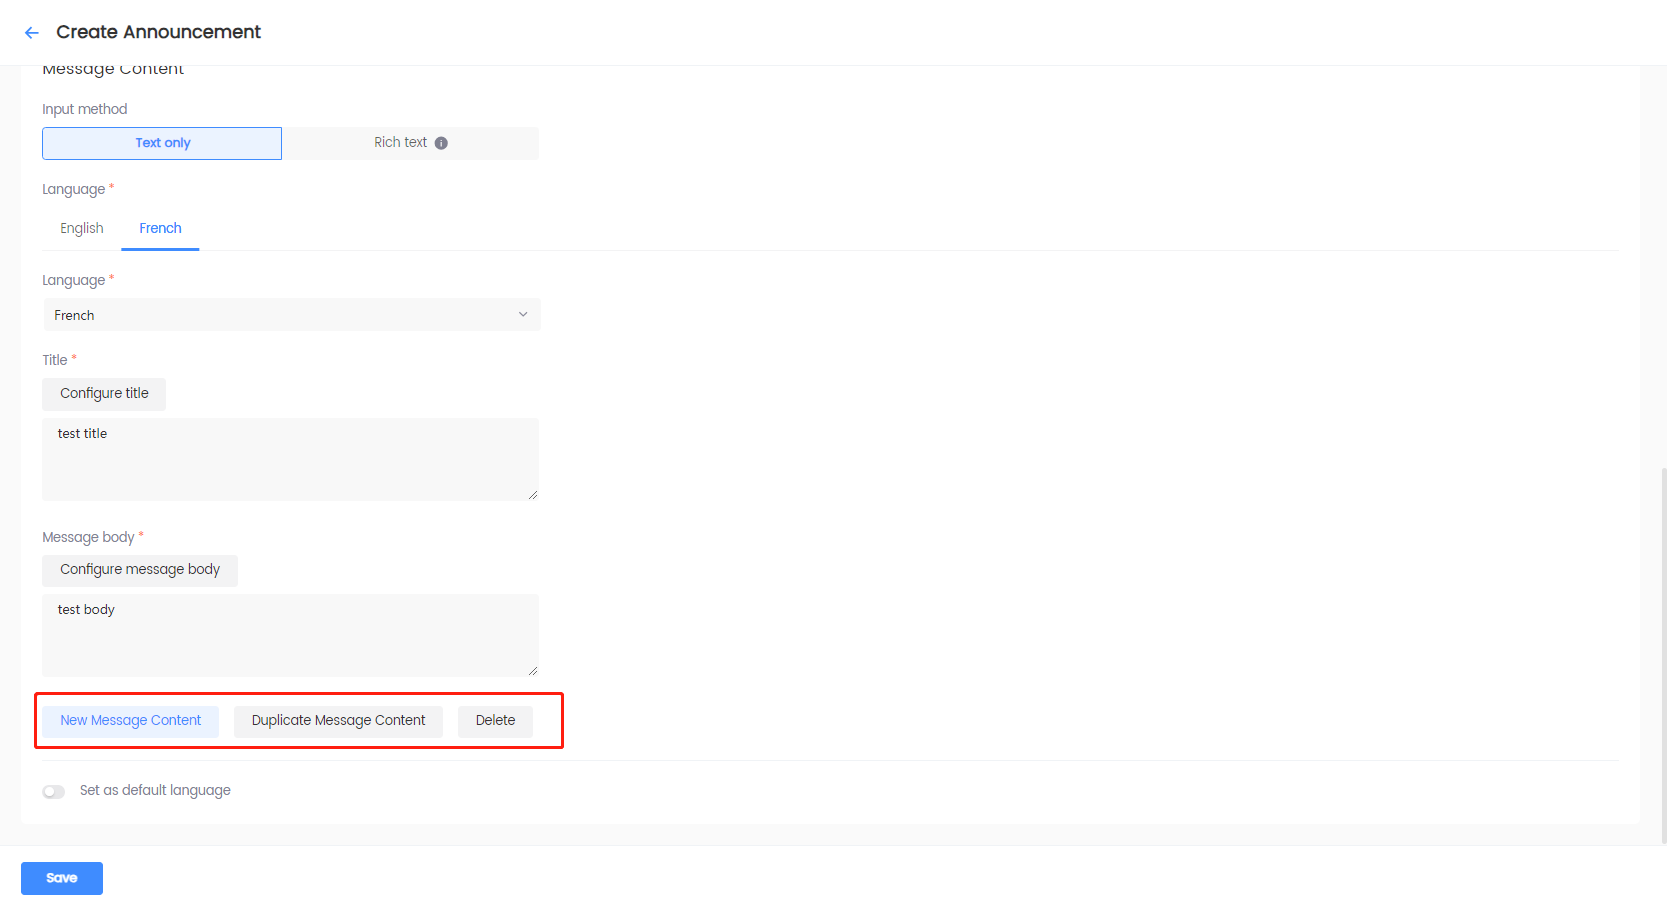
Use one of the following options to set up Message Content:
- Click New Message Content to save the announcement content in the selected language. A new tab for the selected language is created under Language. Use this option to create the message content for multi-language announcements.
- Click Duplicate Message Content to copy the announcement content from the previous language. You need to select a new language after clicking this option.
- Click Delete and click Confirm in the popup window to delete the announcement content of the selected language. This option is disabled when there is only one language.
-
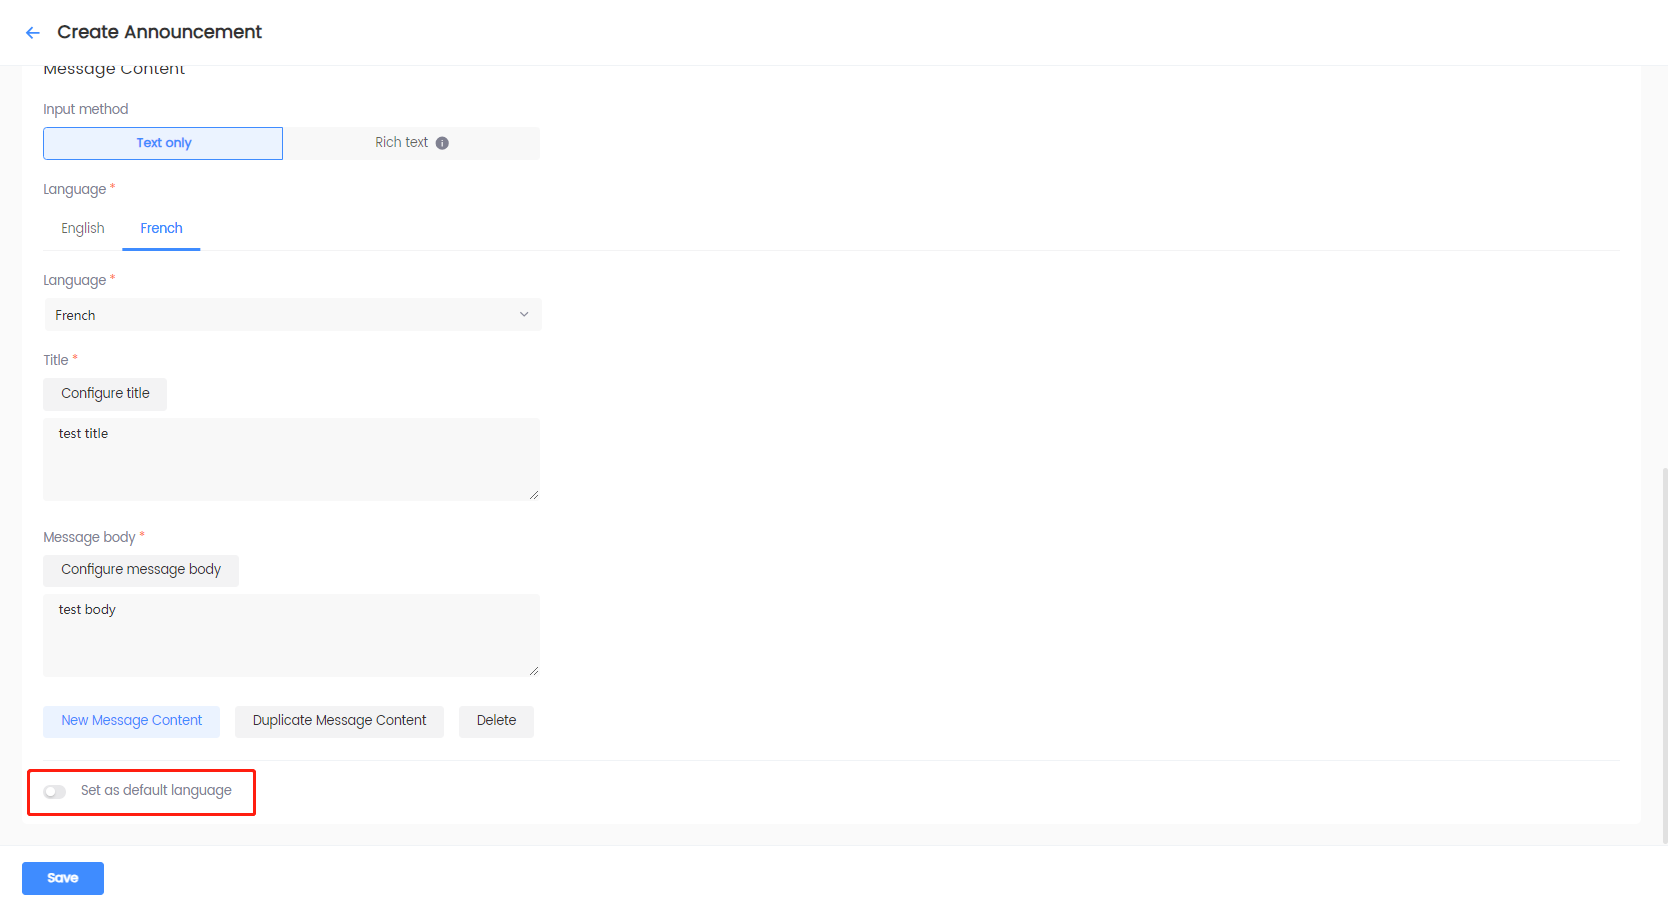
Select whether to set the default language. At least one language must be configured before enabling this option.
- When enabled: Select a saved language to set as the default language. Automatically displays the announcement in the default language for players playing in languages not configured for this announcement.
- When disabled: No default language is set. Displays the announcement in the configured languages set for the announcement, and players playing in other languages will be unable to see this announcement.
-
-
Click Save to save the configurations. The saved announcement will appear in the Announcement List.
Create post-login announcements
-
Log in to the Player Network Console.
-
In the left sidebar, click Announcements > Announcement List under Player Management.
-
Click Create Announcement.

-
In the Select Template popup, select an appropriate template and click Confirm.

-
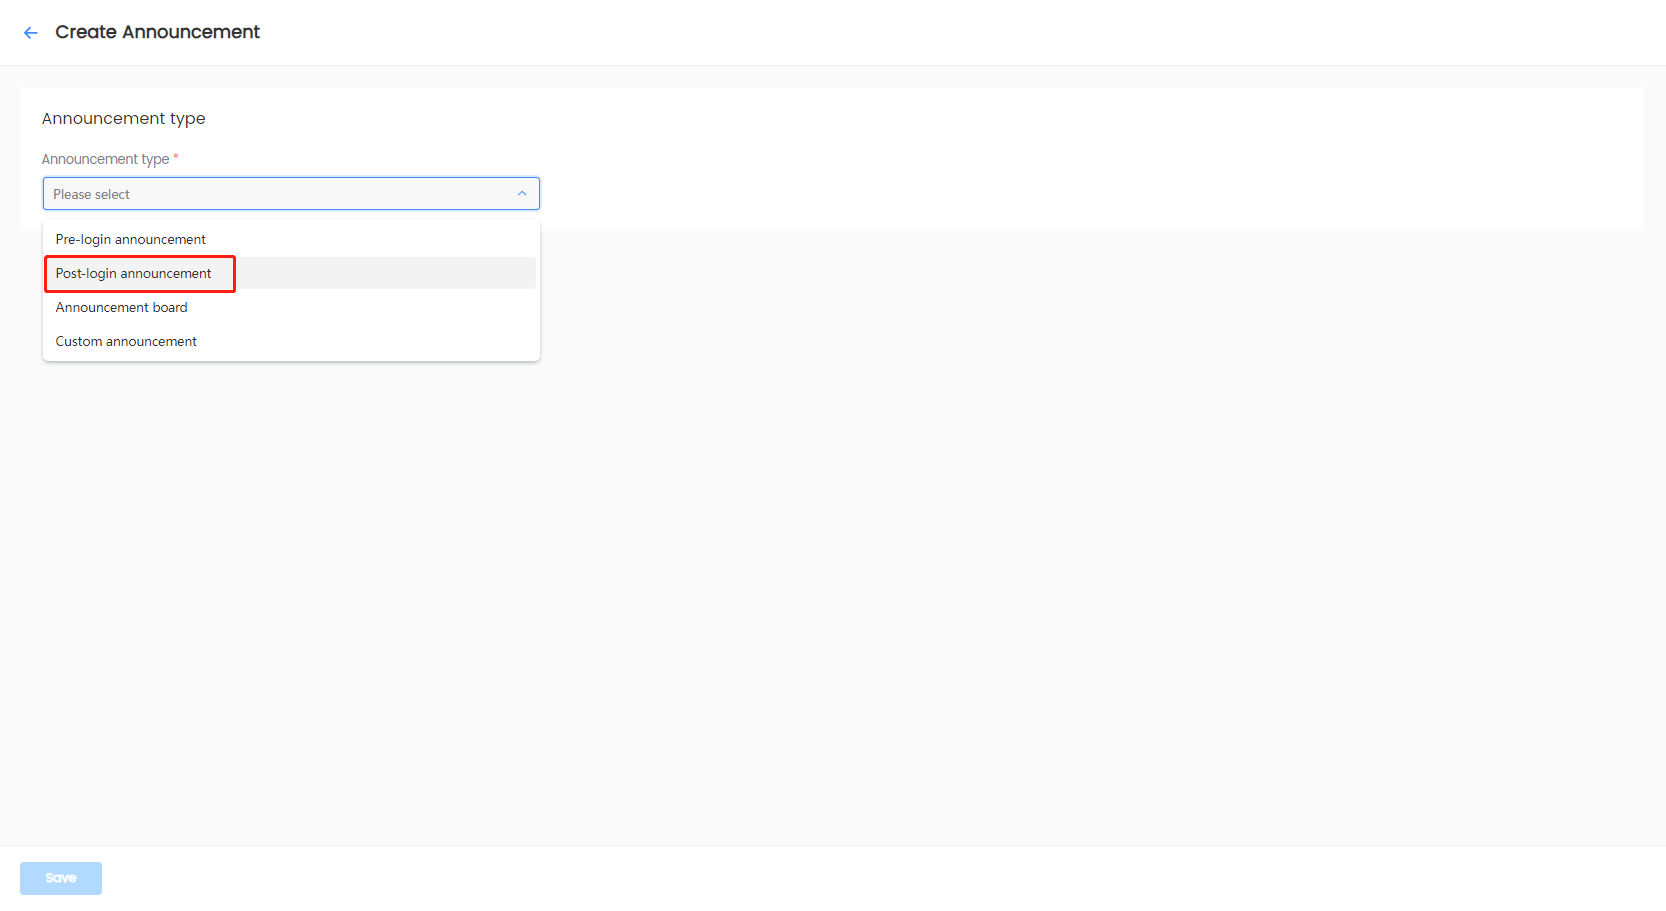
On the Create Announcement page, click the Announcement type dropdown, and select Post-login announcement.
-
Under Basic Information, specify the following details:
-
Enter the Announcement name and Description.

-
Select the Time zone, and the Validity of the time zone.
 note
noteThe start time specifies when to start showing the announcement in the game, and the end time specifies when to stop showing the announcement in the game. For more information, see the
StartTimeandEndTimevariables in INTLNoticeResult data structure for Unity SDK or FINTLNoticeResult data structure for Unreal Engine SDK. -
[Optional] When there are multiple post-login announcements, specify the order of the announcements.

-
-
Under Message Content, specify the following details:
-
Select the preferred input method. Supports both plain text and rich text input methods.
noteThe rich text editor can be used to edit the announcement content, which supports rich text functions such as bold text, changing font and font size, custom font colors, and hyperlinks.
Player Network SDK WebView is recommended for the display of rich text content.
-
Select a language, and specify Title and Message body.

-
[Optional] Click Configure title or Configure message body to select a translation entry. To configure the content of a translation entry, see Manage Contents.
 note
noteWhen the field is configured to use translation entries, editing of Language, Title, Message body, Duplicate Message Content, and Delete is disabled. Remove the translation entry to enable editing.
-
[Optional] For announcements with icons and images, click + Add image, and configure the following:
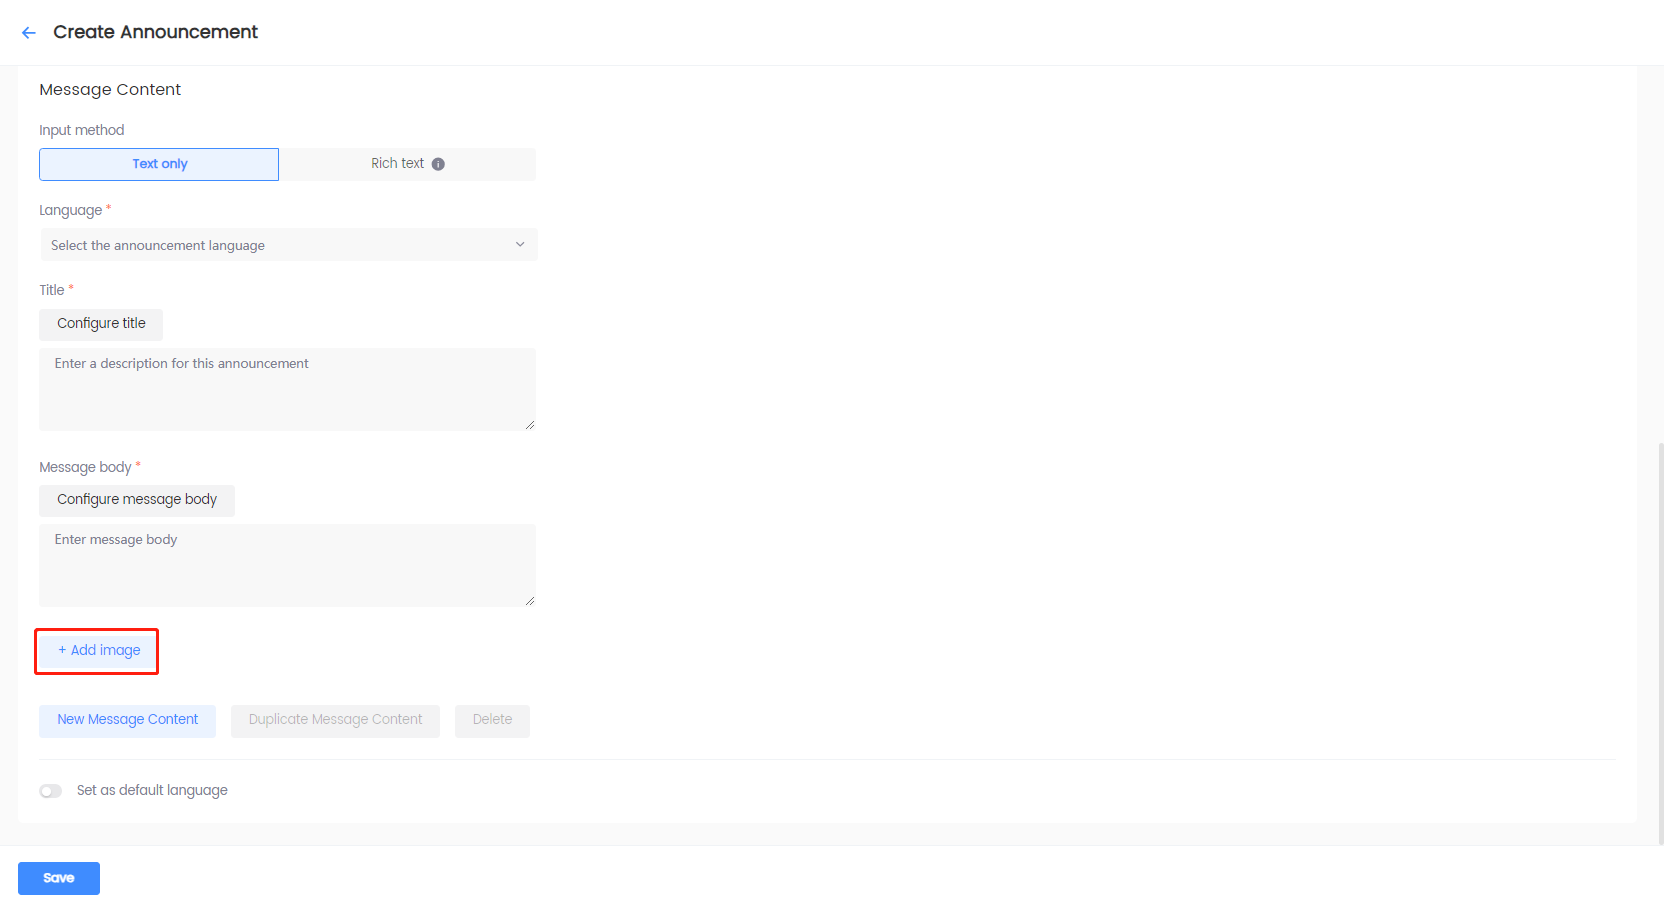
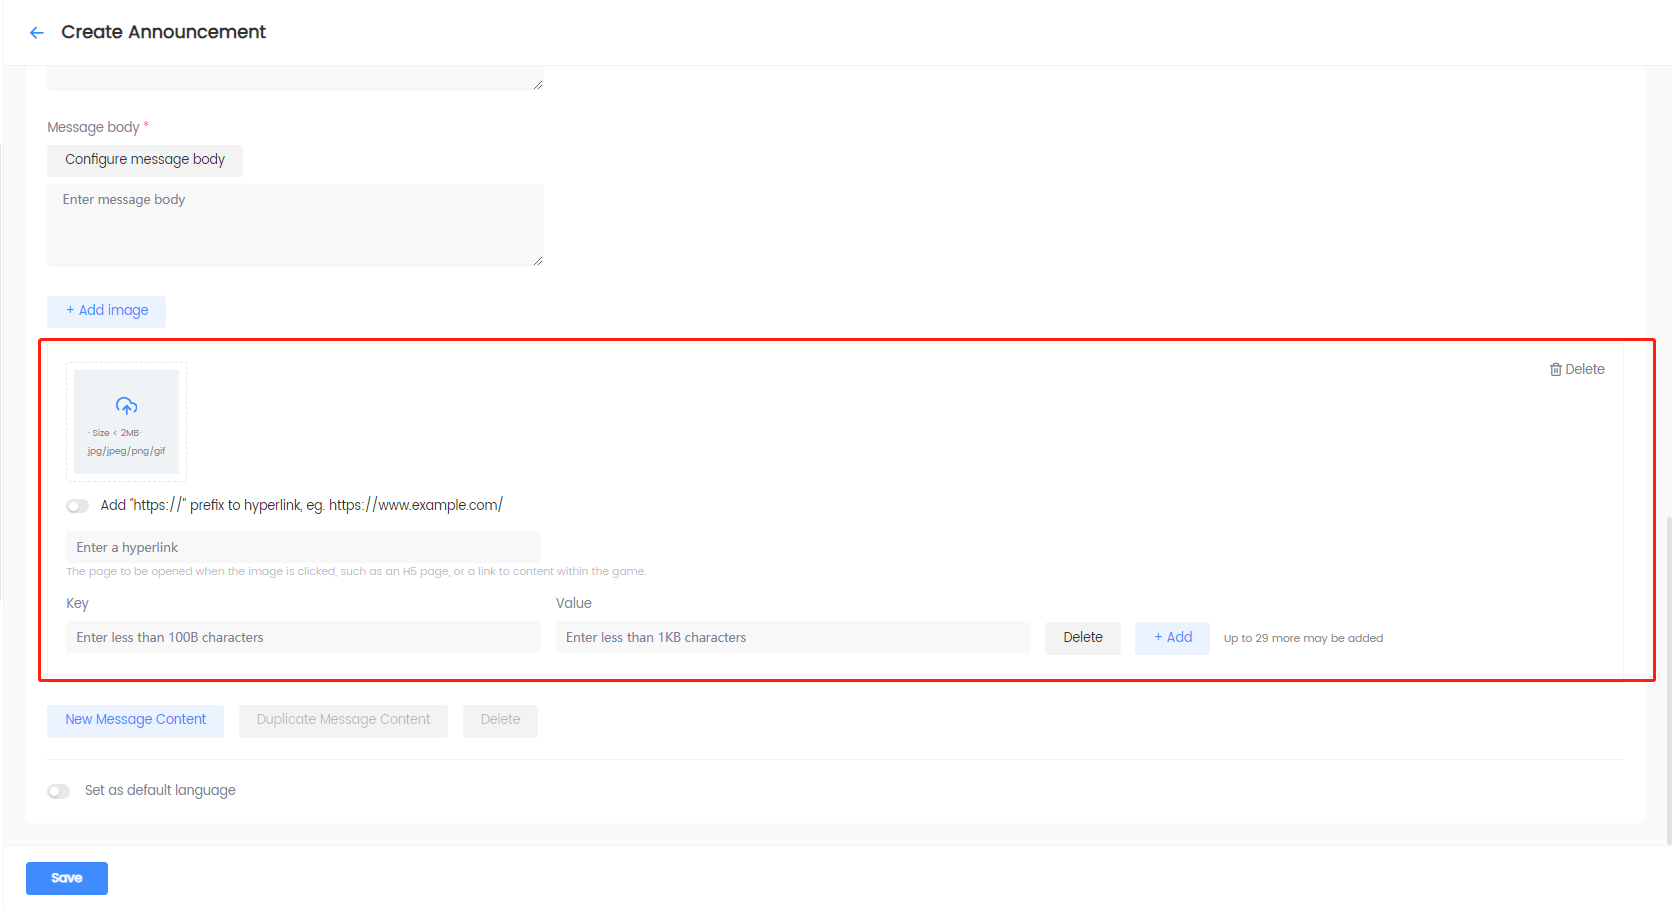
- For static images, click the upload icon to upload a local image file.
- For images that redirect players to a page or somewhere inside the game, enter the appropriate link after uploading the required image.
- To define the image location, attached text, or other properties, add custom attributes as key-value pairs.
- To delete an image, click Delete from the top right corner of the image, and click Confirm in the popup window.
noteMembers with the Author role can add multiple images. For more information, see the
PictureListvariable in INTLNoticeResult data structure for Unity SDK or FINTLNoticeResult data structure for Unreal Engine SDK. -
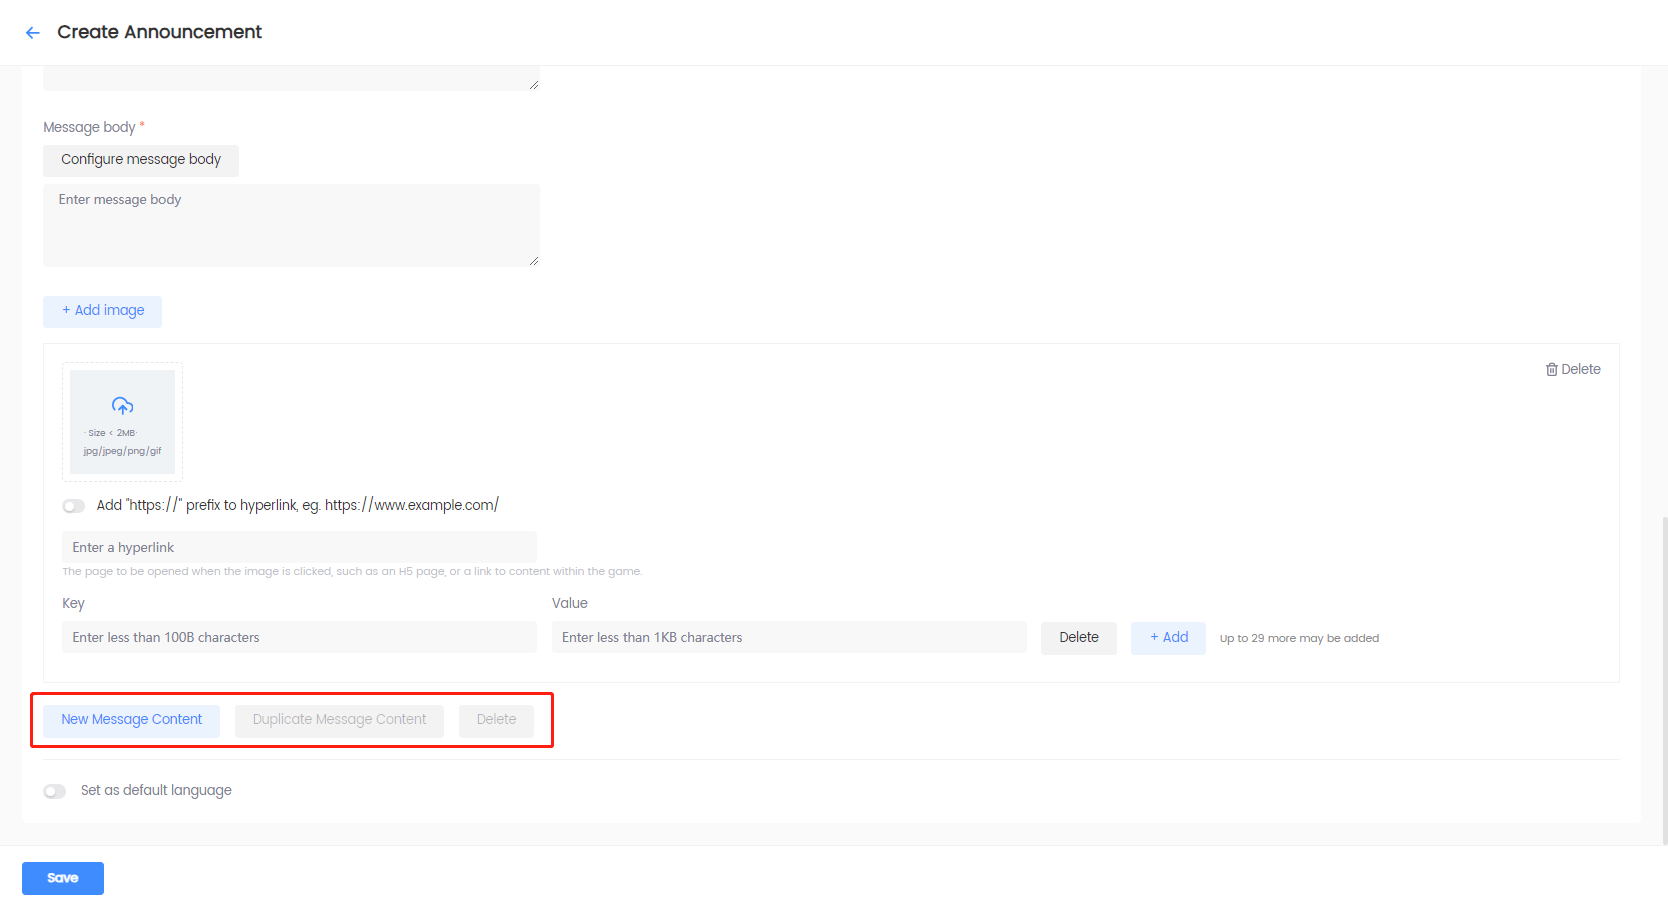
Use one of the following options to set up Message Content:
- Click New Message Content to save the announcement content in the selected language. A new tab for the selected language is created under Language. Use this option to create the message content for multi-language announcements.
- Click Duplicate Message Content to copy the announcement content from the previous language. You need to select a new language after clicking this option.
- Click Delete and click Confirm in the popup window to delete the announcement content of the selected language. This option is disabled when there is only one language.
-
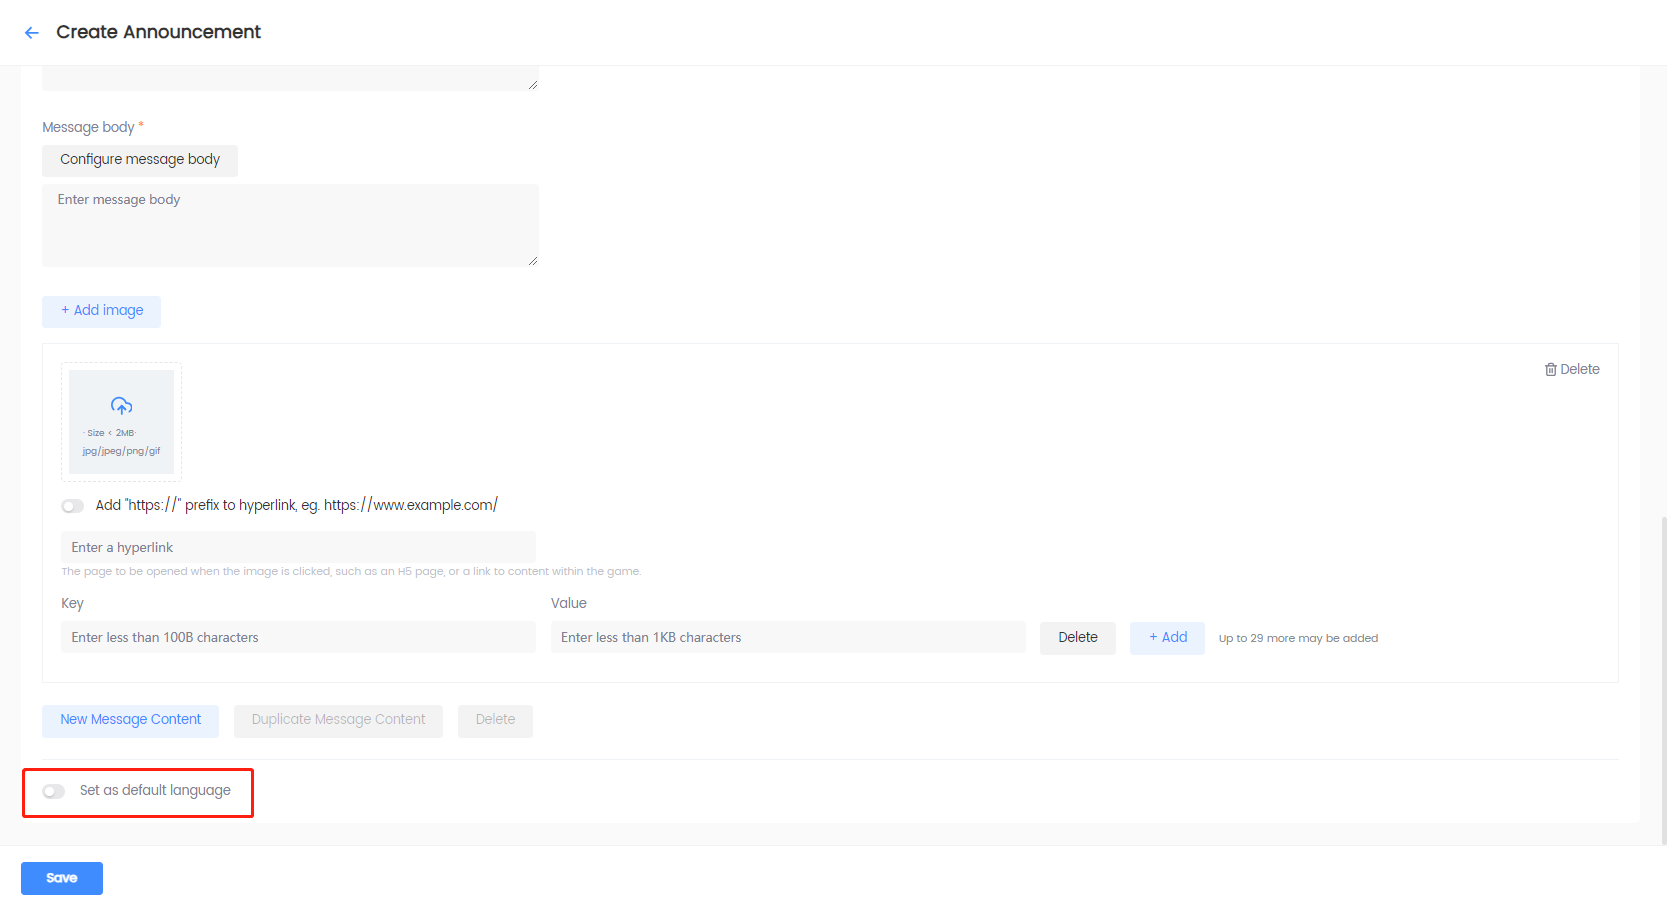
Select whether to set the default language. At least one language must be configured before enabling this option.
- When enabled: Select a saved language to set as the default language. Automatically displays the announcement in the default language for players playing in languages not configured for this announcement.
- When disabled: No default language is set. Displays the announcement in the configured languages set for the announcement, and players playing in other languages will be unable to see this announcement.
-
-
Click Save to save the configurations. The saved announcement will appear in the Announcement List.


Create announcement boards
-
Log in to the Player Network Console.
-
In the left sidebar, click Announcements > Announcement List under Player Management.
-
Click Create Announcement.

-
In the Select Template popup, select an appropriate template and click Confirm.

-
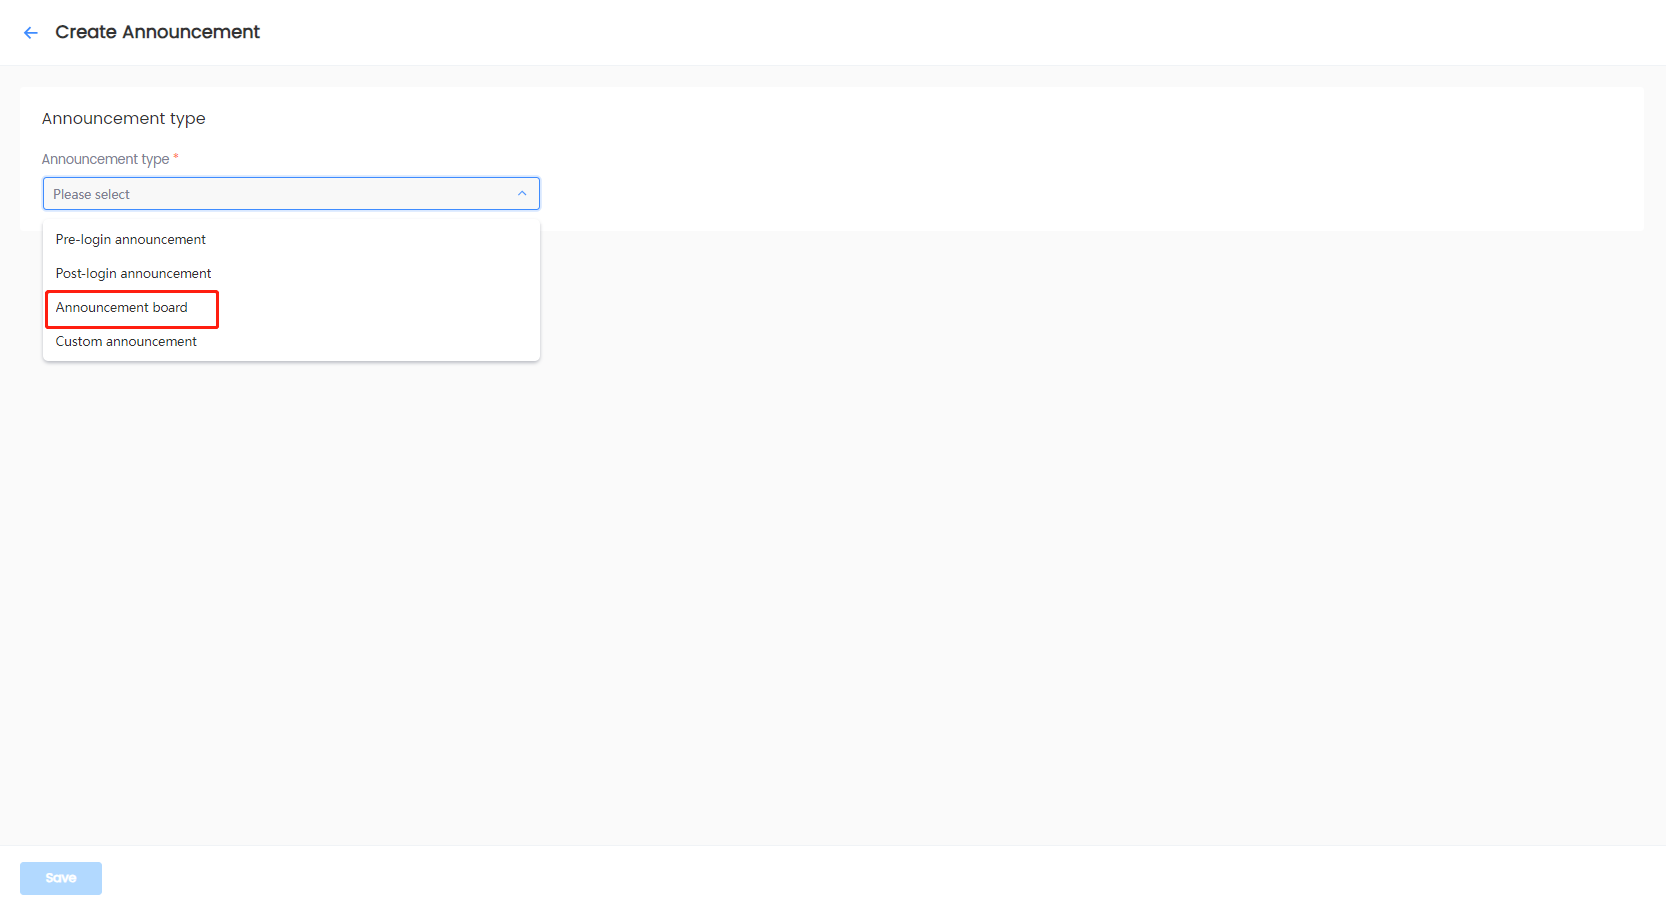
On the Create Announcement page, click the Announcement type dropdown, and select Announcement board.
-
Under Basic Information, specify the following details:
-
Enter the Announcement name and Description.

-
Select the Time zone, and the Validity of the time zone.
 note
noteThe start time specifies when to start showing the announcement in the game, and the end time specifies when to stop showing the announcement in the game. For more information, see the
StartTimeandEndTimevariables in INTLNoticeResult data structure for Unity SDK or FINTLNoticeResult data structure for Unreal Engine SDK. -
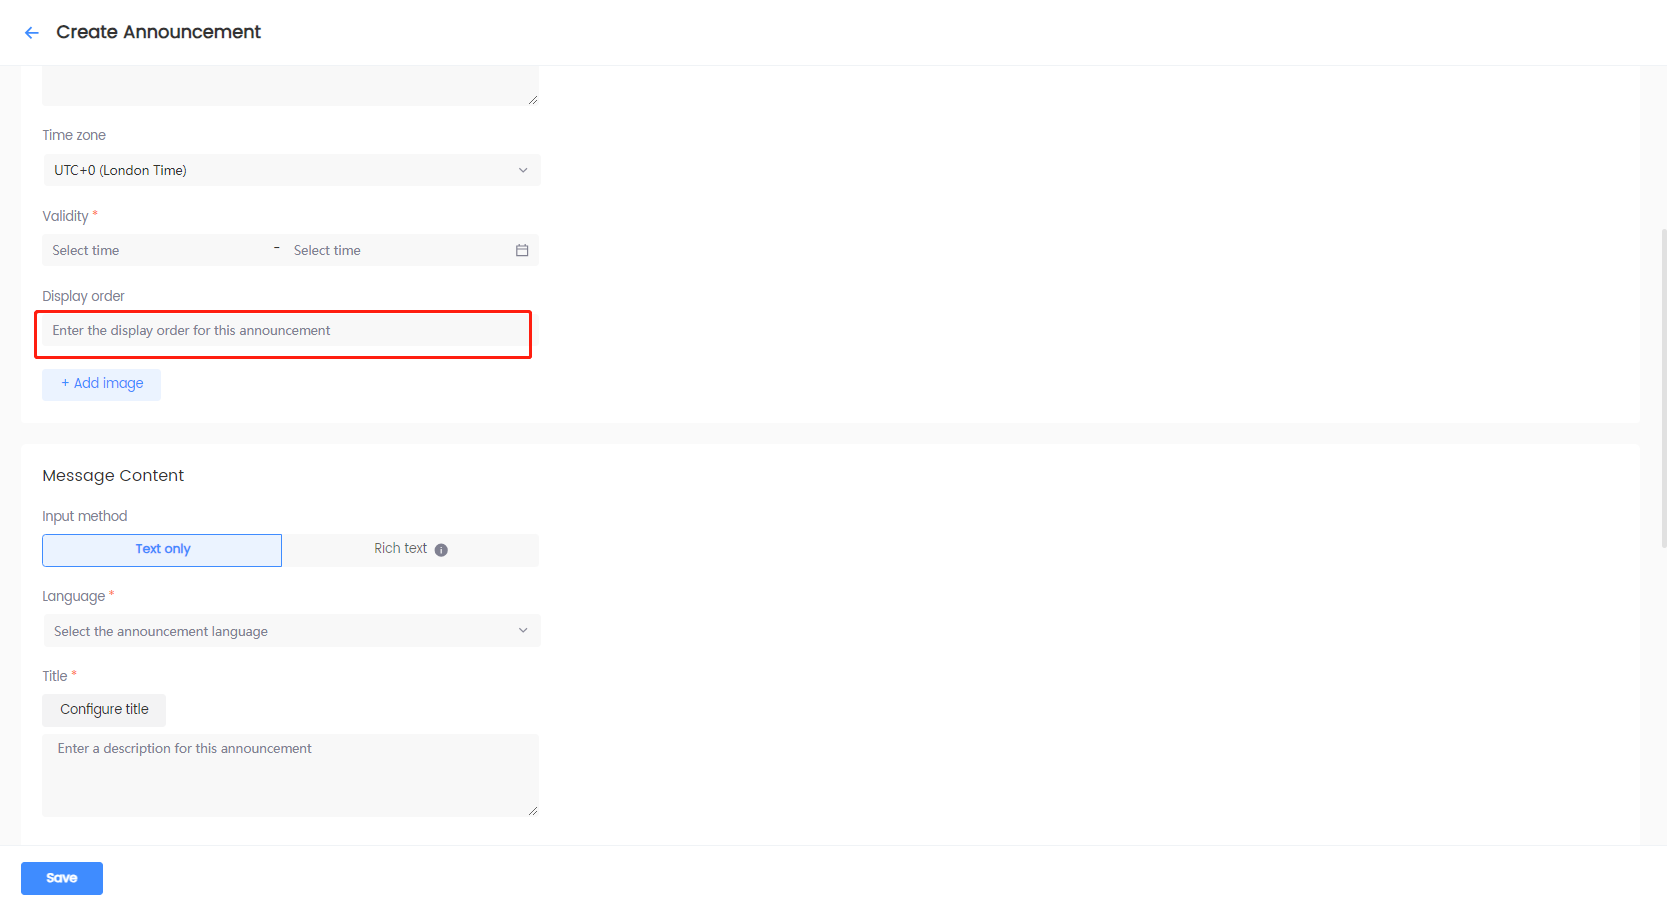
Specify the Display order of the announcement on the bulletin board.
-
[Optional] For announcements with icons and images, click + Add image, and configure the following:
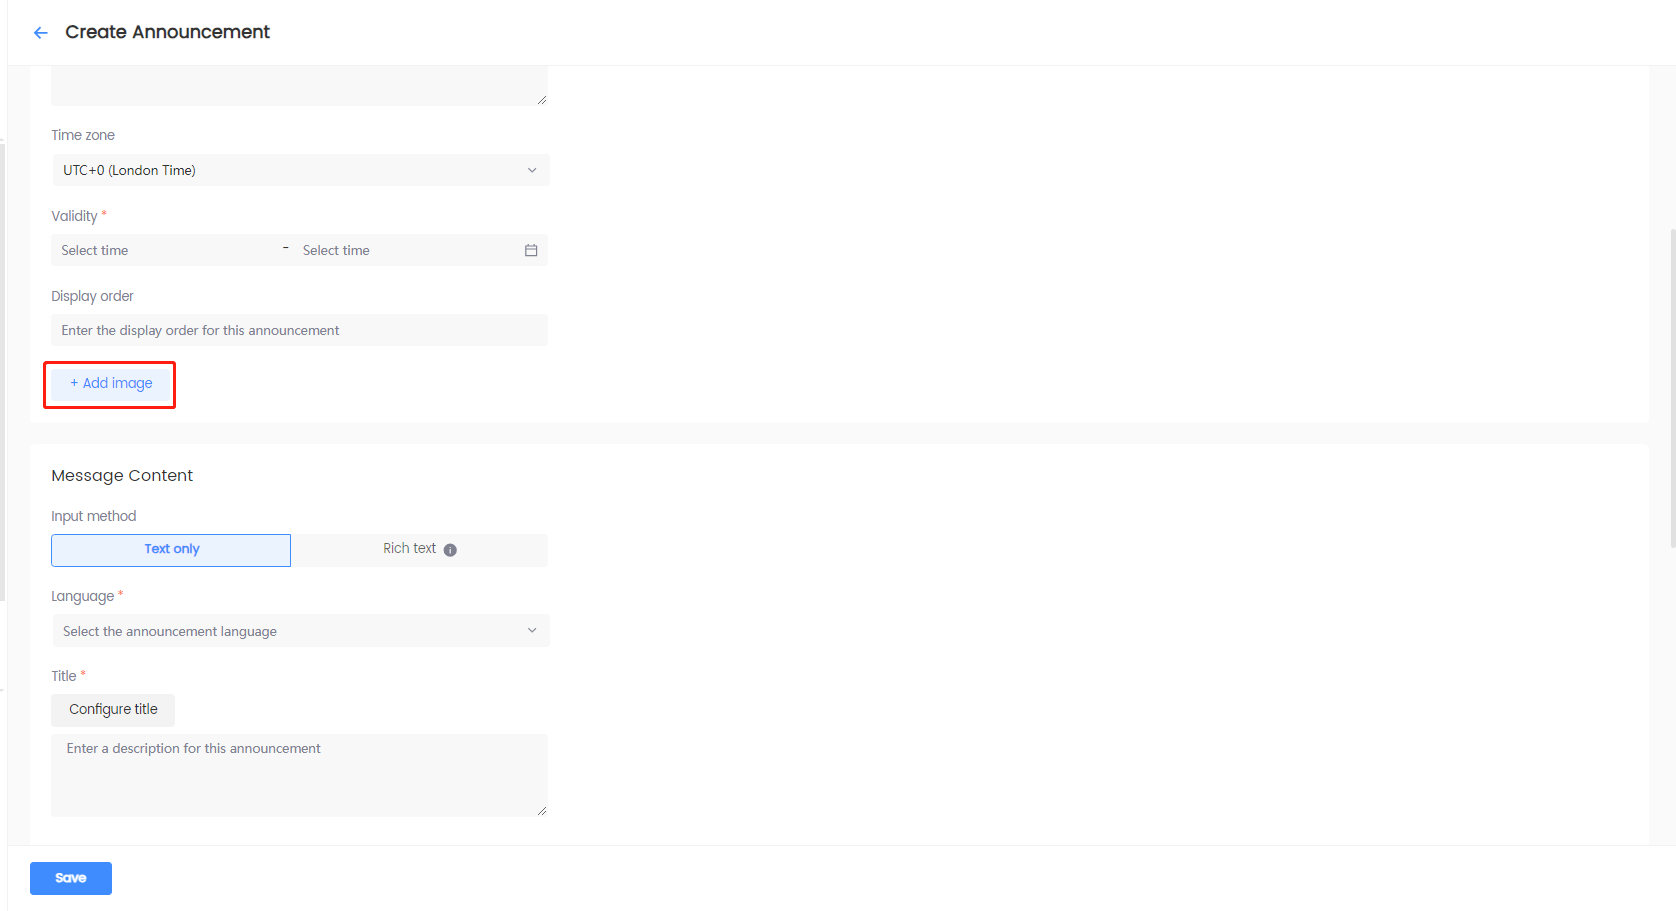
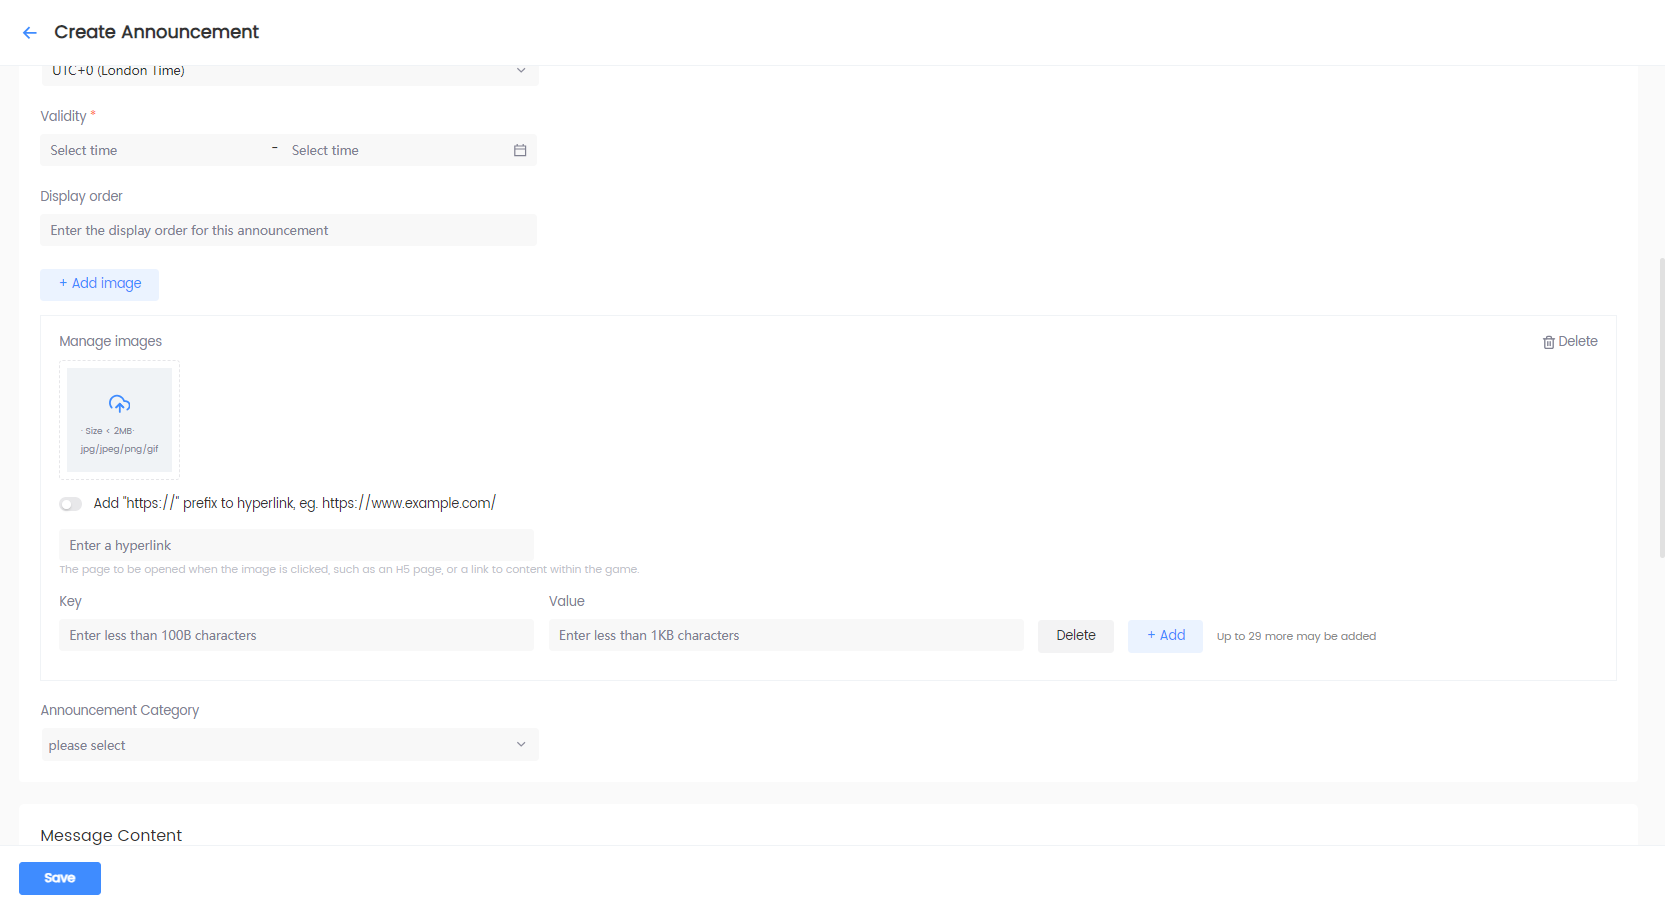
- For static images, click the upload icon to upload a local image file.
- For images that redirect players to a page or somewhere inside the game, enter the appropriate link after uploading the required image.
- To define the image location, attached text, or other properties, add custom attributes as key-value pairs.
- To delete an image, click Delete from the top right corner of the image, and click Confirm in the popup window.
noteMembers with the Author role can add multiple images. For more information, see the
PictureListvariable in INTLNoticeResult data structure for Unity SDK or FINTLNoticeResult data structure for Unreal Engine SDK. -
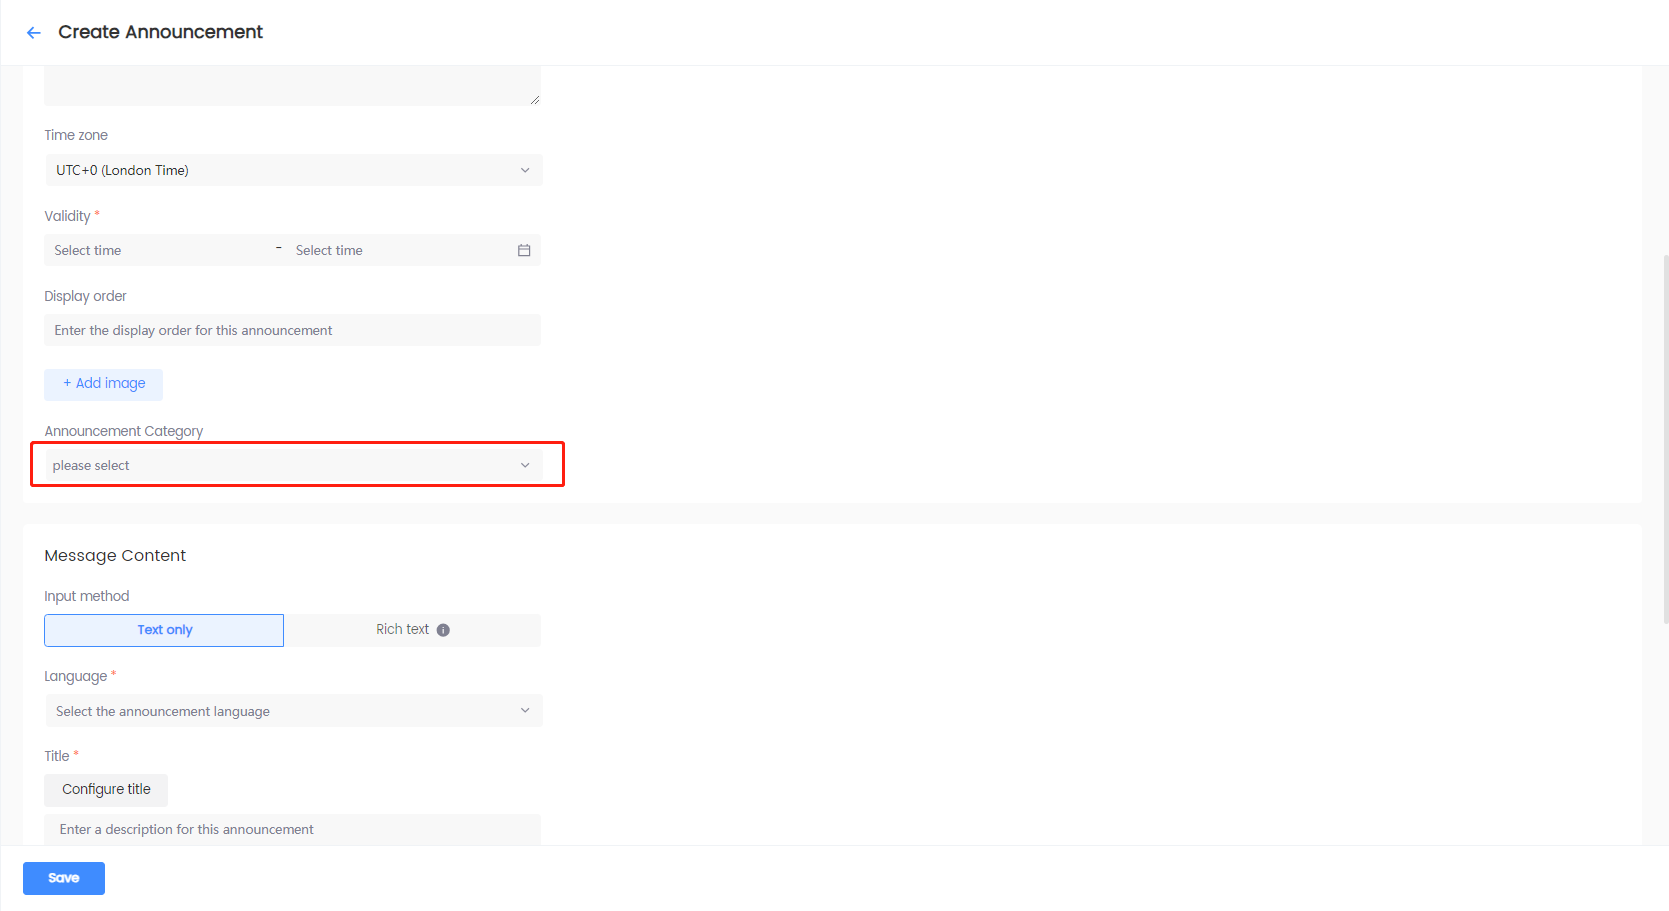
[Optional] Categorize the announcements in the bulletin board based on your needs. See Manage Categories for steps to manage announcement categories.
-
-
Under Message Content, specify the following details:
-
Select the preferred input method. Supports both plain text and rich text input methods.
noteThe rich text editor can be used to edit the announcement content, which supports rich text functions such as bold text, changing font and font size, custom font colors, and hyperlinks.
Player Network SDK WebView is recommended for the display of rich text content.
-
Select a language, and specify Title and Message body.

-
[Optional] Click Configure title or Configure message body to select a translation entry. To configure the content of a translation entry, see Manage Contents.
 note
noteWhen the field is configured to use translation entries, editing of Language, Title, Message body, Duplicate Message Content, and Delete is disabled. Remove the translation entry to enable editing.
-
[Optional] For announcements with icons and images, click + Add image, and configure the following:


- For static images, click the upload icon to upload a local image file.
- For images that redirect players to a page or somewhere inside the game, enter the appropriate link after uploading the required image.
- To define the image location, attached text, or other properties, add custom attributes as key-value pairs.
- To delete an image, click Delete from the top right corner of the image, and click Confirm in the popup window.
noteMembers with the Author role can add multiple images. For more information, see the
PictureListvariable in INTLNoticeResult data structure for Unity SDK or FINTLNoticeResult data structure for Unreal Engine SDK. -
Use one of the following options to set up Message Content:
- Click New Message Content to save the announcement content in the selected language. A new tab for the selected language is created under Language. Use this option to create the message content for multi-language announcements.
- Click Duplicate Message Content to copy the announcement content from the previous language. You need to select a new language after clicking this option.
- Click Delete and click Confirm in the popup window to delete the announcement content of the selected language. This option is disabled when there is only one language.

-
Select whether to set the default language. At least one language must be configured before enabling this option.
- When enabled: Select a saved language to set as the default language. Automatically displays the announcement in the default language for players playing in languages not configured for this announcement.
- When disabled: No default language is set. Displays the announcement in the configured languages set for the announcement, and players playing in other languages will be unable to see this announcement.

-
-
Click Save to save the configurations. The saved announcement will appear in the Announcement List.


Create custom announcements
Custom announcements are primarily edited through custom attributes. Custom attributes refer to the attributes that can be defined freely for announcements in a game. For example, games can customize the text color of the custom announcements.
| Key | Value |
|---|---|
| font_color | Font color 1: black 2: red 3: green 4: gray |
Game developers and the operations team should define the custom attributes together and provide the configuration file to Player Network. The table above is an example row in a configuration file, and the number of rows varies based on the number of custom attributes defined.
-
Log in to the Player Network Console.
-
In the left sidebar, select Announcements > Announcement List under Player Management.
-
Click Create Announcement.

-
In the Select Template popup, select an appropriate template and click Confirm.

-
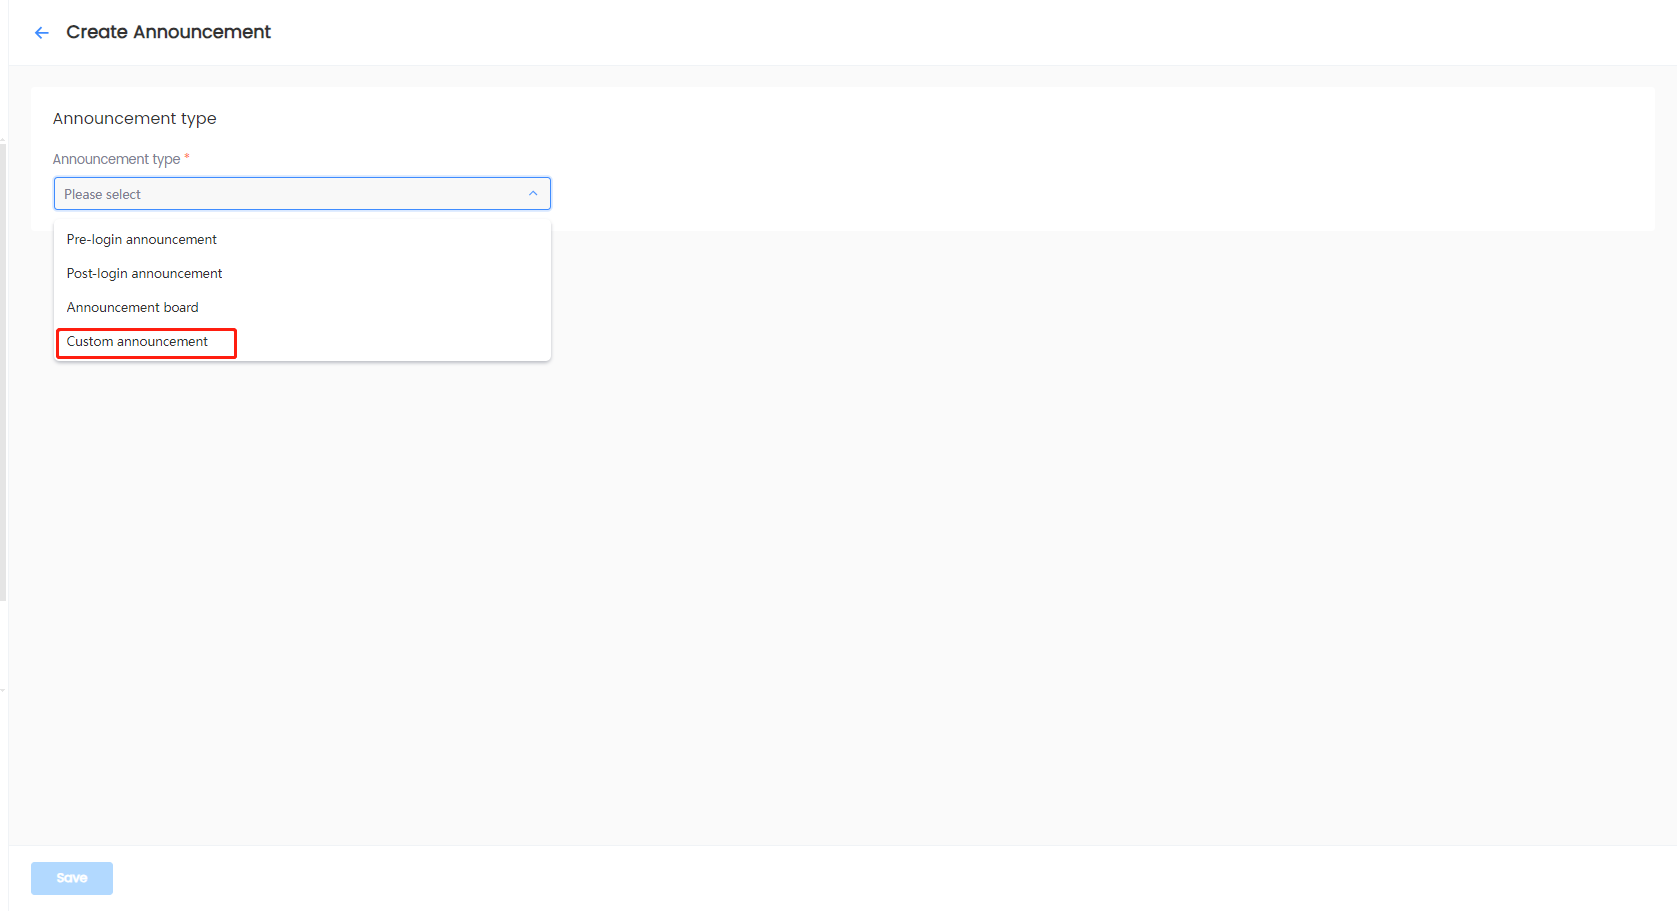
On the Create Announcement page, click the Announcement type dropdown, and select Custom announcement.
-
Under Basic Information, specify the following details:
-
Enter the Announcement name and Description.

-
Select the Time zone, and the Validity of the time zone.
 note
noteThe start time specifies when to start showing the announcement in the game, and the end time specifies when to stop showing the announcement in the game. For more information, see the
StartTimeandEndTimevariables in INTLNoticeResult data structure for Unity SDK or FINTLNoticeResult data structure for Unreal Engine SDK. -
[Optional] For announcements with icons and images, click + Add image, and configure the following:


- For static images, click the upload icon to upload a local image file.
- For images that redirect players to a page or somewhere inside the game, enter the appropriate link after uploading the required image.
- To define the image location, attached text, or other properties, add custom attributes as key-value pairs.
- To delete an image, click Delete from the top right corner of the image, and click Confirm in the popup window.
noteMembers with the Author role can add multiple images. For more information, see the
PictureListvariable in INTLNoticeResult data structure for Unity SDK or FINTLNoticeResult data structure for Unreal Engine SDK.
-
-
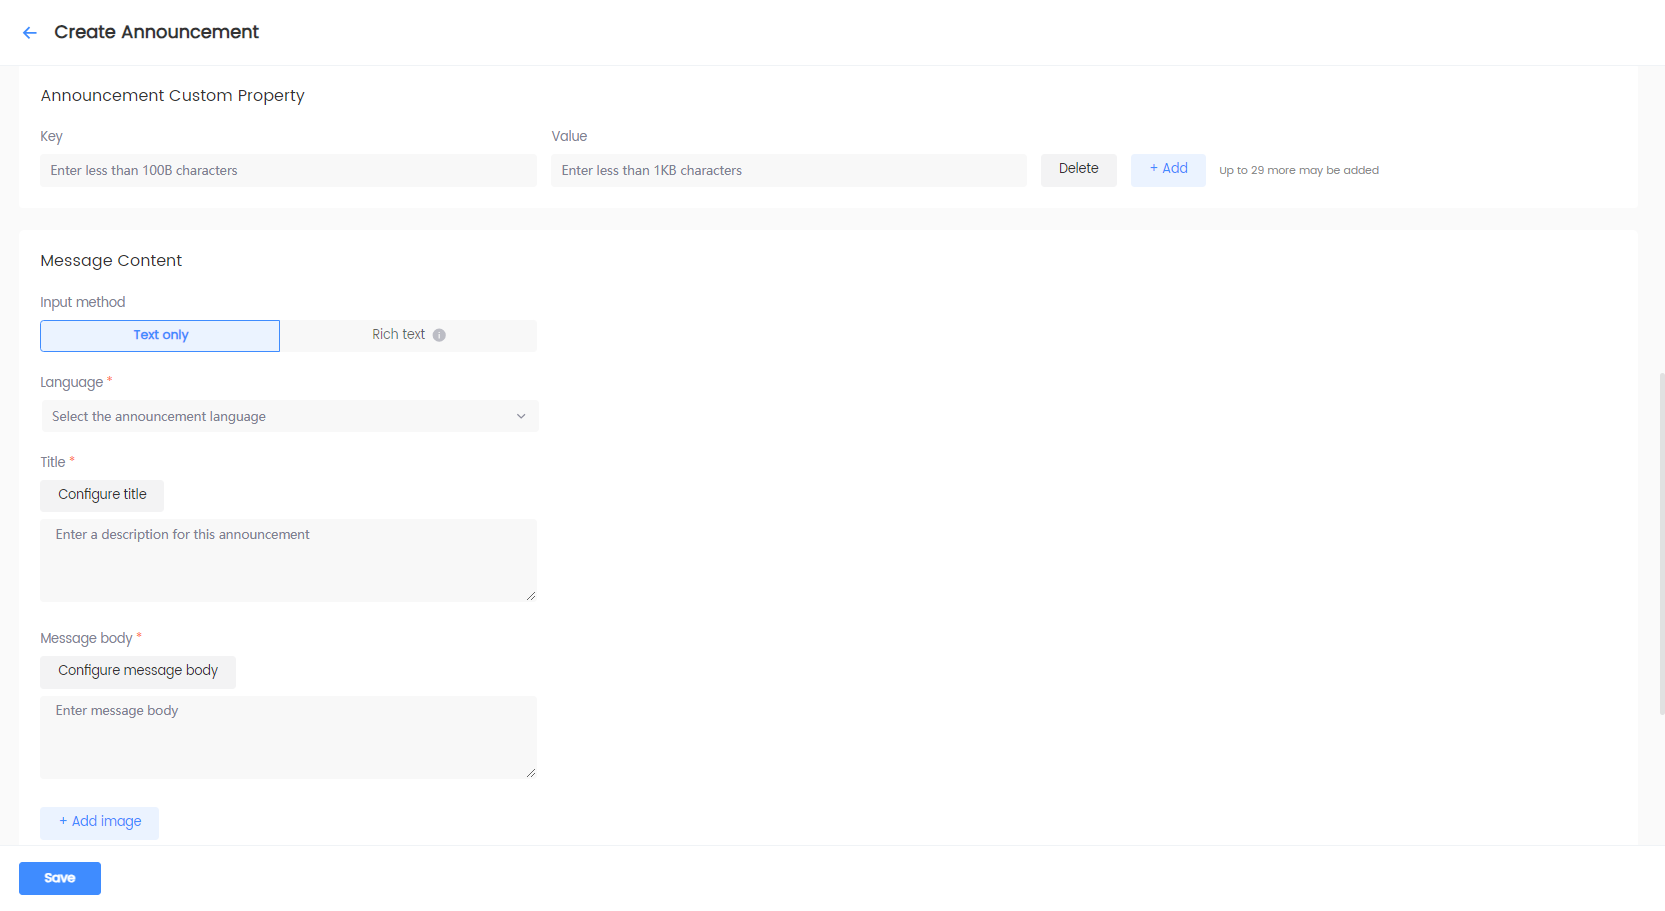
[Optional] Under Announcement Custom Property, add a custom key-value pair to display your announcement for the targeted users only. The below example shows how the announcement can be set to be displayed for Android or iOS users only.
- Key: "os"
- Value: "1"(Android), "2"(iOS)
 note
noteFor more details about the extended information that can be returned, see
ExtraDatain theNoticeResultdata structure for Unity SDK or Unreal Engine SDK. -
Under Message Content, specify the following details:
-
Select the preferred input method. Supports both plain text and rich text input methods.
noteThe rich text editor can be used to edit the announcement content, which supports rich text functions such as bold text, changing font and font size, custom font colors, and hyperlinks.
Player Network SDK WebView is recommended for the display of rich text content.
-
Select a language, and specify Title and Message body.

-
[Optional] Click Configure title or Configure message body to select a translation entry. To configure the content of a translation entry, see Manage Contents.
 note
noteWhen the field is configured to use translation entries, editing of Language, Title, Message body, Duplicate Message Content, and Delete is disabled. Remove the translation entry to enable editing.
-
[Optional] For announcements with icons and images, click + Add image, and configure the following:


- For static images, click the upload icon to upload a local image file.
- For images that redirect players to a page or somewhere inside the game, enter the appropriate link after uploading the required image.
- To define the image location, attached text, or other properties, add custom attributes as key-value pairs.
- To delete an image, click Delete from the top right corner of the image, and click Confirm in the popup window.
noteMembers with the Author role can add multiple images. For more information, see the
PictureListvariable in INTLNoticeResult data structure for Unity SDK or FINTLNoticeResult data structure for Unreal Engine SDK. -
[Optional] Under Custom Property, custom attributes can be added for each configured language.
noteAdd the custom attributes according to the configuration file defined by the developers and the operations team.
For more information, see theExtraDatavariable in INTLNoticeResult data structure for Unity SDK or FINTLNoticeResult data structure for Unreal Engine SDK. -
Use one of the following options to set up Message Content:
-
Click New Message Content to save the announcement content in the selected language. A new tab for the selected language is created under Language. Use this option to create the message content for multi-language announcements.
-
Click Duplicate Message Content to copy the announcement content from the previous language. You need to select a new language after clicking this option.
-
Click Delete and click Confirm in the popup window to delete the announcement content of the selected language. This option is disabled when there is only one language.

-
-
Select whether to set the default language. At least one language must be configured before enabling this option.
- When enabled: Select a saved language to set as the default language. Automatically displays the announcement in the default language for players playing in languages not configured for this announcement.
- When disabled: No default language is set. Displays the announcement in the configured languages set for the announcement, and players playing in other languages will be unable to see this announcement.

-
-
Click Save to save the configurations. The saved announcement will appear in the Announcement List.


Edit announcements
Game operators can modify the created announcements before publishing them. For more information, see Announcement Publishing Workflow. This guide illustrates how to modify an existing announcement.
-
Log in to the Player Network Console.
-
In the left sidebar, select Announcements > Announcement List under Player Management.
-
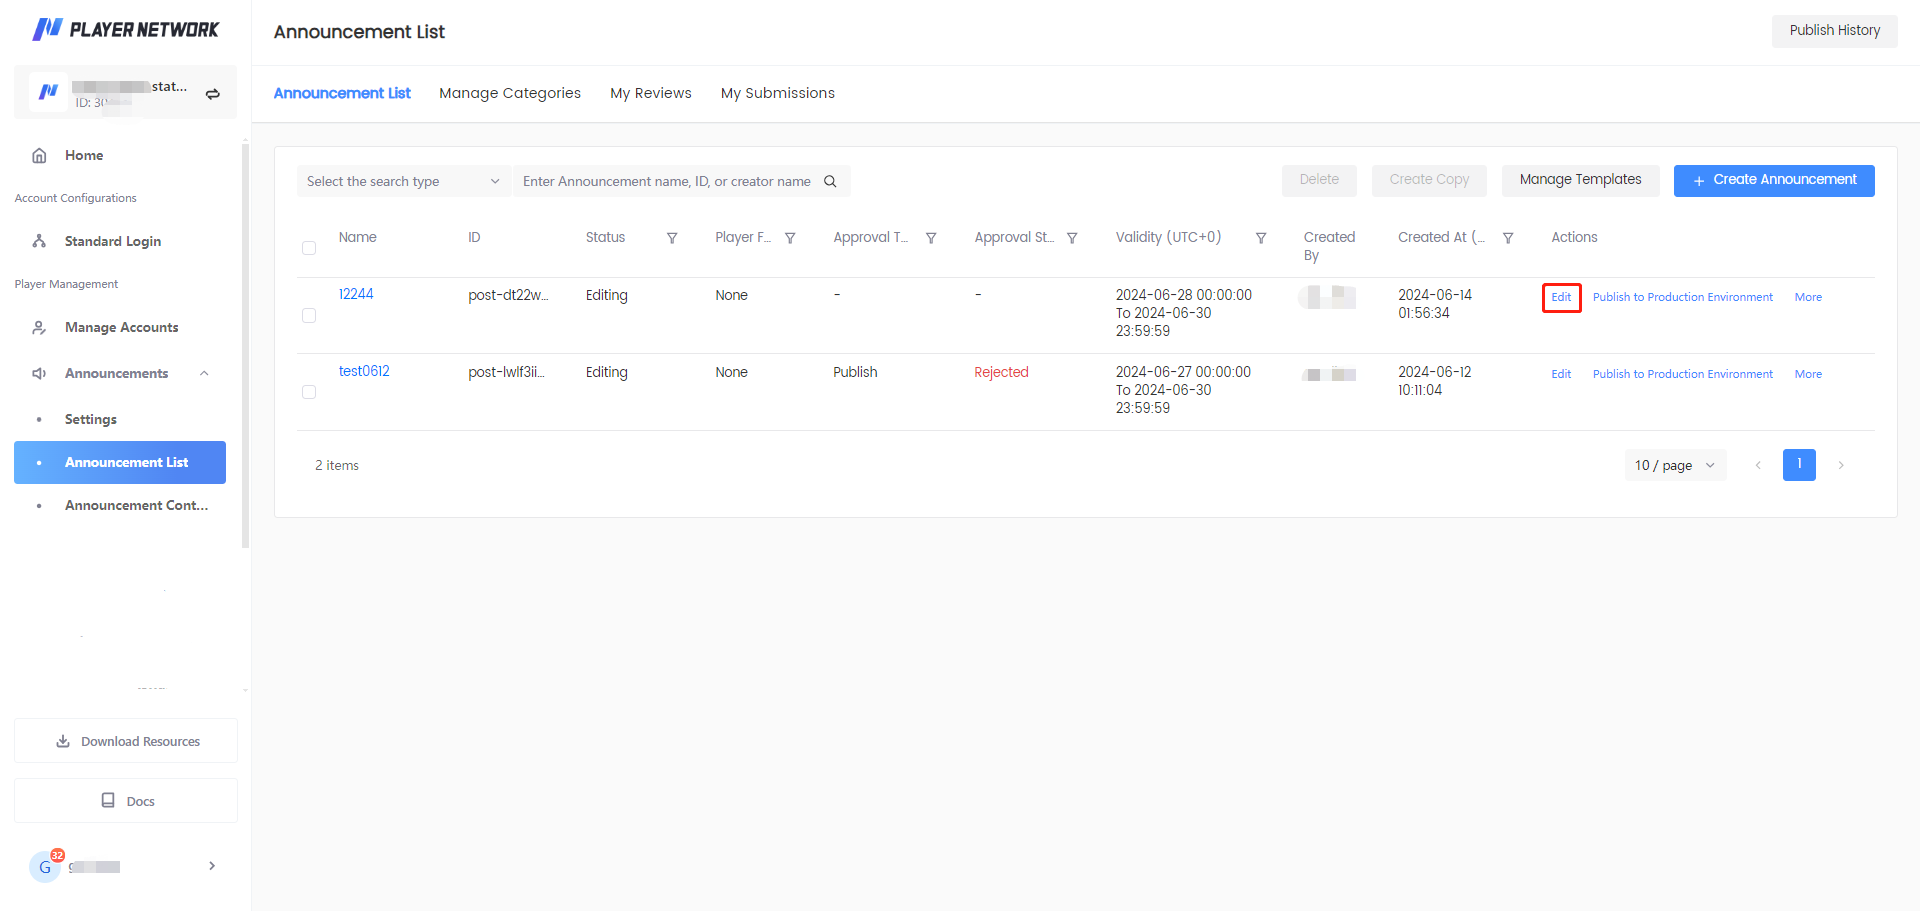
Click Edit in the Actions column of the announcement to modify. Alternatively, click the title of the announcement, then click Edit in the Announcement Details.
-
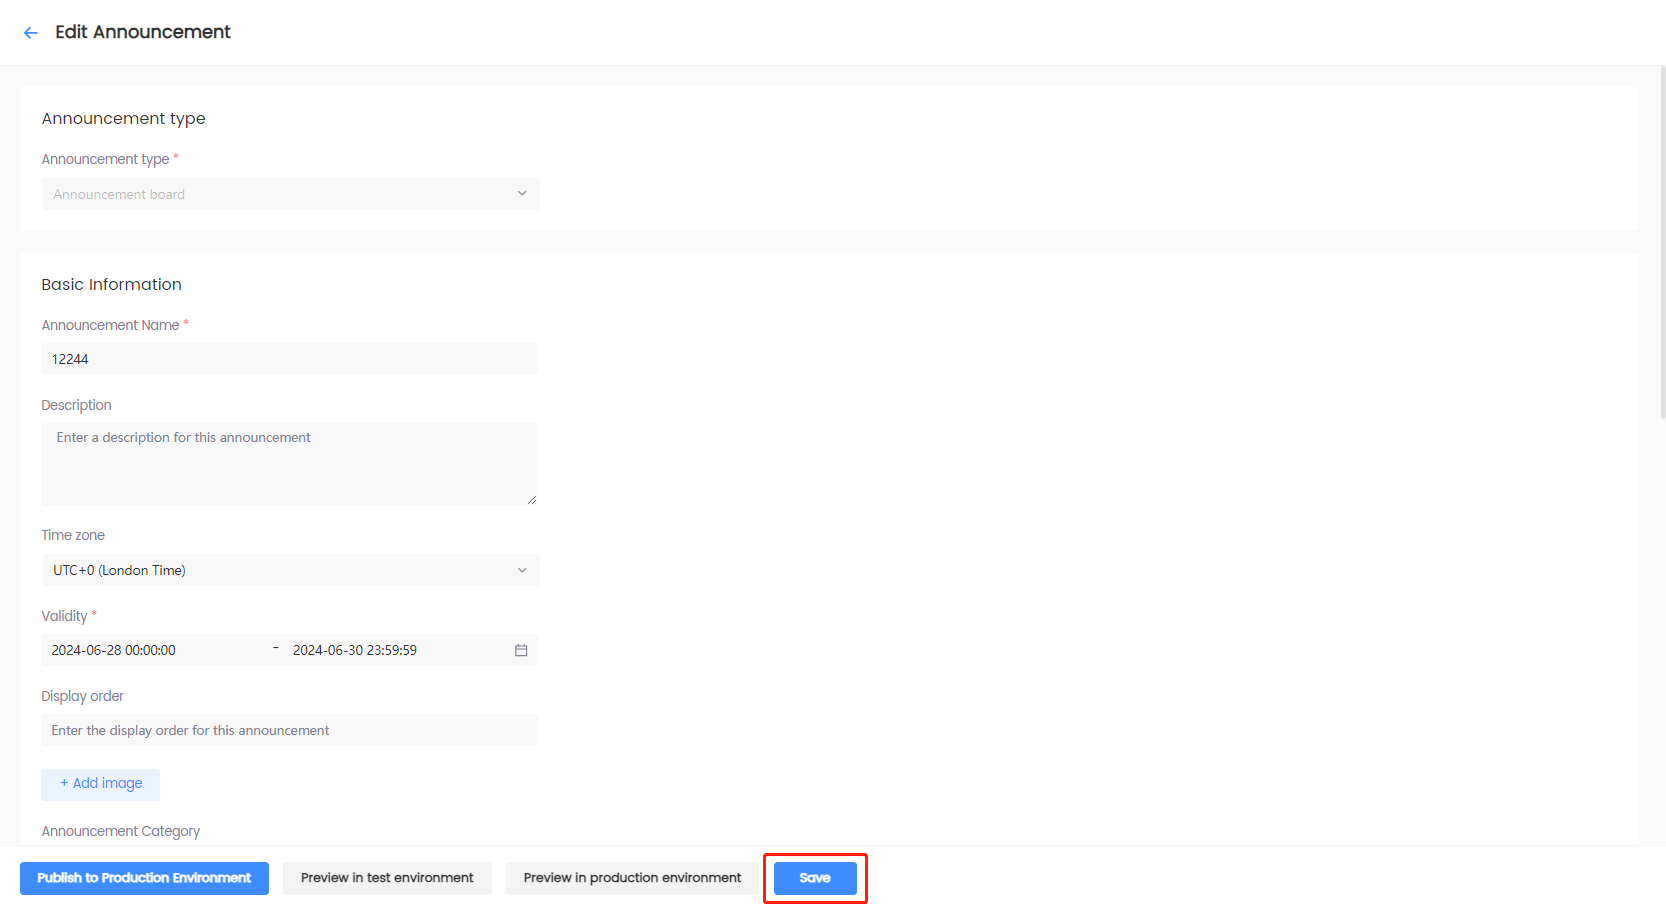
On the Edit Announcement page, edit the content of the announcement in the necessary fields.
-
Click Save to save the changes.
Preview announcements
Player Network enables games to preview announcements in both the test and production environments. Alternatively, games can also directly export JSON files to preview the announcements.
As announcements published to the production environment are displayed to all players, when previewing in the production environment, a group of testers will have to be set first to limit the audience of the announcements. This ensures that the announcements are previewed properly before they are published to all players.
Preview in test environment
-
Log in to the Player Network Console.
-
In the left sidebar, select Announcements > Announcement List under Player Management.
-
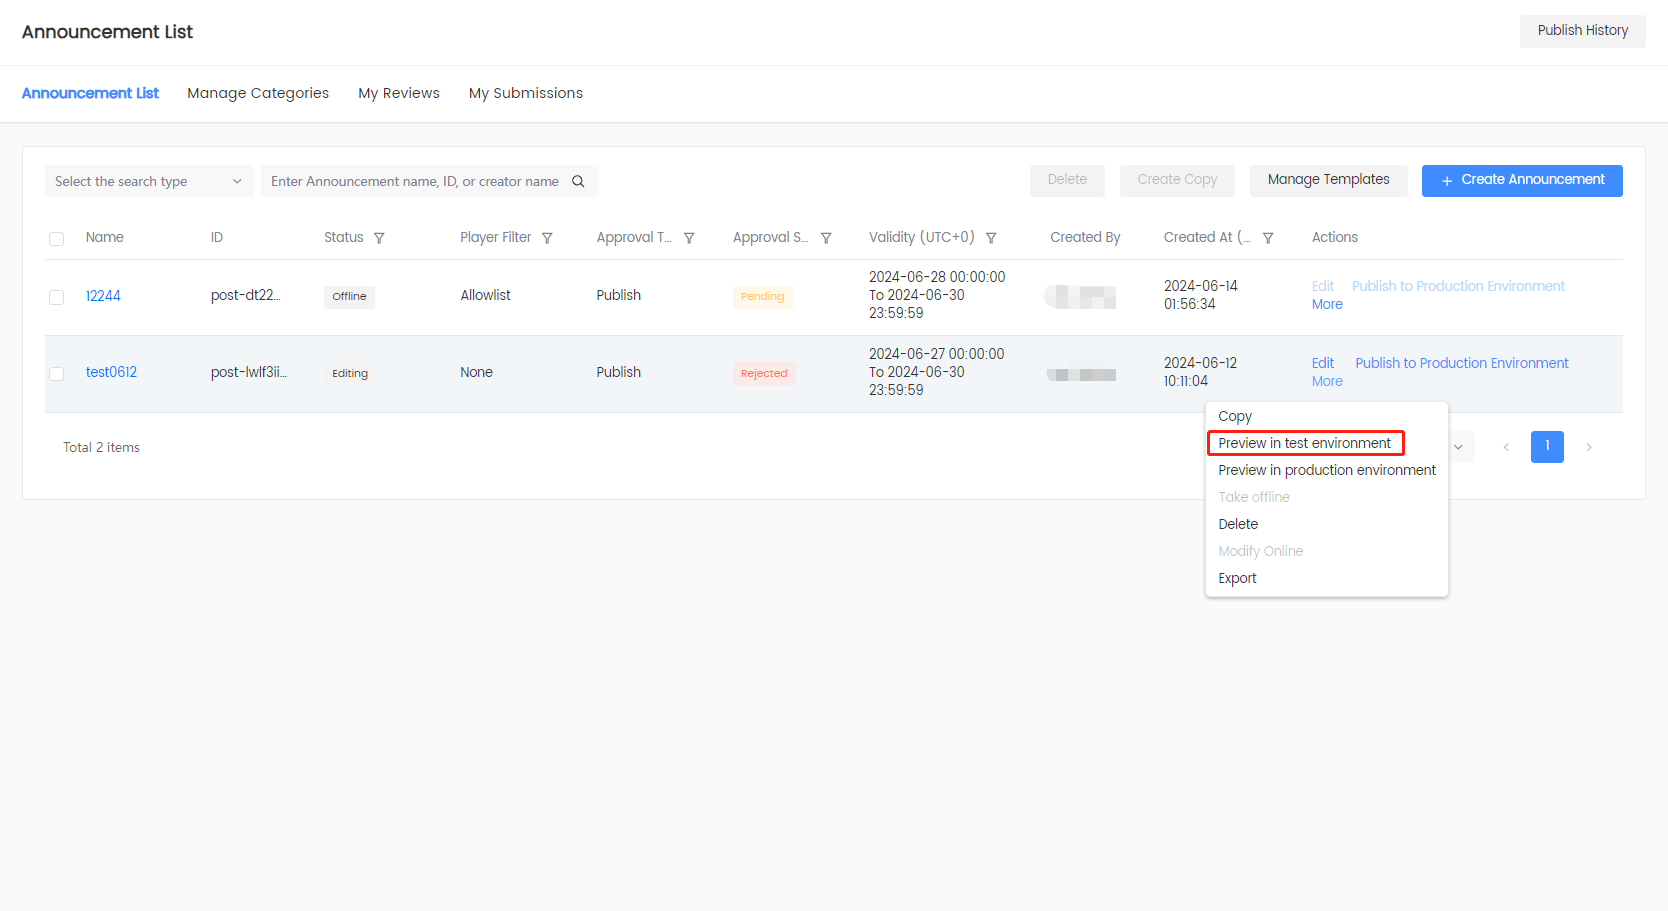
Click More > Preview in test environment in the Actions column of the announcement to modify. Alternatively, click the title of the announcement, then click Edit > Preview in test environment on the Announcement Details page.
-
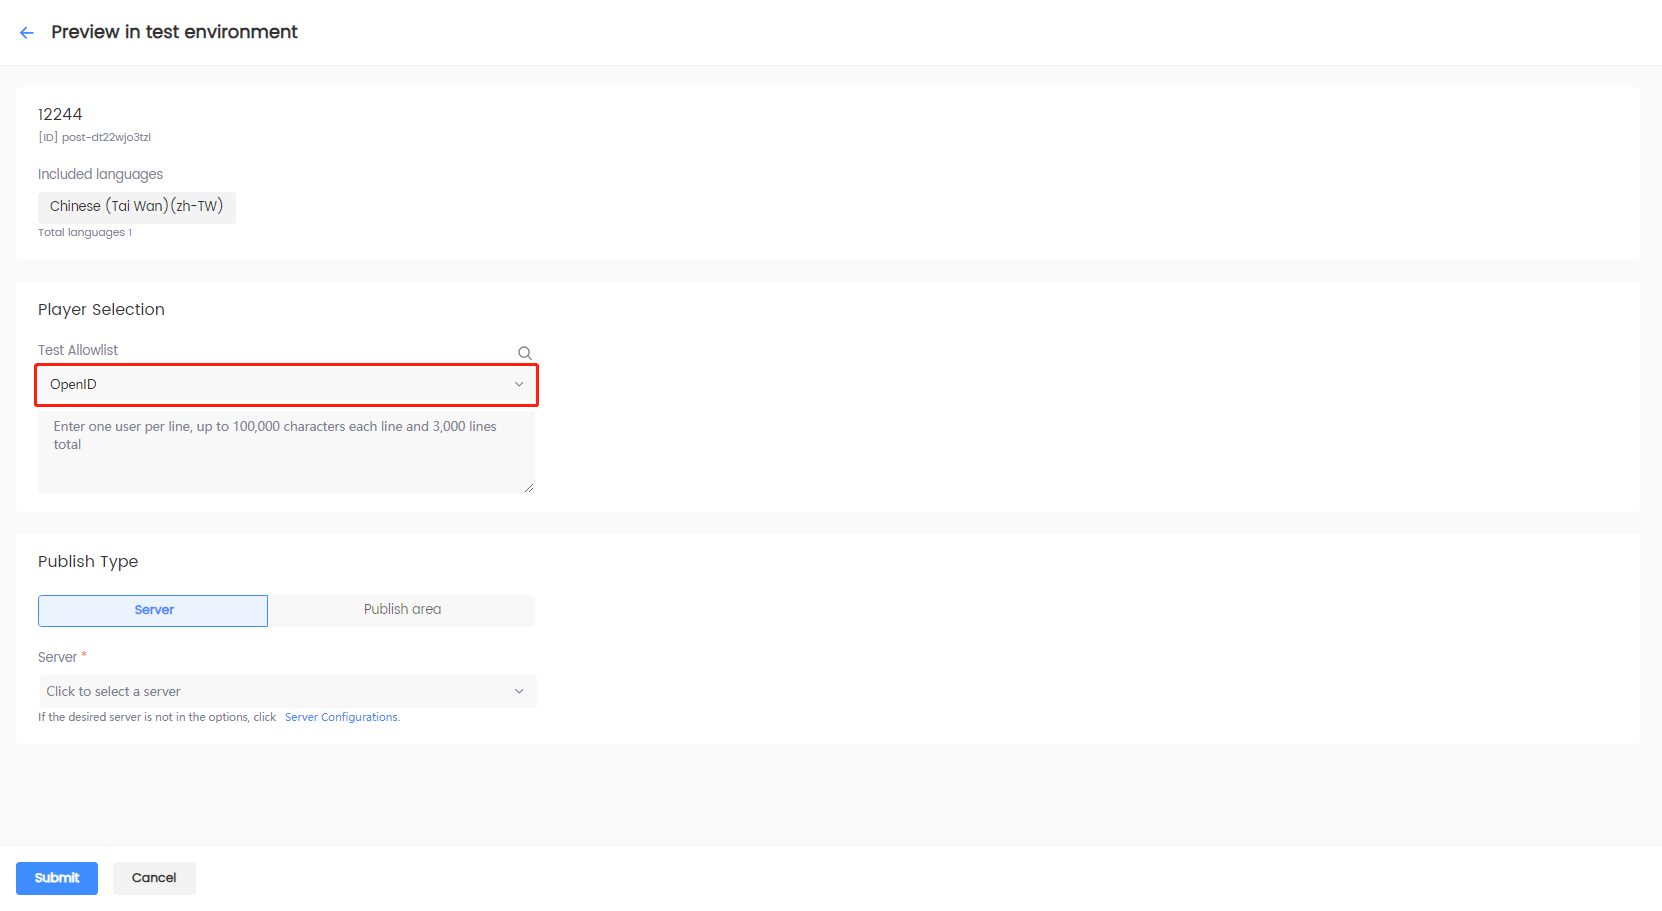
[Optional] On the Preview in test environment page, configure the allowlist under Player Selection.
noteOnly players in the allowlist can see the published announcements. If no allowlist has been configured, The announcement will be sent to all players by default.
-
Click the dropdown menu to select the ID type, and enter the player ID in the text field.
-
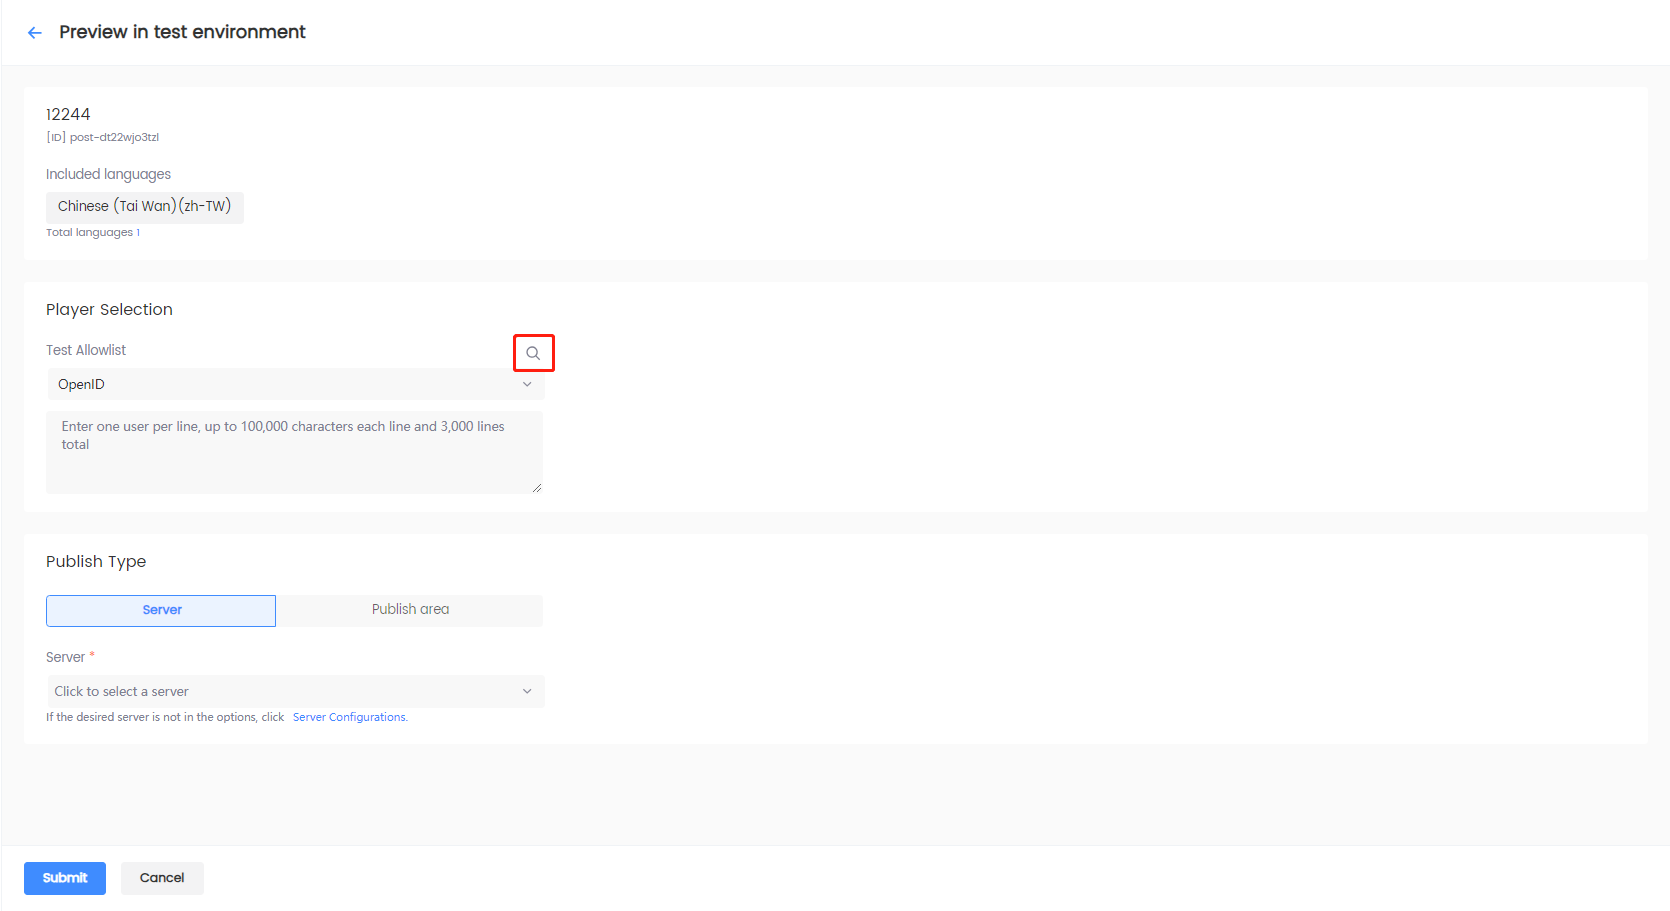
Click the search icon from the top right corner.
-
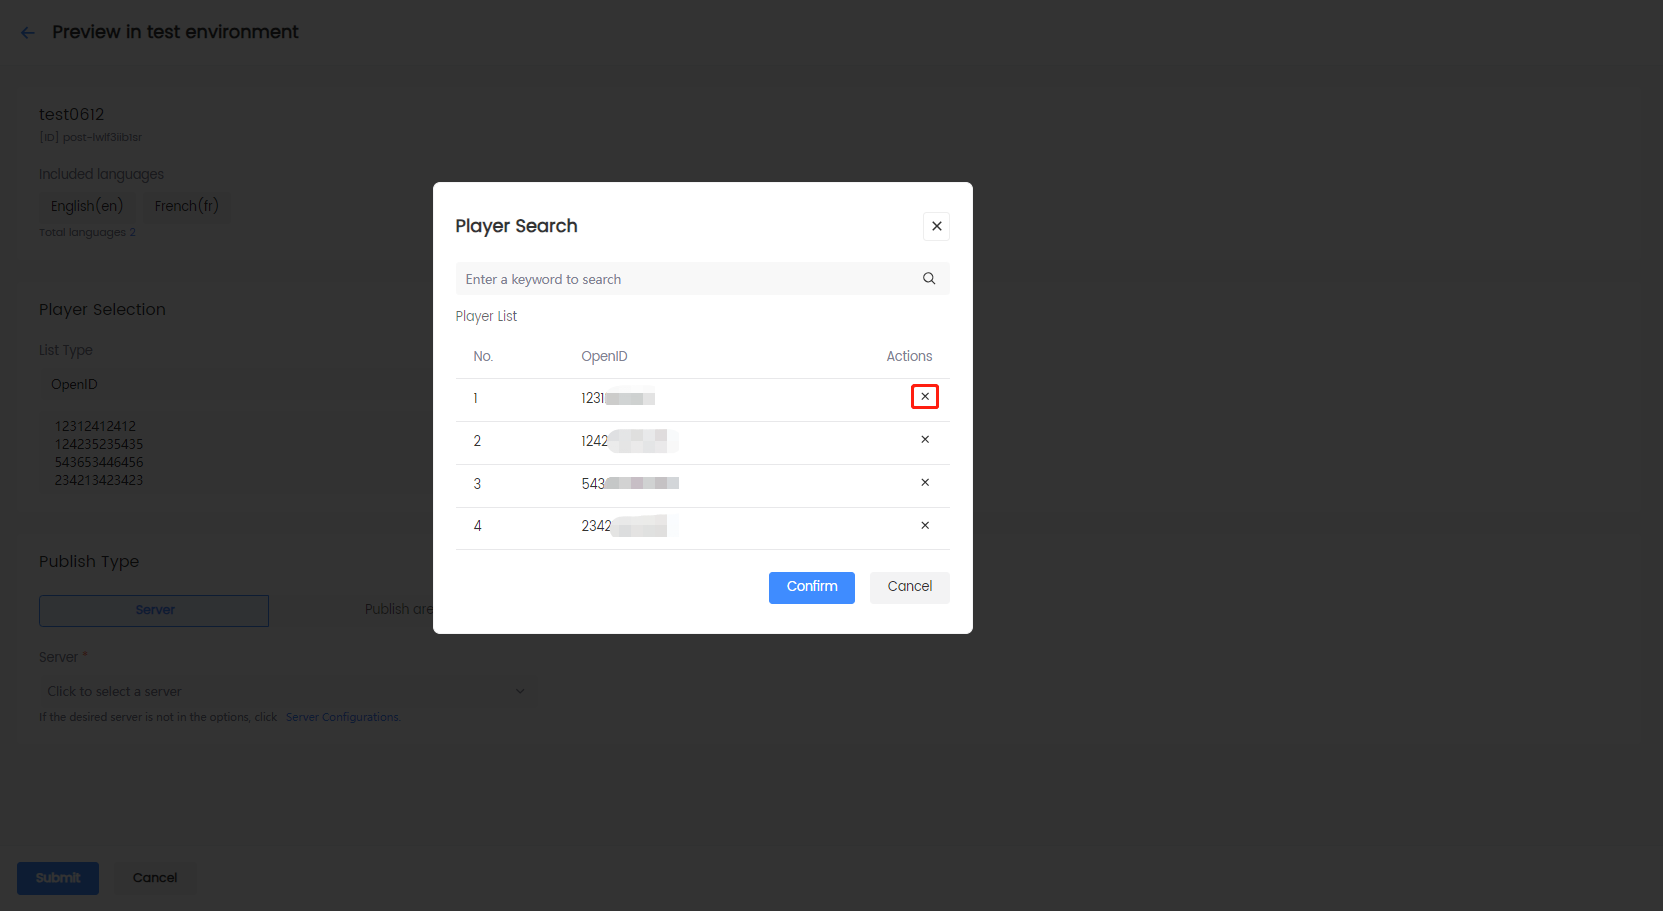
In the Player Search popup, use the search bar to search for the desired player ID, or click delete under Actions to delete a player ID.
-
Click Confirm to save the changes.
-
-
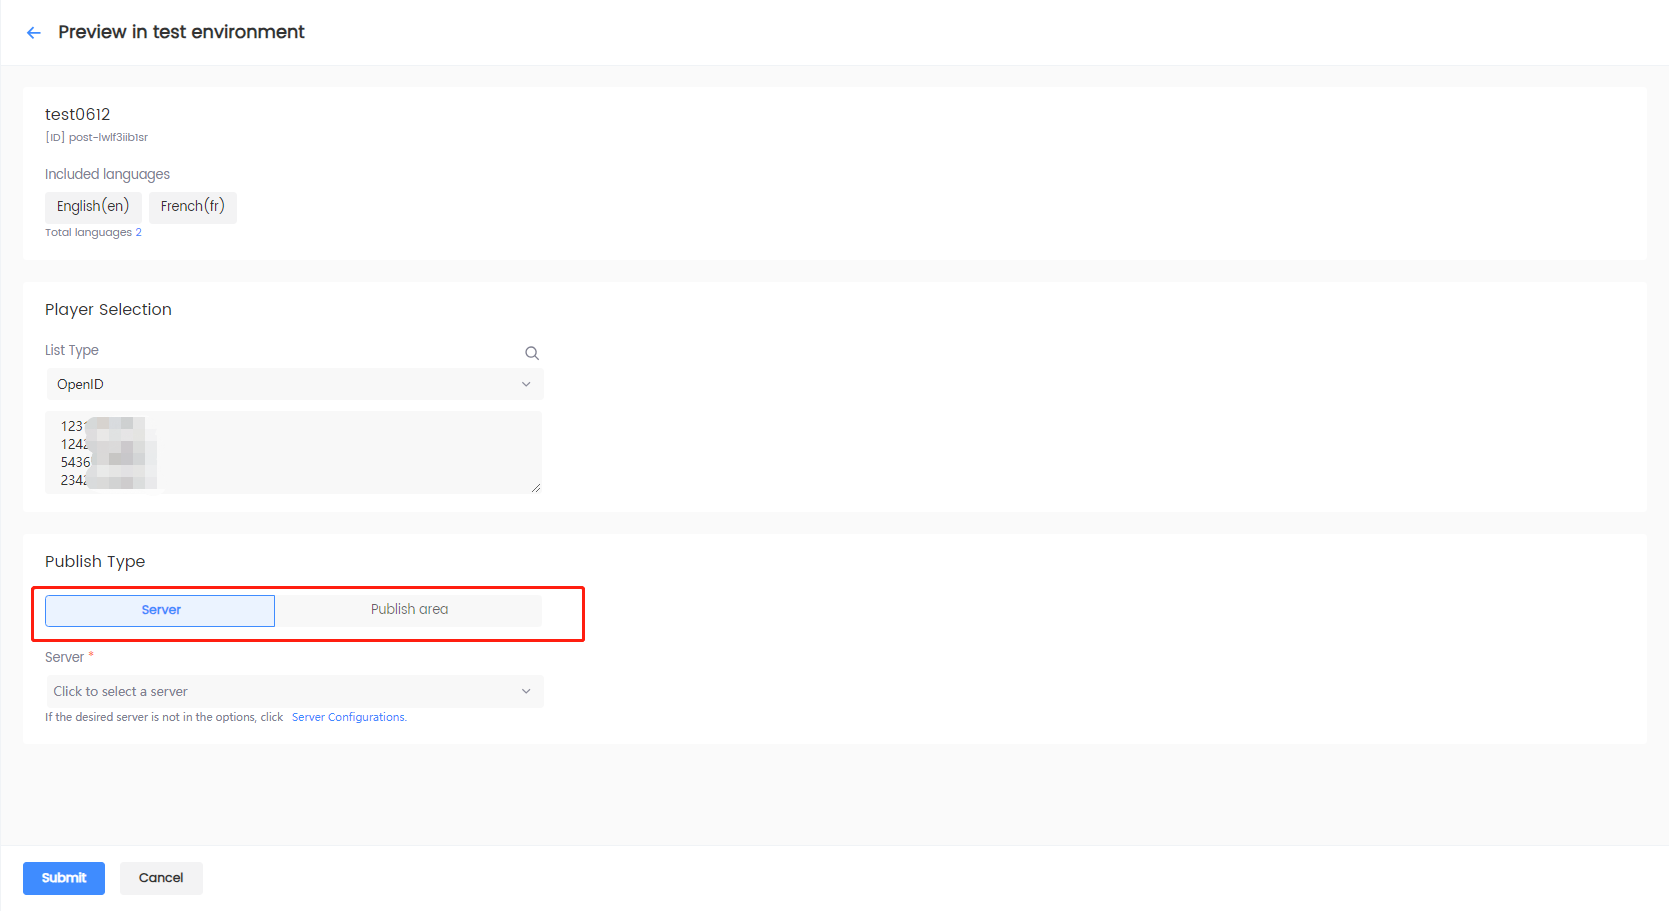
Under Publish Type, configure the server or the publish area details:
- Click Server and click the Server dropdown to select the desired server group configured in Server Configurations.
- Click Publish area and click the Publish area dropdown to select the desired countries/regions, or search for the publish areas configured in Region Configurations.
-
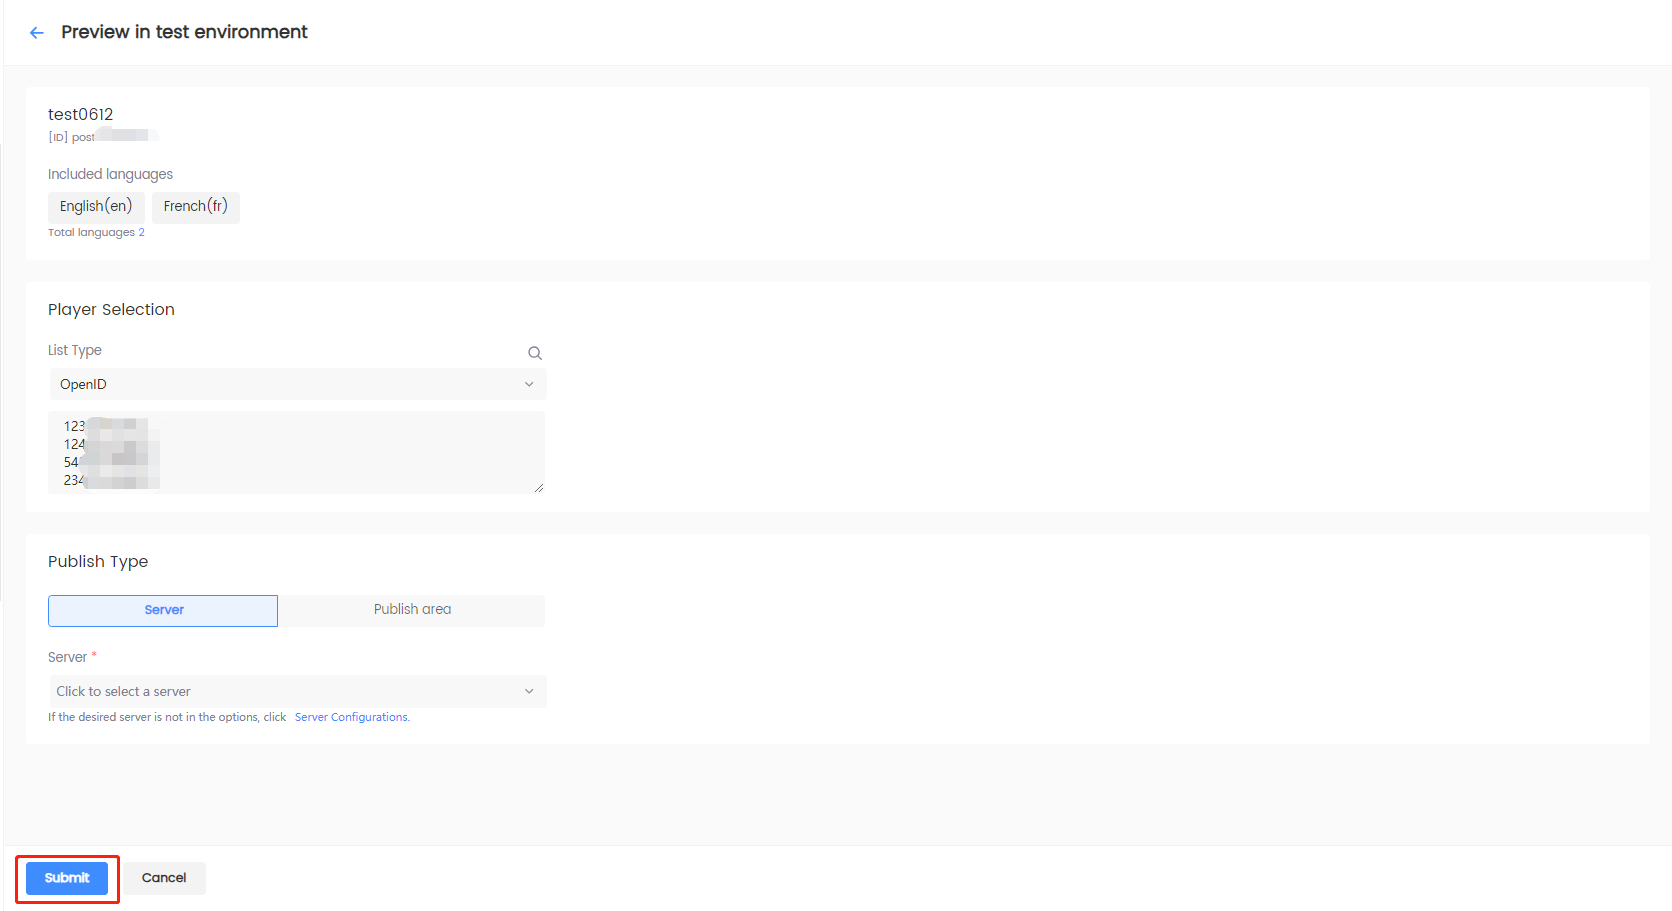
Click Submit to preview the announcement in the test environment.
Preview in production environment
-
Log in to the Player Network Console.
-
In the left sidebar, select Announcements > Announcement List under Player Management.
-
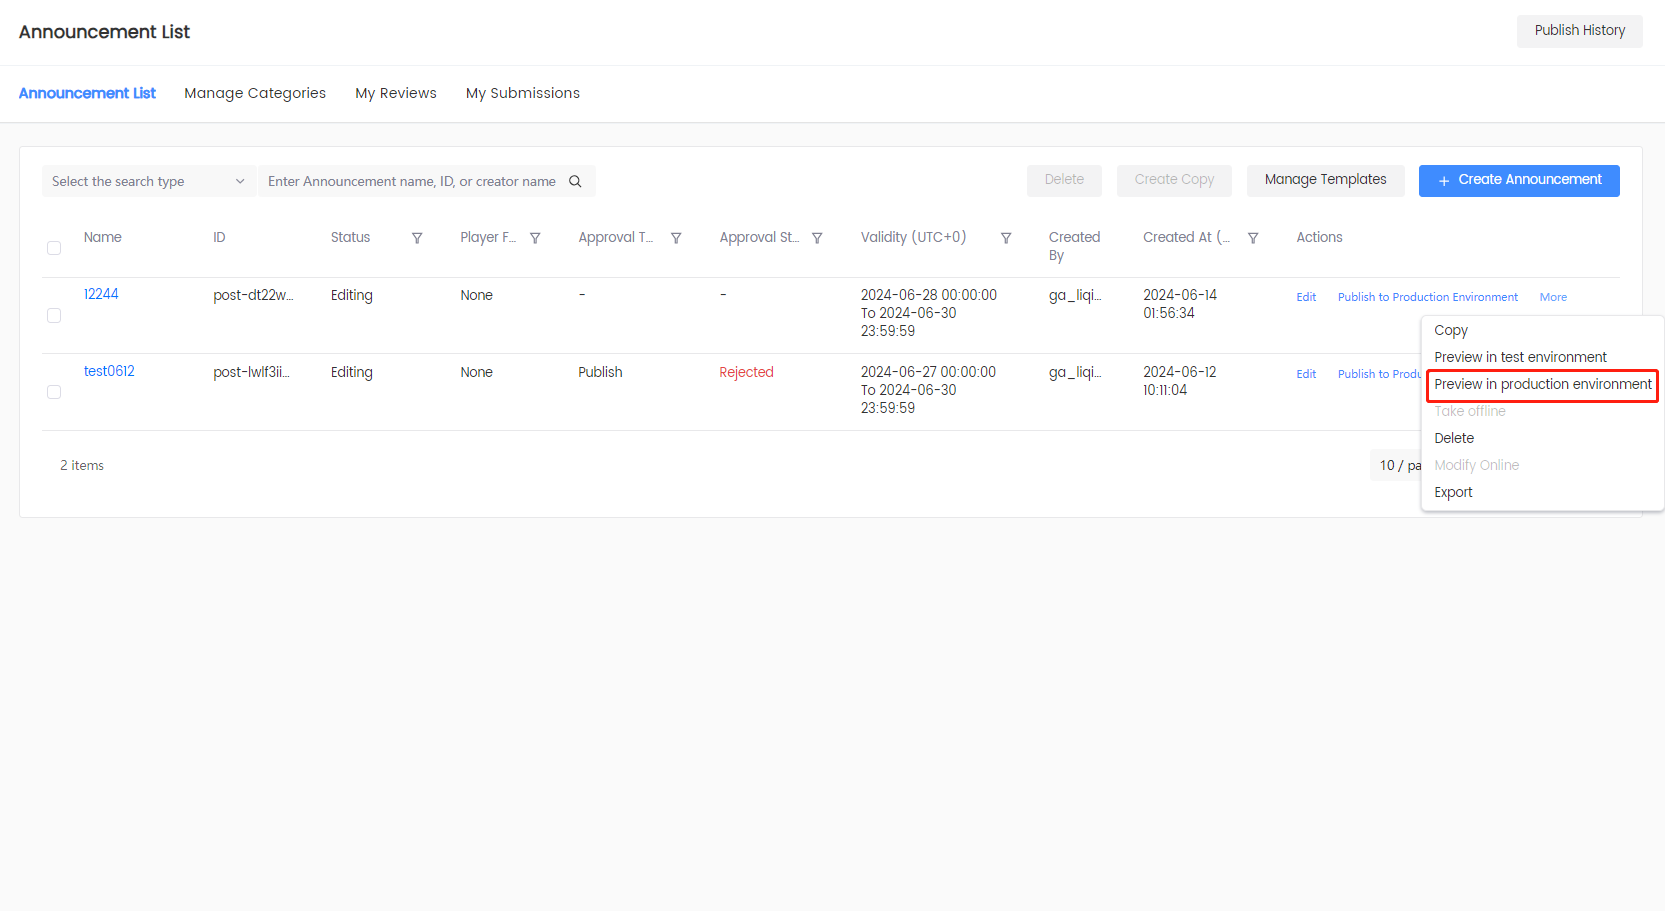
Click More > Preview in production environment in the Actions column of the announcement. Alternatively, click the title of the announcement, then click Edit > Preview in production environment on the Announcement Details page.
-
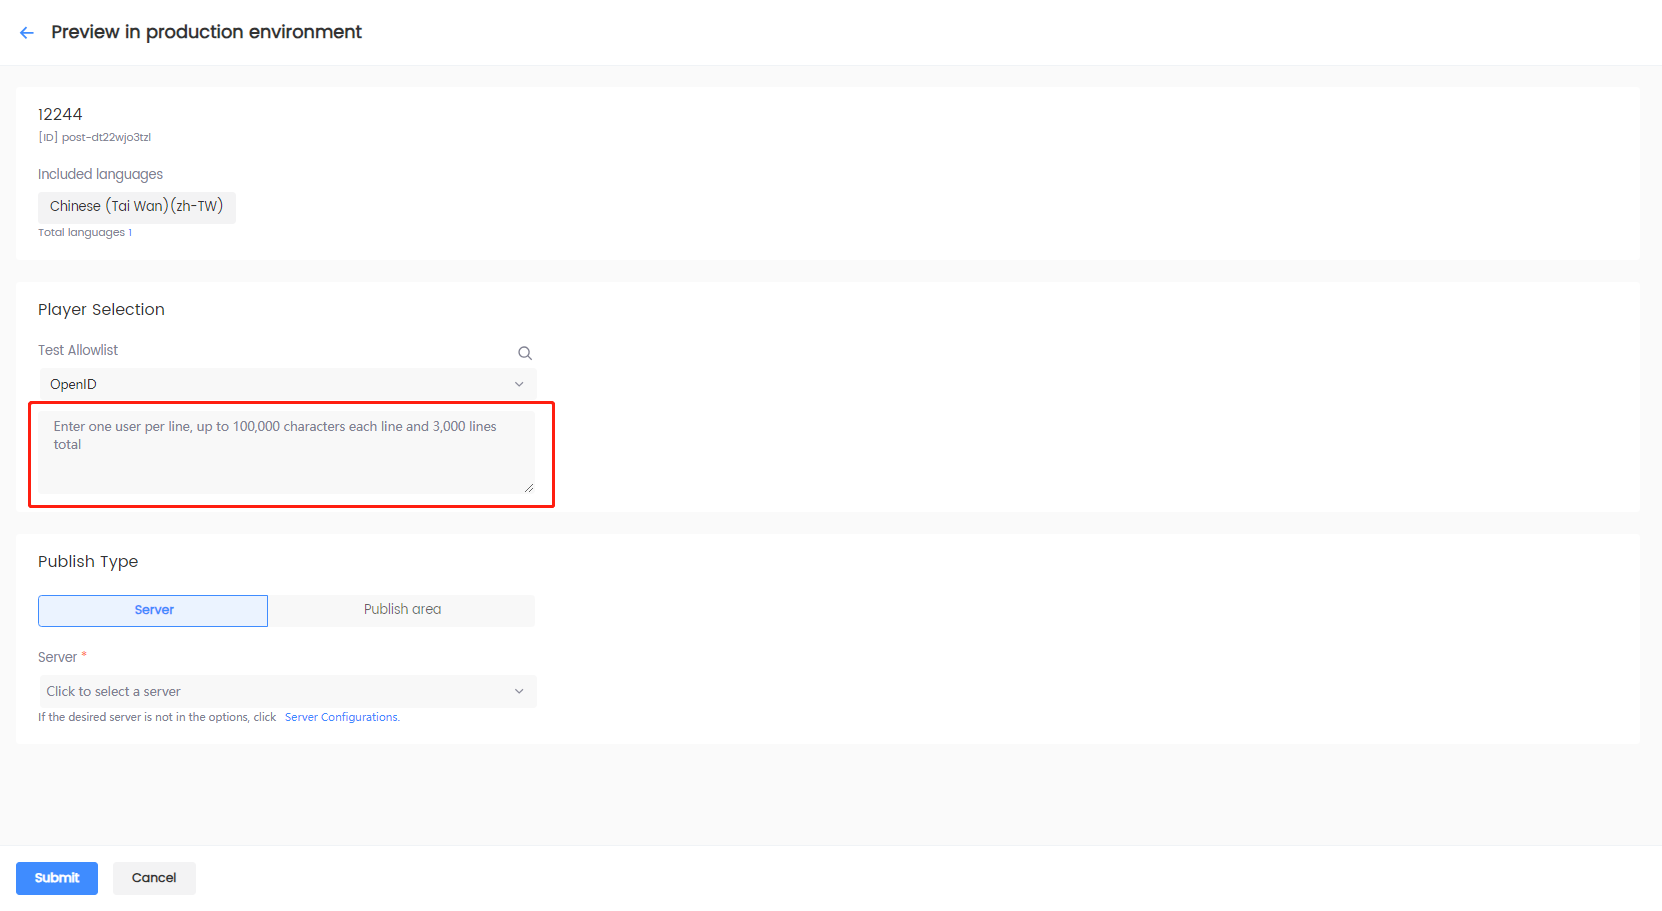
[Optional] On the Preview in production environment page, configure the allowlist under Player Selection.
cautionAn allowlist is mandatory for previewing in the production environment.
noteOnly players in the allowlist can see the published announcements. If no allowlist has been configured, The announcement will be sent to all players by default.
-
Click the dropdown menu to select the ID type, and enter the player ID in the text field.
-
Click the search icon from the top right corner.
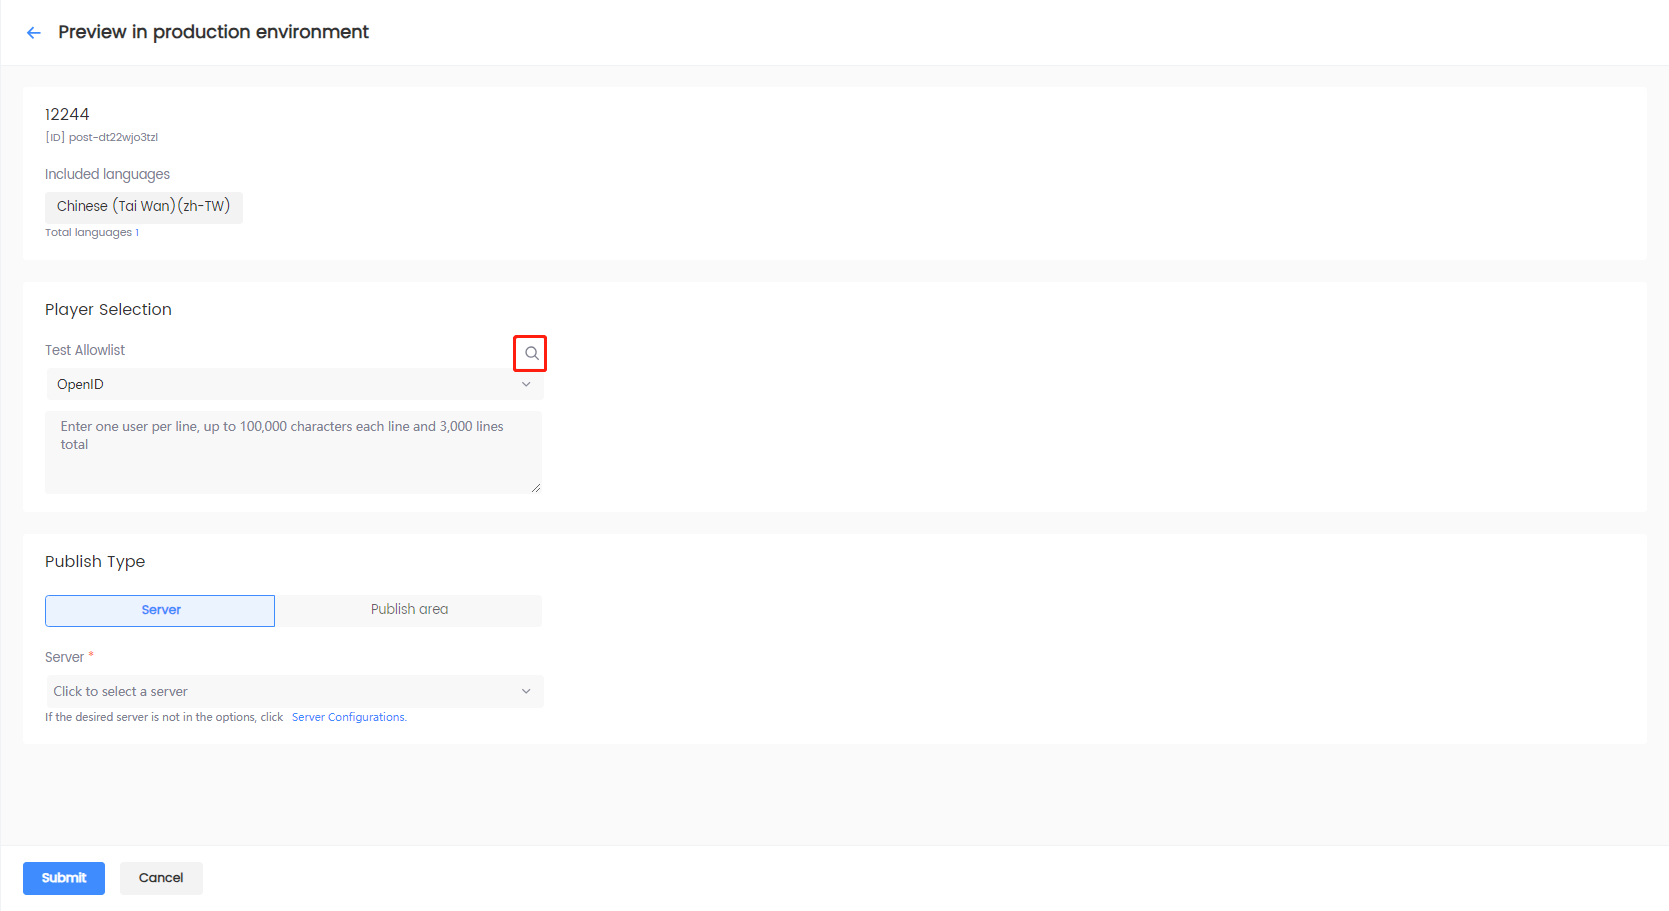
-
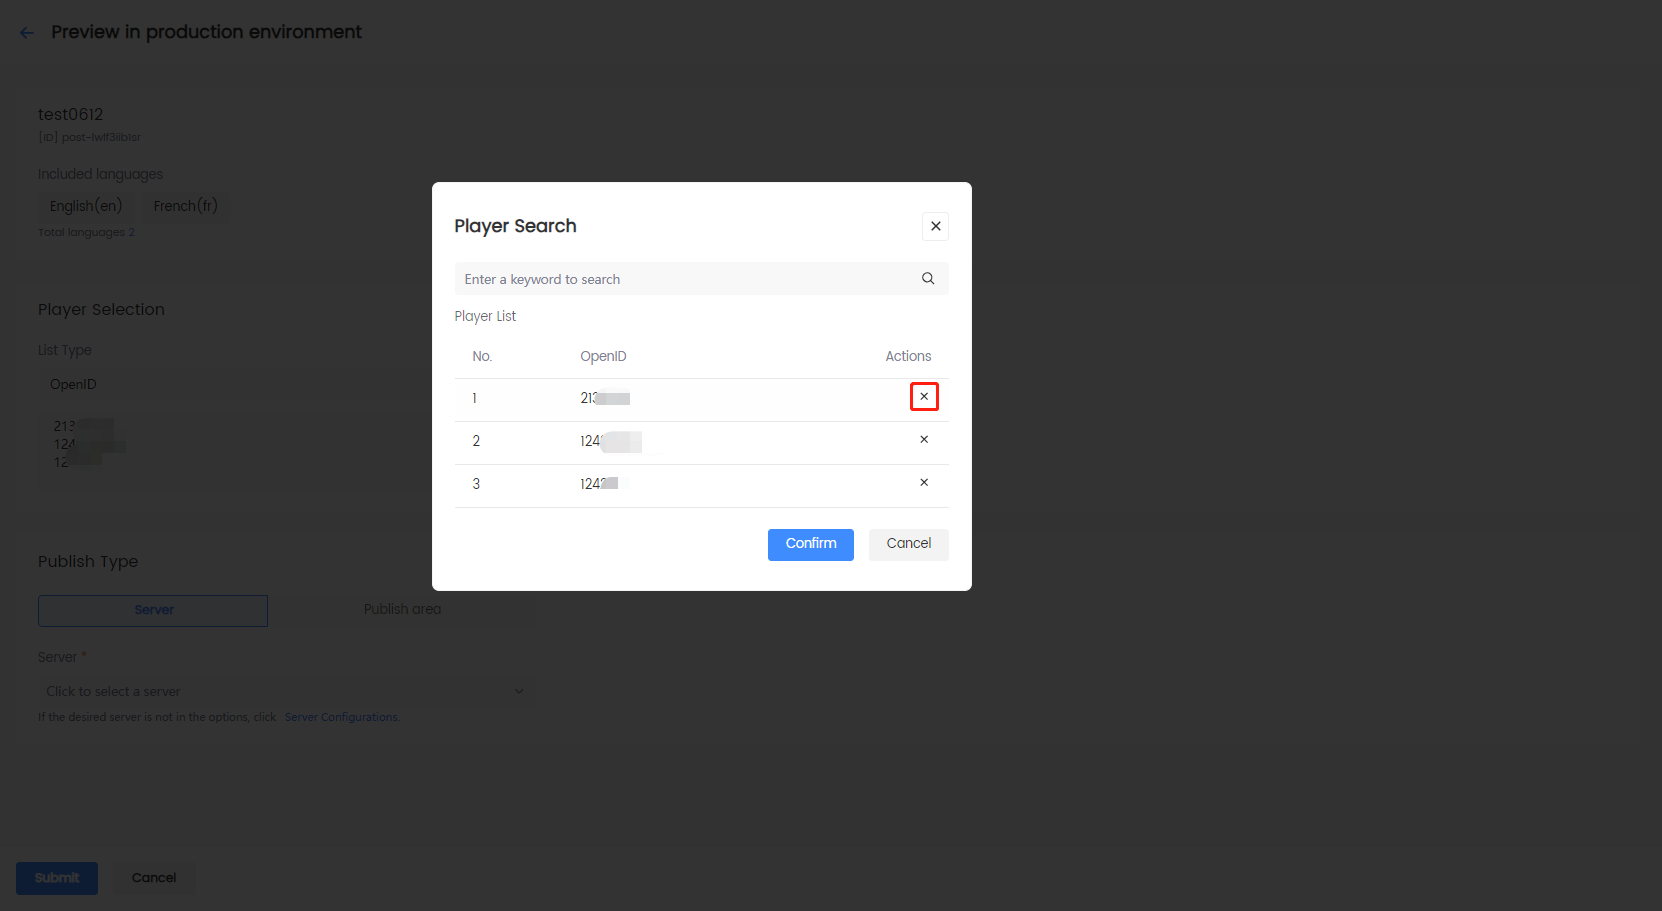
In the Player Search popup, use the search bar to search for the desired player ID, or click delete under Actions to delete a player ID.
-
Click Confirm to save the changes.
-
-
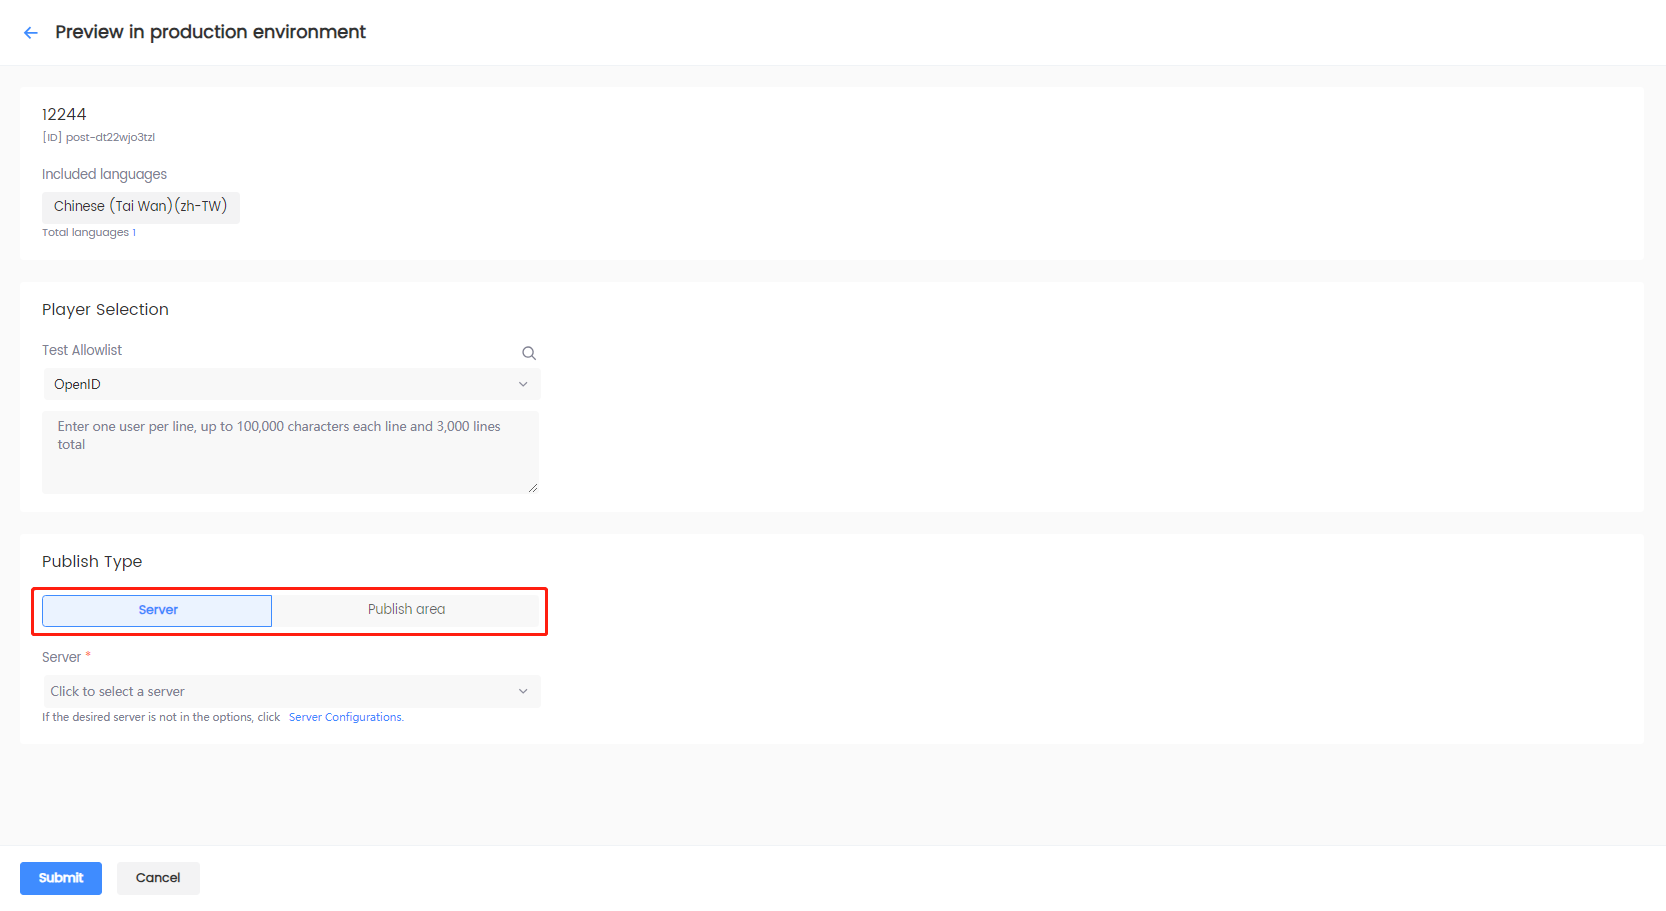
Under Publish Type, configure the server or the publish area details:
- Click Server and click the Server dropdown to select the desired server group configured in Server Configurations.
- Click Publish area and click the Publish area dropdown to select the desired countries/regions, or search for the publish areas configured in Region Configurations.
-
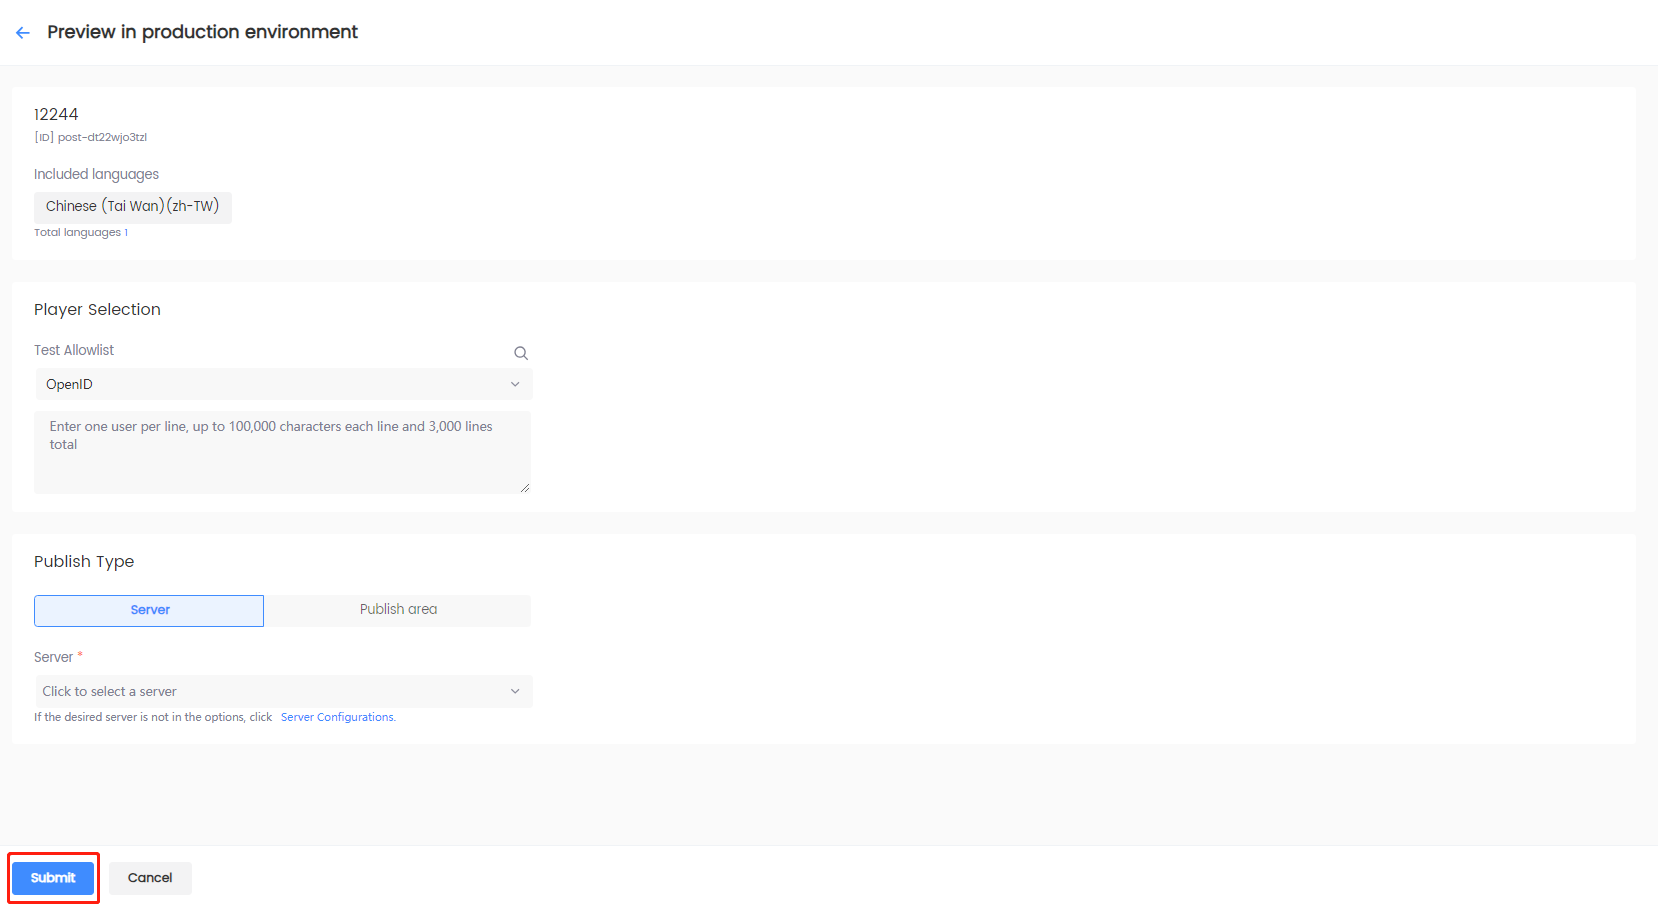
Click Submit to preview the announcement in the production environment.
Publish announcements
Once an announcement is published to the production environment, the preview version in the test environment is removed, and the announcement status is updated to Published on the Announcement List page.
-
Log in to the Player Network Console.
-
In the left sidebar, select Announcements > Announcement List under Player Management.
-
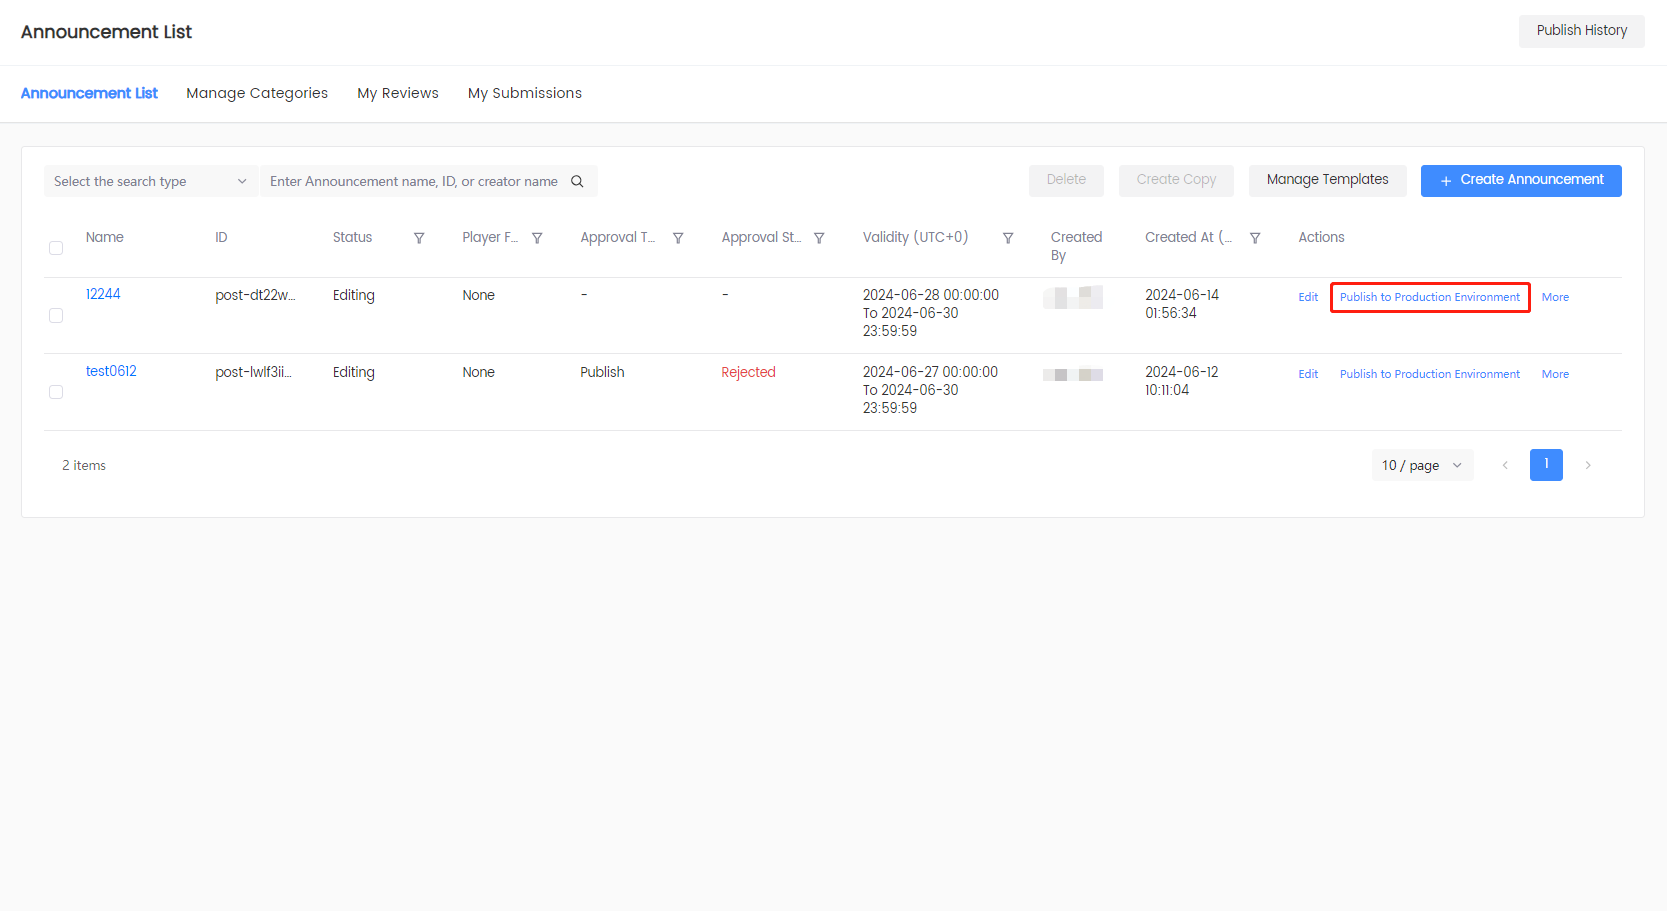
Click More > Publish to Production Environment in the Actions column of the announcement.
-
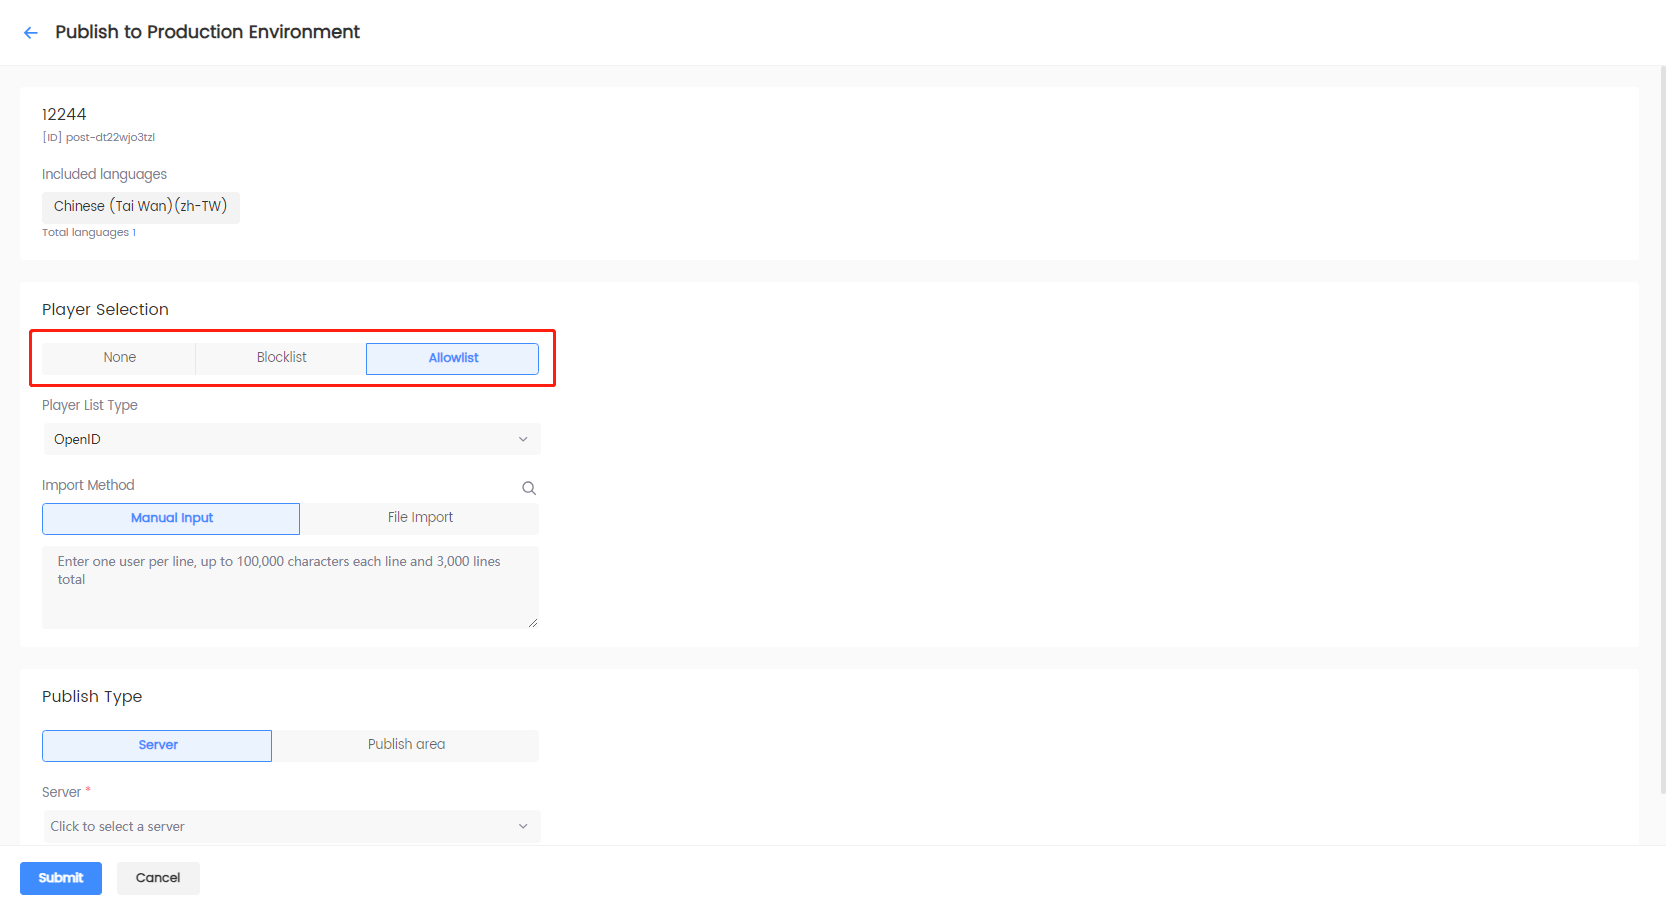
[Optional] On the Publish to Production Environment page, set up Player Selection if the announcement has an allowlist, blocklist, or none:
-
Click Blocklist or Allowlist if applicable.
-
Click the List Type dropdown menu to select the ID type.
-
Select the preferred Import Method:
- Click Manual Input to enter the player ID in the text field.
- Click File Import > Choose File to import a blocklist or allowlist.
-
-
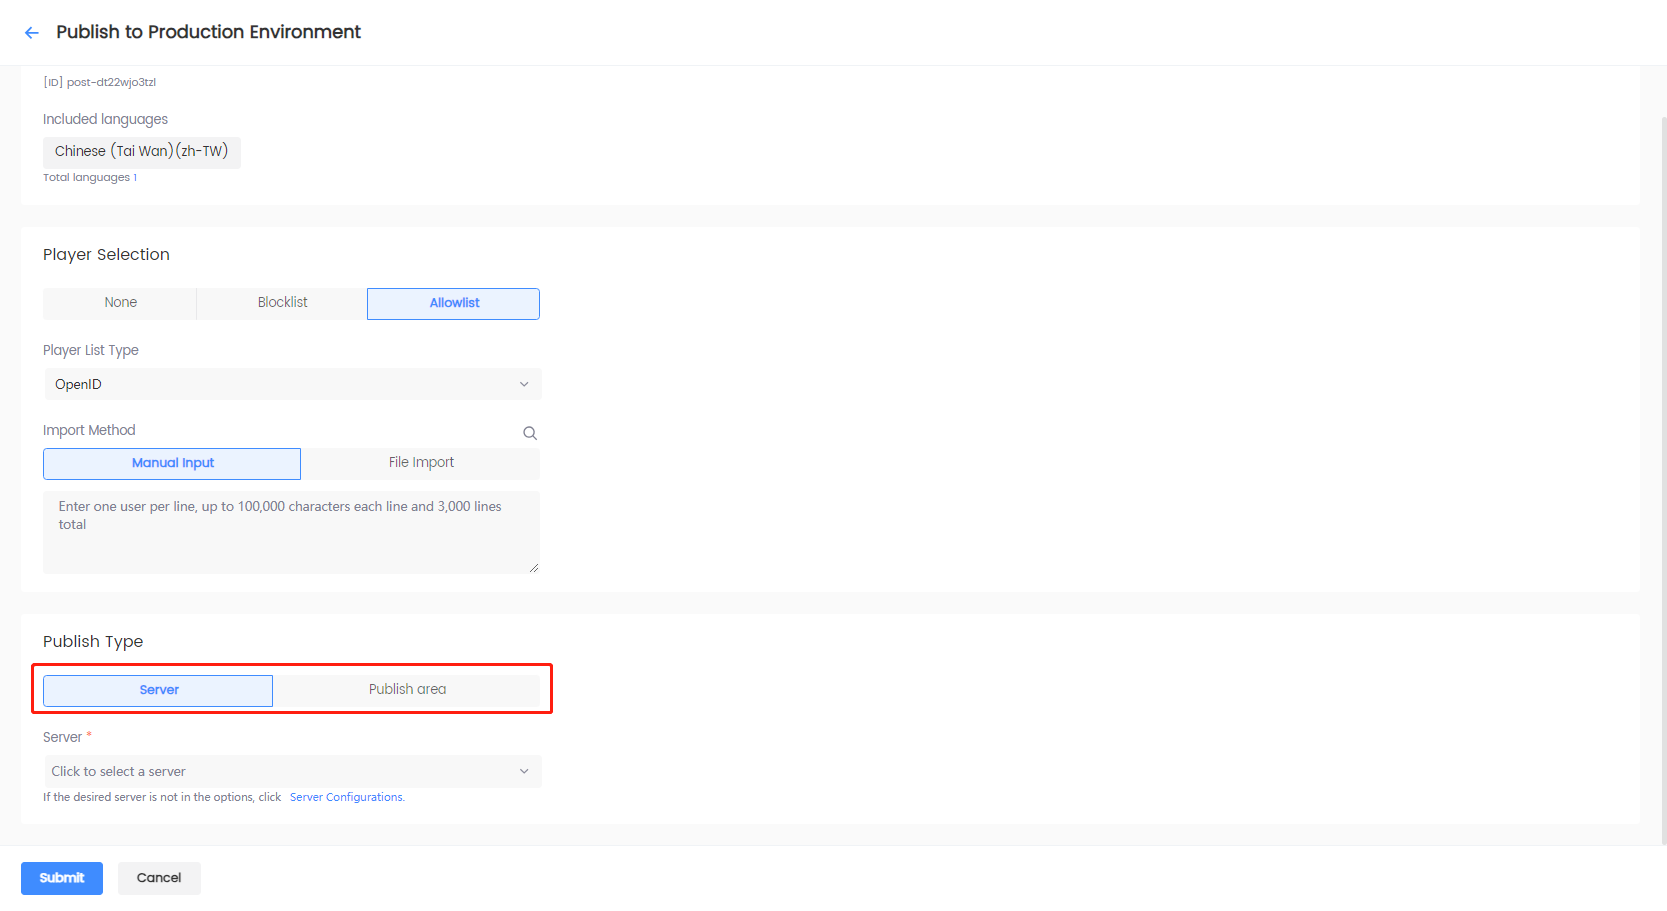
Under Publish Type, configure the server or the publish area details:
- Click Server and click the Server dropdown to select the desired server group configured in Server Configurations.
- Click Publish area and click the Publish area dropdown to select the desired countries/regions, or search for the publish areas configured in Region Configurations.
-
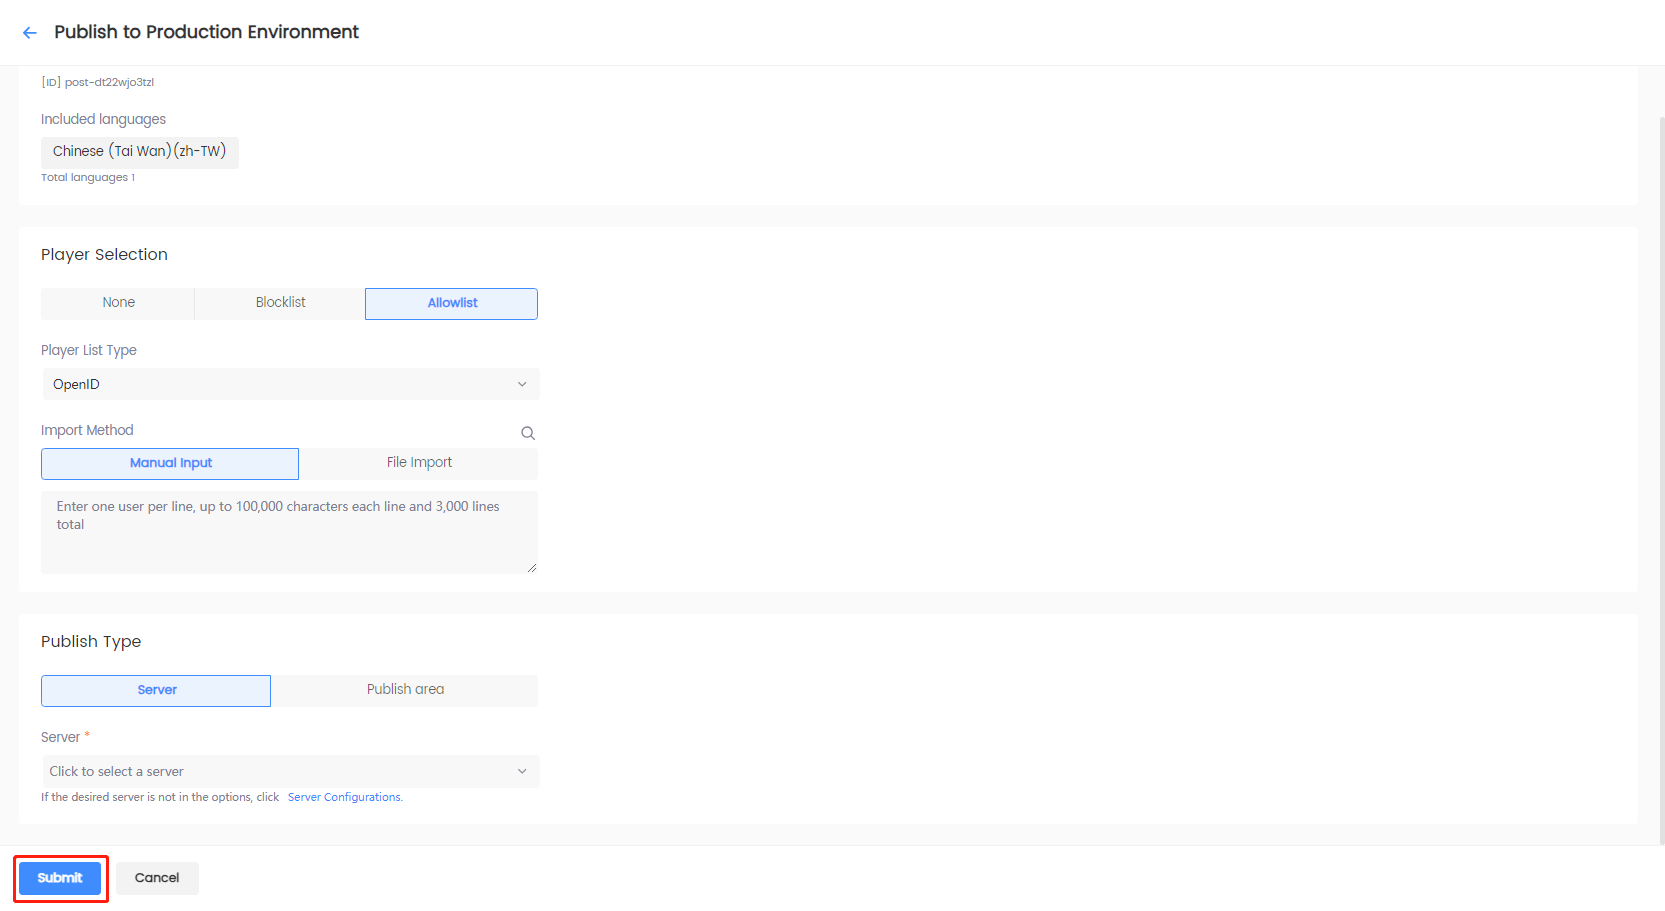
Click Submit to publish the announcement to the production environment.
Edit published announcements online
Player Network allows games to seamlessly replace an online announcement that is already published. However, only reviewers can perform this action. To change or add reviewers, see Approval Settings.
-
Log in to the Player Network Console.
-
In the left sidebar, select Announcements > Announcement List under Player Management.
-
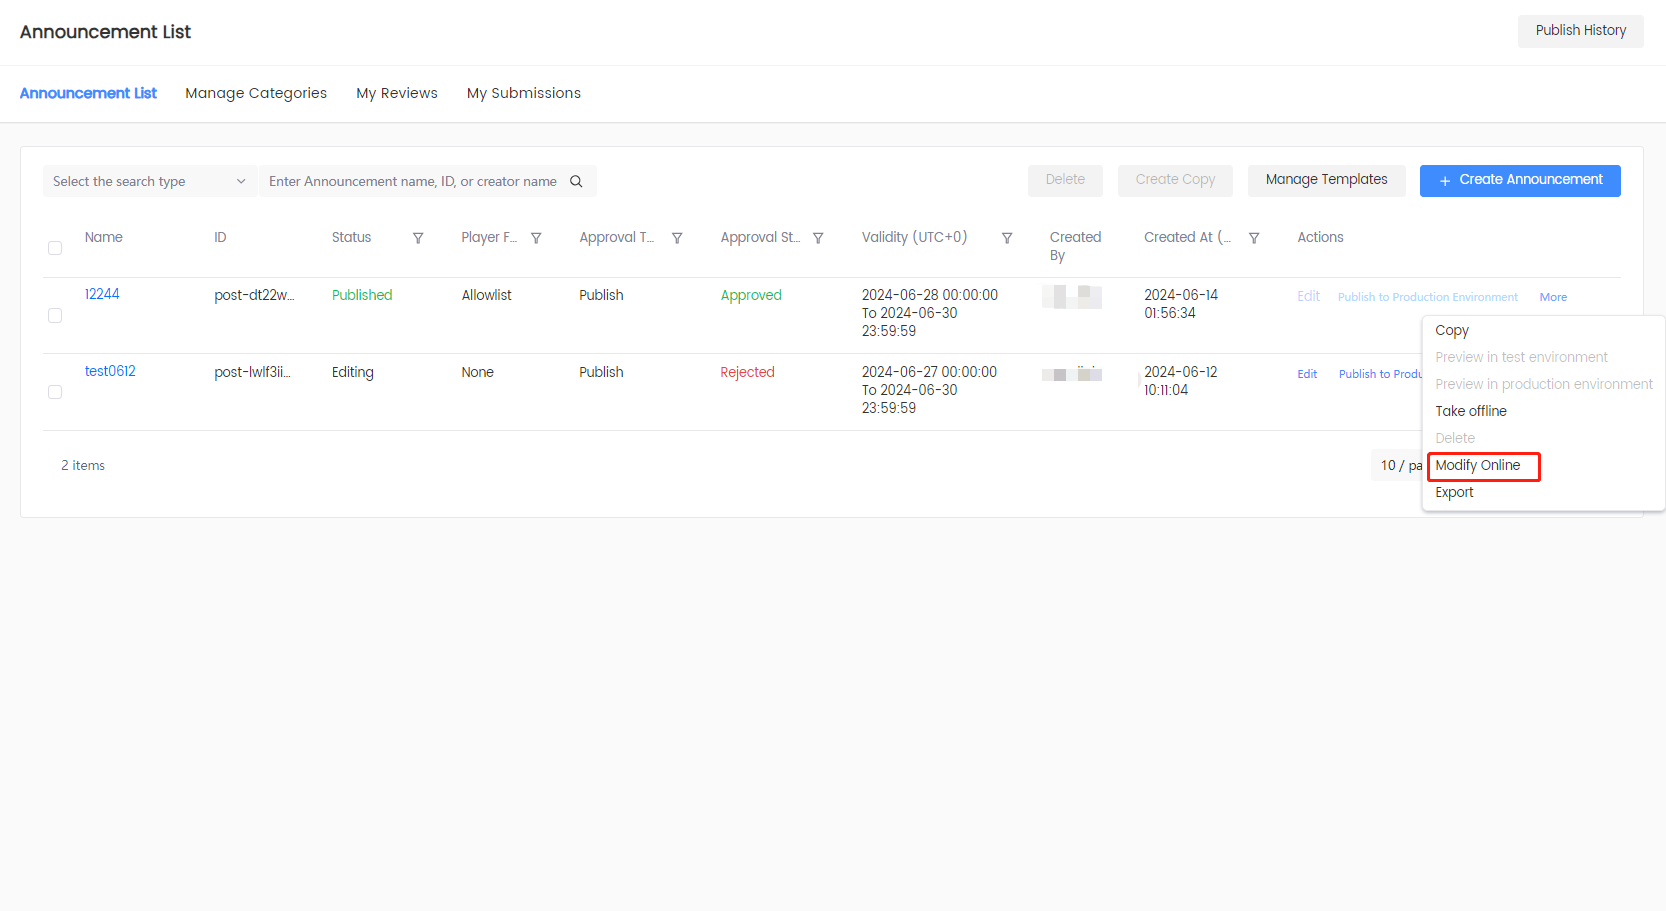
Click More > Modify Online in the Actions column of the announcement that is already published.
-
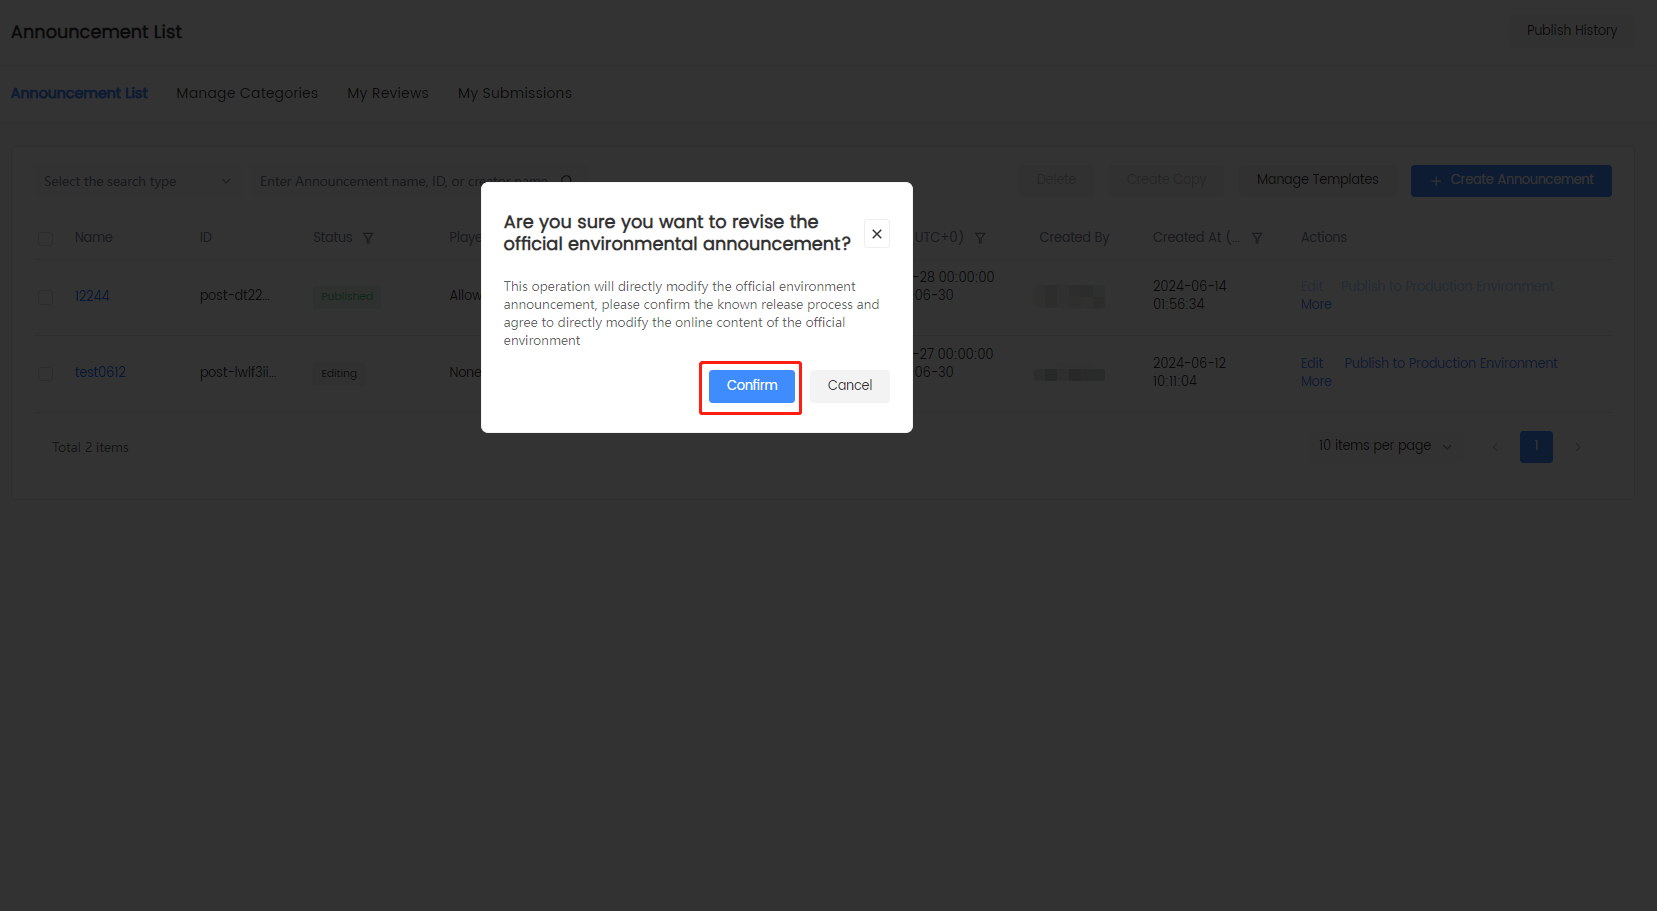
In the popup, click Confirm to edit the announcement.
-
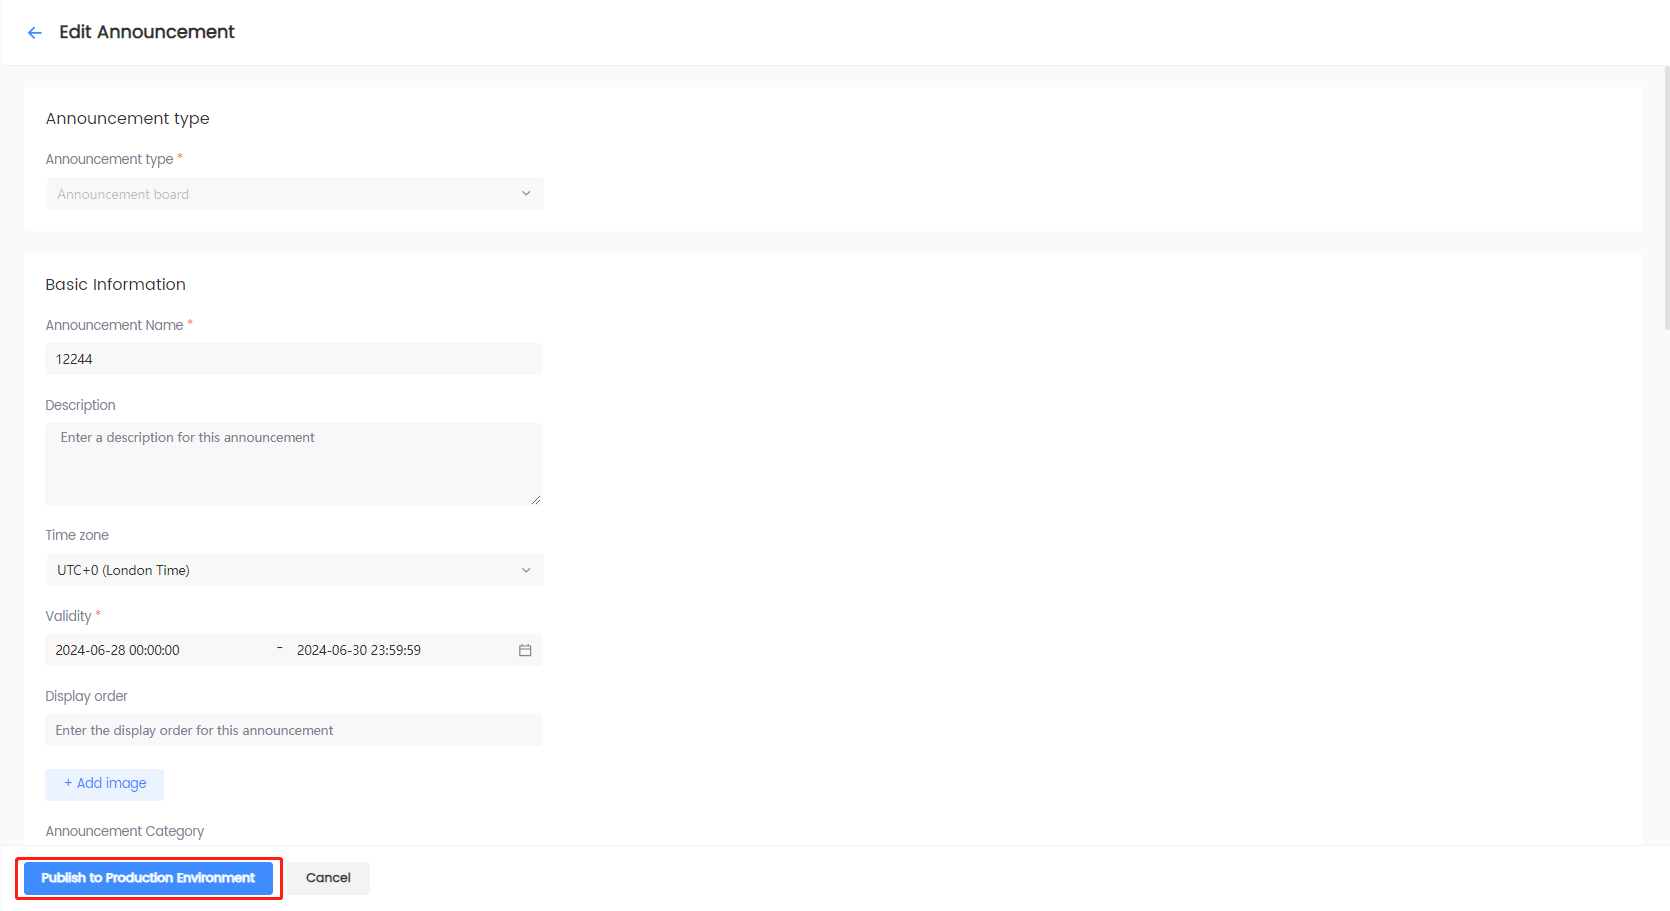
Edit the announcement as needed and click Publish to Production Environment to update the published announcement.
Take announcements offline
Games can stop previewing or publishing an announcement by taking the announcement offline when the announcement status is Preview in test environment, Preview in production environment, or Published.
-
Log in to the Player Network Console.
-
In the left sidebar, select Announcements > Announcement List under Player Management.
-
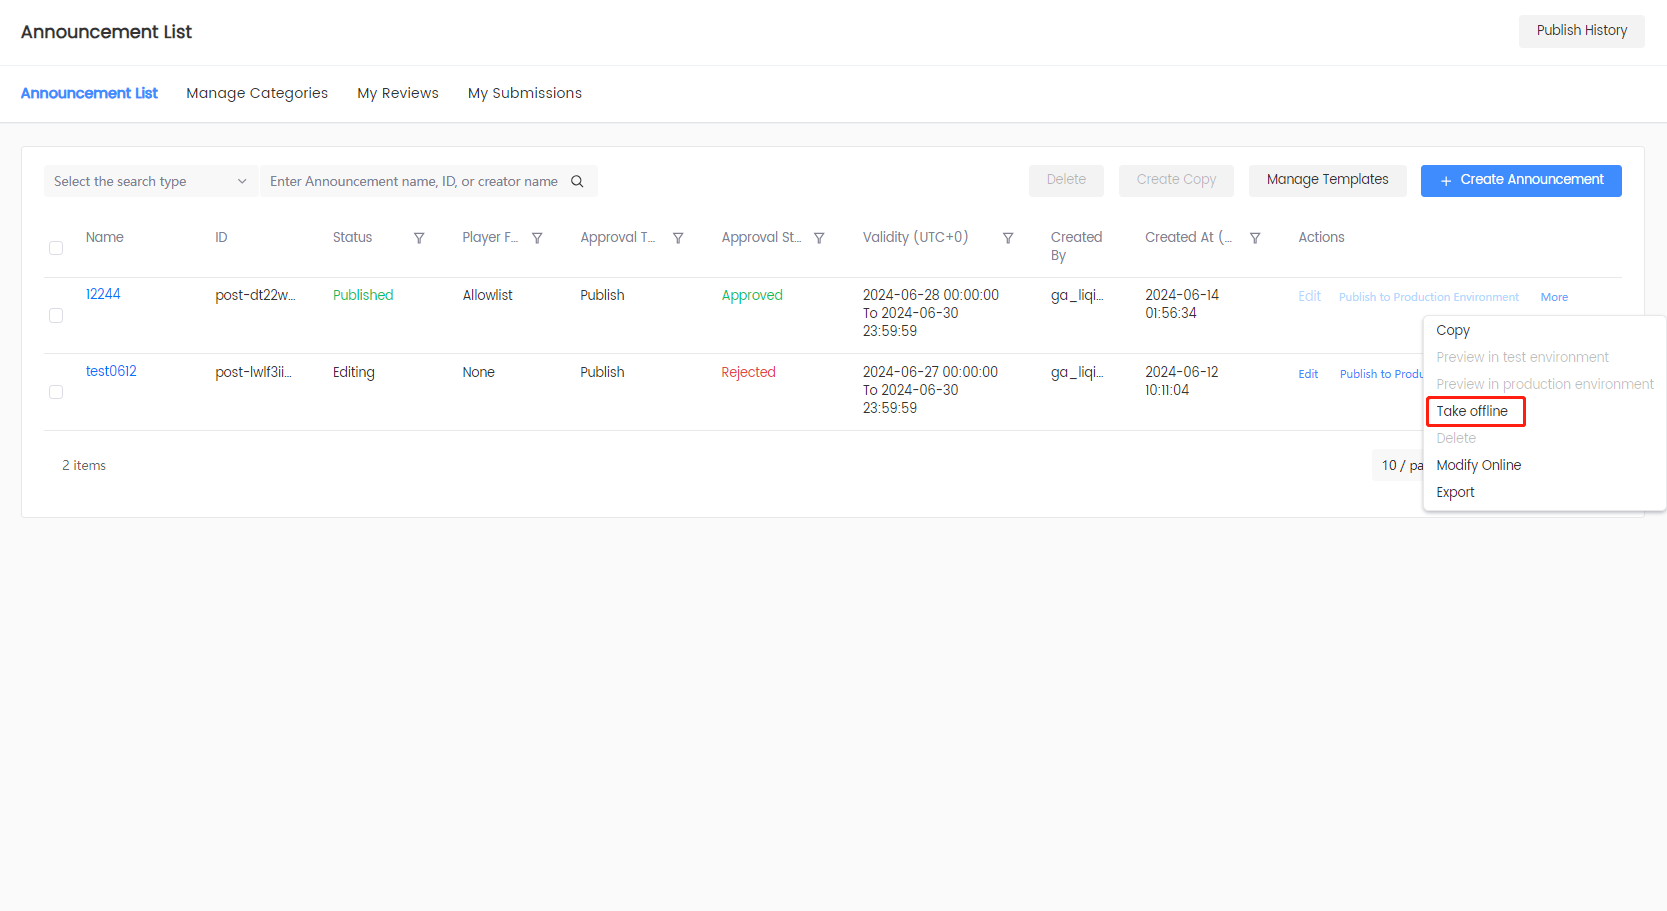
Click More > Take Offline in the Actions column of the announcement to stop previewing or publishing the announcement.
Export announcements to JSON files
-
Log in to the Player Network Console.
-
In the left sidebar, select Announcements > Announcement List under Player Management.
-
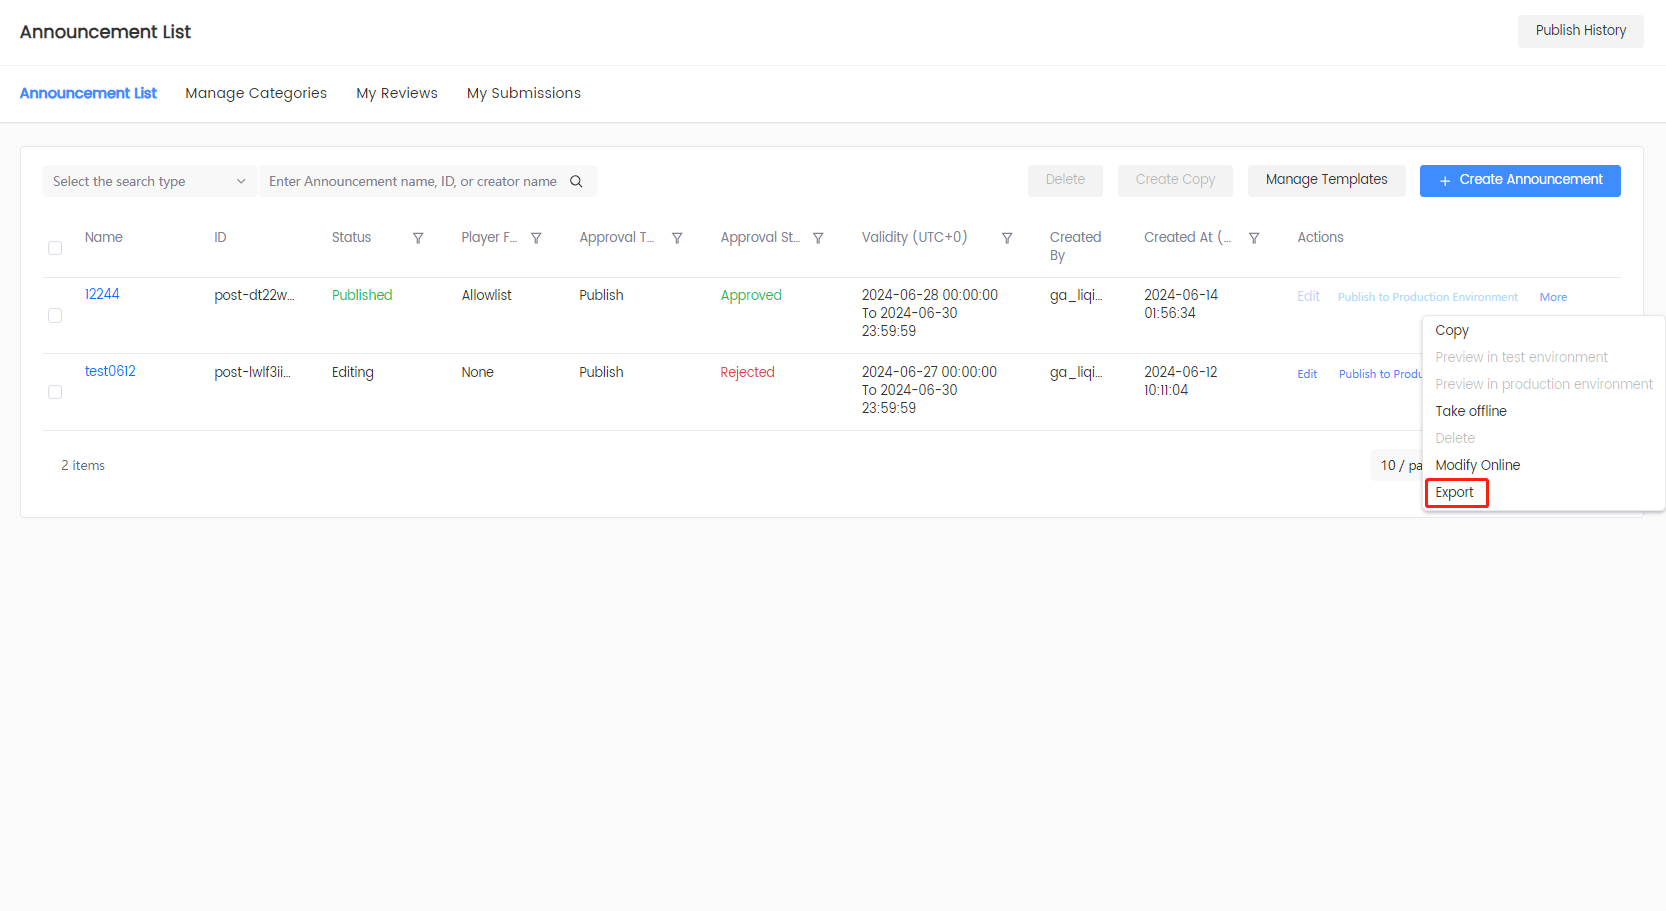
Click More > Export in the Actions column of the announcement to export the announcement as a JSON file.
Manage Categories
Player Network allows creating announcement categories to categorize announcement boards. You can create and delete announcement categories on the Manage Categories page.
Create new categories
-
Log in to the Player Network Console.
-
In the left sidebar, select Announcements > Announcement List under Player Management.
-
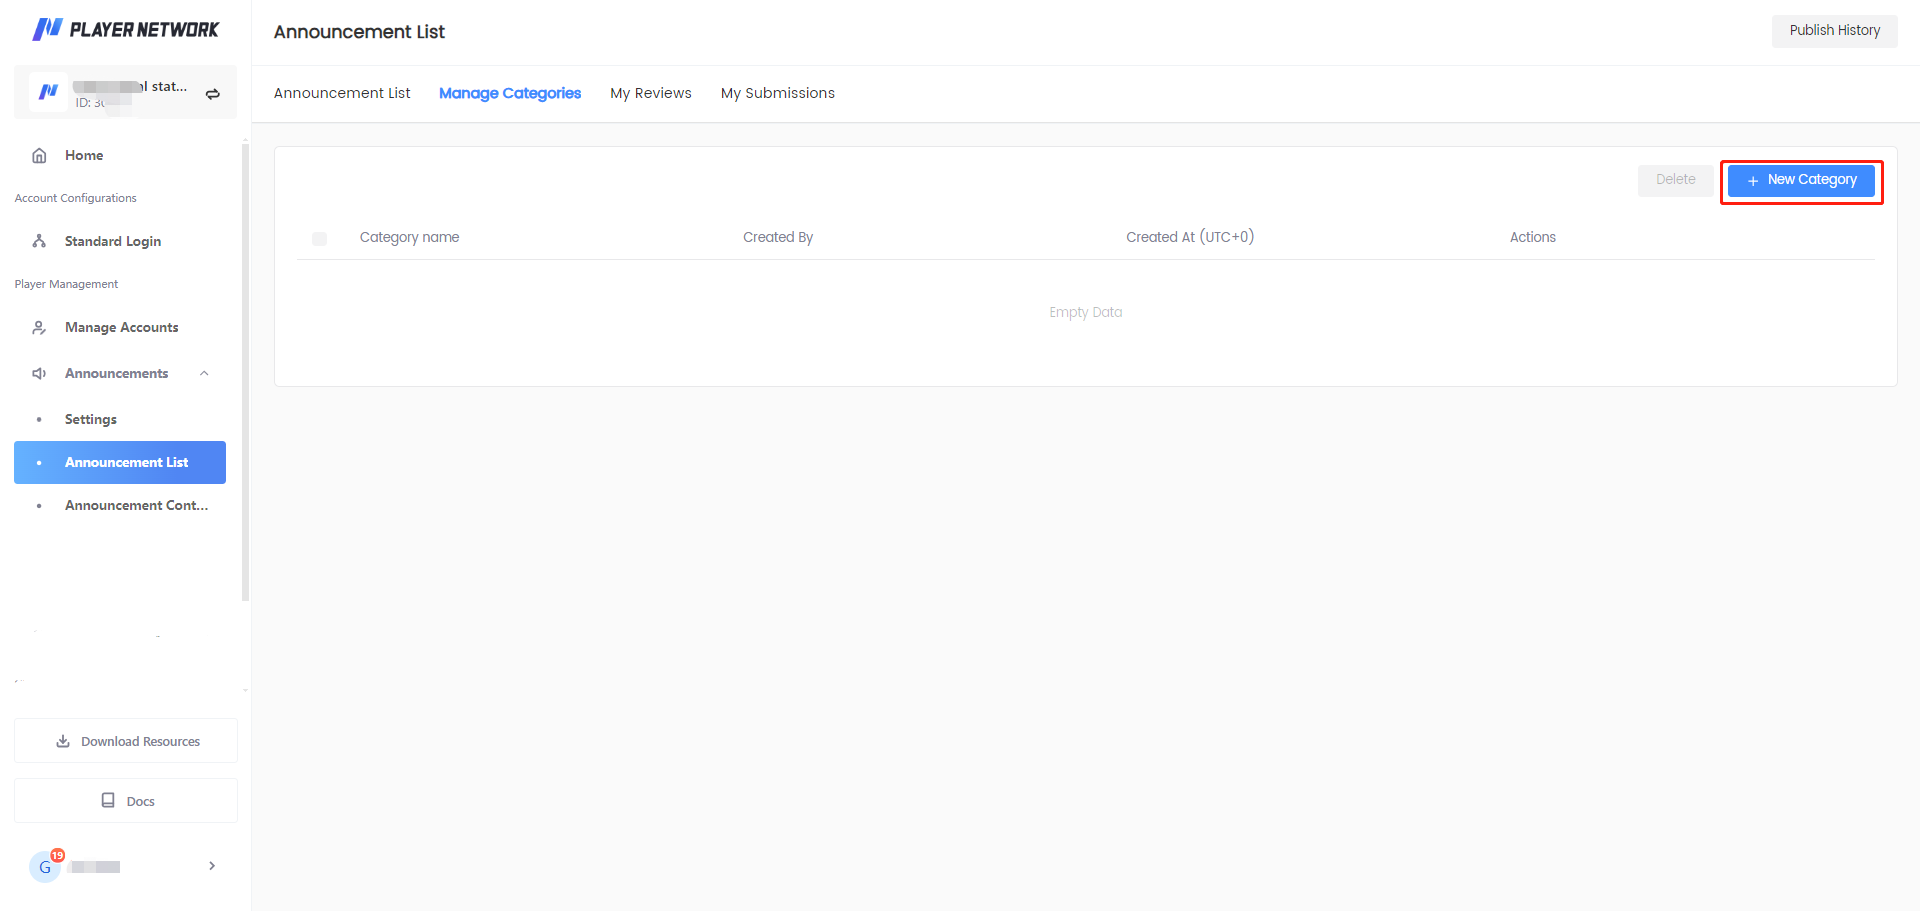
Click Manage Categories > New Category.
-
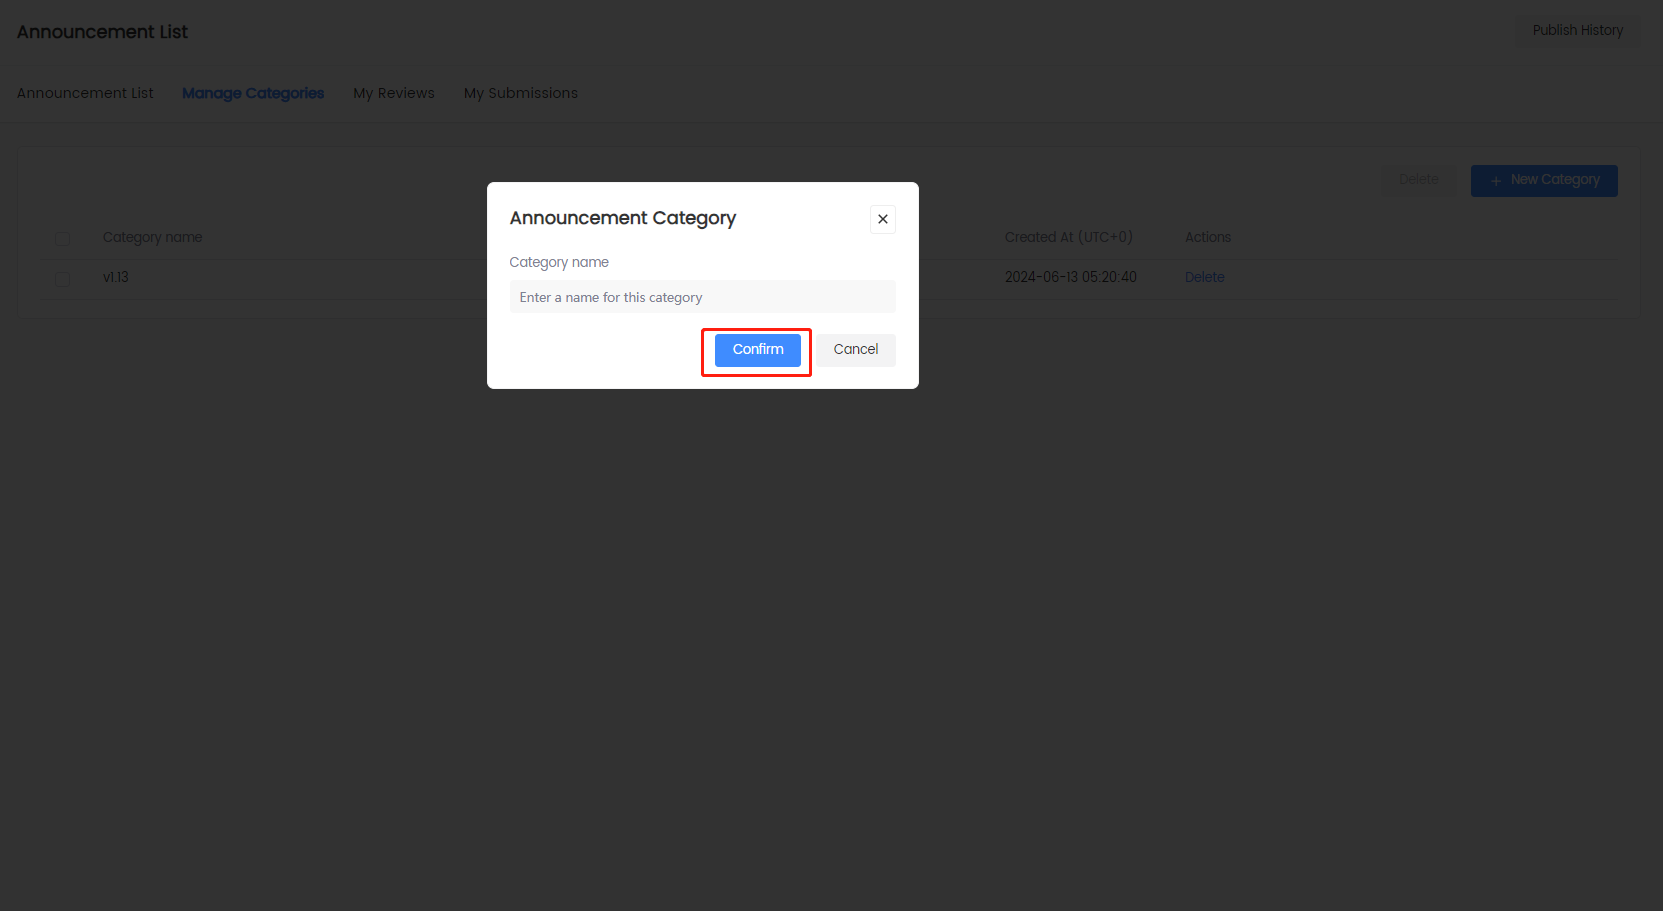
In the Announcement Category popup, specify Category name, and click Confirm to save the category. The newly created category displayed on the Manage Categories page.
Delete announcement categories
-
Log in to the Player Network Console.
-
In the left sidebar, select Announcements > Announcement List under Player Management.
-
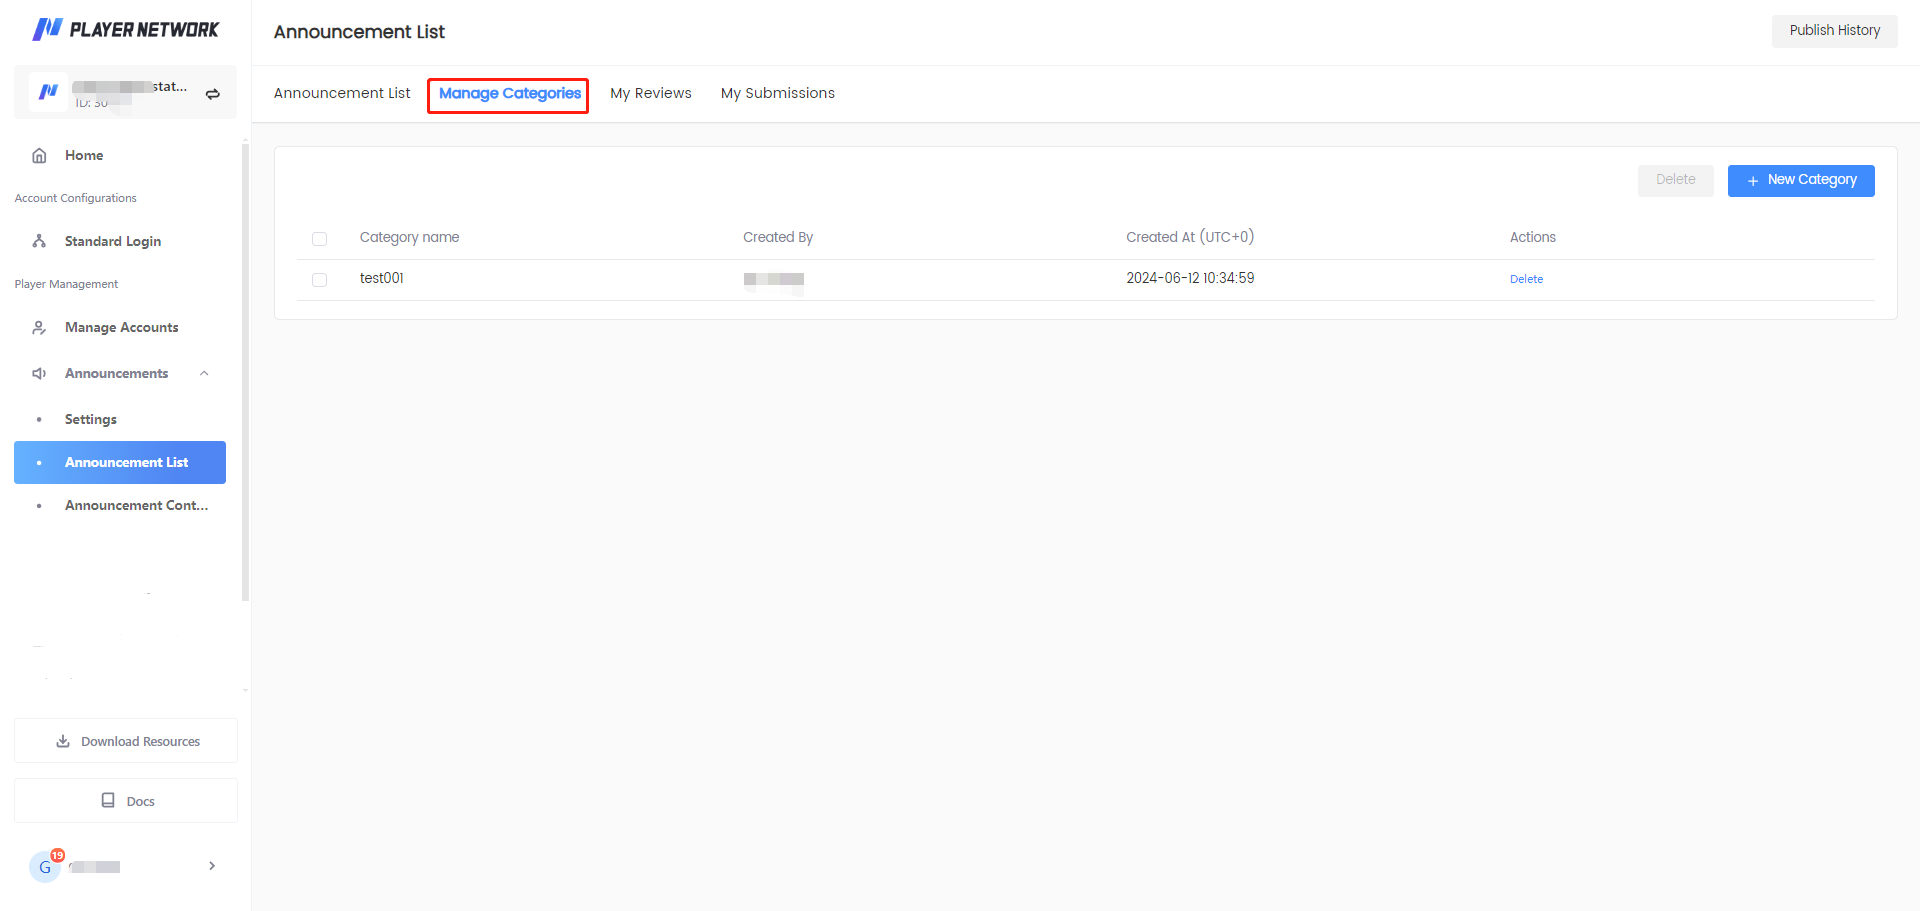
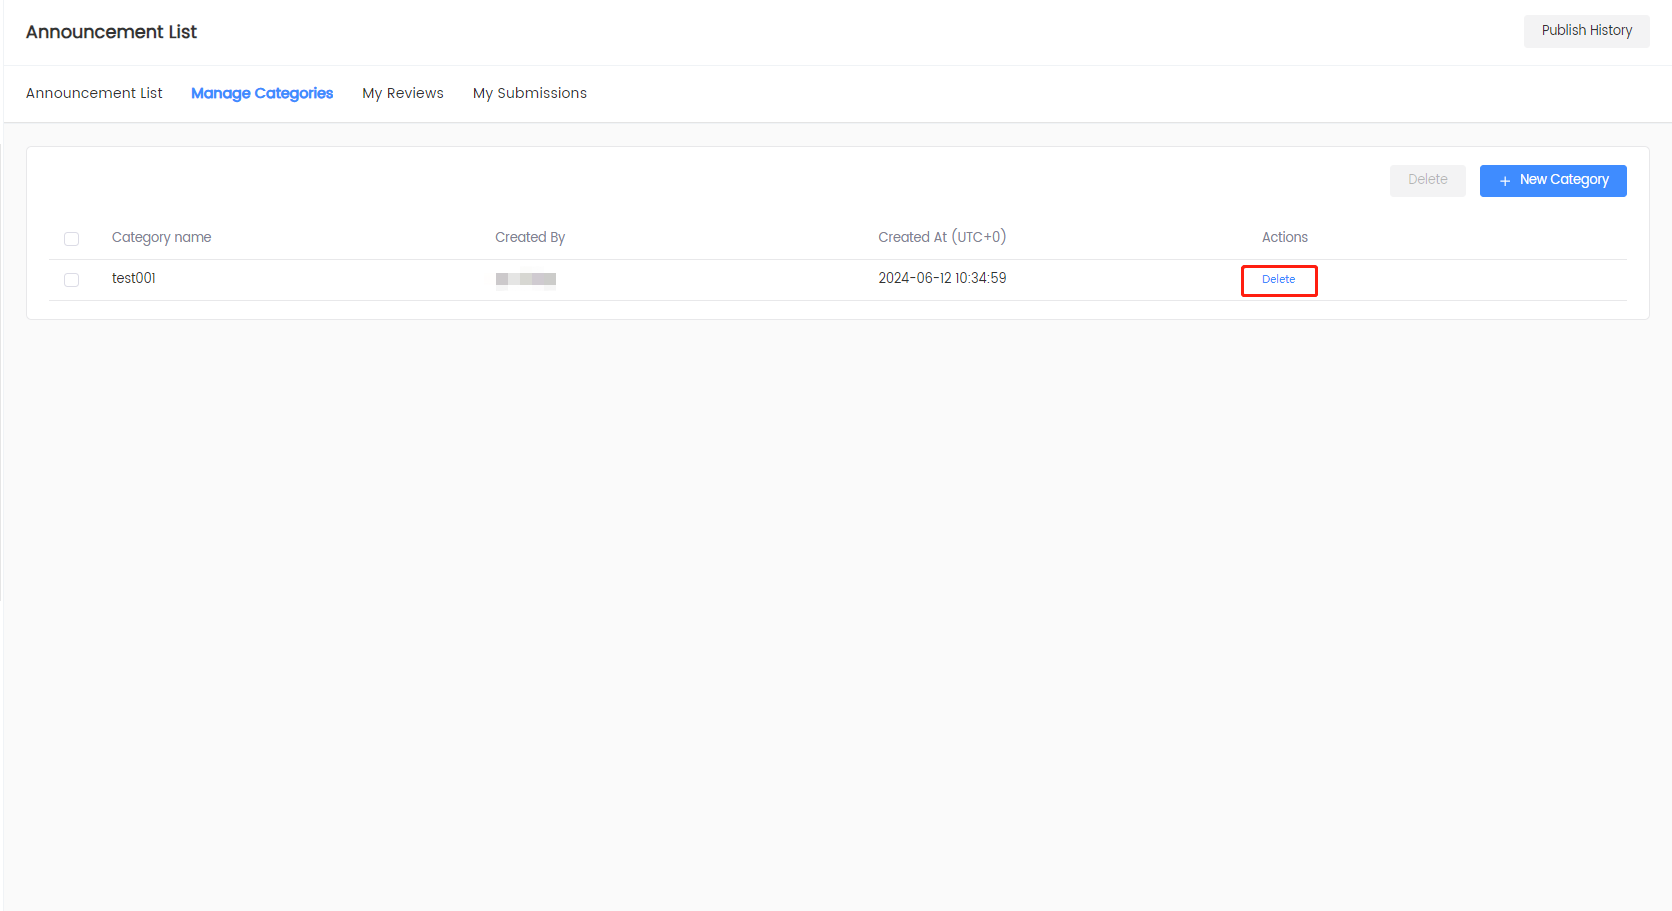
Click Manage Categories, and use one of the following methods to delete one or multiple categories:
- To delete a category, click Delete under the Actions column of the category.
- To delete multiple categories, check the checkbox next to the desired categories, and click Delete from the top right corner.
-
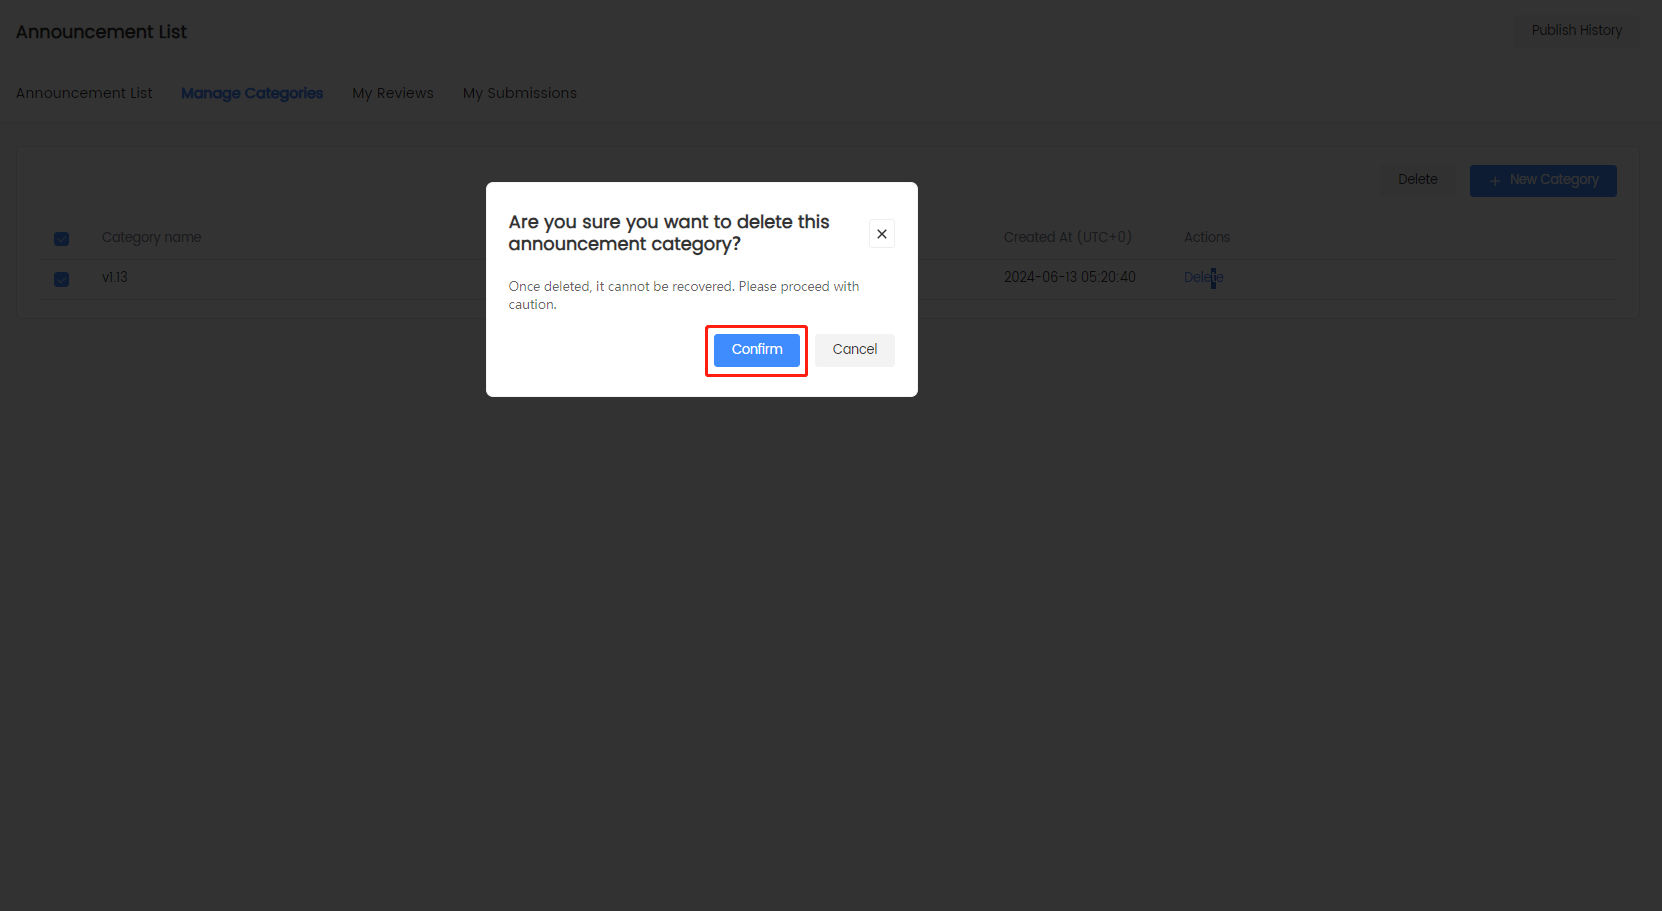
In the popup, click Confirm to complete the deletion of the selected categories.
My Reviews
Only reviewers can perform this action. To change or add reviewers, see Approval Settings.
-
Log in to the Player Network Console.
-
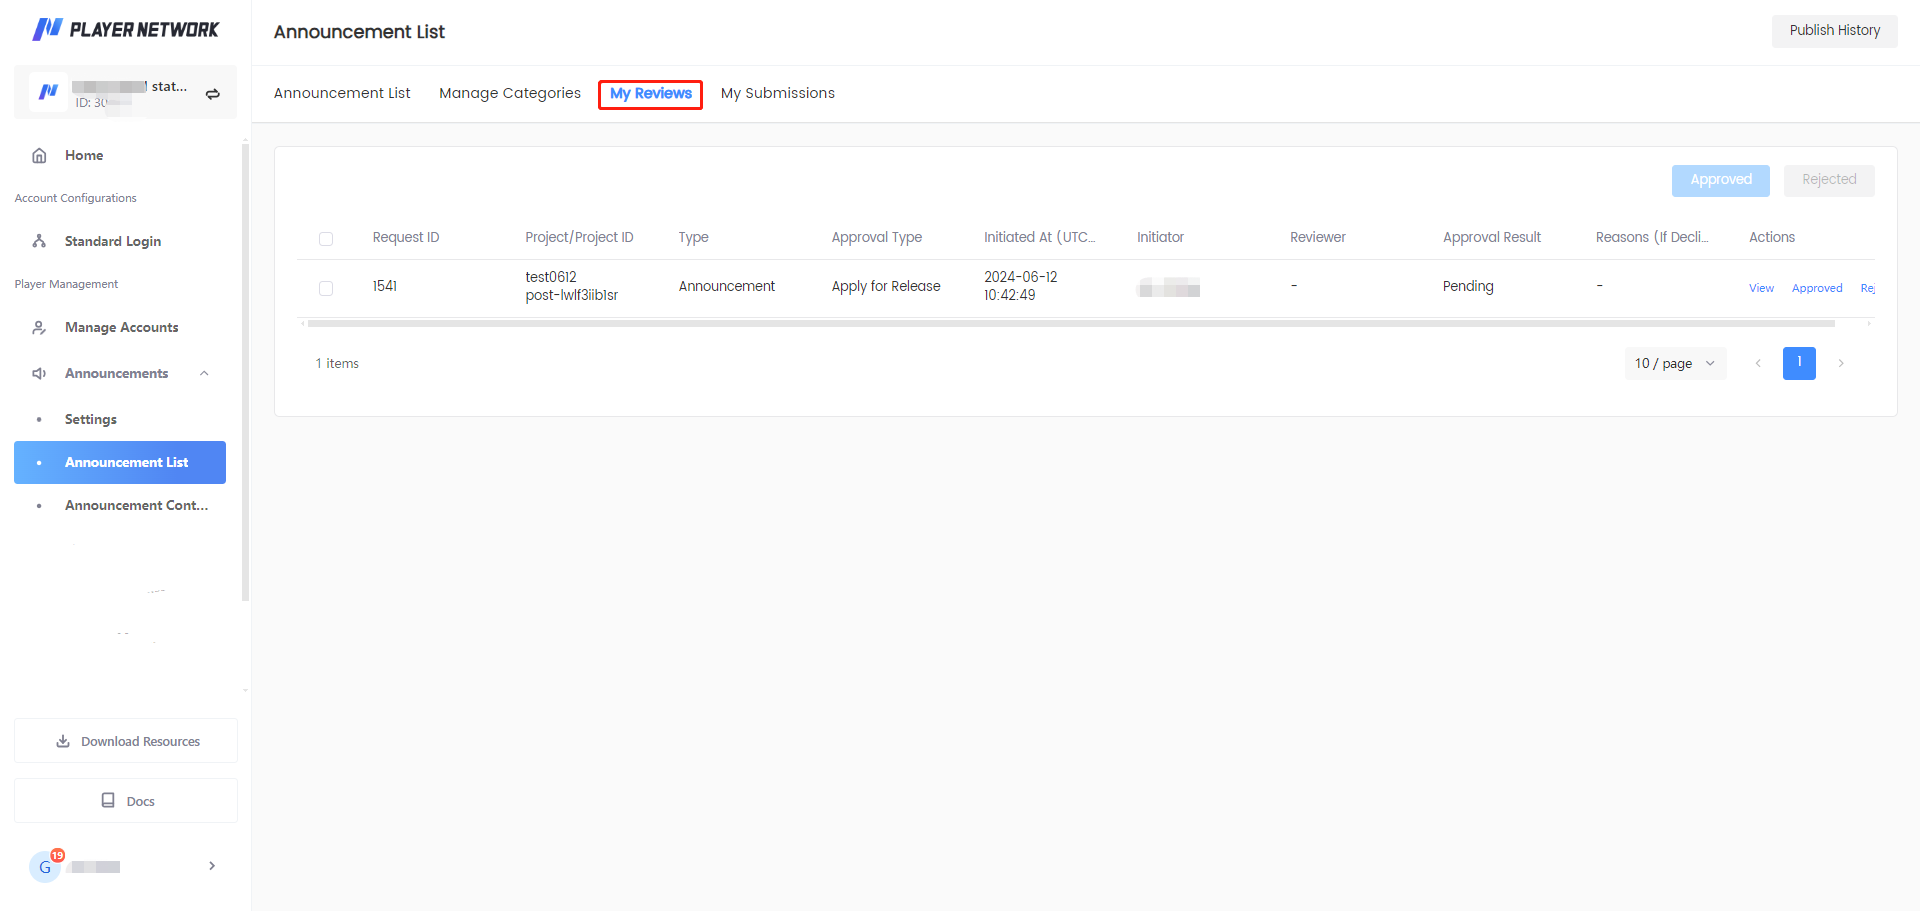
In the left sidebar, select Announcements > Announcement List under Player Management.
-
Click My Reviews, and use one of the following methods to approve or reject one or multiple submissions:
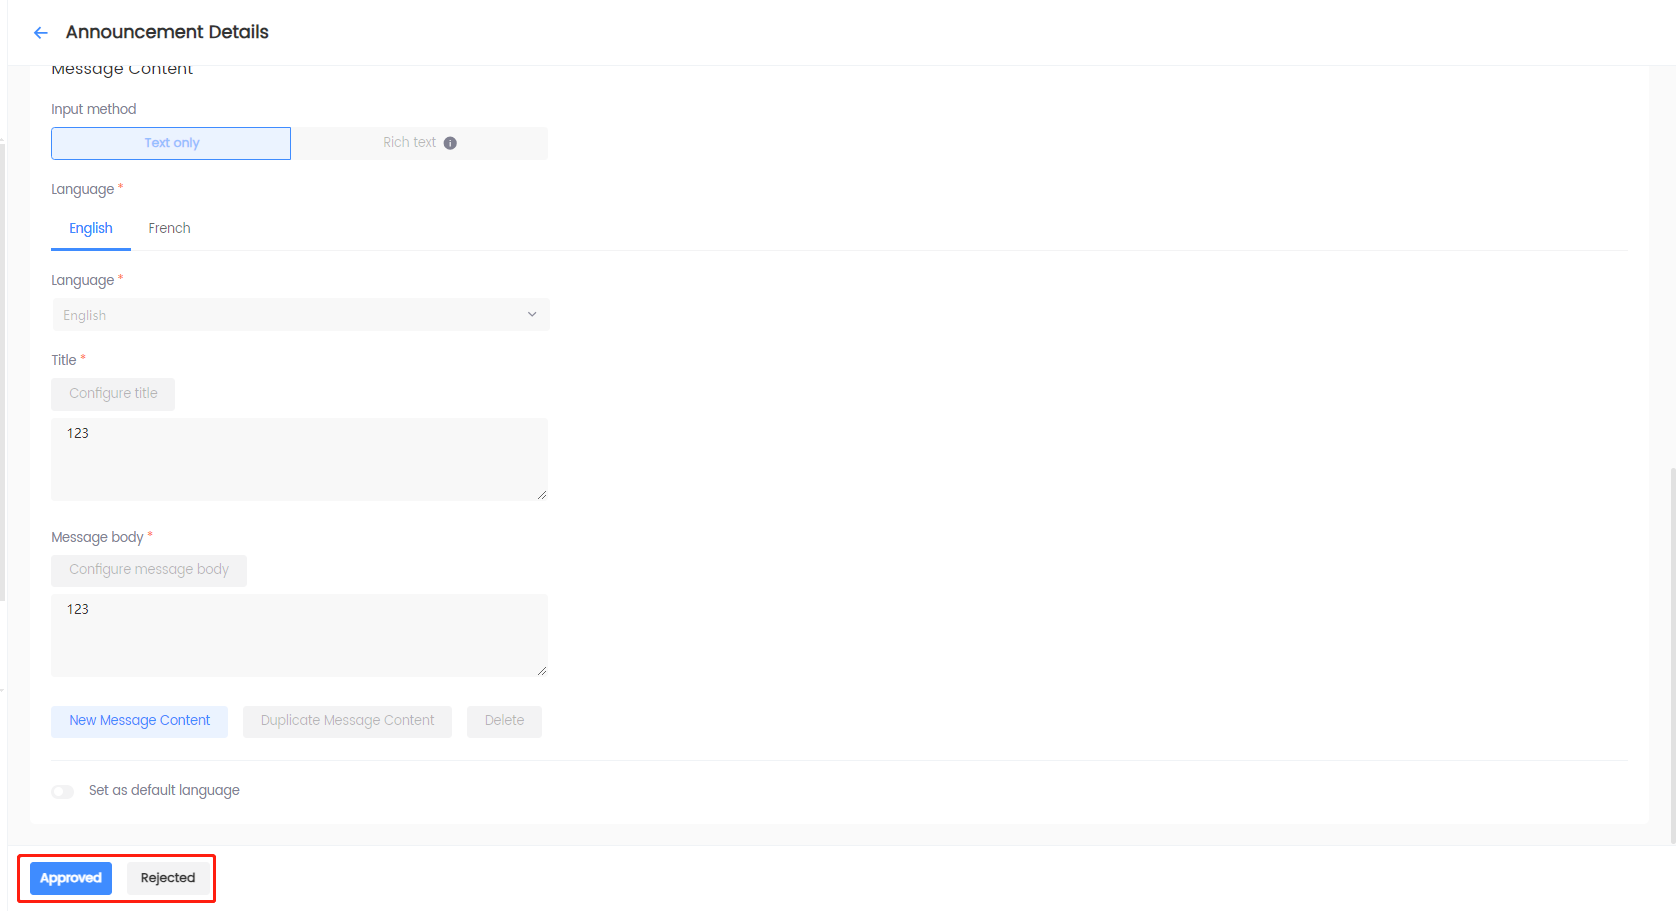
- [Optional] Click View in the Actions column of the submission, and click Approve or Reject on the Announcement Details page after reviewing the submission.
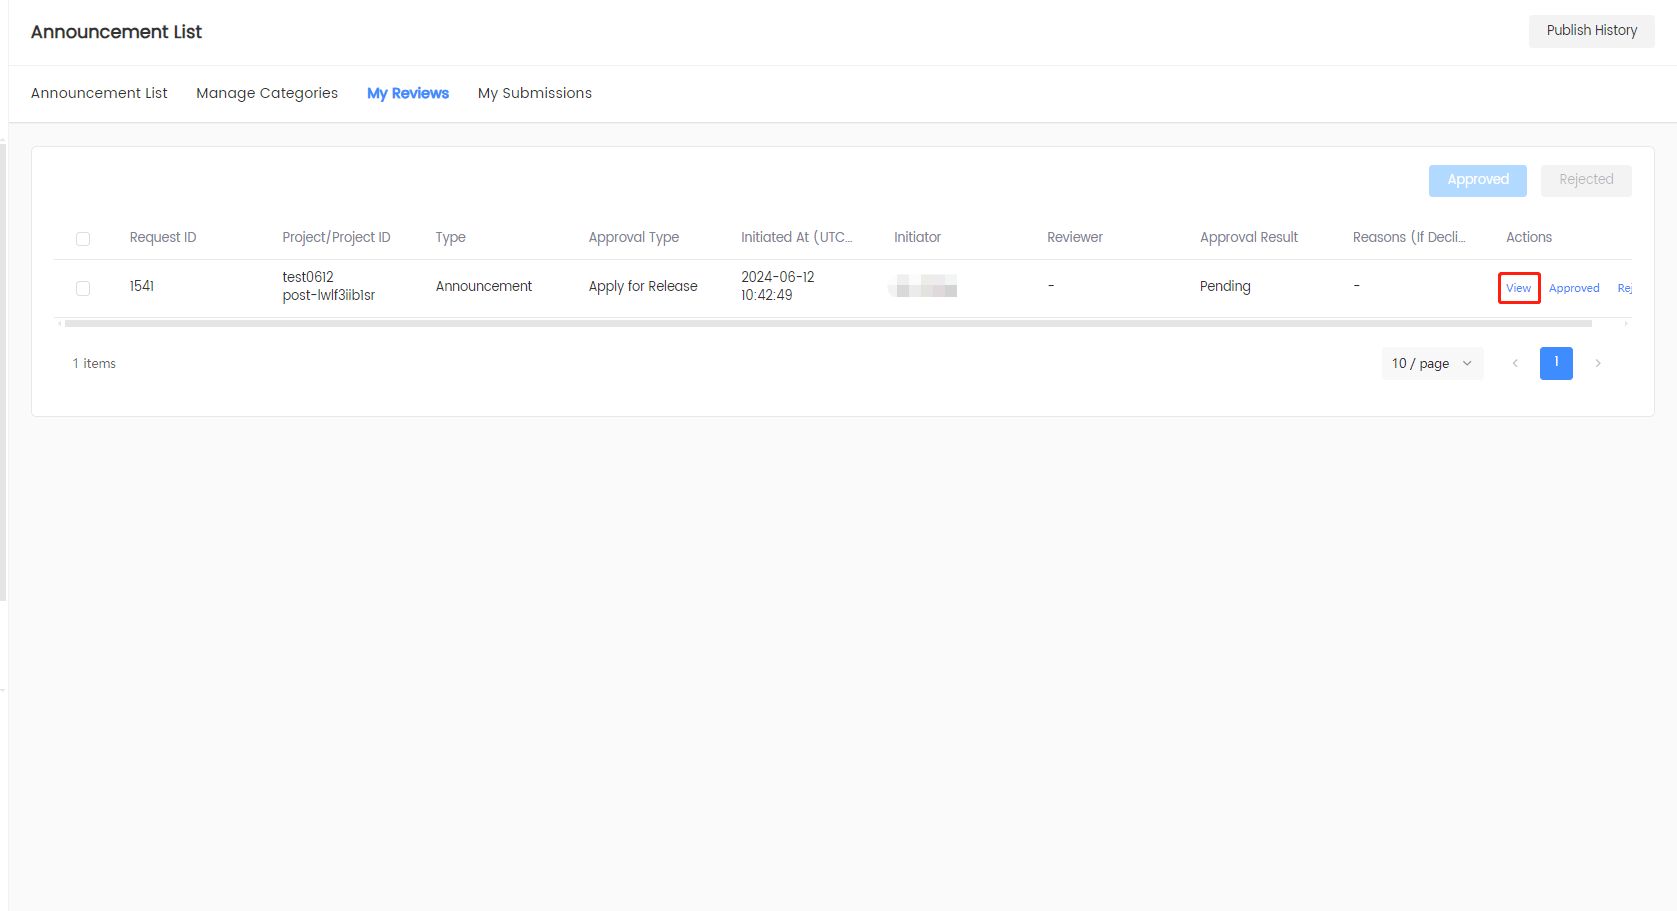
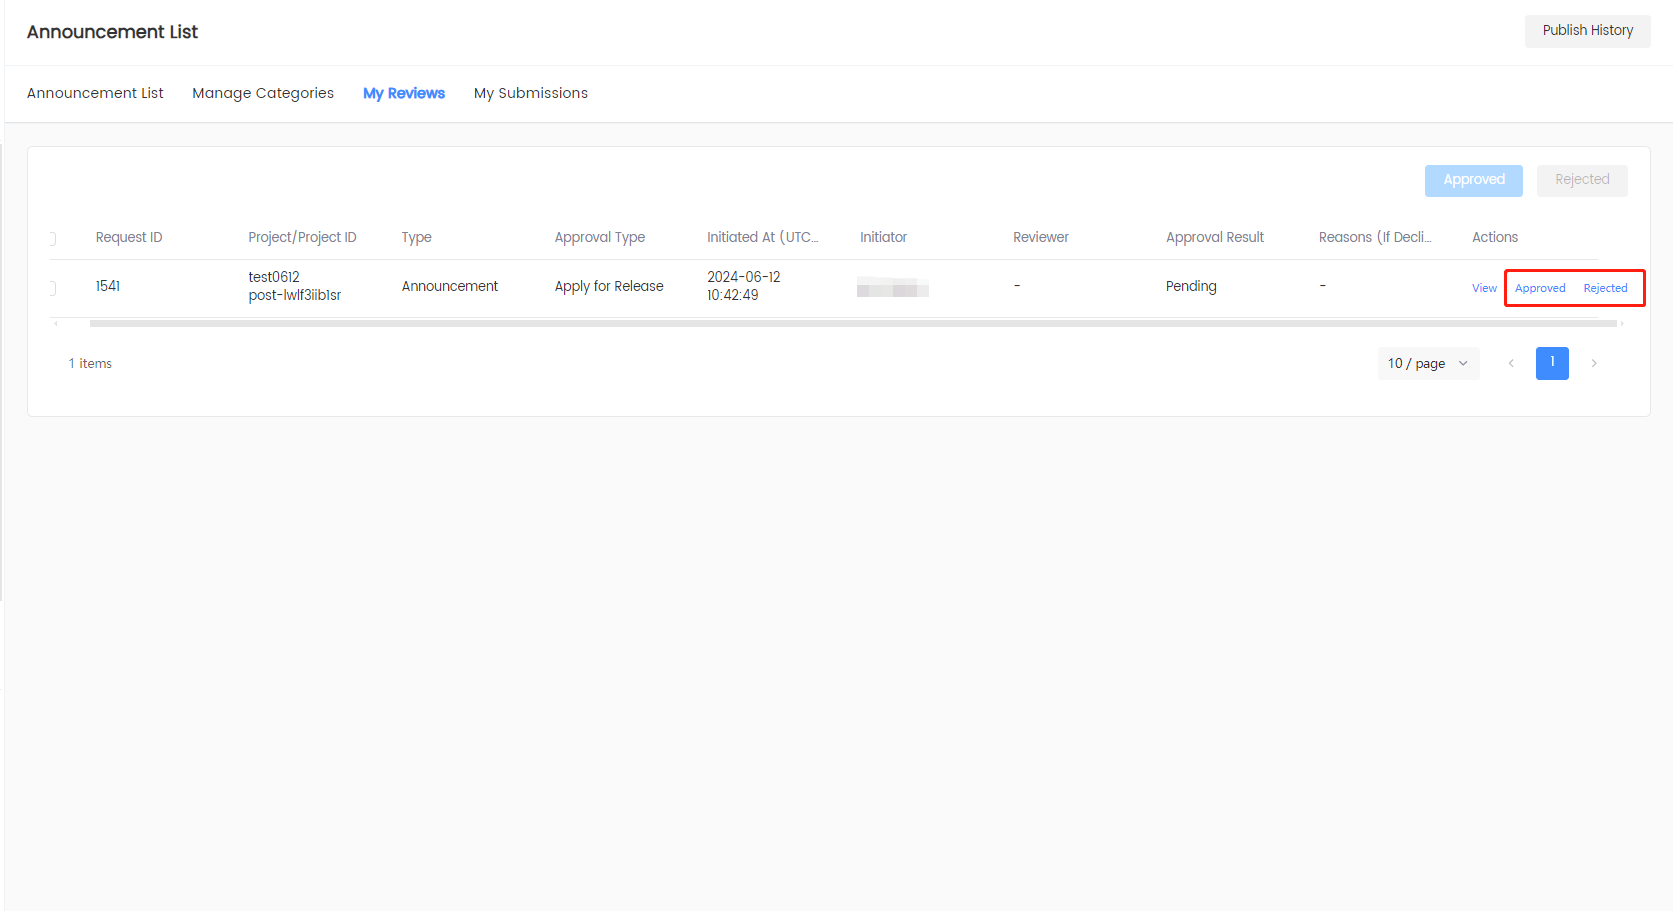
- To approve or reject a submission, click Approve or Reject under the Actions column of the submission.
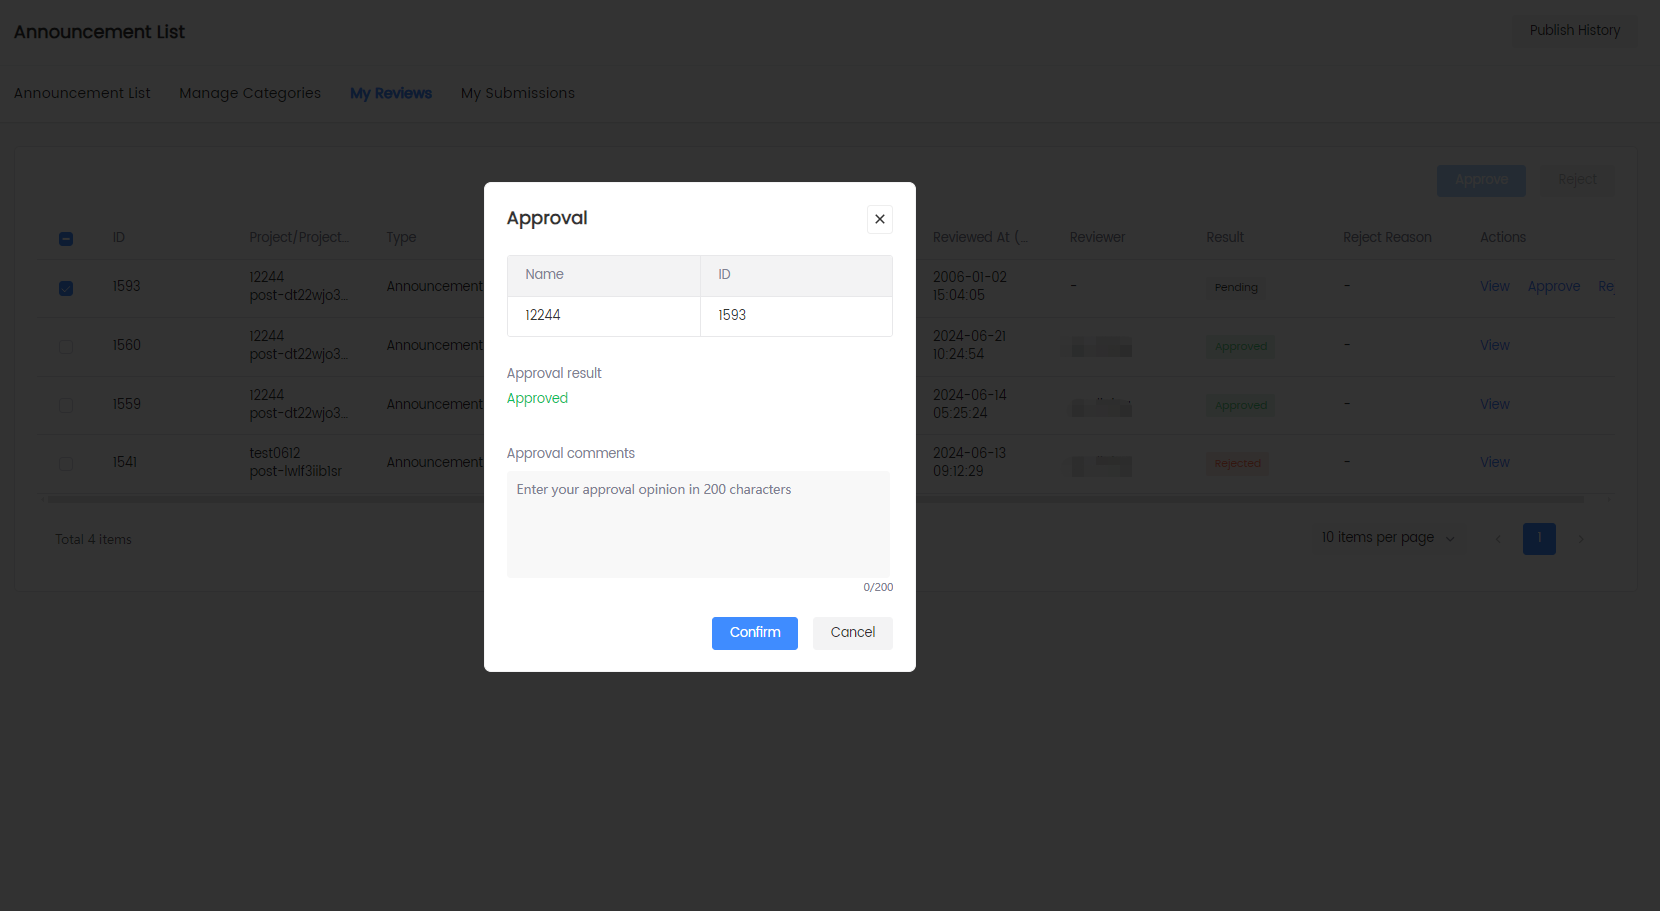
- To approve or reject multiple submissions, check the checkbox next to the desired submissions, and click Approve or Reject from the top right corner.
- [Optional] Click View in the Actions column of the submission, and click Approve or Reject on the Announcement Details page after reviewing the submission.
-
[Optional] Add your approval comments as needed, be it for approval or for rejection.
My Submissions
-
Log in to the Player Network Console.
-
In the left sidebar, select Announcements > Announcement List under Player Management.
-
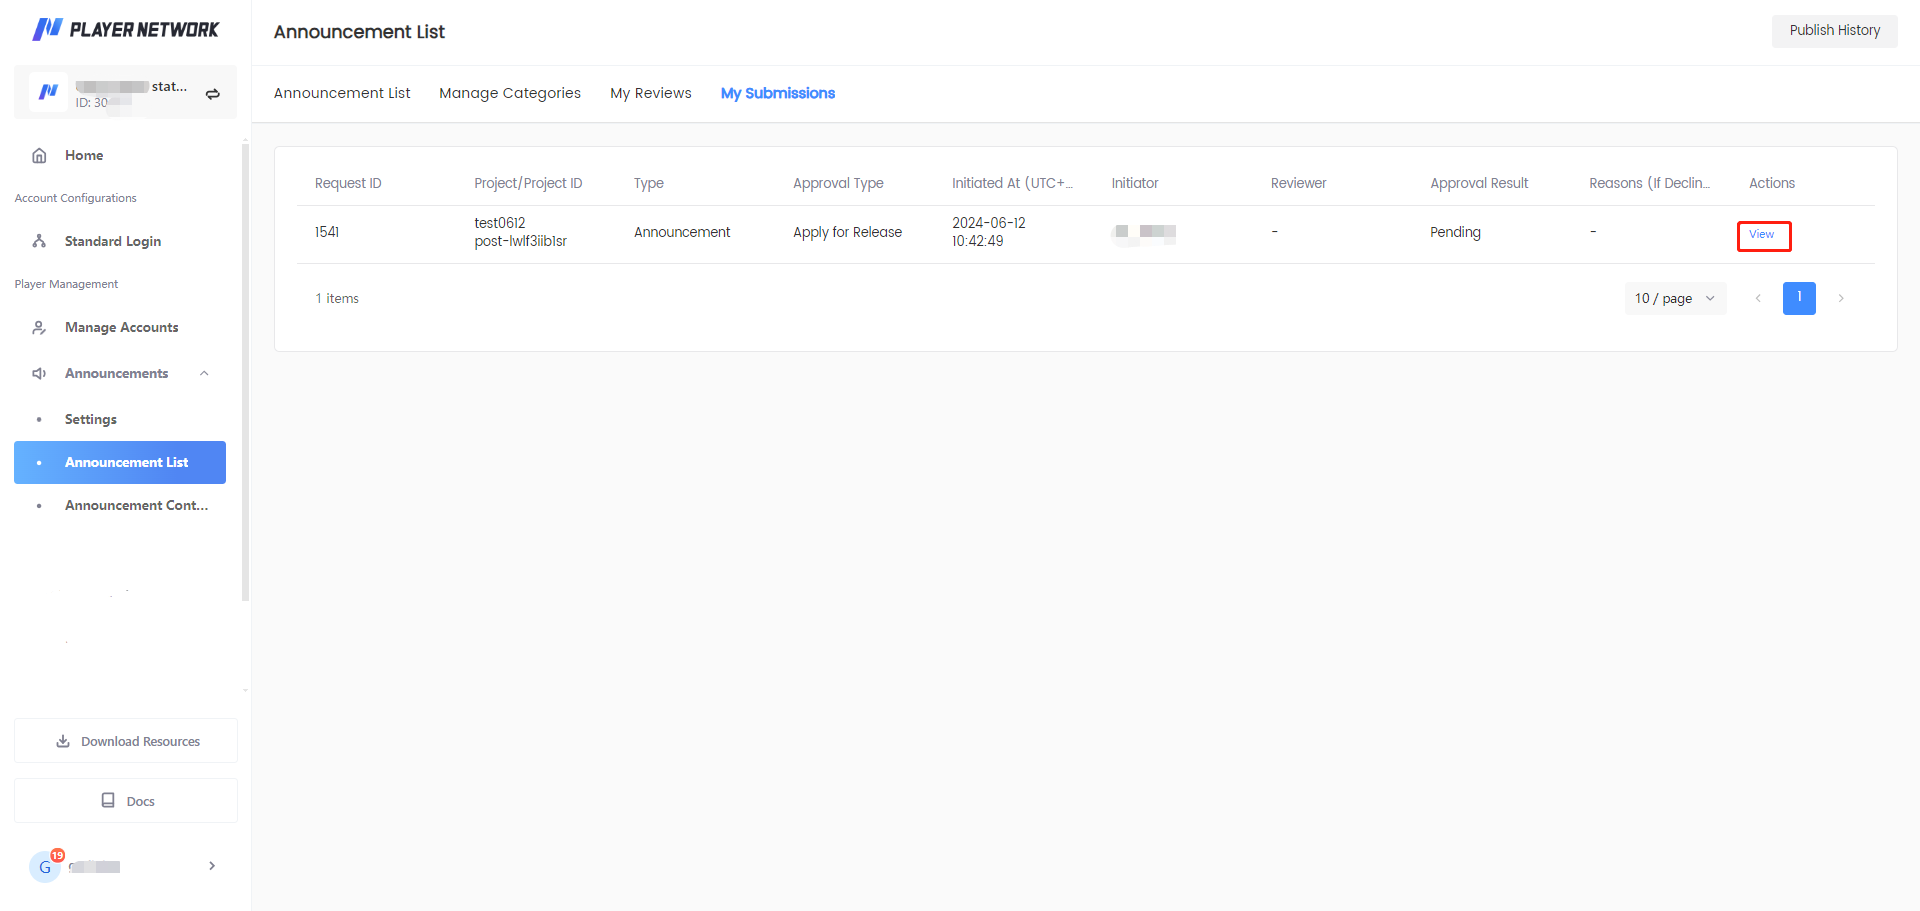
Click My Submissions, and check the status of the submissions you submitted.
-
[Optional] Click View in the Actions column to view the announcement details submitted for approval.
Manage announcement contents
Game operators can import text content in different languages through multilingual templates, reducing the workload and error rate.
Manual entry
-
Log in to the Player Network Console.
-
In the left sidebar, select Announcements > Announcement Contents under Player Management.
-
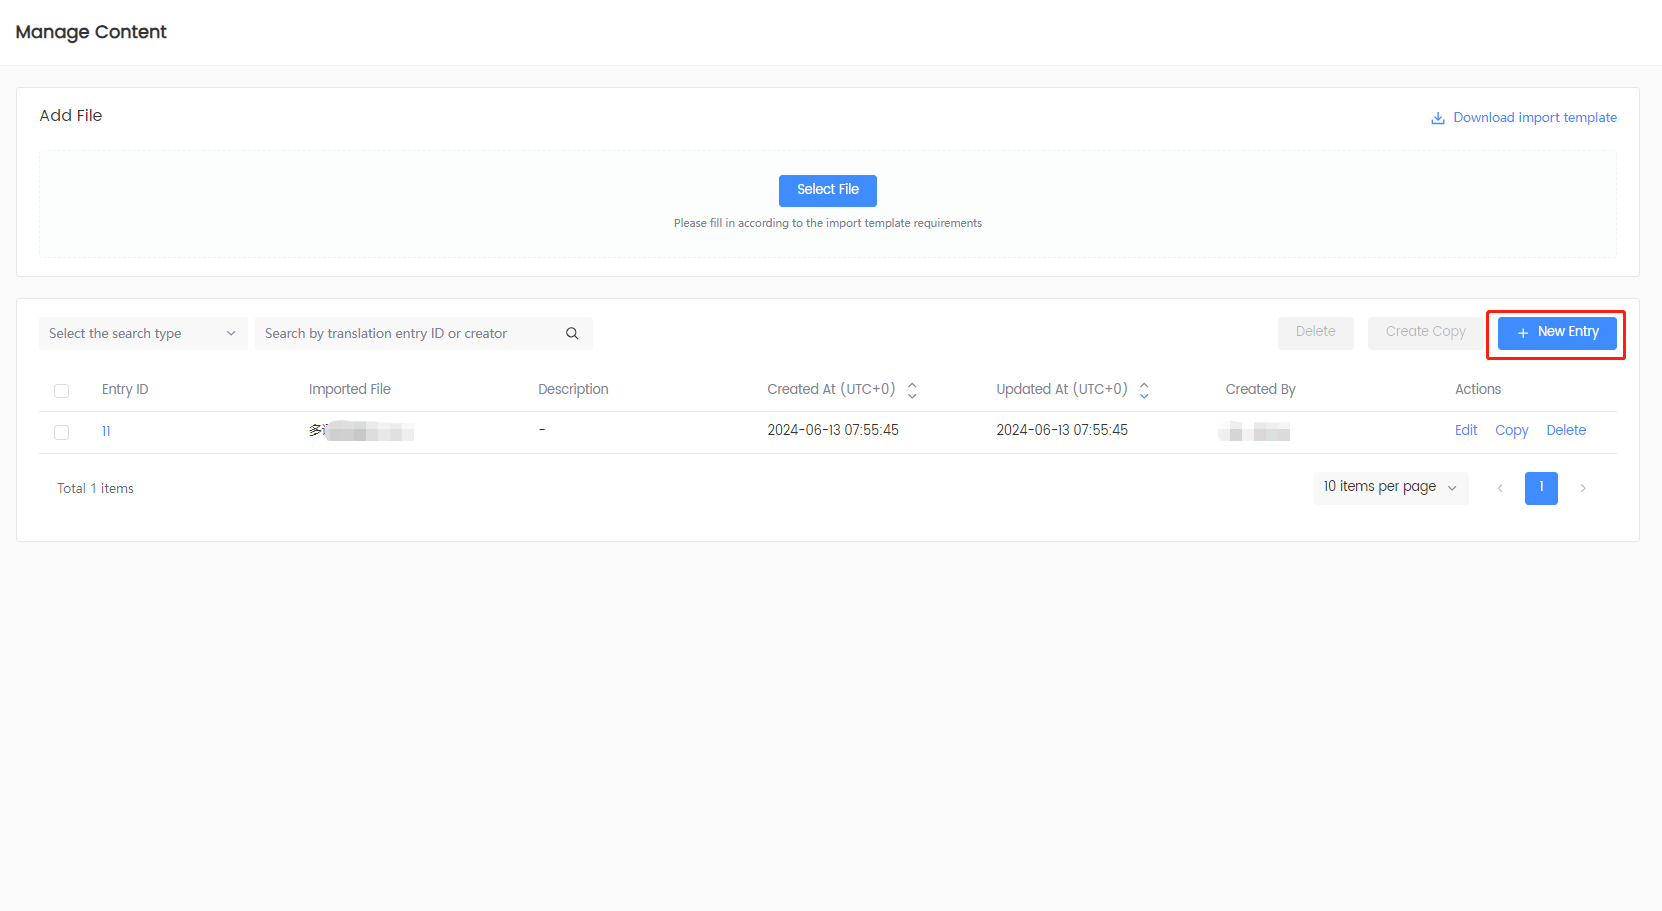
On the Content page, click New Entry.
-
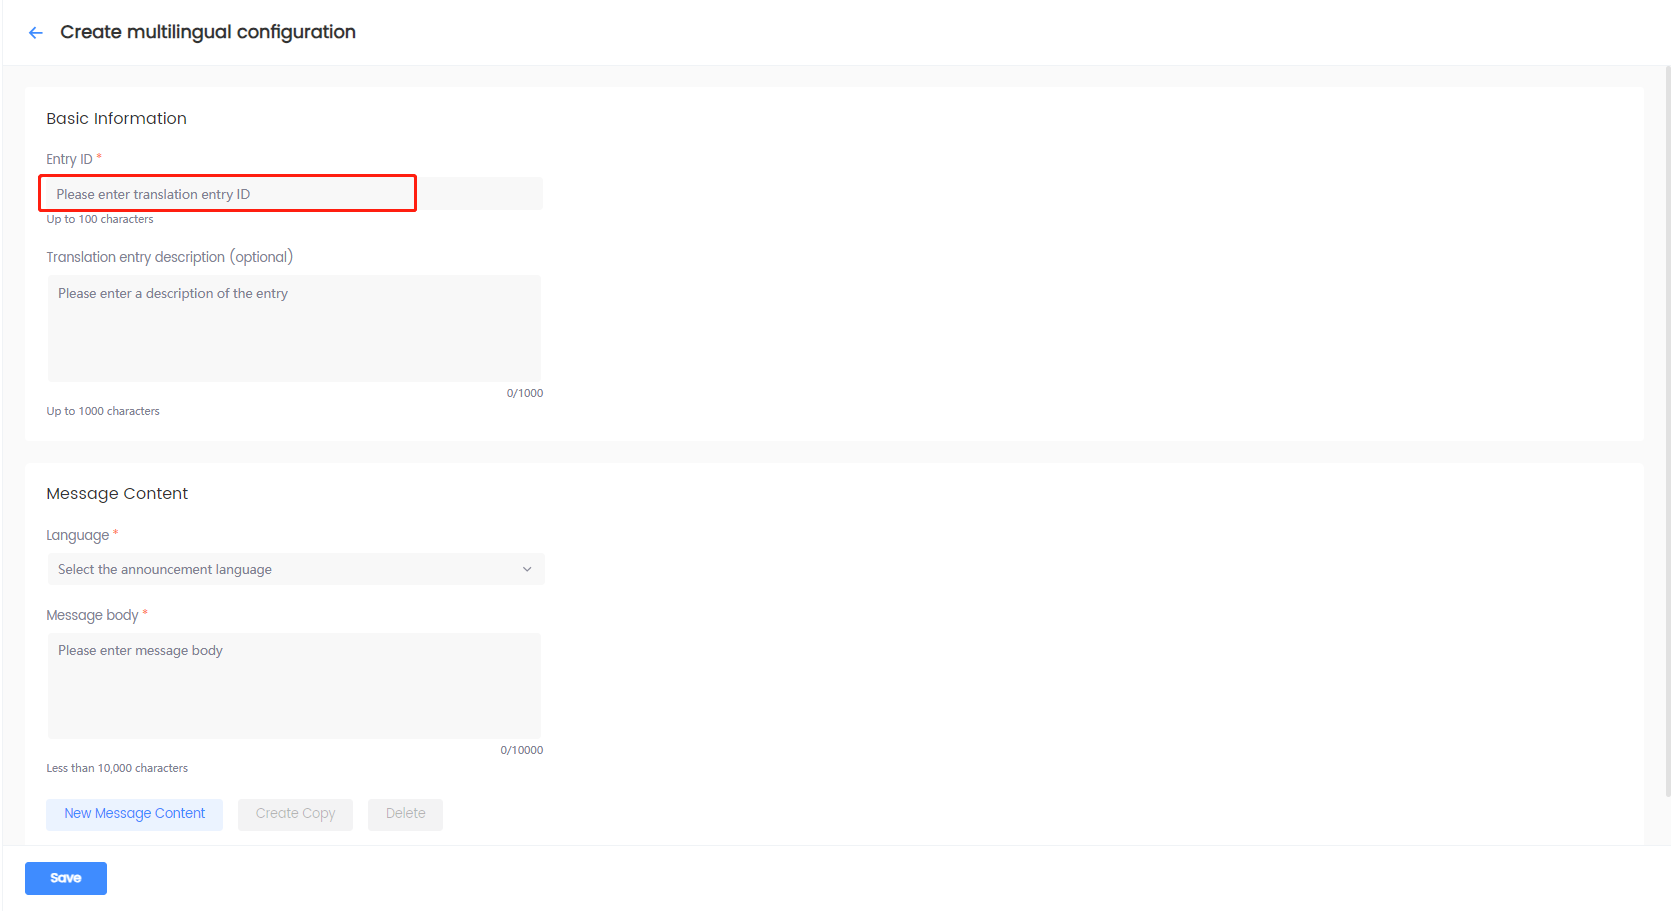
On the Create multilingual configuration page, under Basic Information, specify an Entry ID that easily identifies the translation entry and its description.
-
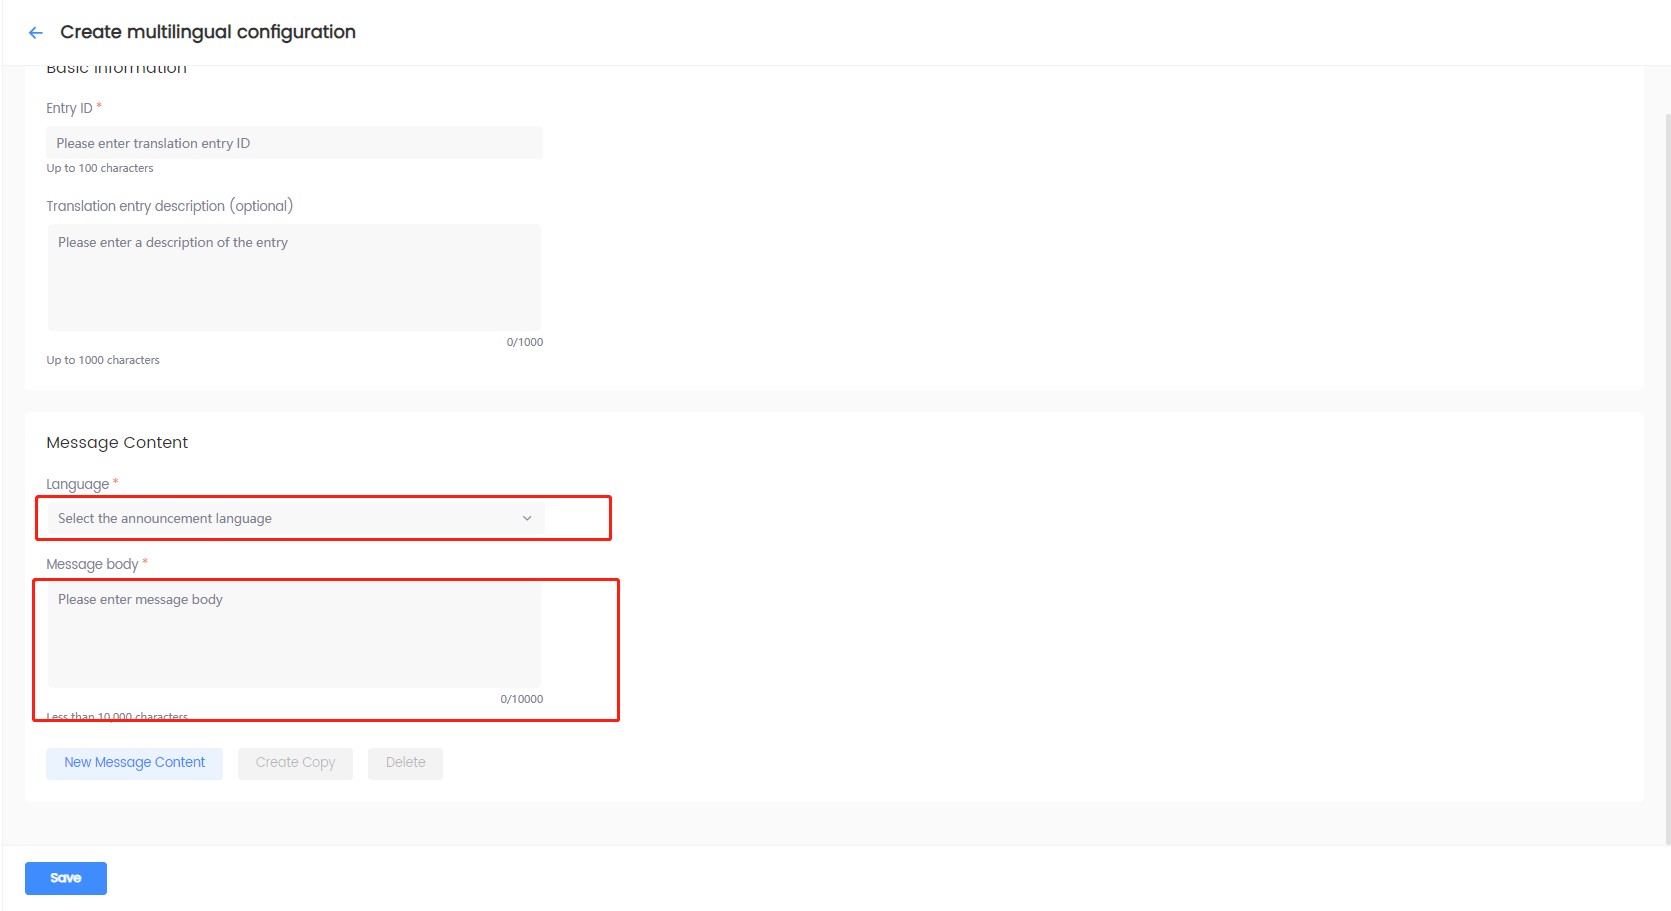
Under Message Content, specify Language and Message body.
-
To add translation entries for other languages, use one of the following options:
- Click New Message Content to save the translation entry in the selected language. A new tab for the selected language is created above Language.
- Click Create Copy to copy the translation entry from the previous language. You need to select a new language after clicking this option.
- Click Delete to delete the translation entry of the selected language.

-
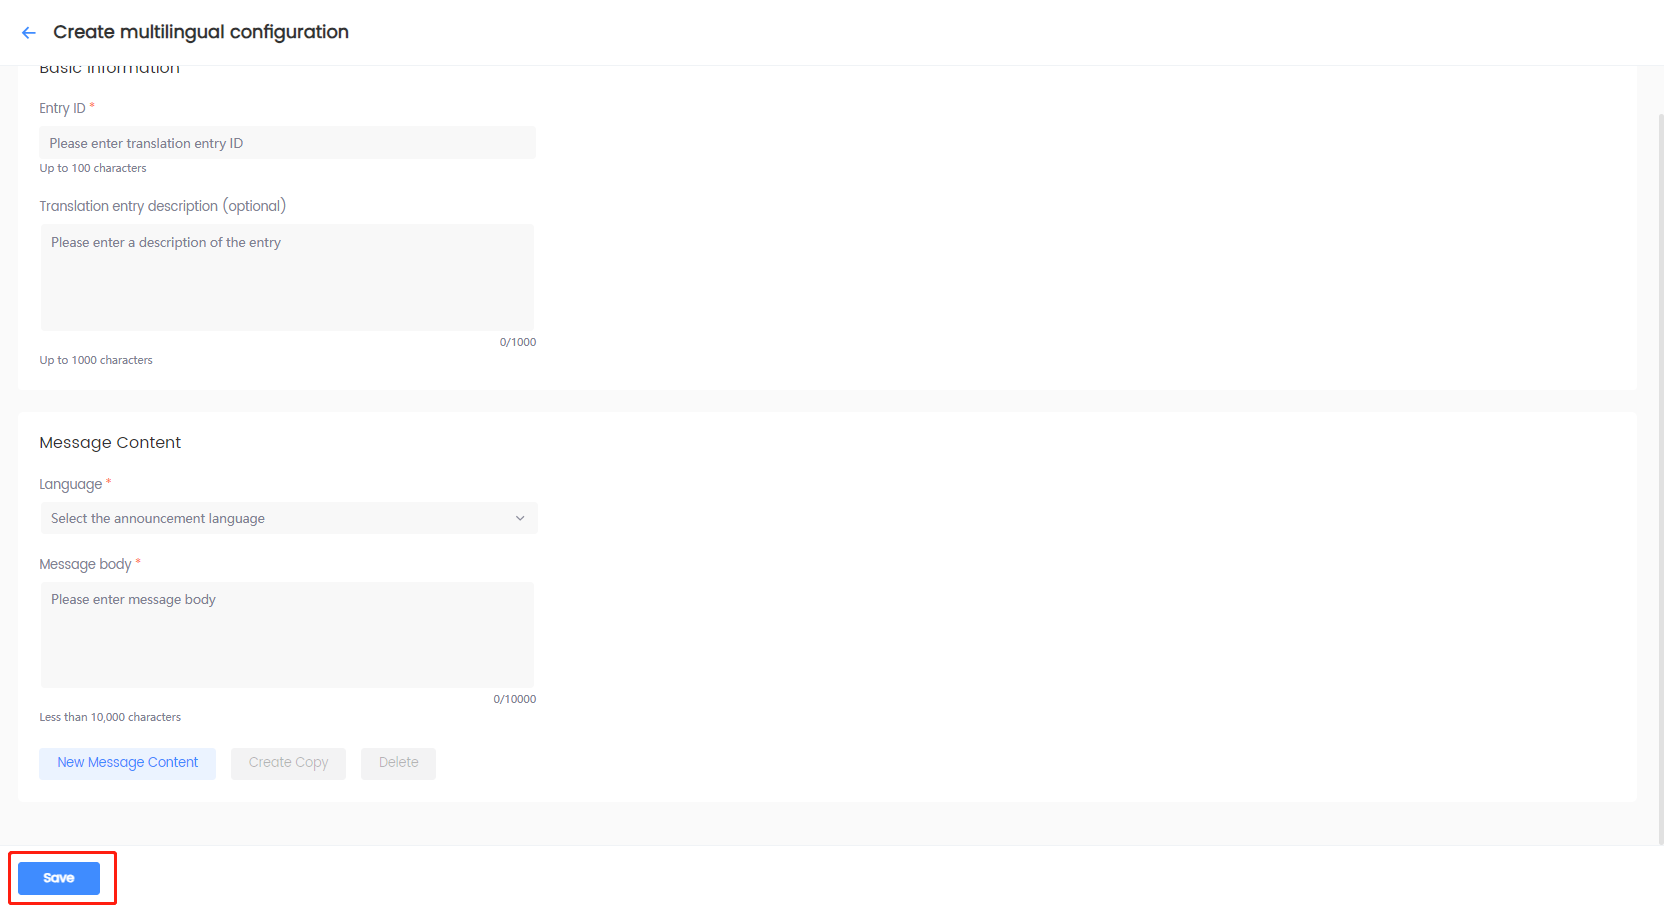
Click Save to save the translation entry.
Import templates
-
Log in to the Player Network Console.
-
In the left sidebar, select Announcements > Announcement Contents under Player Management.
-
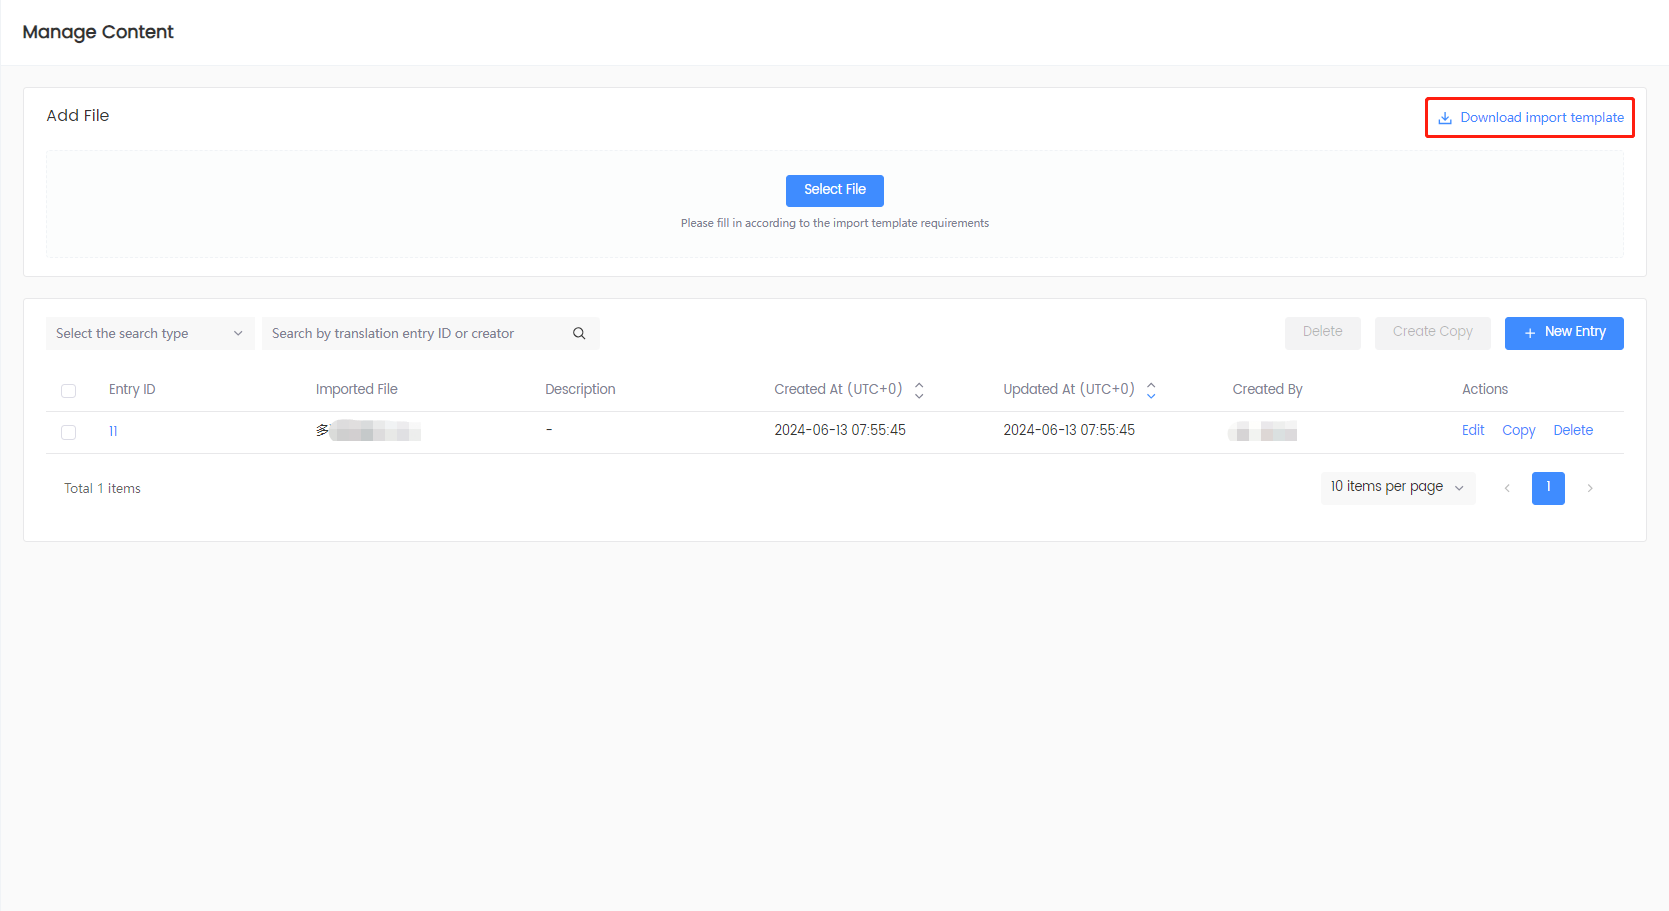
Under Add File, click Download import template and edit the downloaded template as needed.
-
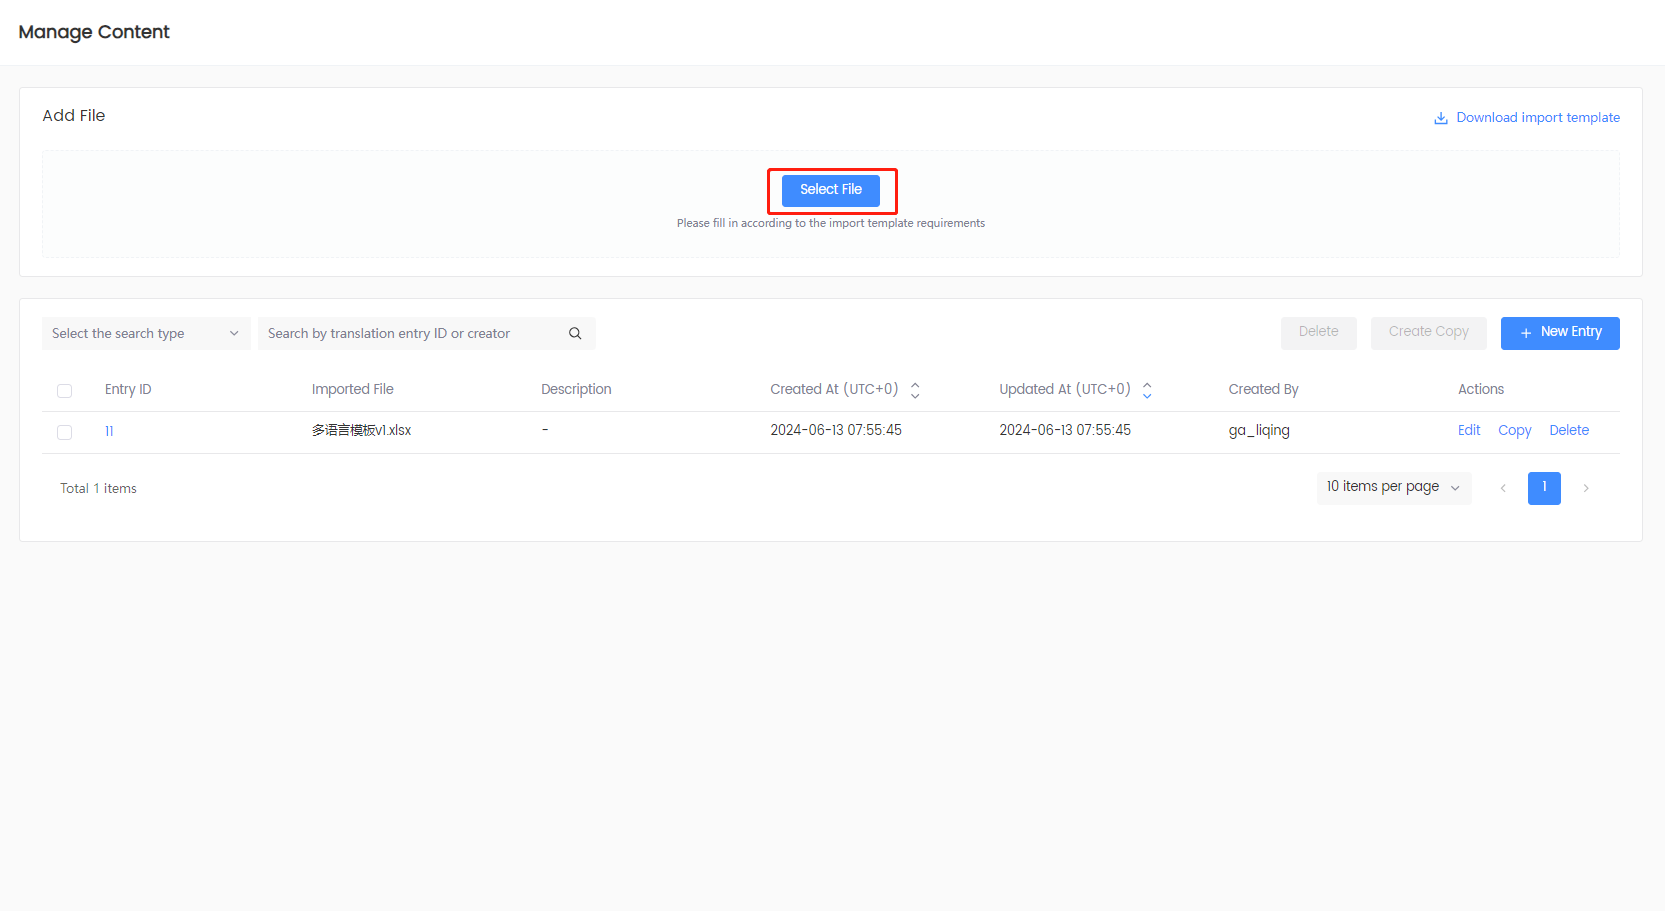
Click Select File to upload the edited template file.
-
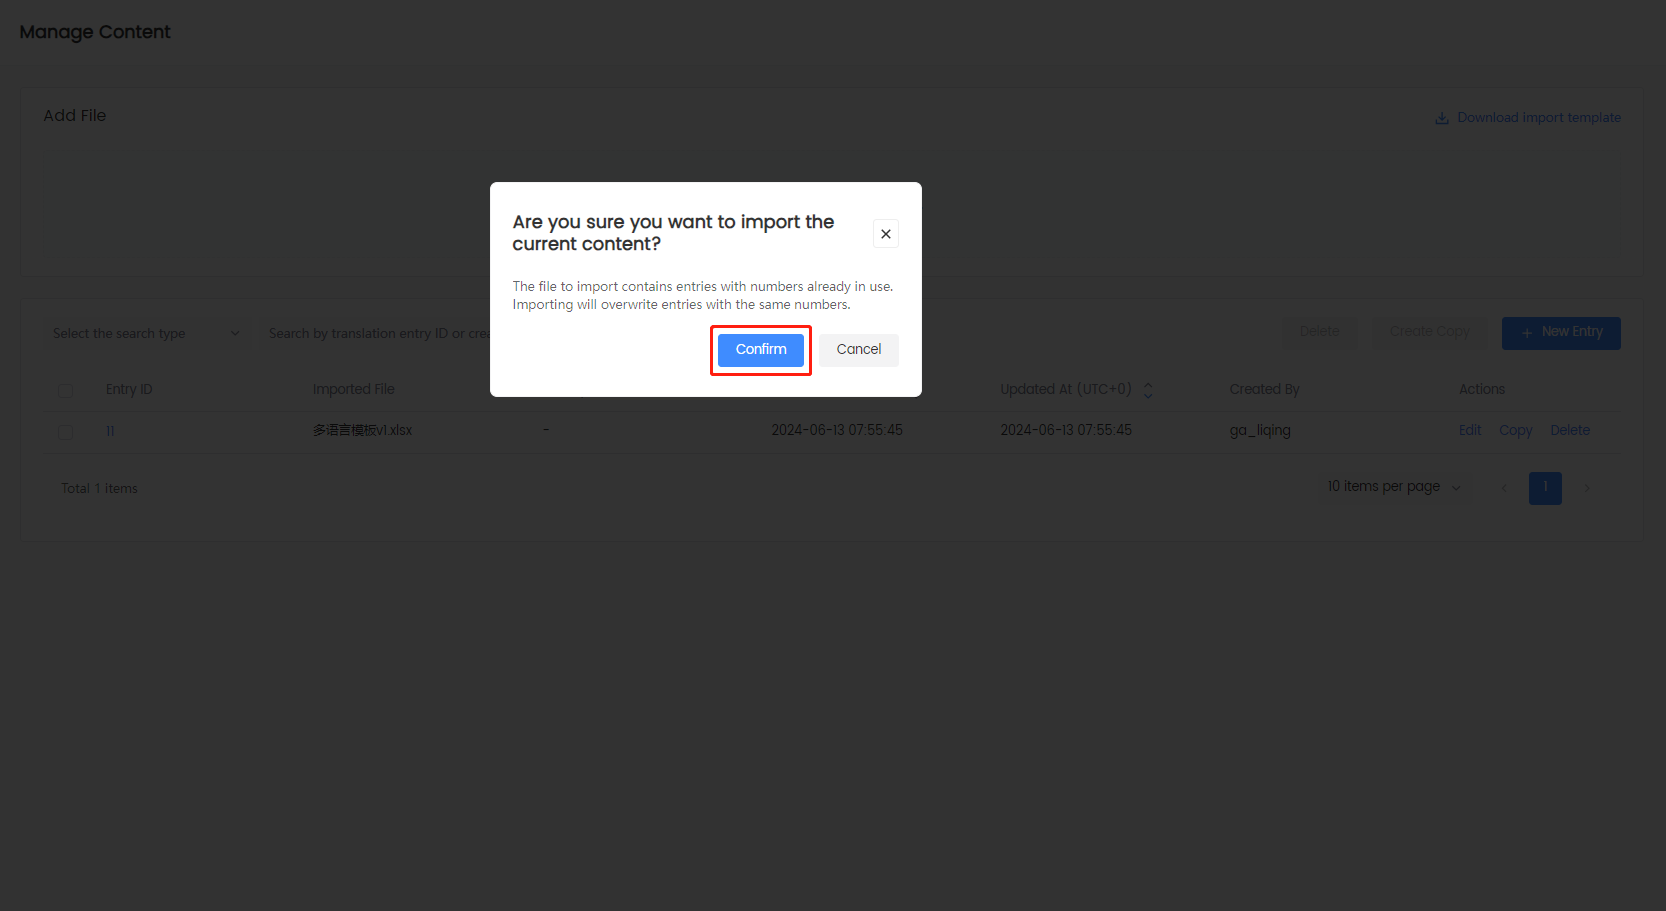
Click Confirm to import your template.
Announcement samples
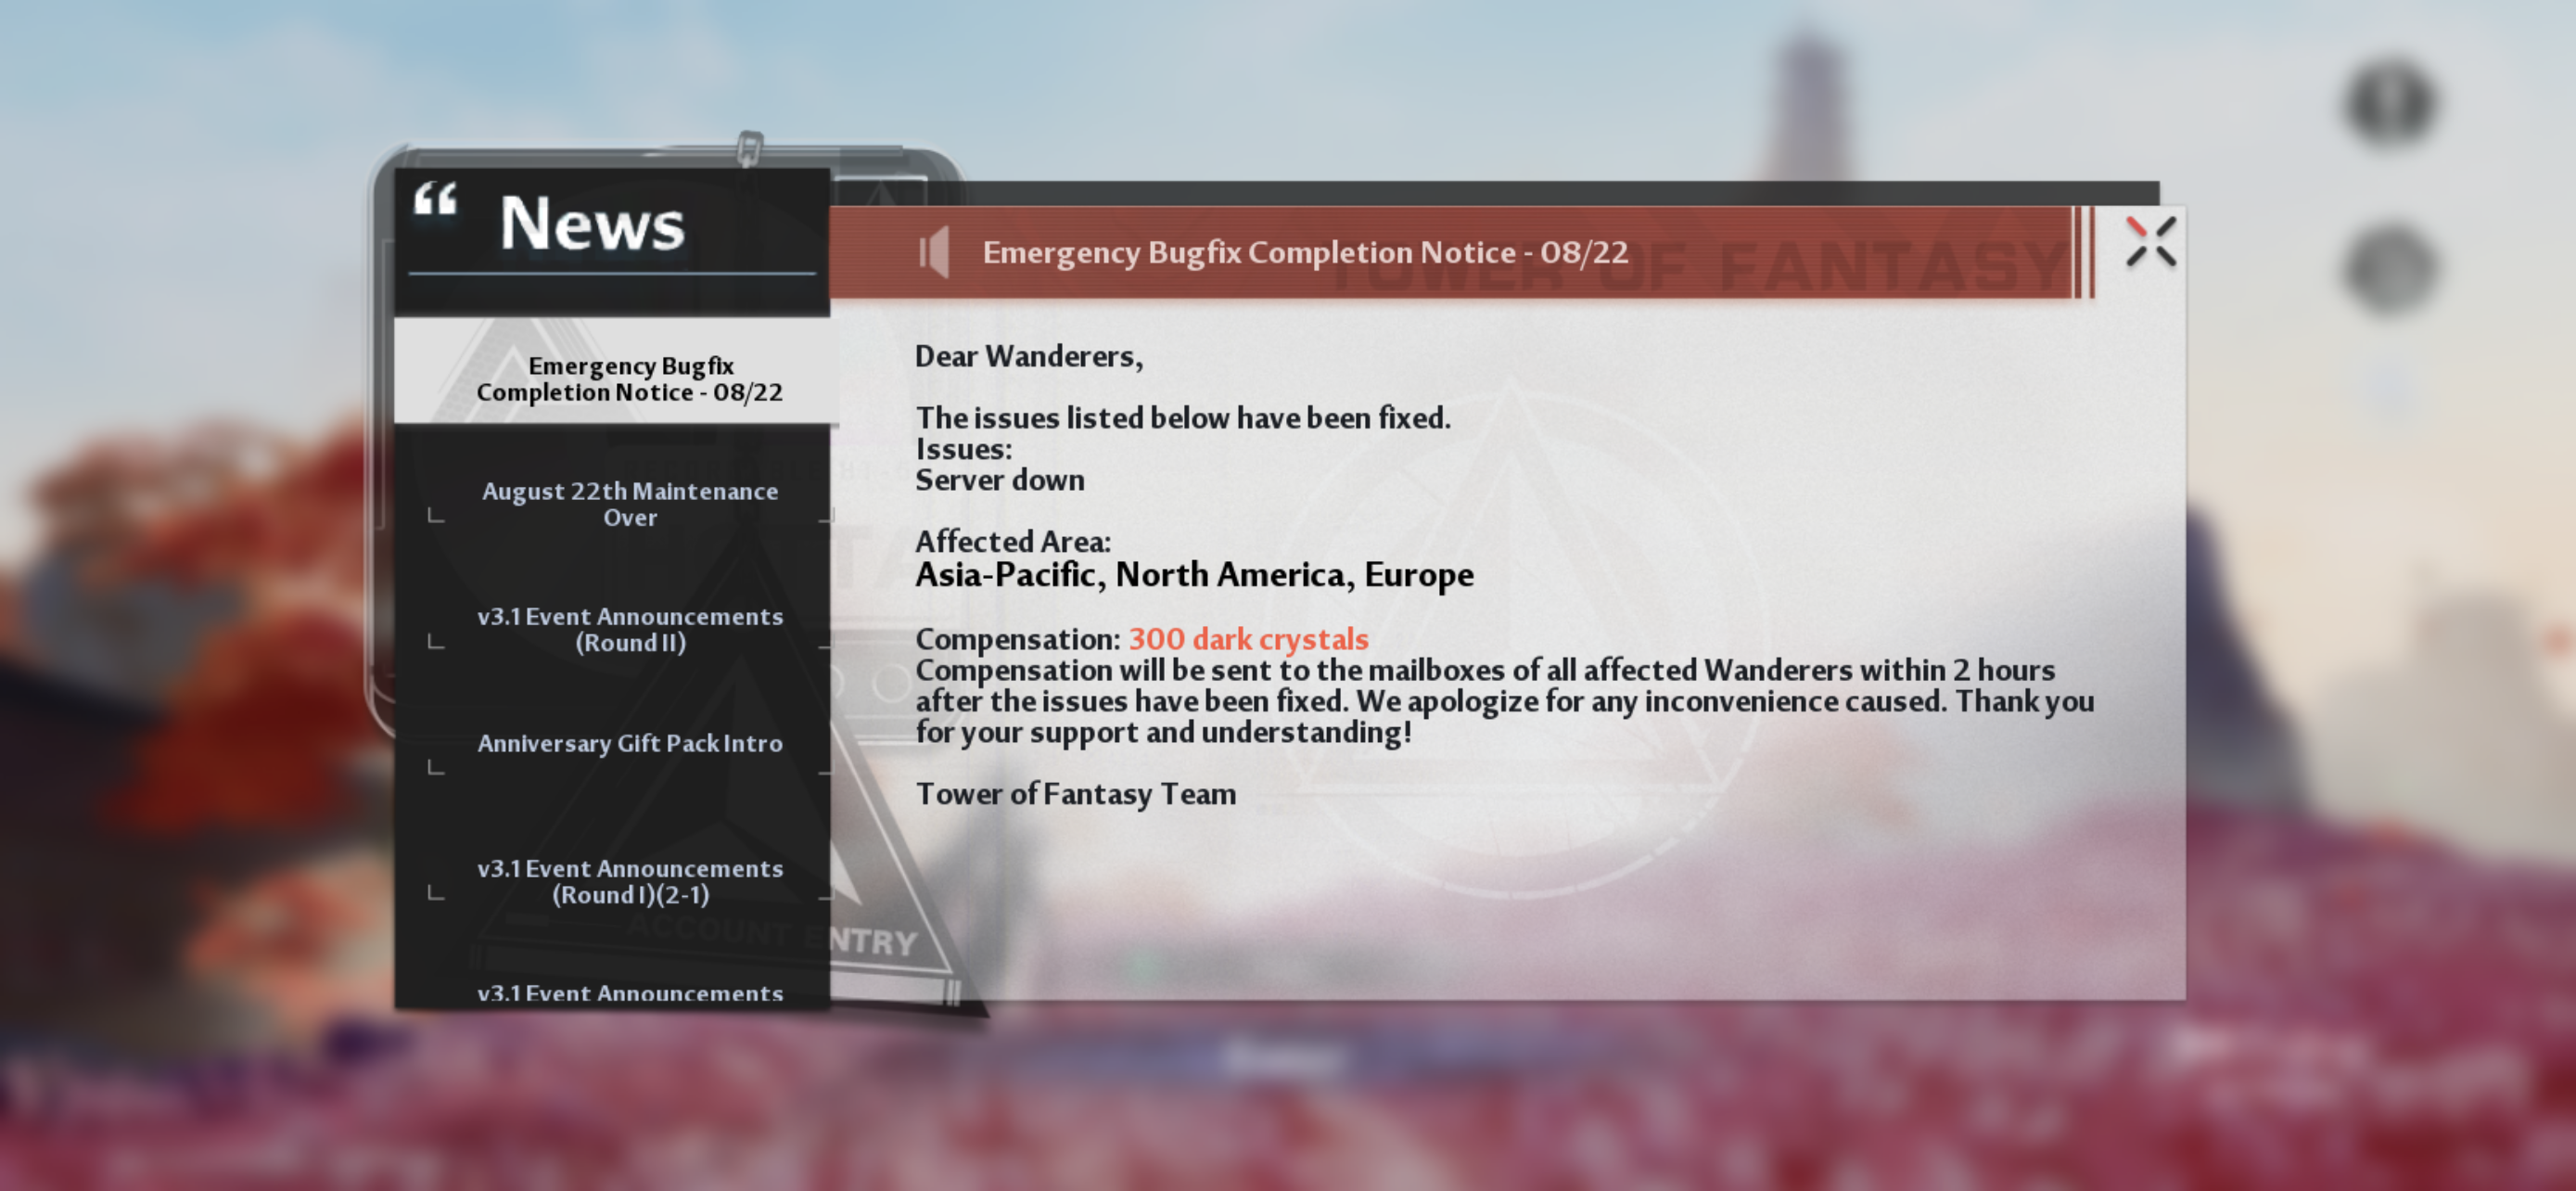
Announcements are typically conveyed through text or image, and can be displayed on the in-game announcements board or before logging in.
Announcements board
Such announcements are commonly used for new event releases.
-
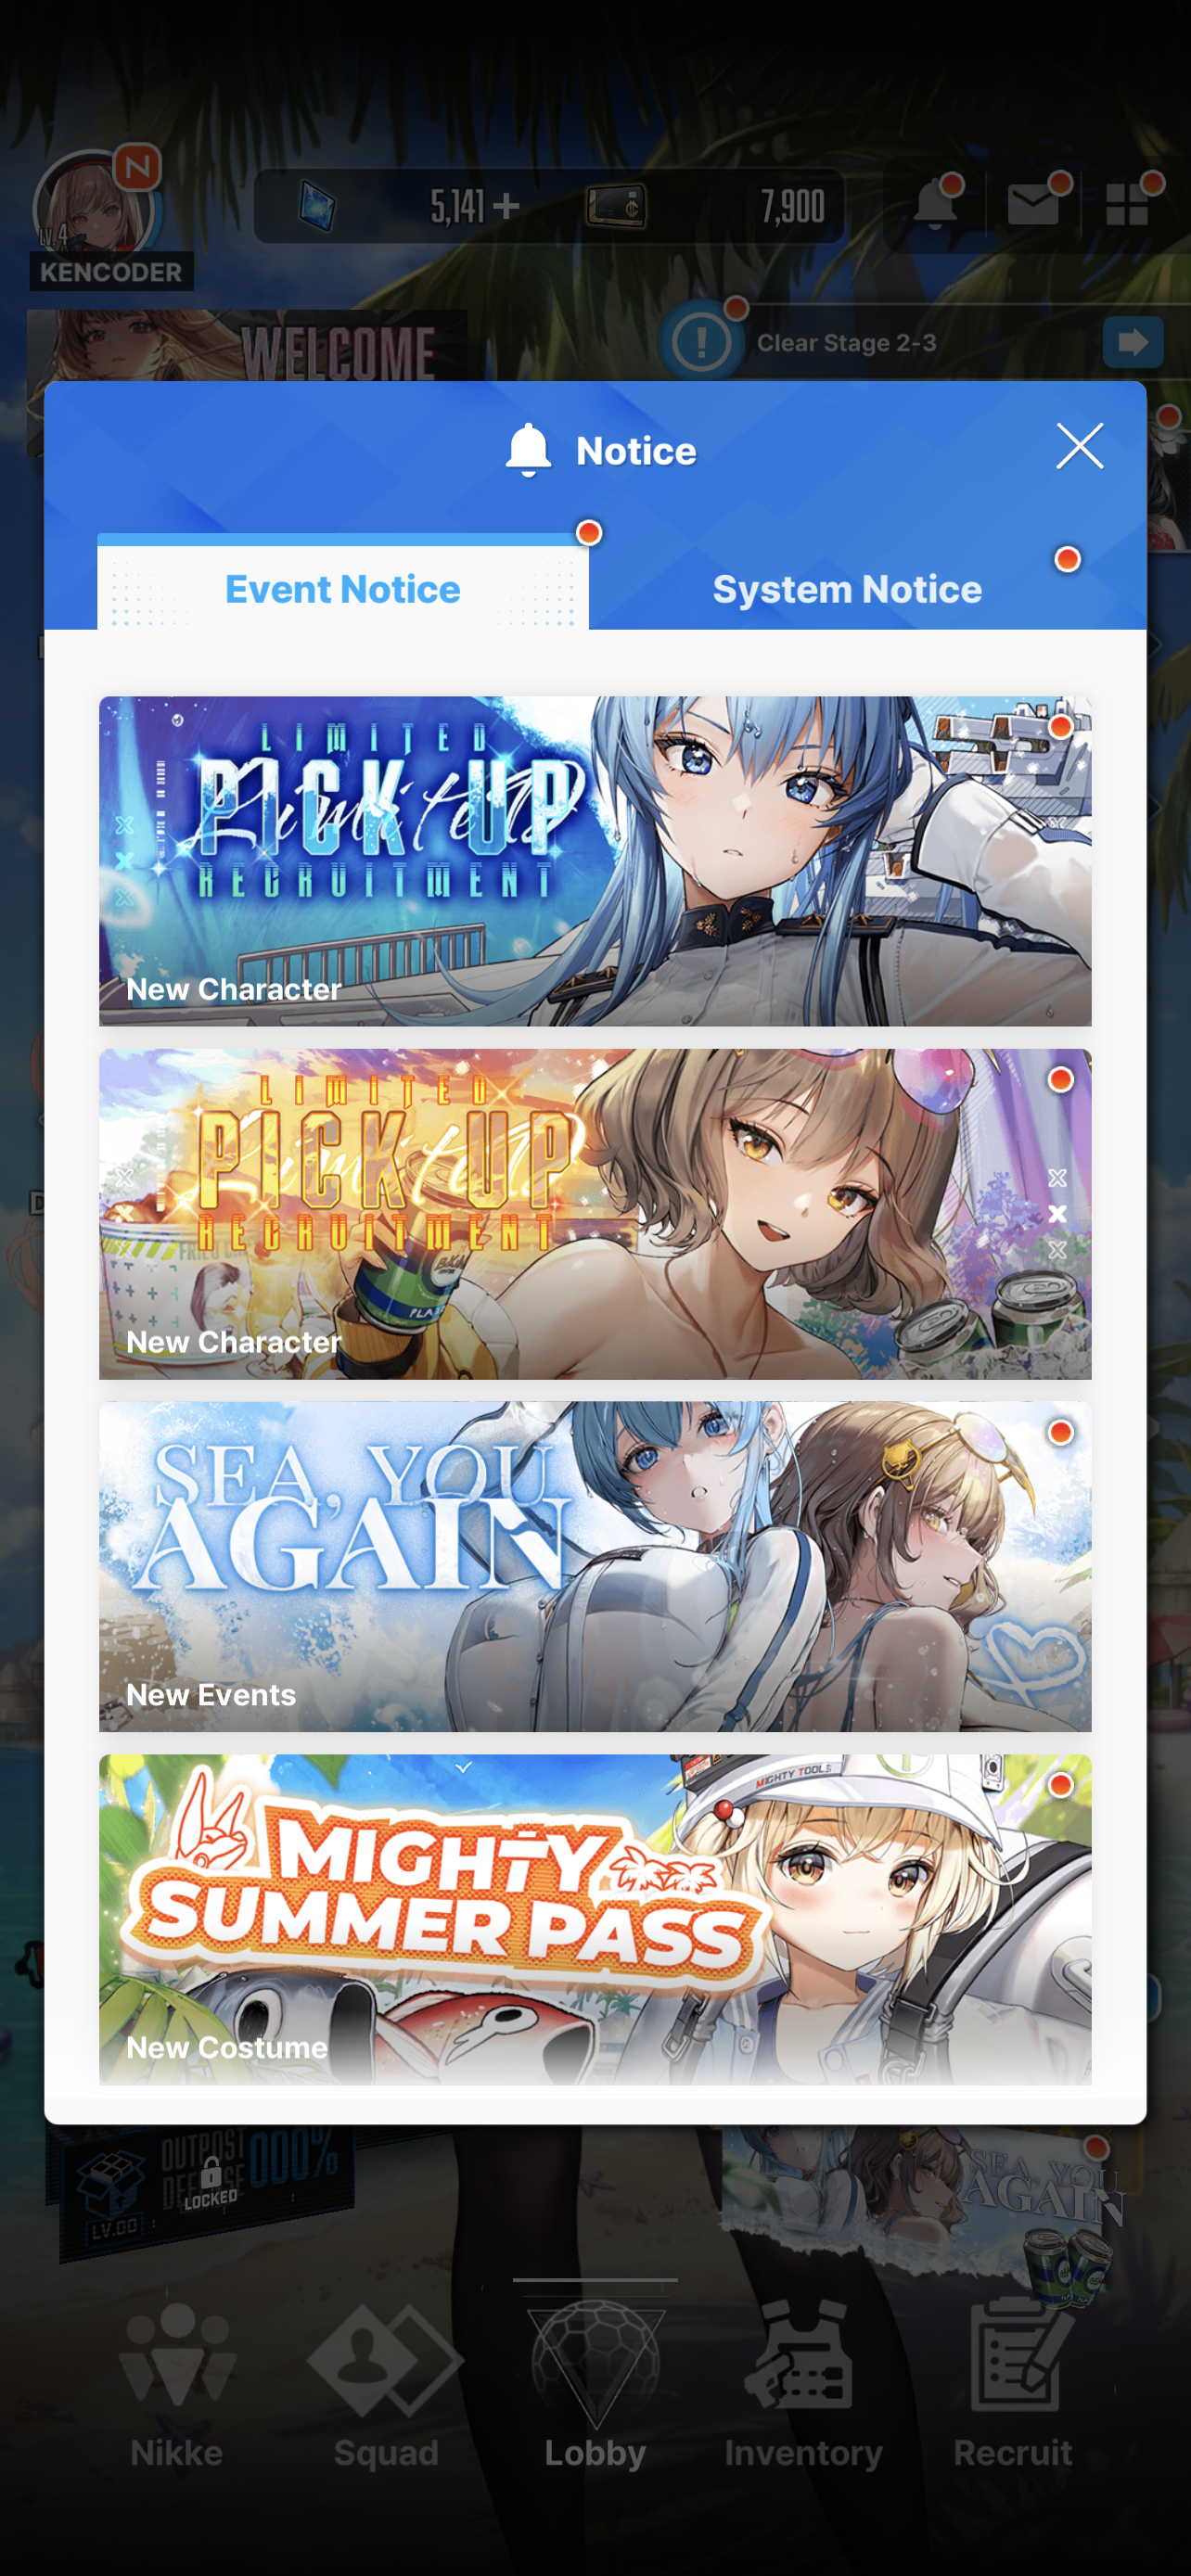
Picture-based announcement board:
-
Text-based announcement board:
Pre-login announcements�
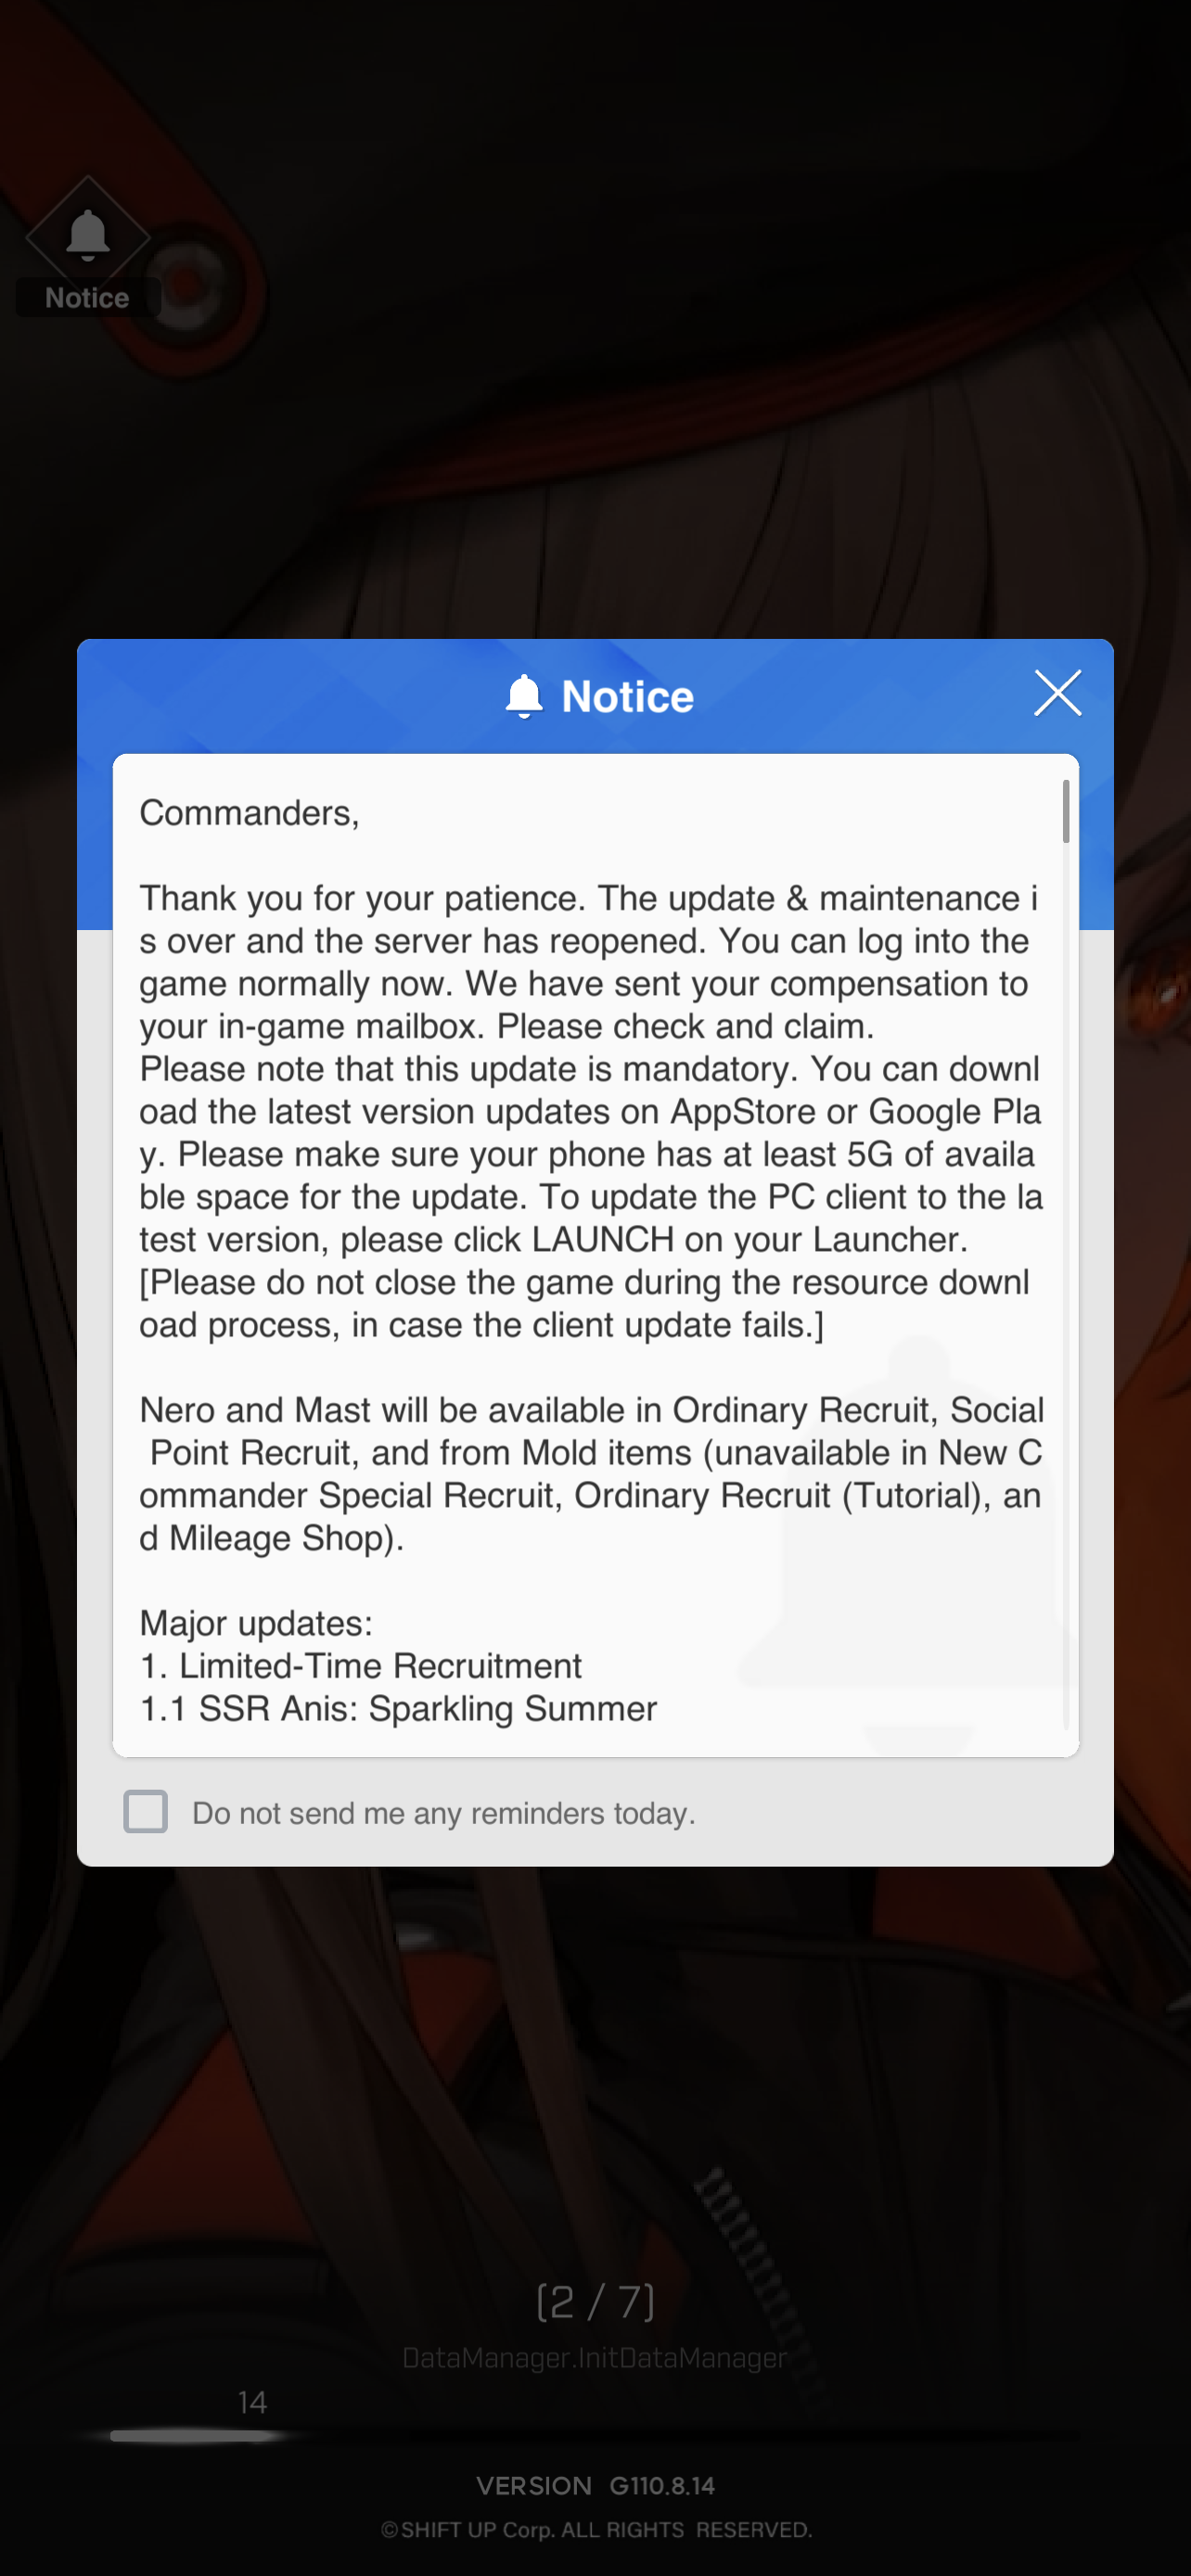
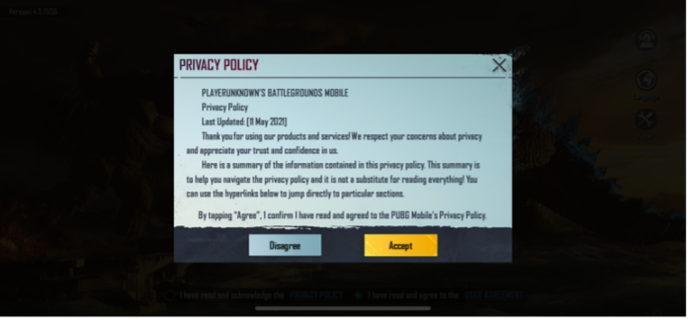
Such announcements are commonly used to notify players of updates related to game content or compliance information.
-
Pre-login game update announcement:
-
Pre-login compliance information update announcement:
Popups
In-game popups are typically images customized to fit the style of the game, and may be rendered as rectangles or other polygons. These popups are commonly used to display marketing campaigns or other news.
Announcements displayed in the announcements tab require players to click the corresponding page to see its full details. In contrast, popups are images that are fully visible by design and do not require additional input from the players.
