Account Center
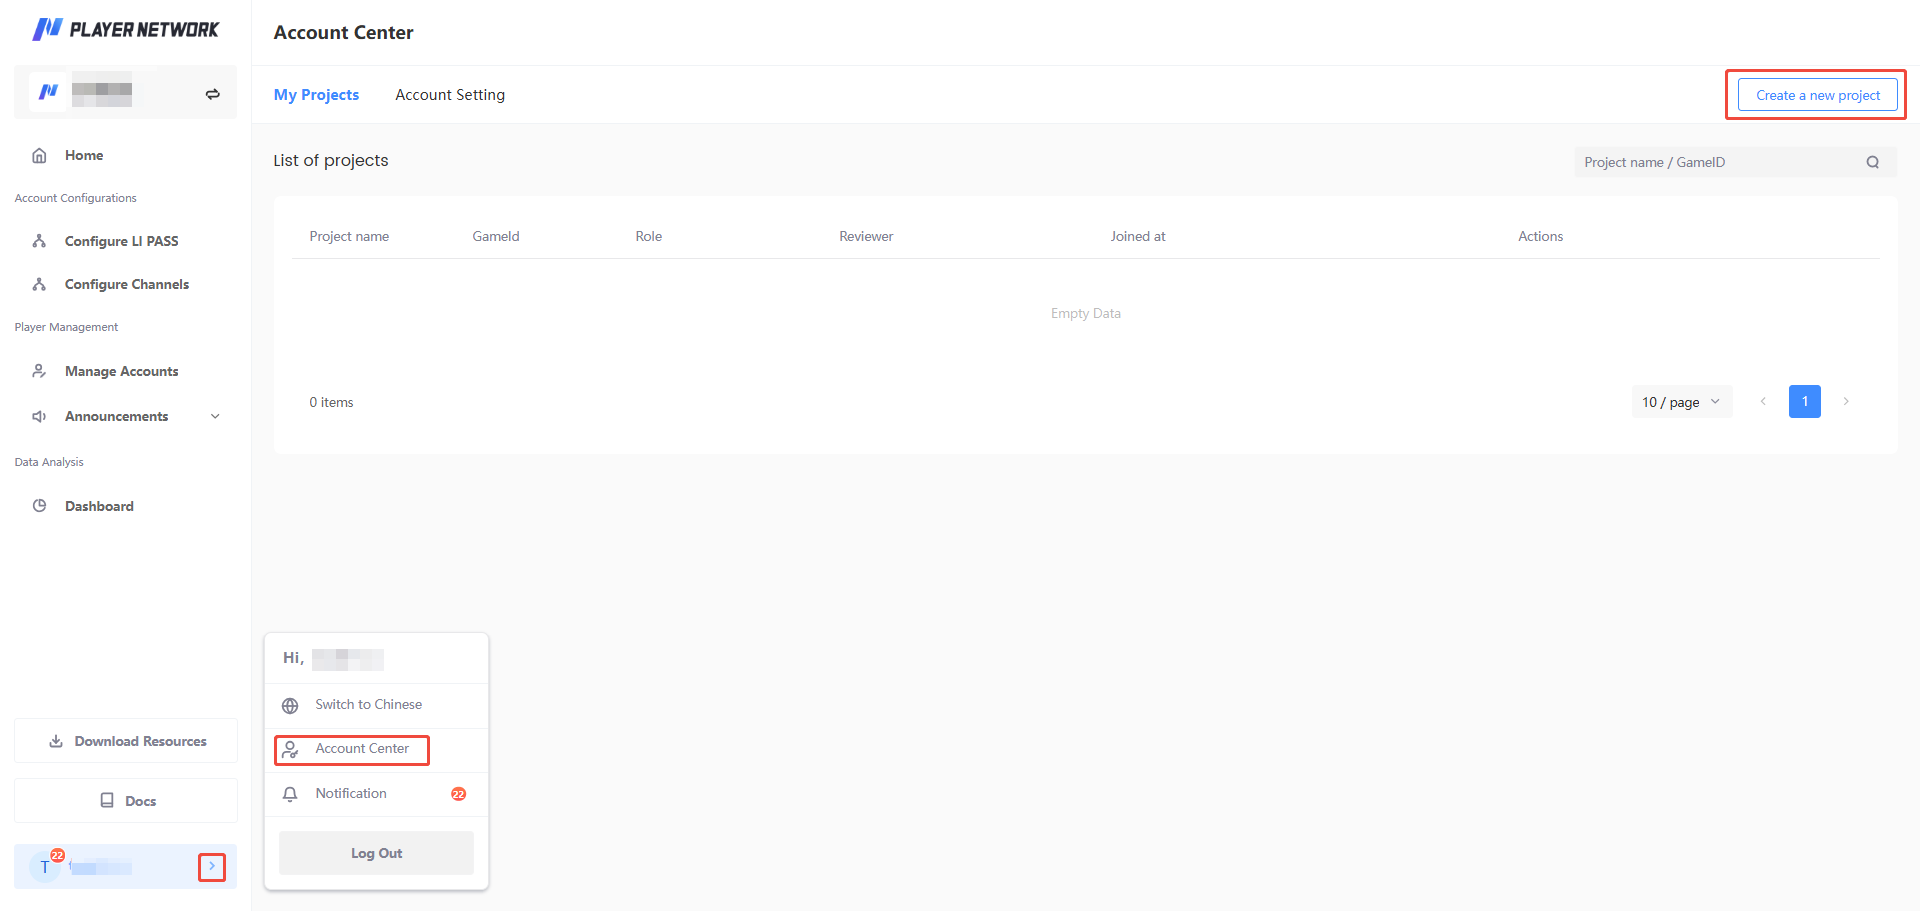
Users may manage their projects from the Account Center:
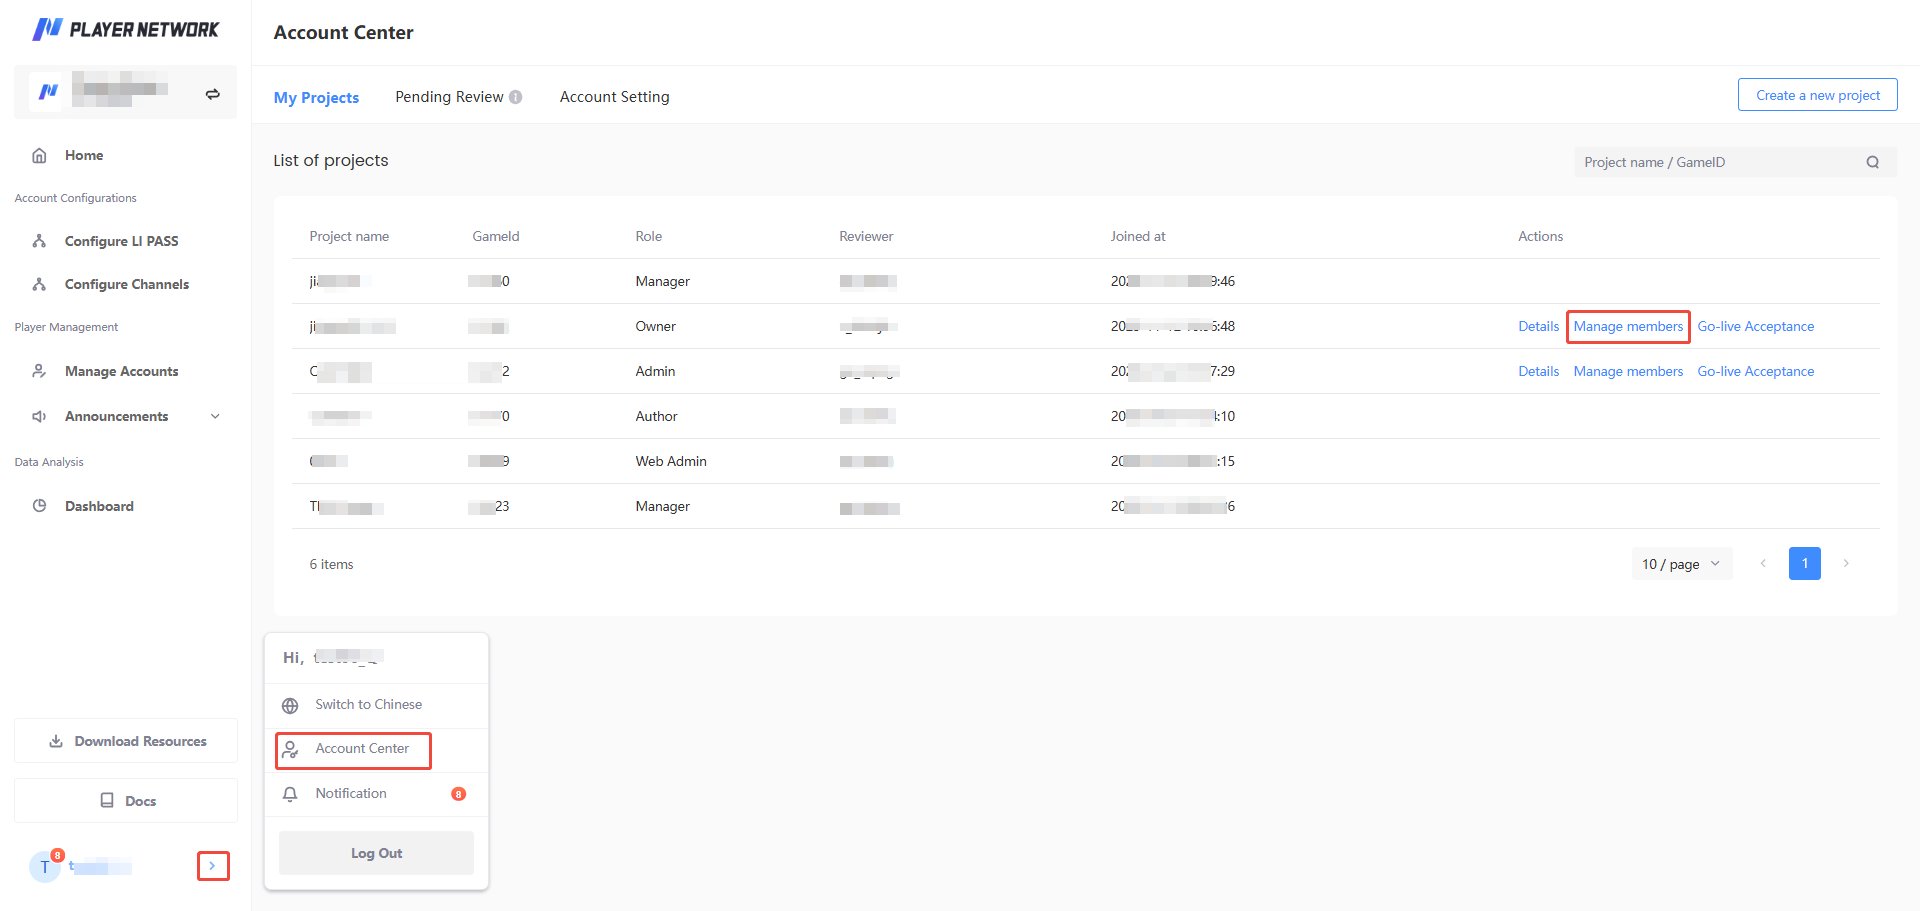
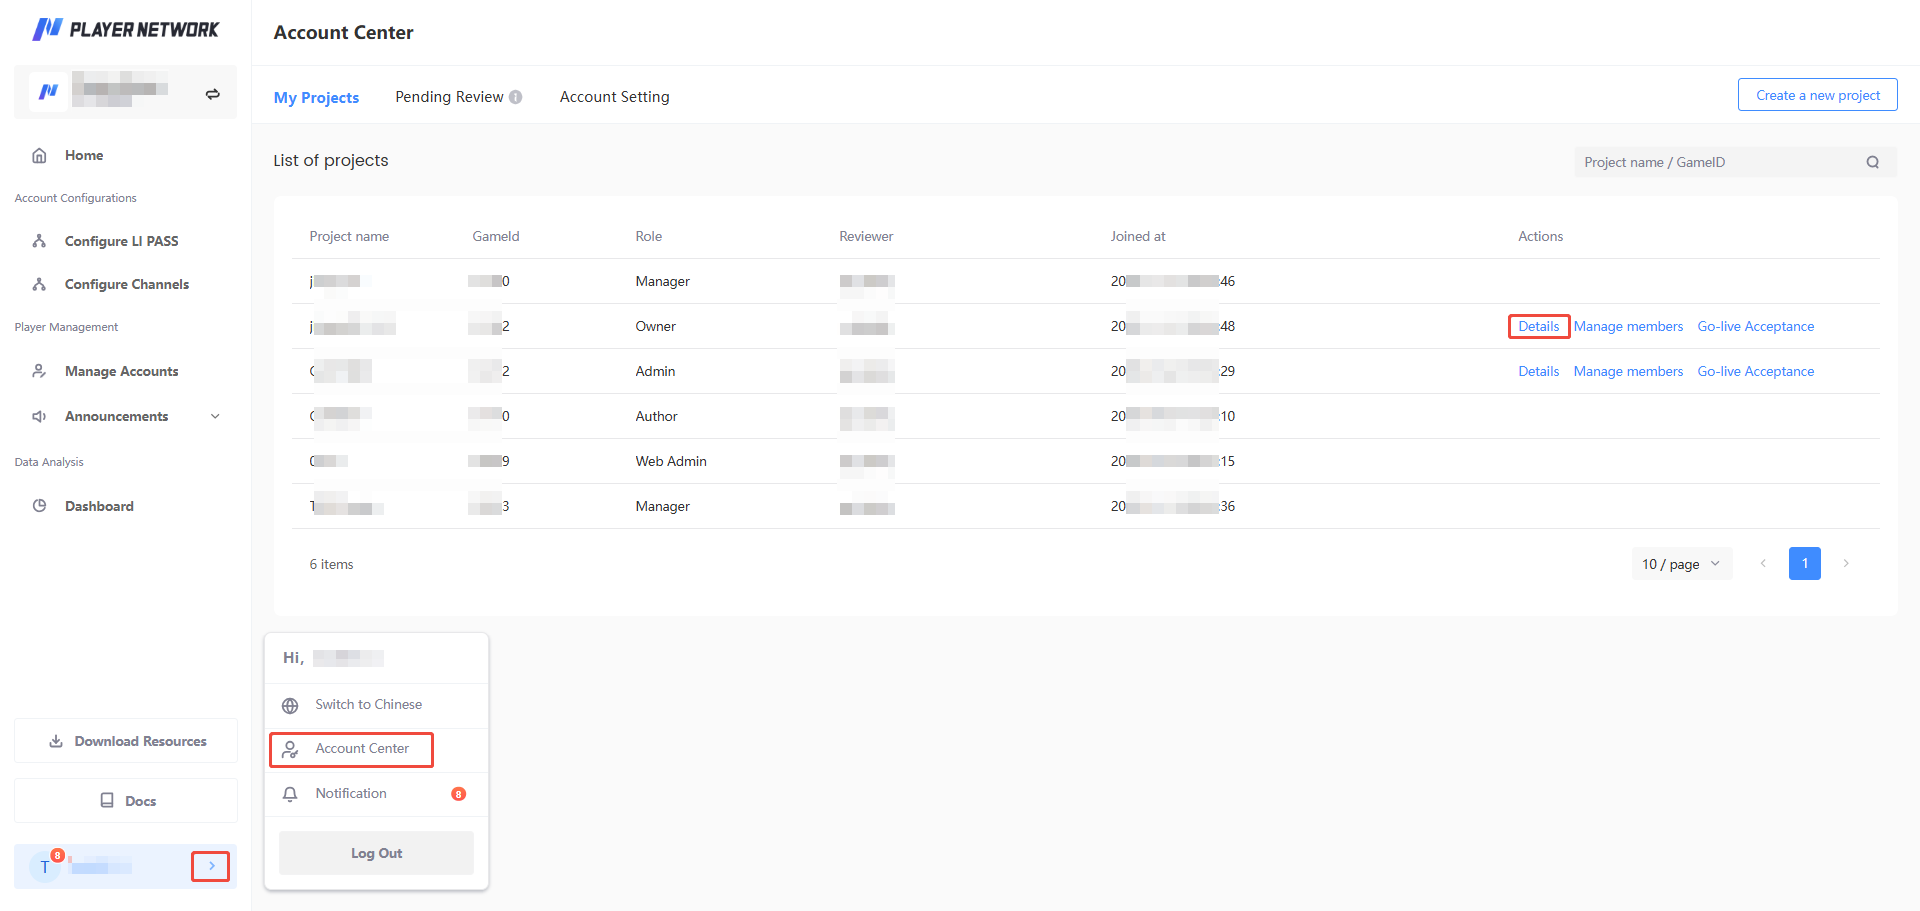
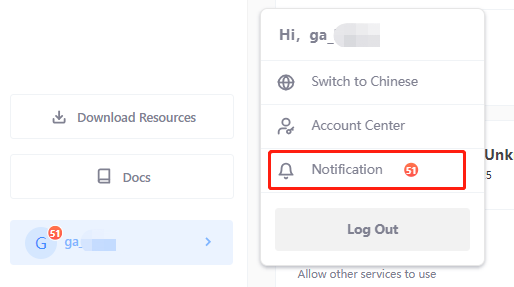
- At the bottom of the left sidebar, click your account name.
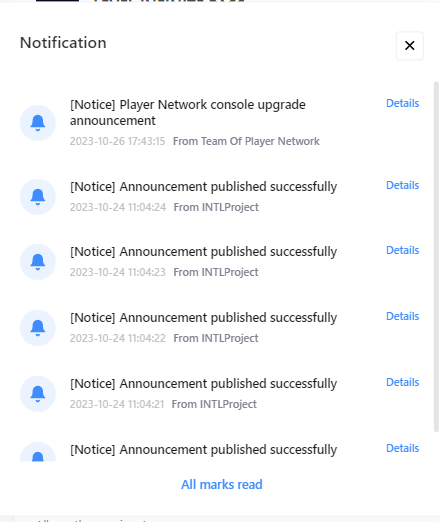
- [Optional] Click Switch to Chinese to change the display language, or click Notification to view all received notifications.
For more information, see Notifications. - Click Account Center.
Create a new project
-
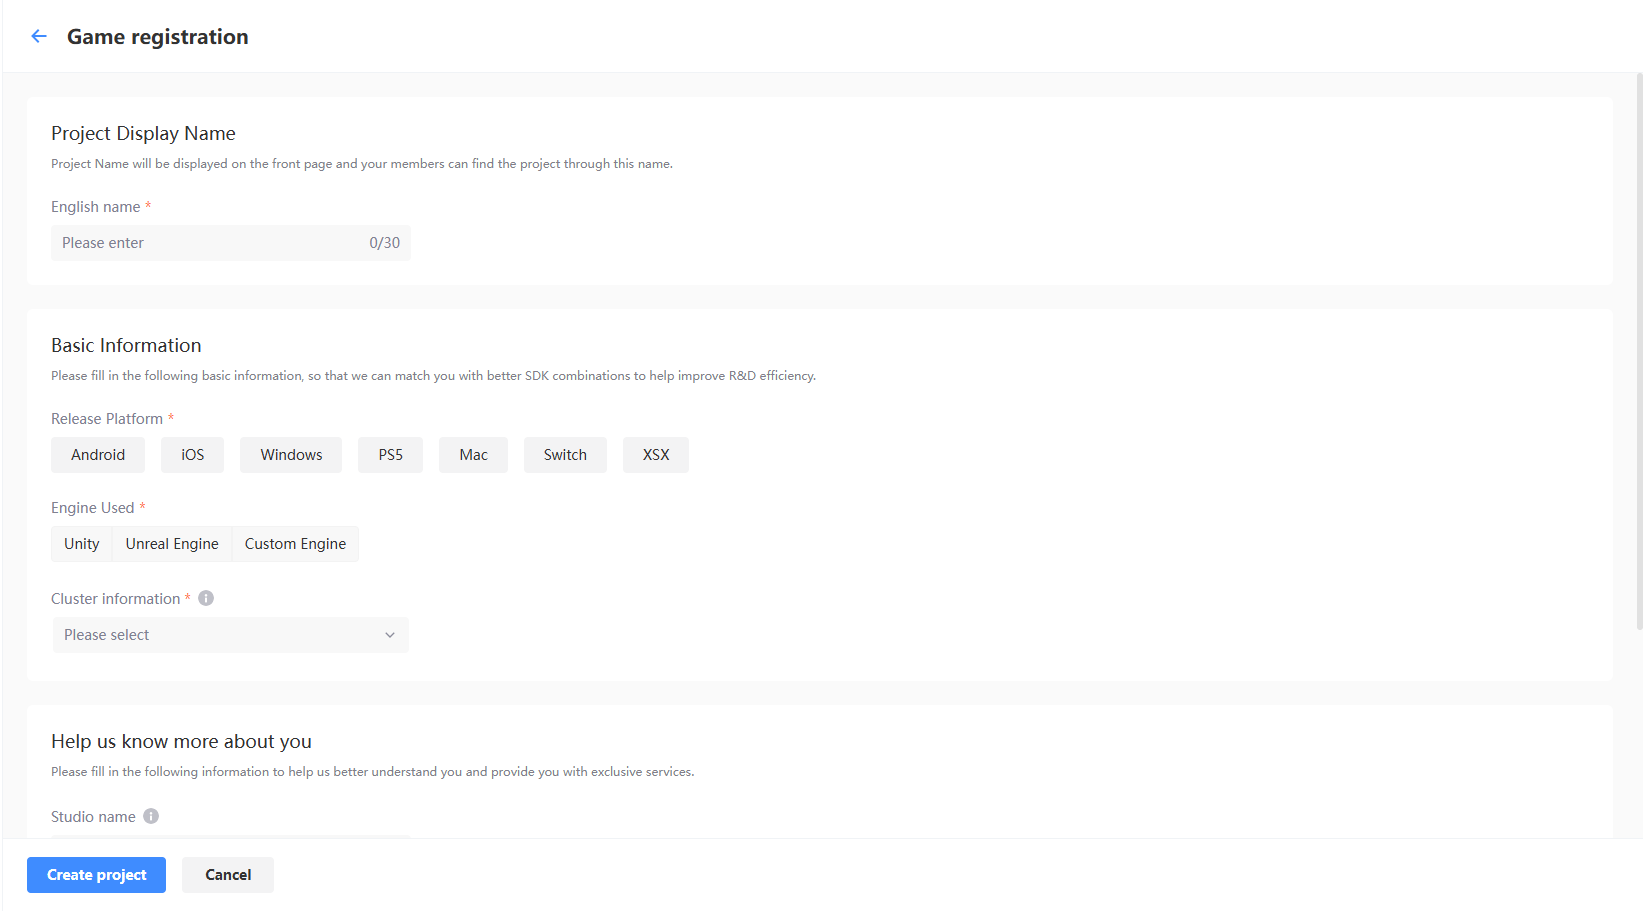
From Account Center, click Create a new Project to enter the Game registration page.
-
After entering the basic information of the project, click Submit. Registration will be complete only after an Admin approves it.
-
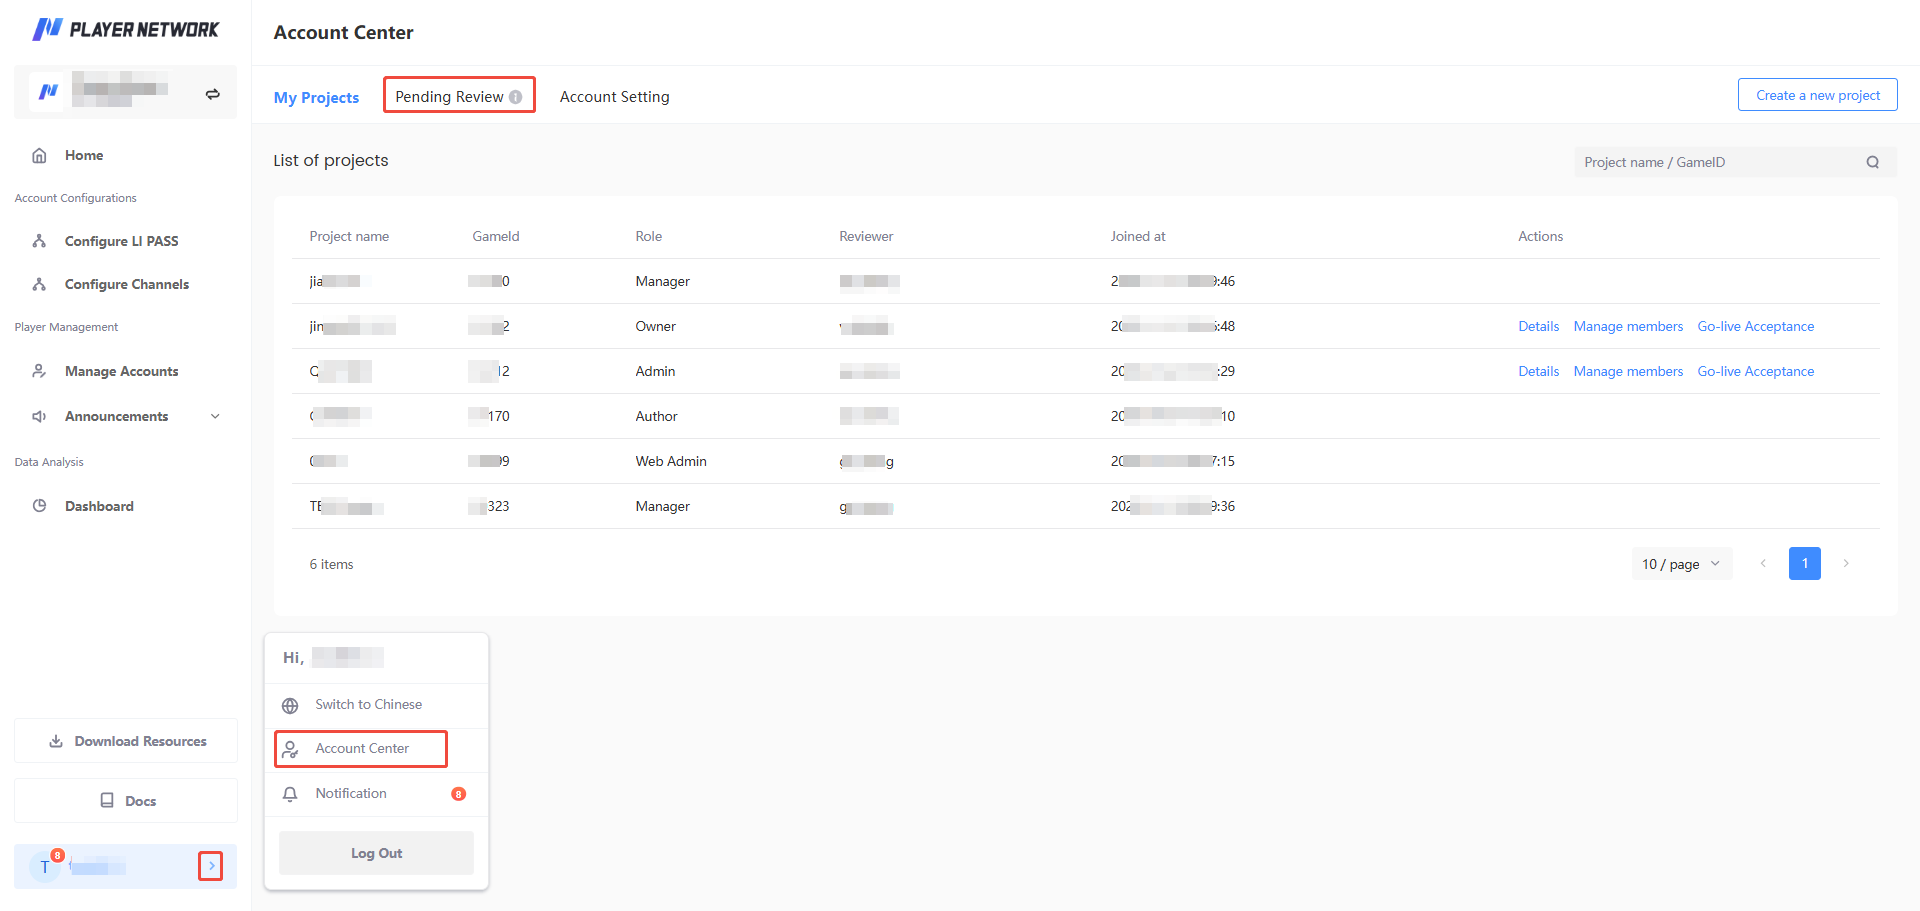
View the approval status of the created project Review projects in Account Center.
-
An email notification will be sent out once the project is Approved/Rejected, and the results can also be seen from notifications within Player Network. If the application is approved, enter the project to complete the process.
If the project registration is successful, the user who submitted the application will automatically be granted the Owner role.
For more information regarding the project approval process, reach out to the Player Network representative.
Invite users to join the project
The Owner and users with Admin permissions of a project can directly invite other users to join their project, and the invited users will gain access to the project without having to apply for permission.
Users may be invited in the following ways:
- Send email invitation: Send an email to invite users to join your project, unregistered users will have to create a Player Network account first.
- Authorize users: Grant project permissions directly for registered Player Network users.
For more information, see Roles and Permissions.
Send email invitation
-
From Account Center, go to My projects, then click Manage members under the Actions column.
-
Under List of members, click Send email invitation.

-
In the popup, enter the email address to invite, select the corresponding roles, then click Confirm.
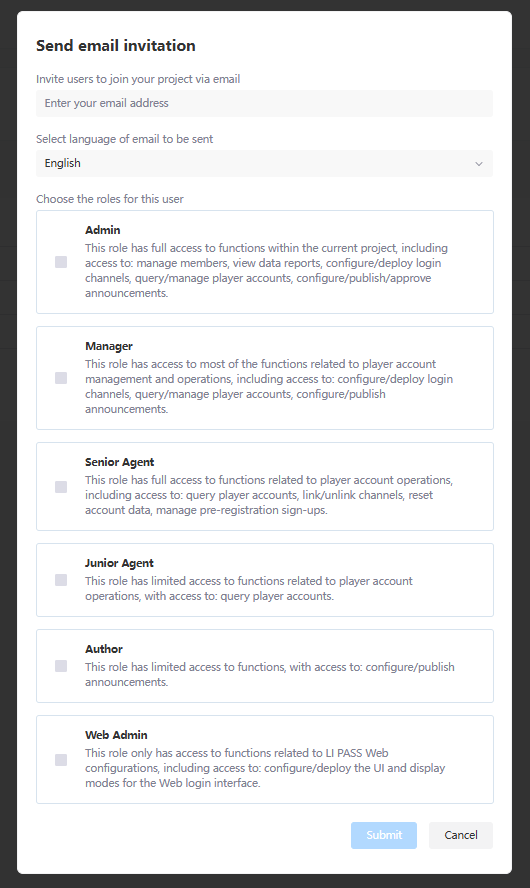
-
After the invitation email is sent, the recipient can click Join now from the email to open Player Network Console.
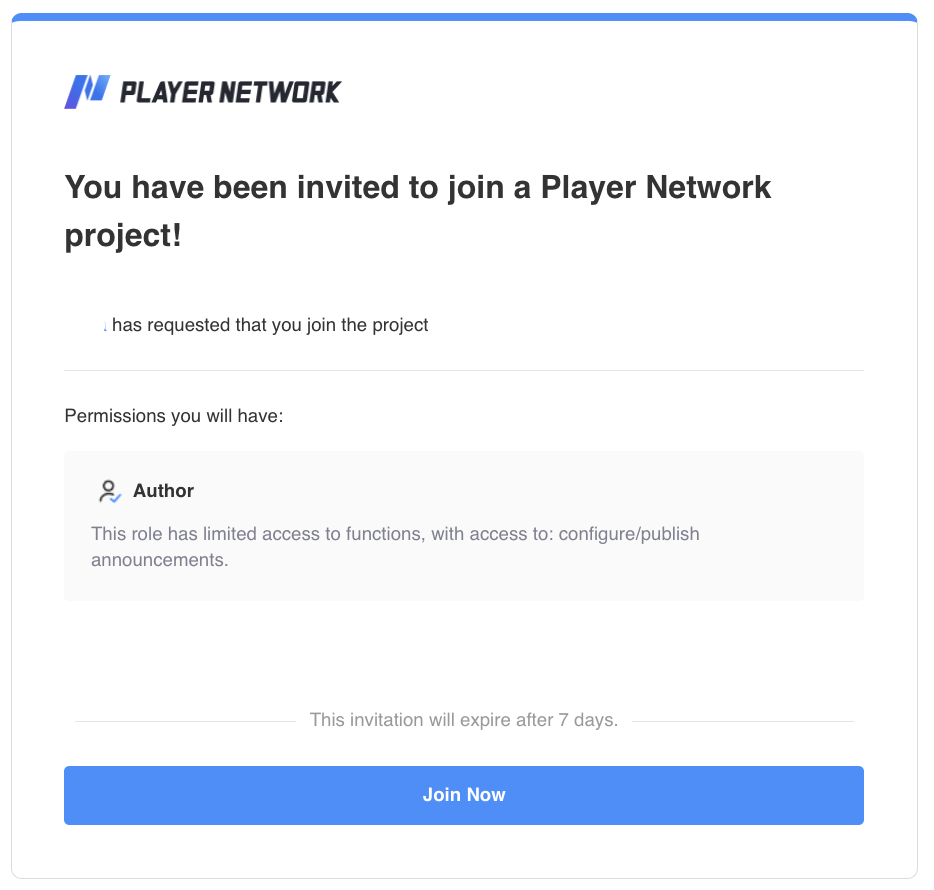
If the recipient already has a Player Network account, they will be able to join the project directly.
Else, they can create a Player Network account first by following the instructions from either Create a Player Network account or Log in with an iOA account.
Authorize users
-
From Account Center, go to My projects, then click Manage members under the Actions column.

-
Under List of members, click Authorize users.

-
In the popup, enter the usernames for the users to be authorized, select the corresponding roles, then click Confirm. Ensure that the usernames are entered correctly and in full.
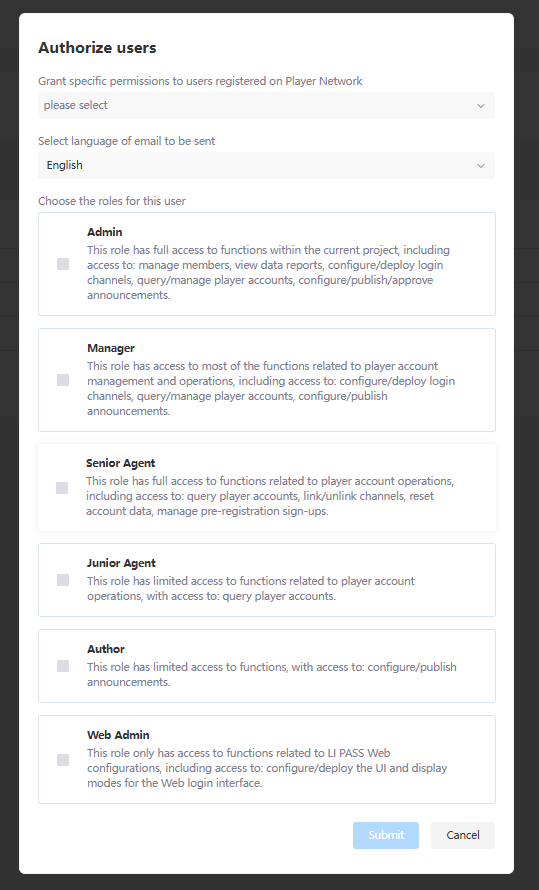
Multiple users may be authorized at the same time by entering their usernames in the input box.
Only users registered with Player Network can be authorized. For unregistered users, they will be required to create a Player Network account first by following the instructions from either Create a Player Network account or Log in with an iOA account before they can be authorized.
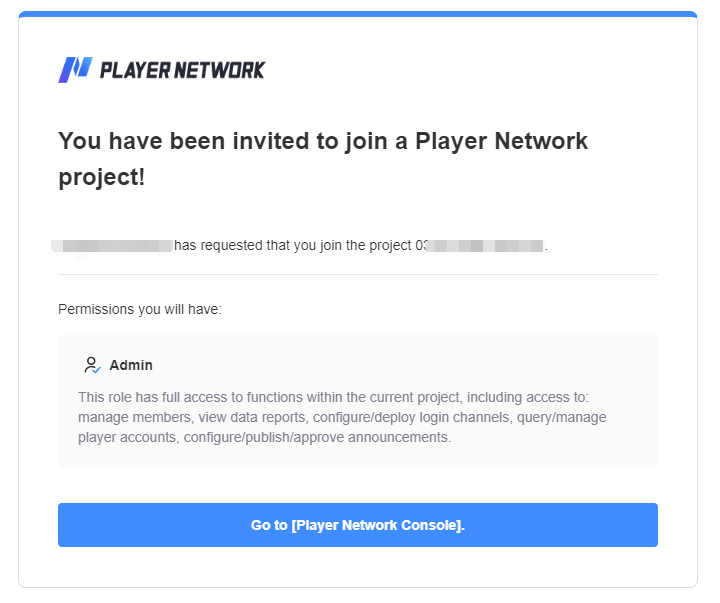
- After the invitation email is sent, the recipient can click Go to [Player Network Console] from the email to open Player Network Console.
Change user roles
The Owner and users with Admin permissions of a project can change the roles of a user within the same project. Only the Owner can assign the Admin role to a user.
-
From Account Center, go to My projects, then click Manage members under the Actions column.

-
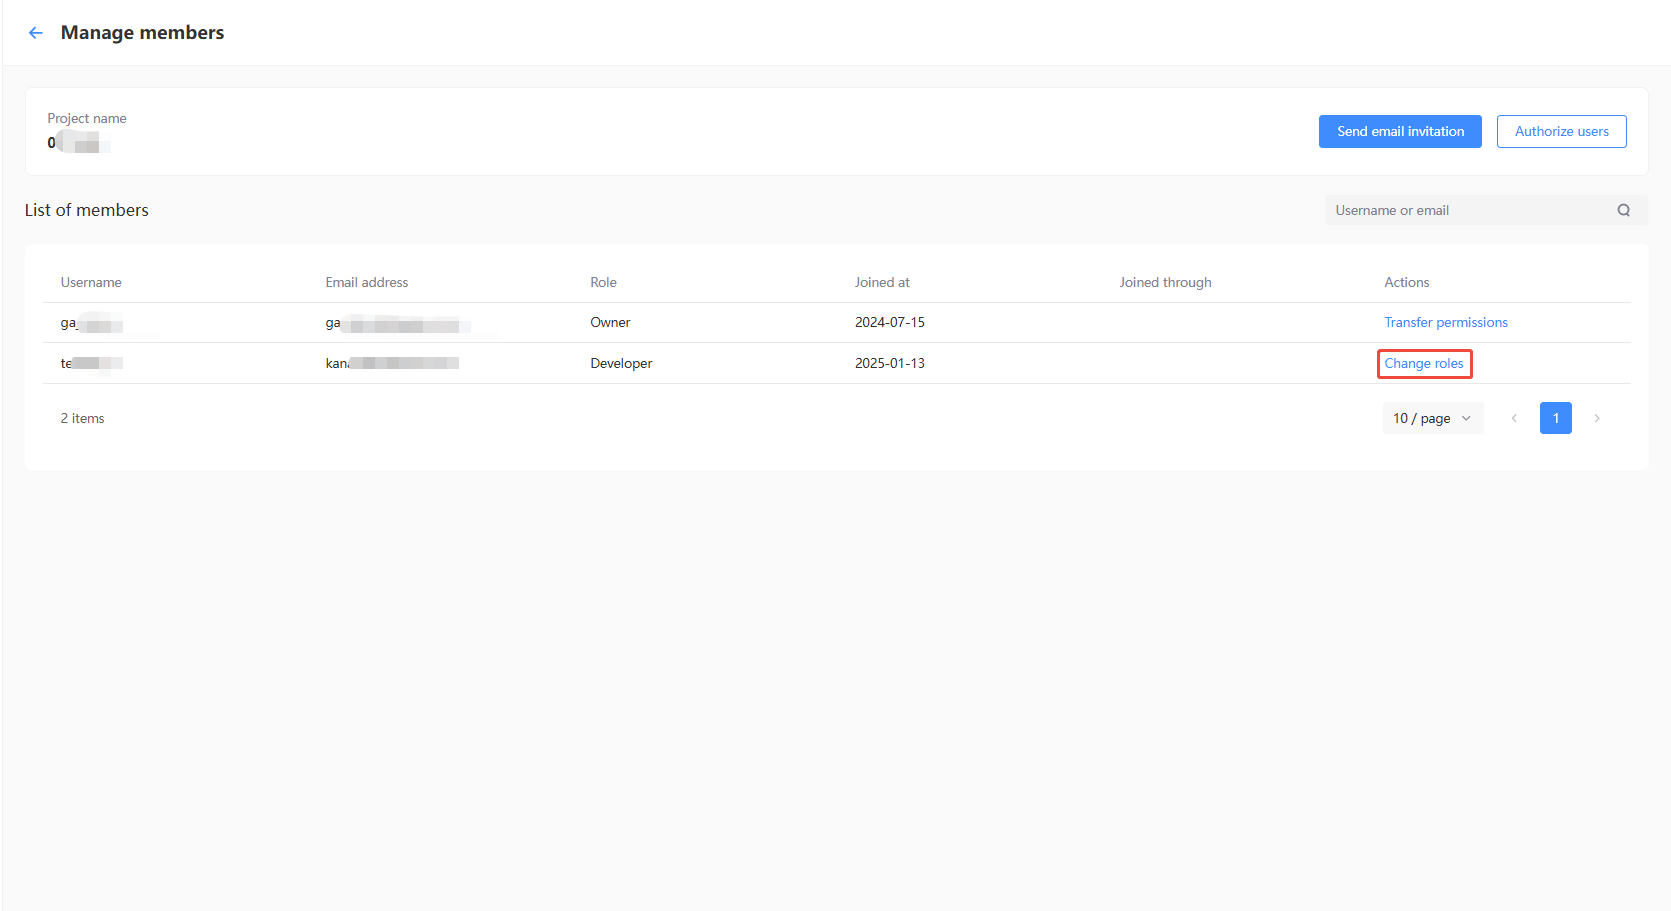
On the List of members page, click Change roles.
-
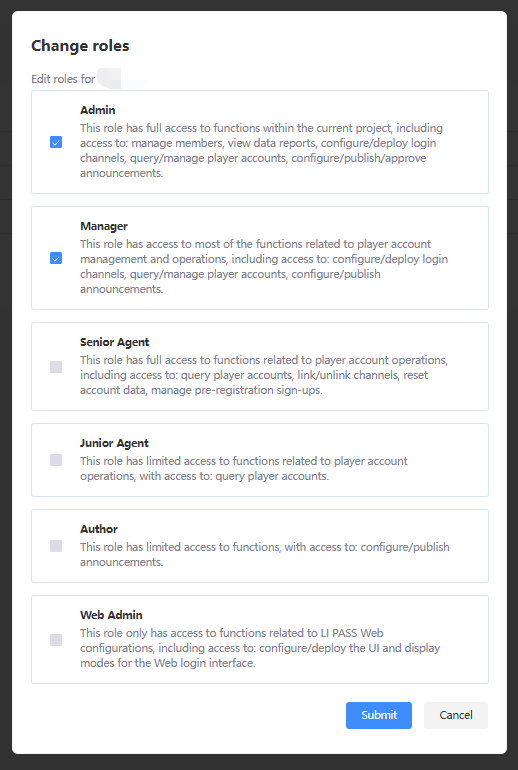
From the popup, select the roles to be adjusted, then click Submit to complete the role change.
Additional approval is not required, and the changes will take effect immediately upon submission.
Delete user roles
The Owner and users with Admin permissions of a project can delete the roles of other users. Only the Owner can remove the Admin role.
-
From Account Center, go to My projects, then click Manage members under the Actions column.

-
On the List of members page, click Transfer permissions.

-
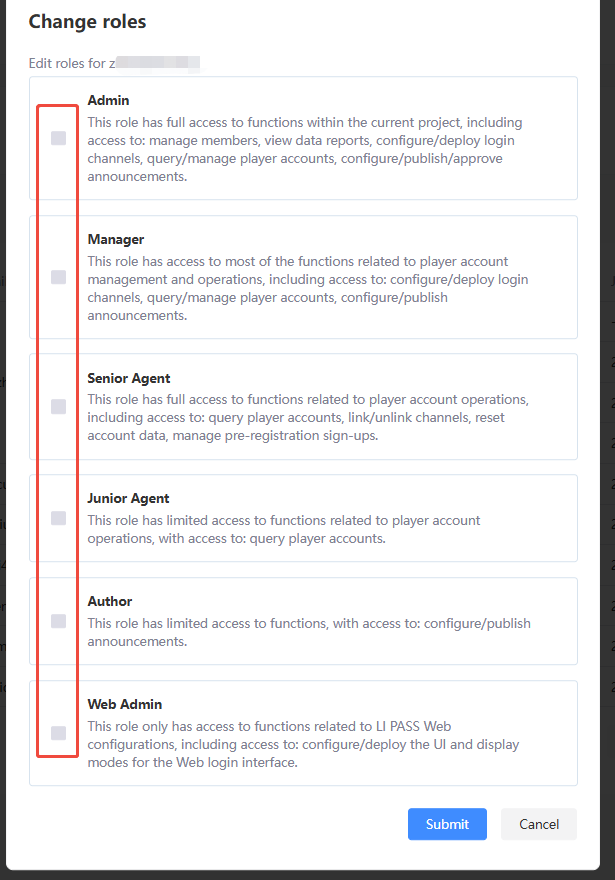
In the popup, uncheck the roles to be removed, then click Submit. Removing all roles for a user will effectively remove the user from the project.
Transfer permissions
The Owner of a project can transfer their role to another user, only the Owner is eligible to perform this operation. If the Owner of the project is no longer able to carry out the transfer, reach out to the Player Network representative for more assistance.
-
From Account Center, go to My projects, then click Manage members under the Actions column.

-
On the List of members page, click Transfer permissions.
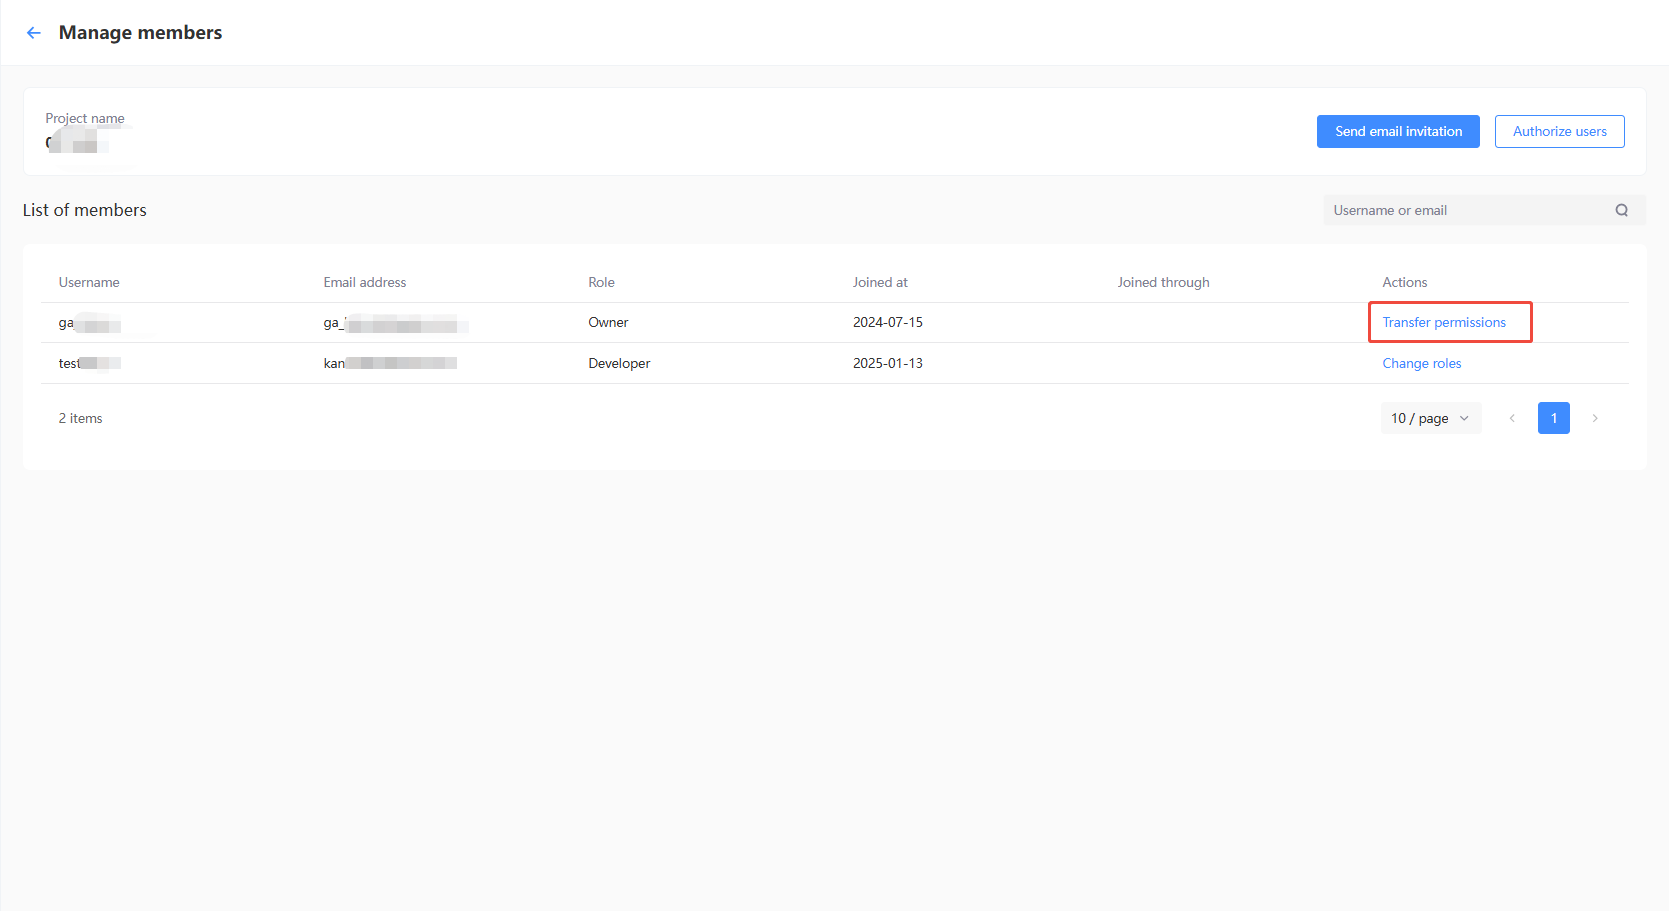
-
In the popup, select the member to become the new Owner from the member list. If the user is not currently in the member list, the member must first be invited and be provided with a role first.
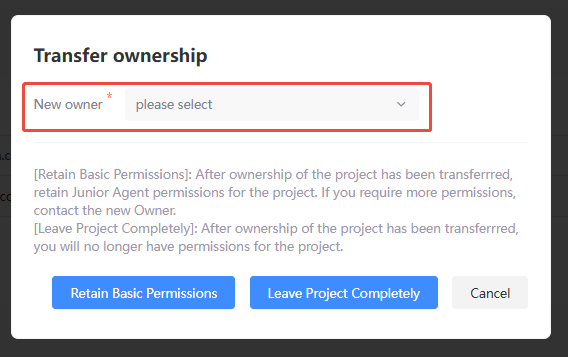
-
Select either Retain Basic Permissions or Leave Project Completely, according to your needs.
- Retain Basic Permissions :After ownership of the project has been transferred, retain Junior Agent permissions for the project. To obtain more permissions, contact the new Owner.
- Leave Project Completely :After ownership of the project has been transferred, you will no longer have permissions for the project.
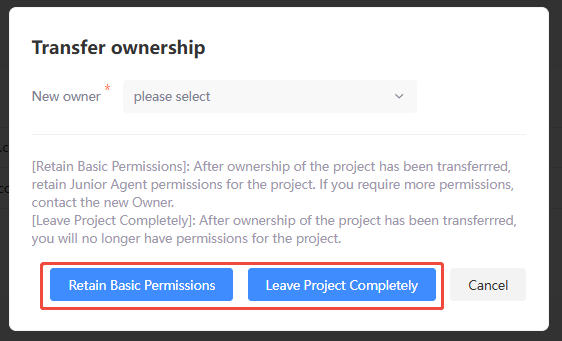
- Click Confirm in the confirmation popup to finalize the transfer.
Account Settings
-
Click Account Settings in the Account Settings to view account-related settings, such as username and email address.
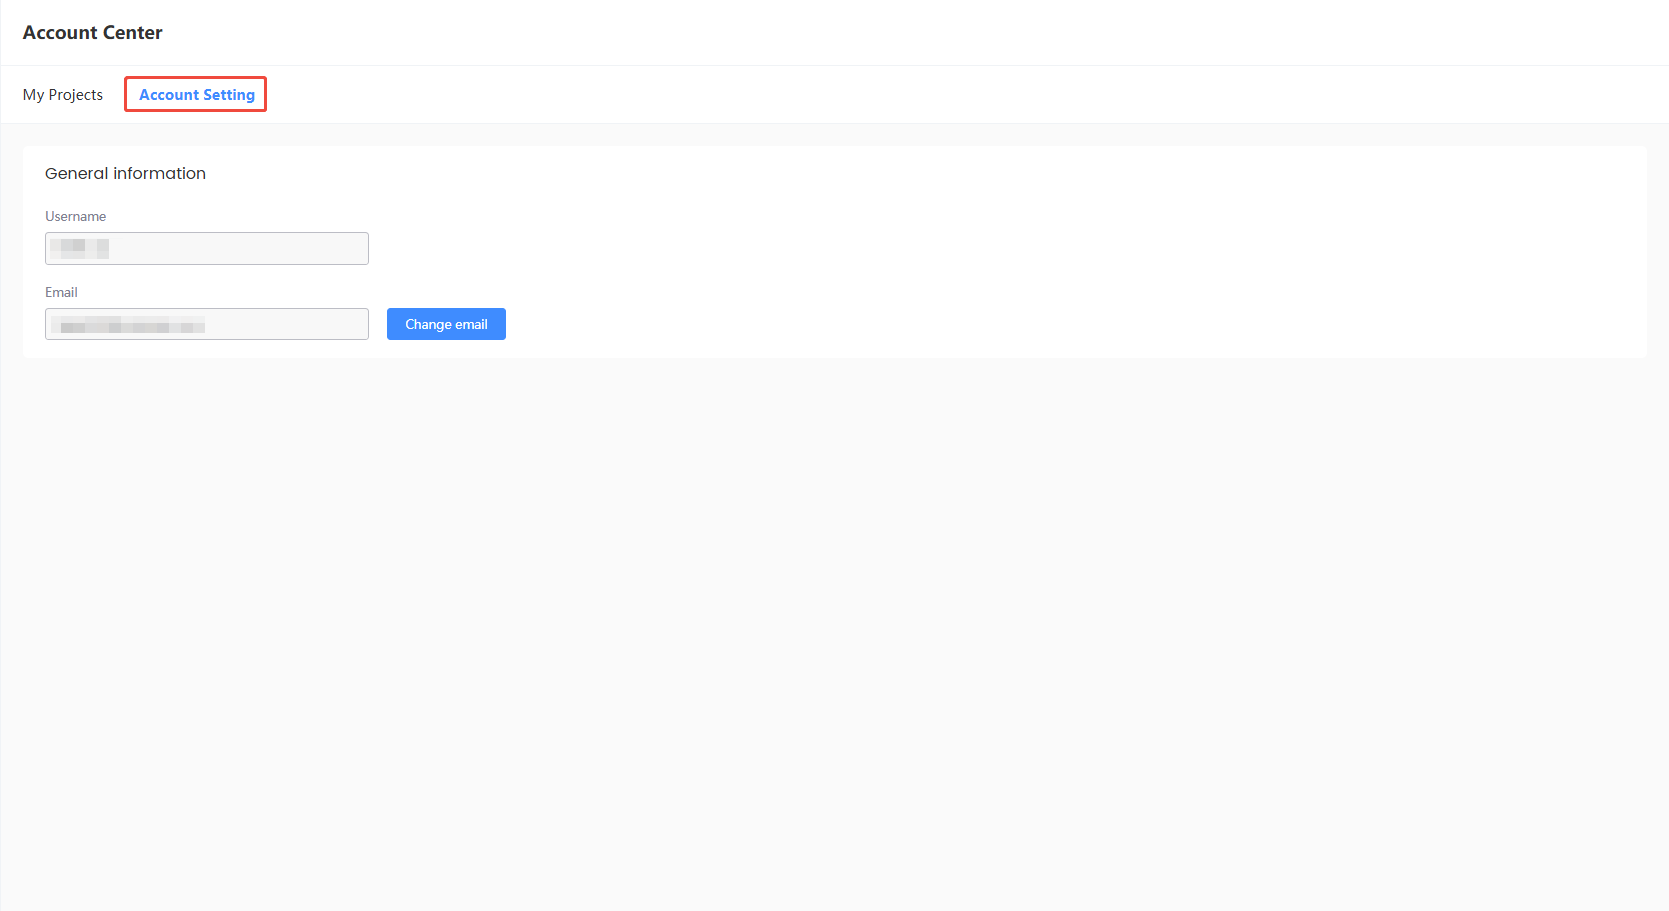
-
If your current login email is no longer in use, you can update it using the Change Email function.
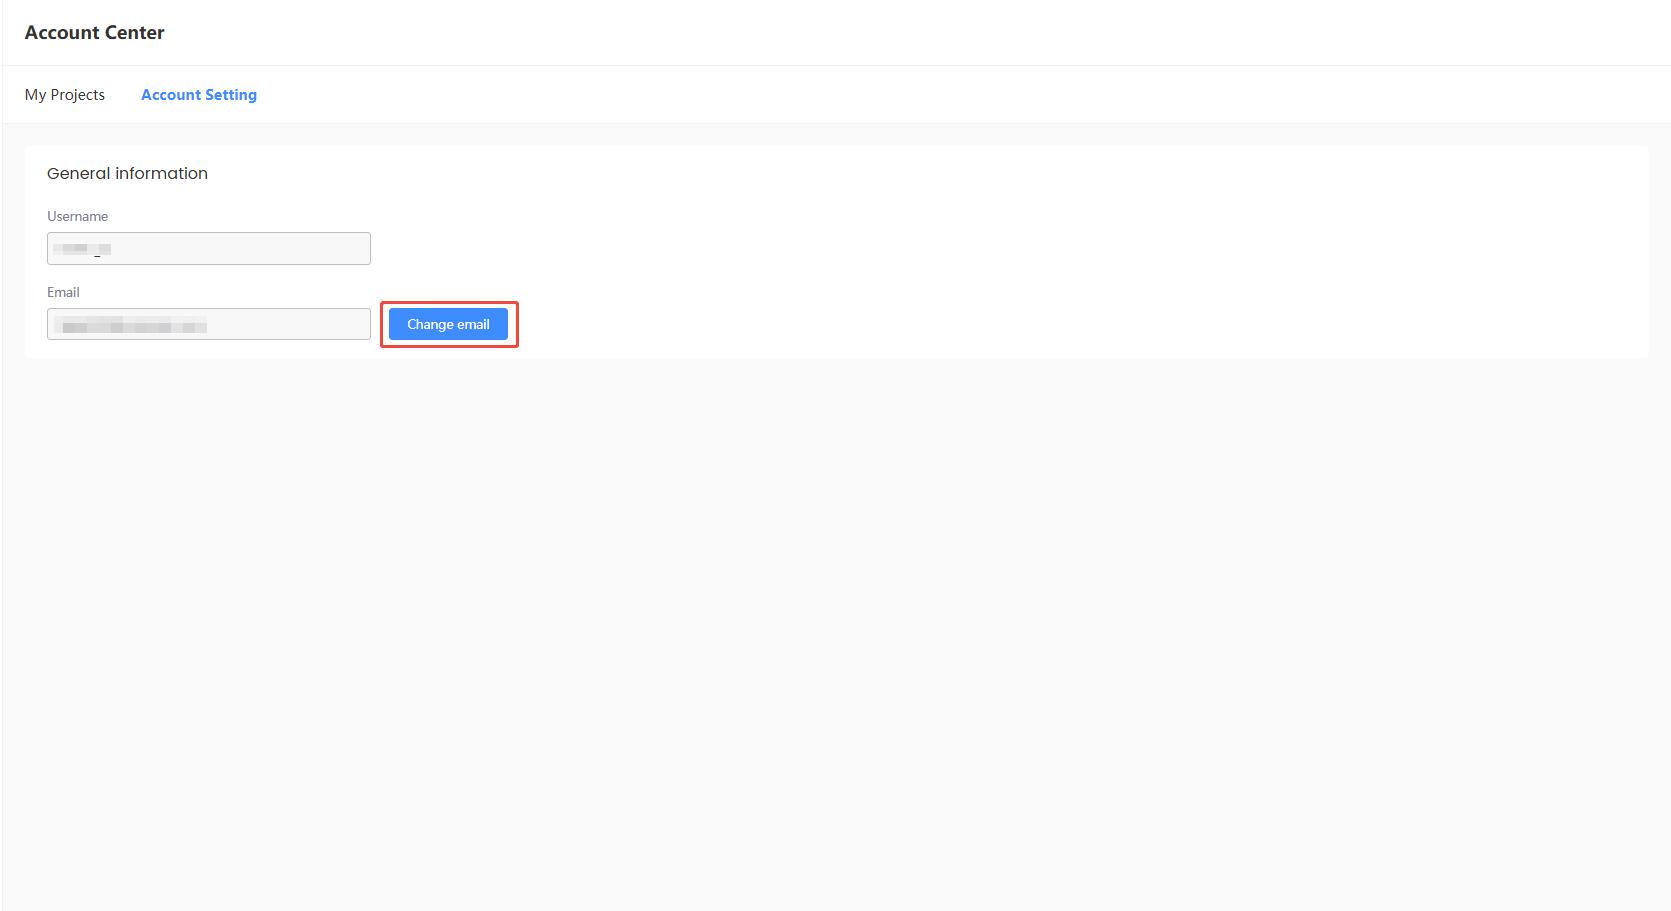
-
Enter your account password to verify your identity. After successful verification, click Continue.
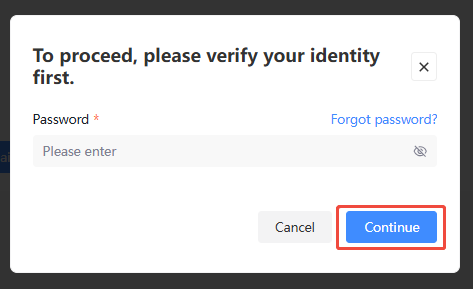
-
[Optional] If you have forgotten your account password, click Forgot password to reset it.
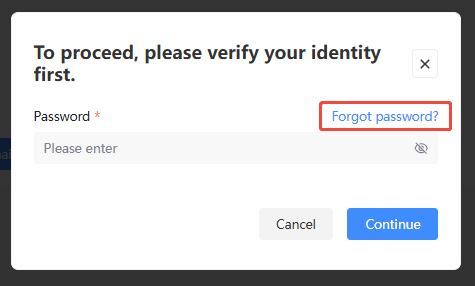
-
Enter your New email and click Send code.
-
Enter the Send code received in your new email.
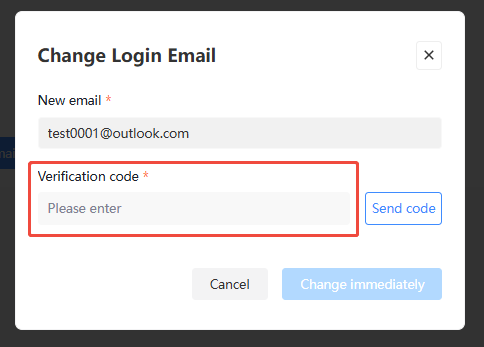
-
Click Change immediately; your email address will be updated immediately.
Retrieve private keys
Once a project application is approved, Player Network Console will generate the following private keys for the game:
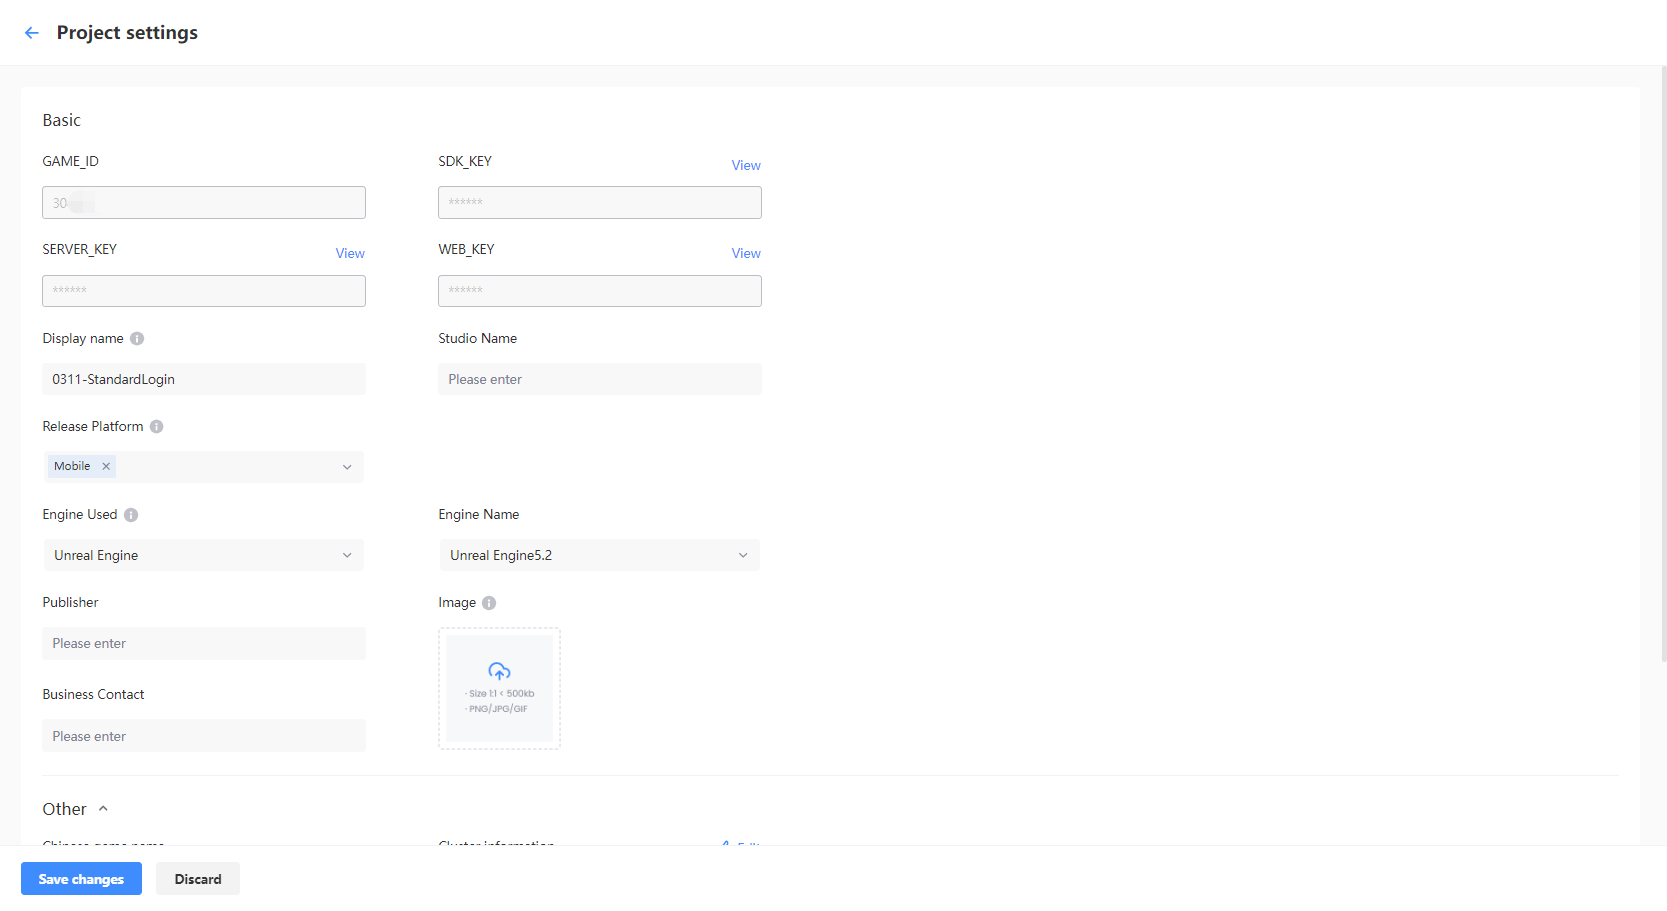
GAME_ID: An unique identifier for the project.SDK_KEY、SERVER_KEY、WEB_KEY: Used to create the keys required for signing in to the client, backend server, and Web.
GAME_ID and SDK_KEY are used in configuring INTLConfig.ini, while SERVER_KEY and WEB_KEY are used to generate the sigkey when calling the backend API.
Only the Owner and users with Admin permissions can access these key information. Other users who wish to retrieve the private keys, contact an Admin from the project.
You may confirm if you have the appropriate permissions from the My projects page in Account Center.
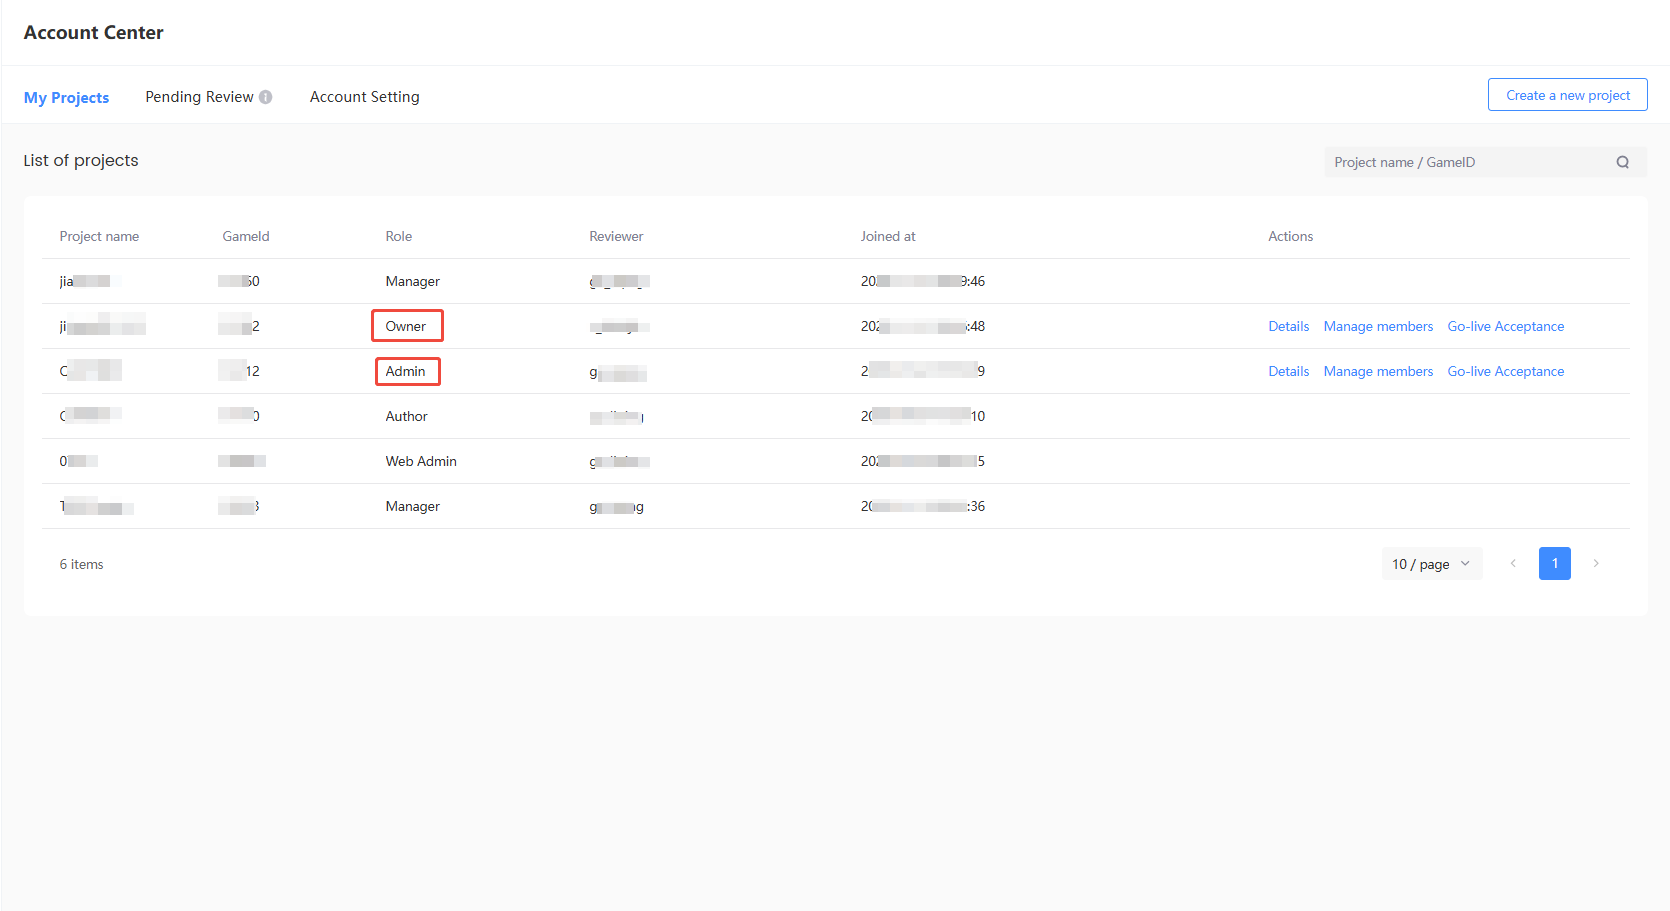
View the private keys of the game by following the below steps:
- From Account Center, go to My projects, then click Details under the Actions column.
- On the Project settings page, click View to verify the private keys from under the Basic section.
Retrieve cluster information
The cluster information for a project can be confirmed from the Project settings page, which is determined by the deployment cluster selected during project registration and the current environment:
- Environment: The value for the string
env, which represents the environment the SDK operates in, required for JSSDK when instantiating the SDK. - URL: The value for the string
INTL_URL, which represents the Player Network backend service URL, required for Player Network SDK and configured inINTLConfig.ini.
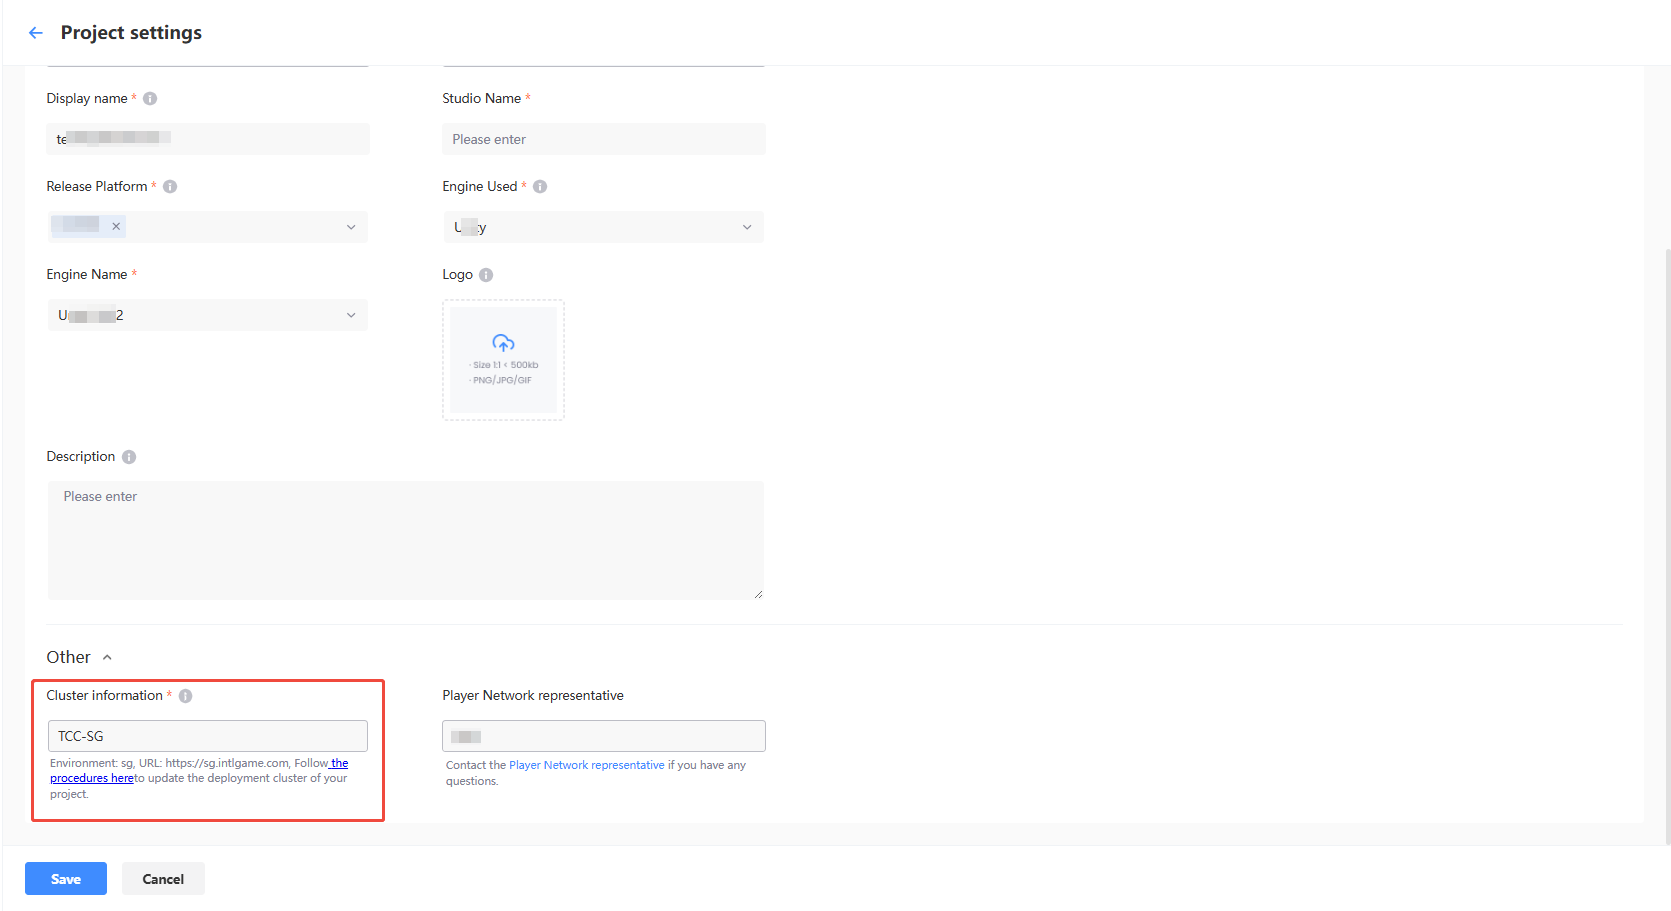
Only the Owner and users with Admin permissions can access the cluster information of a project. Other users who wish to view or change the deployment cluster, contact an Admin from the project.
You may confirm if you have the appropriate permissions from the My projects page in Account Center.

Please view the business’s deployment cluster information by following these steps:
-
From Account Center, go to My projects, then click Details under the Actions column.

-
View the deployment cluster information under the Other card on the Project settings page.

Notifications
Notifications on Player Network Console allow users to conveniently process information and handle tasks, covering account creation results, project approval results, published announcements, and Player Network version updates.
Go-live acceptance
Based on your project requirements, the LI PASS team can assist projects in going live during major milestones (such as CBT, SL). Approximately 30 days before go-live acceptance officially begins, the LI PASS team will send an email to the representative designated by the project team, for ease of information collection during the acceptance.
For details regarding the acceptance, reach out to the Player Network representative.
Only the Owner and users with Admin permissions have access to go-live acceptance.
You may confirm if you have the appropriate permissions from the My projects page in Account Center. If you do not have the permissions, Go-live Acceptance will not be displayed in the Actions column.
-
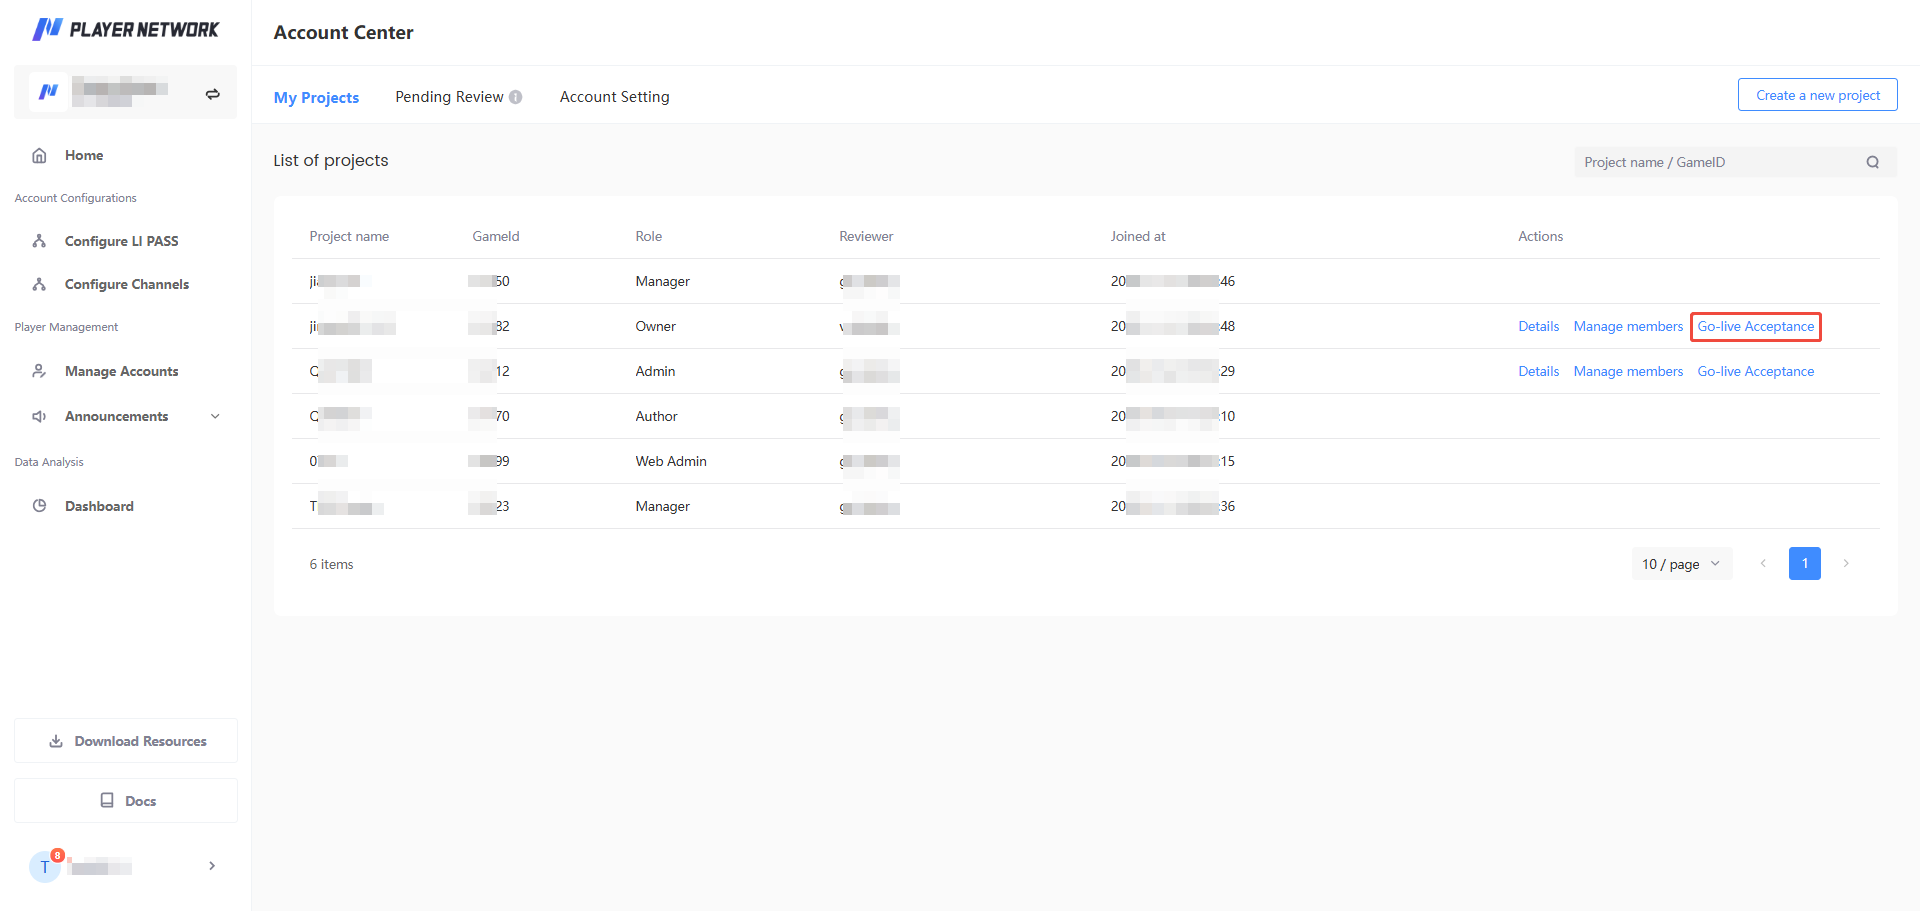
From Account Center, go to My projects, then click Go-live Acceptance under the Actions column.
-
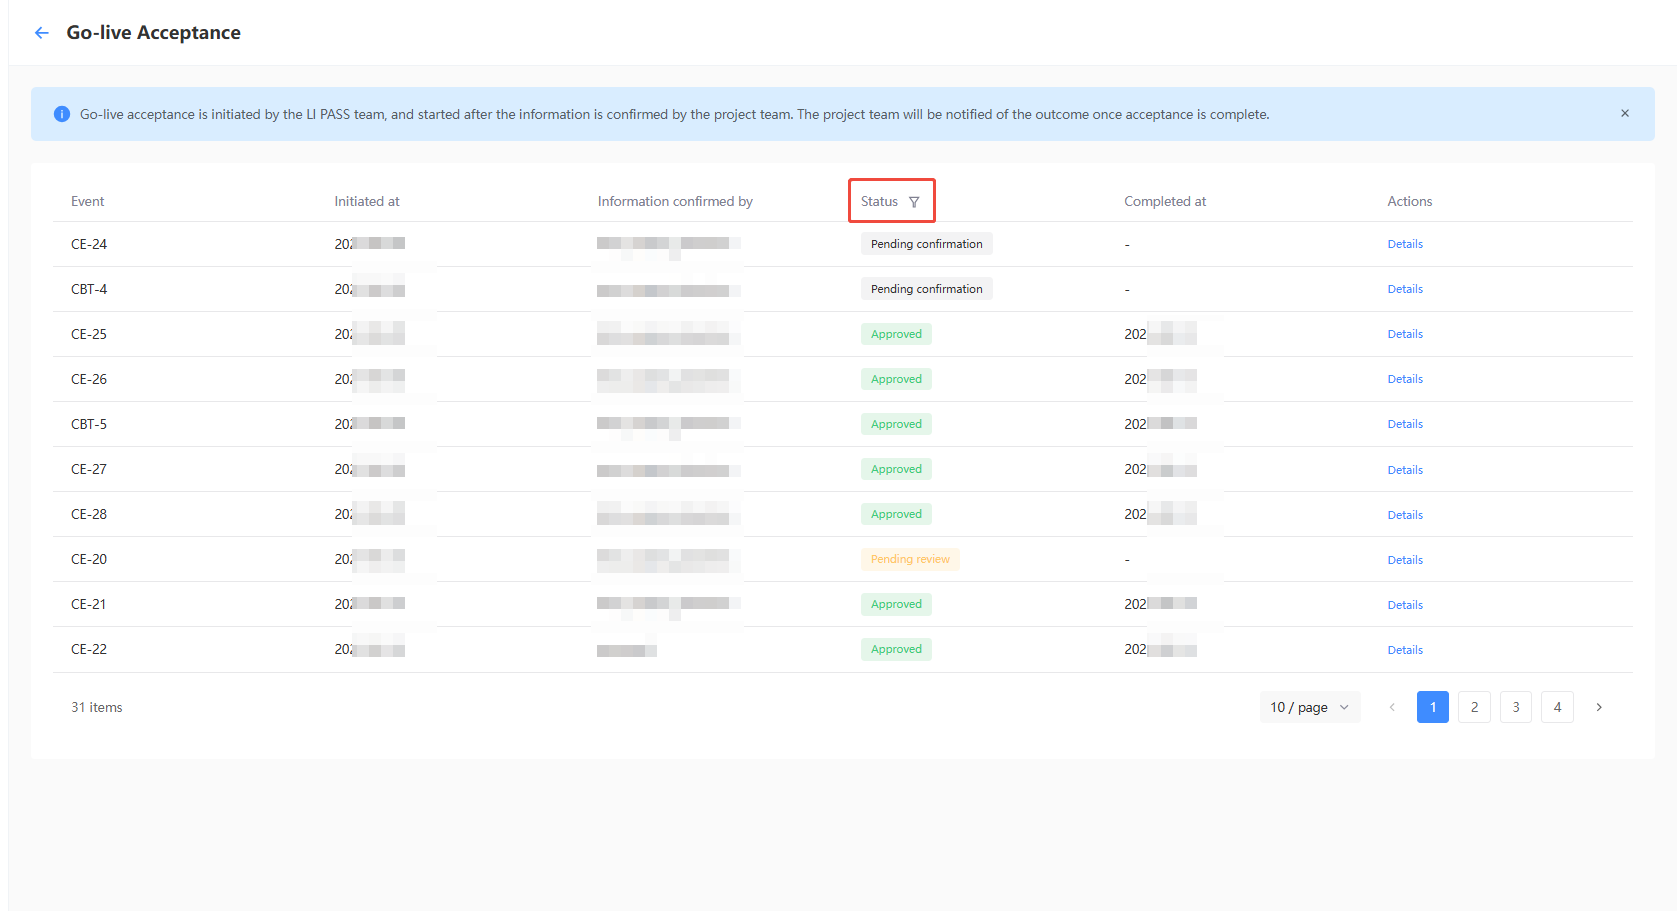
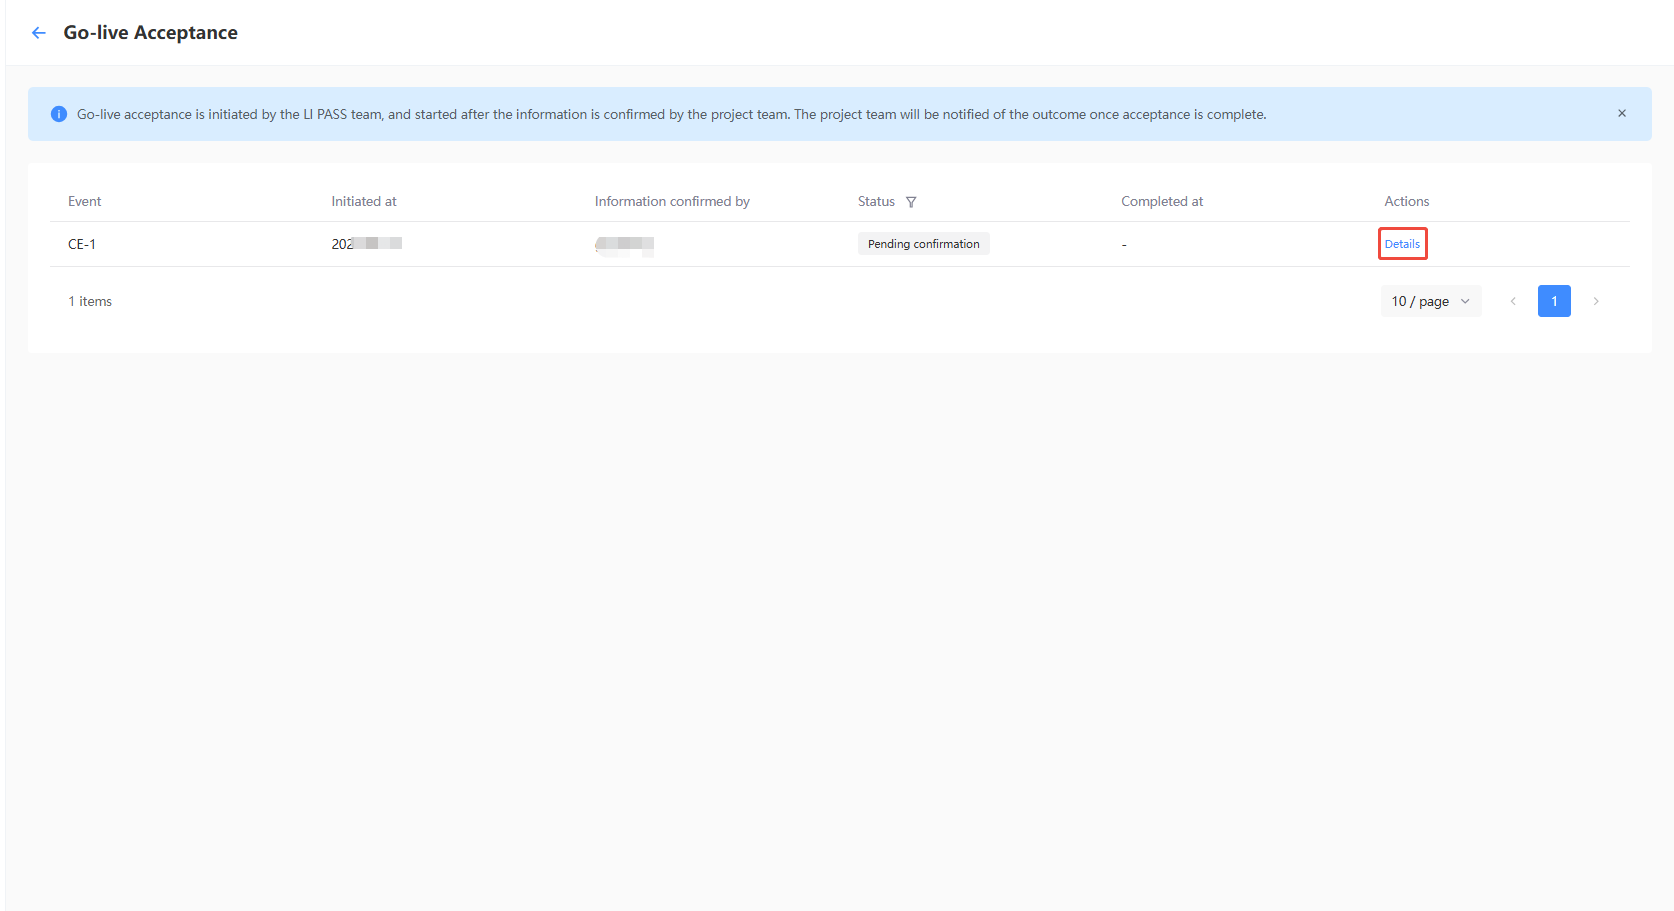
On the Go-live Acceptance page, a history of all events can be confirmed. If the status of an event is Pending confirmation, confirmation will be required to complete the acceptance. Click Details in the Actions column for more information about the event.
-
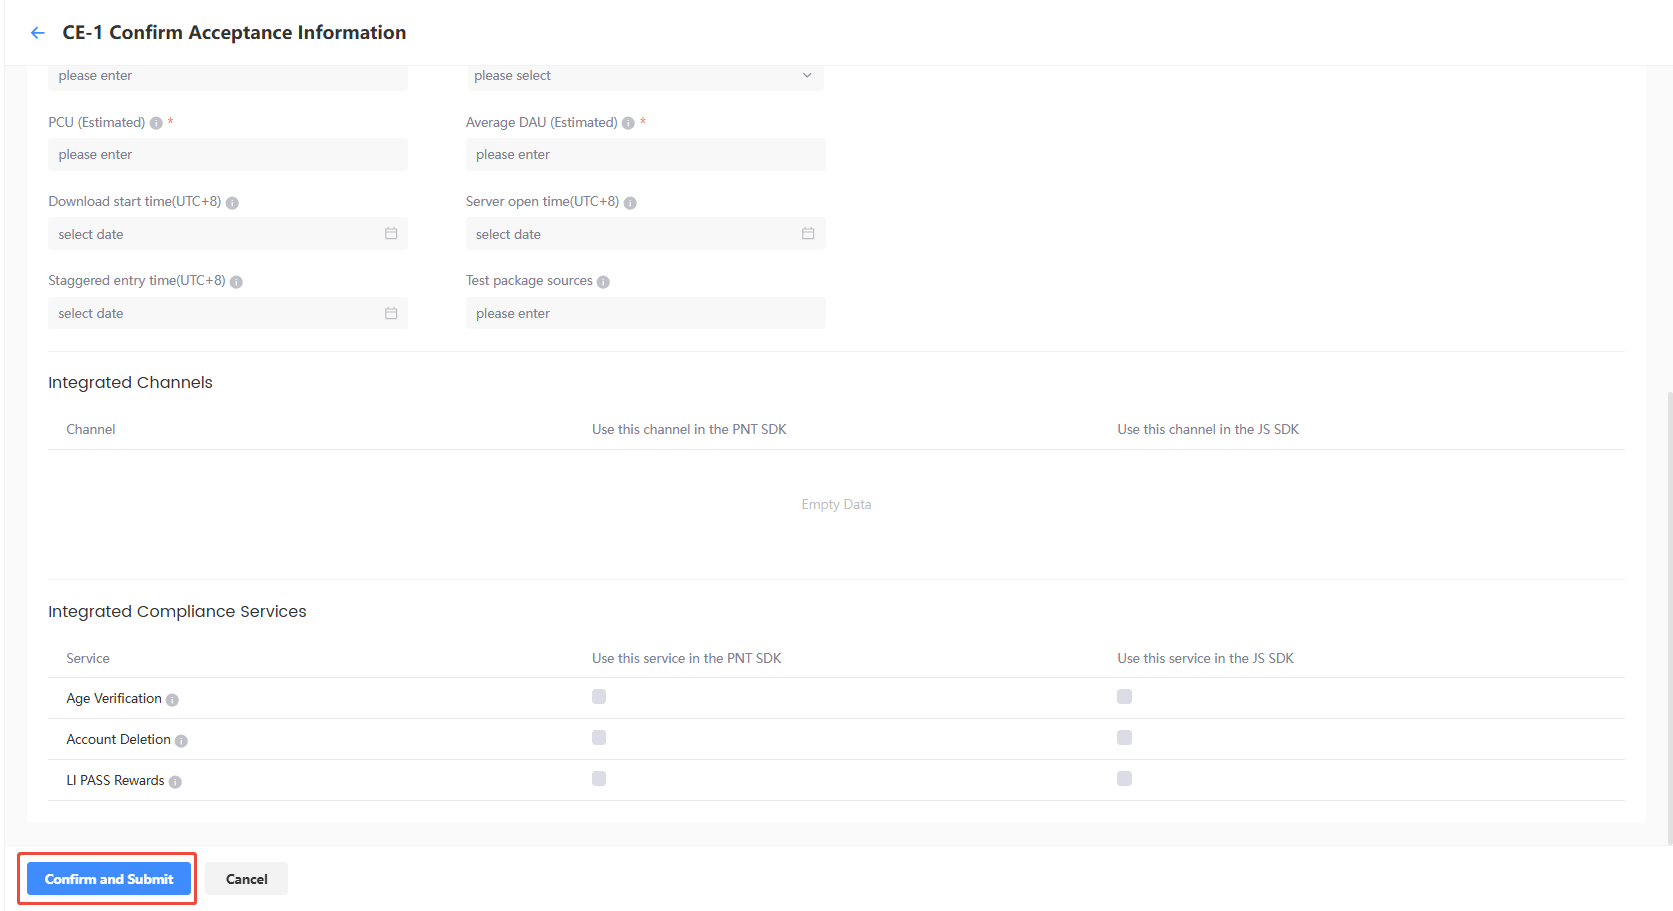
After completing the required fields, click Confirm and Submit for the LI PASS team to start the acceptance process based on the information entered.
-
Any updates to the acceptance progress can be confirmed from the Go-live Acceptance page. If you have any questions about the progress, reach out to the Player Network representative.
